Today’s Bring Back Beautiful challenge is all about friendship. Make sure you check out the Flourishes blog and the new team members! They are amazing stampers and I can’t see what they will create.

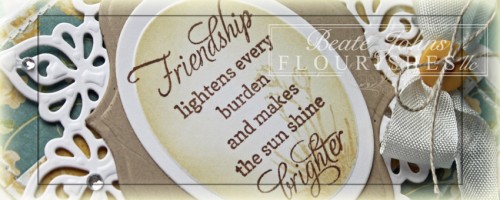
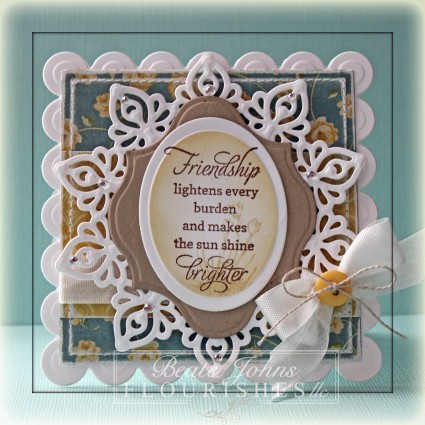
For my sample I used a sentiment from Sweet Days of Summer. It was stamped in Rich Cocoa Memento Ink on a piece of Neenah Solar White cardstock, cut and embossed with the third smallest of the Large Classic Oval Nestabilities die. The edges were first  sponged with Antique Linen, then with a  Frayed Burlap Distress Ink. The oval was layered on a piece of Kraft cardstock, cut and embossed with a Label 13 Nestabilities die, then on white cardstock, cut and embossed with a Persian Motifs Shapeabilities die (I thought it would go great with the sentiment. It almost looks like a sun die, doesn’t it?).

Cosmo Cricket Tea for Two patterned paper was cut and embossed with the largest Classic Square Nestabilities die. The edges were sanded and stitched. Seam binding was tied around the paper square before it was adhered to a piece of white cardstock, cut and embossed with the largest Lg. Scallop Square Nestabilities die. The card front was adhered to a card base, cut and embossed with the same large Scallop Square Nestabilities die.

A button was tied to the bow with  Linen Thread. Rhinestones from Baby Bling and Sleek Strips Silver Rhinestones finish off the card.

Thanks so much for stopping by! Have a wonderful day!
Hugs and smiles

March in the Northern Hemisphere is the seasonal equivalent of September in the Southern Hemisphere. In the Northern hemisphere, the beginning of the meteorological spring is March. In the Southern hemisphere, the beginning of the meteorological autumn is March. So this month we are asking you to create a project based on either Spring or Autumn.

Link up your Bringing Back Beautiful Challenge creations HERE to enter. If you upload to SCS, please use the keyword BBB20. You have until March 31st to enter! As we unveil our challenge for next month, we’ll share our True Beauties – those card makers who wowed us with this challenge! Winners will be featured on the Flourishes Blog and will receive a True Beauty blog button to display proudly on their blog!
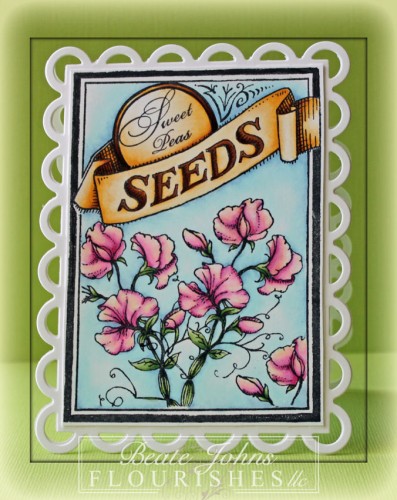
I love spring time! I love when trees and flowers start to bloom turning naked trees and brown grass back into luscious green! So I thought my card should feature the the Seeds of Friendship stamp set with flowers inside.

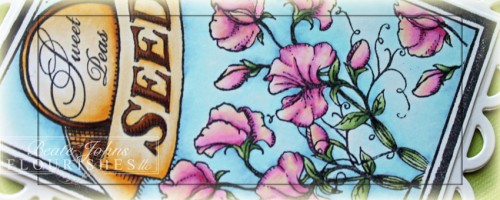
I stamped the Seed frame in Tuxedo Black Memento Ink on Neenah Classic White cardstock. The frame was masked and the small image from Sweet Peas was stamped twice inside. The image was colored with Copic Markers ( Petals: RV10, RV52, RV55, YR30   Leaves: G40, G43, G46   Label: YR30, 1/5 YR31, YR31, E33, E37   Background: B0000, B91) and cut out.

I kept the rest of the card very simple. I cut and embossed the card base with the Scalloped Frame and adhered the image on it. That was it. No ribbon, no rhinestones. I don’t do this very often, but I thought it worked for this card.

Check out what the rest of the design team has created!

Betty Wright
Heather Jensen
Iwona Palamountain
Kathy Jones
Yvonne Hagane

Thanks so much for stopping by! I hope you have time to participate in the challenge this month!
Have a wonderful day! Hugs and smiles

With Valentines quickly approaching I am sure there is one last card that needs to be made. Create a project based on Love. It does not have to be Valentine related. It can be just because you love someone.

Link up your Bringing Back Beautiful Challenge creations HERE to enter. If you upload to SCS, please use the keyword BBB19. You have until February 29th to enter! As we unveil our challenge for next month, we’ll share our True Beauties – those card makers who wowed us with this challenge! Winners will be featured on the Flourishes Blog and will receive a True Beauty blog button to display proudly on their blog!

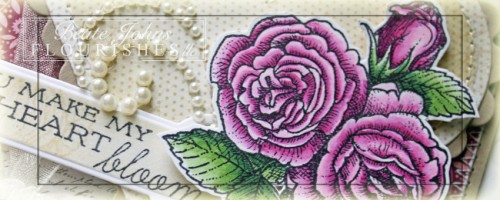
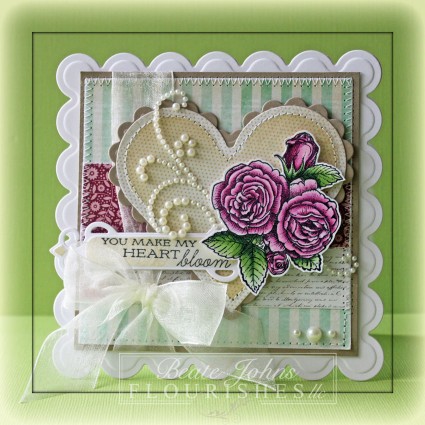
For my card I chose The roses from A Year in Flowers 2. The image was stamped in Tuxedo Black Memento Ink on  Neenah Solar White cardstock. I had received the new Copic colors on Saturday and had to use them right away to color my roses (Flowers: RV10, RV52 new, RV55, RV66    Leaves: G40, G43 new, G46 new).

A piece of MME Lost & Found 2 Blush Patterned Paper was cut and embossed with a Classic Heart Nestabilities. The inside of the heart was sponged with Antique Linen and the heart was stitched to a piece of Kraft cardstock, cut and embossed with a  Classic Scalloped Heart. The rose image was cut out and adhered with with dimensionals to the right hand side of the hearts. Part of a Finesse Pearl Swirl was adhered to the left side of the heart.

A sentiment from the stamp set April Showers was stamped on a piece of cardstock that had been cut and embossed with a Fancy Tag die. The inner part of the tag was sponged with Antique Linen distress ink and part of the rose image was stamped over the left hand side of the tag. The sentiment layer was adhered partly under the flower and over the heart.

Two 4 1/8″ wide strips of Blush Paper were adhered to a 4 1/8″ square of the same paper pack. The edges of the paper were sanded before the layers were stitched to a 4 3/8″ square of Kraft cardstock. Ivory Organdy Ribbon was tied around the layers vertically before the heart and sentiment were adhered to the card front with dimensionals. Everything was adhered to the card base; white cardstock cut and embossed with the second smallest Grand Scallop Square Nestabilities die. Three pearls on the lower right corner finish off the card.

Check out what the rest of the design team has created!

Thanks so much for stopping by! I hope you have time to participate in the challenge this month!
Have a wonderful day! Hugs and smiles

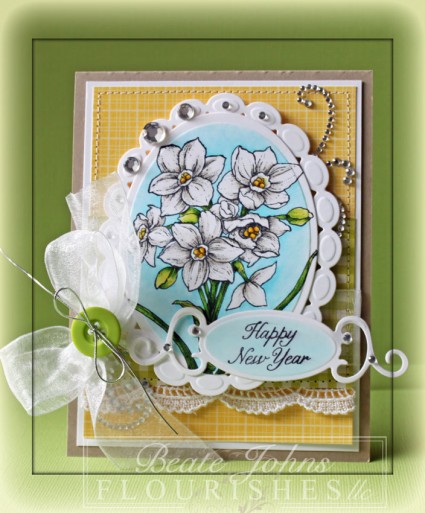
Today’s Bring Back Beautiful challenge is called The Beauty of Bling. Link up your Bringing Back Beautiful Challenge creations at the Flourishes Blog. If you upload to SCS, please use the keyword BBB18. You have until January 31th to enter! As we unveil our challenge for next month, we’ll share our True Beauties – those card makers who wowed us with this challenge! Winners will be featured on the Flourishes Blog and will receive a True Beauty blog button to display proudly on their blog!

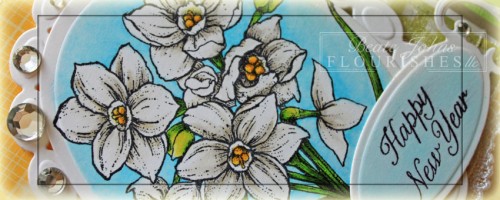
For my sample I chose the gorgeous Paperwhites Stamp set. The image was stamped in Tuxedo Black Memento Ink on  Neenah Solar White cardstock. It was colored with Copic Markers (Y11, Y13, Y18, W00, W2, YG21, YG23, YG17, B0000, B000, B00) and cut and embossed with the largest of the Classic Oval Nestabilities. The oval was adhered to a piece of white cardstock, cut and embossed with the largest Beaded Oval Nestabilities die (the Beaded Circle and Oval dies are still some of my favorites).

A strip of Venetian Lace was adhered under a 2 1/4″ x 3 3/4″ piece of October Afternoon Weathervane Paper. The strip was taped to a 3 3/4″ x 5″ piece of OA Fly A Kite paper. The layers were stitched to a 1/4″ bigger piece of white cardstock. May Arts White Organdy Ribbon was tied around the horizontal layer before everything was adhered to the card base, a 4 1/4″ x 11″ piece of Kraft cardstock, folded in half. The bow was topped with an October Afternoon button, tied on with silver cord.

Parts of a Finesse Rhinestone Swirl were adhered to the upper right and lower left of the card front before the image layers was placed over it. Rhinestones from a  72 Count Rhinestone pack were added to the Beaded oval layer. A sentiment was stamped on a piece of cardstock that had been cut and embossed with a Fancy Tag die.

Check out what the rest of the design team has created!

Thanks so much for stopping by! I hope you have time to participate in the challenge this month! It’s’ easy. Who doesn’t like bling? I definitely have a hard time not making a card with at least some bling on it.

Have a wonderful day! Hugs and smiles


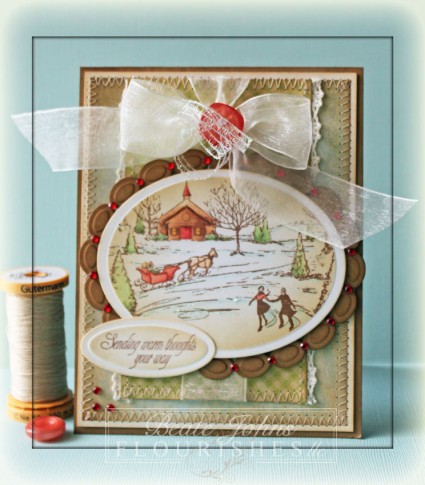
This month the challenge is to create a winter/holiday creation. Link up your Bringing Back Beautiful Challenge creations at the Flourishes Blog. If you upload to SCS, please use the keyword BBB17. You have until December 31th to enter! As we unveil our challenge for next month, we’ll share our True Beauties – those card makers who wowed us with this challenge! Winners will be featured on the Flourishes Blog and will receive a True Beauty blog button to display proudly on their blog!


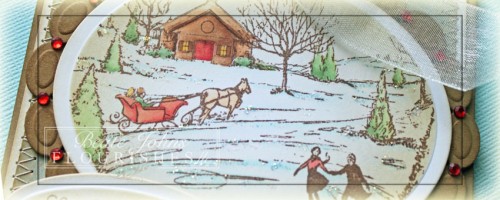
For my card I pulled out the Christmas Post card stamp set. I stamped it in Rich Cocoa Memento Ink on a piece of Neenah Solar White cardstock, cut and embossed with the largest Classic Oval Nestabilities die. The image was colored with Copic Markers ( Horse E50, E51   House: E21, E23   Trees: G20, G21   Bushes: YG61, YG63   Reds: R20, R21, R22) and the edges were sponged first with Antique Linen, then with Vintage Photo Distress ink.

The image was layered on a piece of Kraft cardstock that had been cut and embossed with a Beaded Oval Nestabilities die  that had been sponged with Vintage Photo Distress ink. The snow in the image was highlighted with Diamond Stickles and Red Baby Bling was added in between each beaded oval piece.

Two pieces of May Arts Crochet Lace were stitched to a 2 3/4″ x 4 3/4″ piece of Baby Steps Simple Stories Patterned Paper after the edges of the paper were sponged with Vintage Photo Ink. The edges of a 3 3/4″ x 5″ piece of the same paper pack were sponged with Vintage Photo ink before they were stitched to a 1/4″ bigger piece of Neenah Solar White cardstock that had been sponged with Antique Linen ink.

Ivory Organdy Ribbon was tied around the smaller layers before they were adhered to the bigger layers. The ribbon bow was topped with a button, tied on with iridescent curling Ribbon.  The main image was adhered over the layers with dimensionals and everything was adhered to the card base, a 4 1/4″ x 11″ piece of Kraft cardstock, folded in half and sponged with Vintage Photo.

A sentiment from the Vintage Postcard stamp set was stamped in Rich Cocoa Ink on a piece of Neenah Solar White cardstock, cut and embossed with the smallest Petite Oval Nestabilities die. The layer was sponged with Antique Linen Distress ink. It was adhered to the lower left of the image. Three small red bling Rhinestones on the bottom left corner finish off the card.

Check out what the rest of the design team has created!

Thanks so much for stopping by! I hope you have time to participate in the challenge. Have a wonderful day!
Hugs and smiles

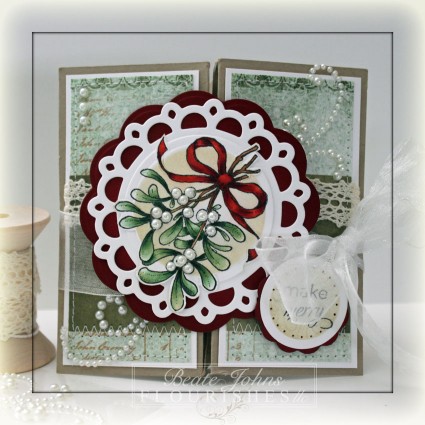
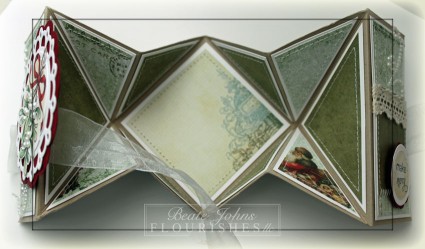
This months Bring Back Beautiful Challenge is to create a special fold card. I had seen a sample of a Diamond Fold card where the card wasn’t used as shown in the tutorial, but inside out. The diamond was inside the card, not on top. I thought that would be a great thing to try out.

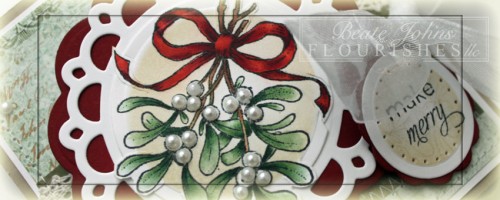
For my sample I stamped an image from Meet me Under the Mistletoe in Tuxedo Black Memento Ink on Neenah Solar White cardstock. It was colored with Copic Markers (Leaves G21, G24, G28   Branch: E21, E23, E25   Bow: R08, R24, R29, R39). The image was cut out with a Classic Circle Nestabilities die and the Out of the Box Technique, sponged with Antique Linen Distress ink and layered on a piece of white cardstock cut and embossed with Picot Edge Circle Nestabilities die.

The image was layered on a piece of Cherry Cobbler Cardstock that had been cut and embossed with the Jumbo  Scallop Circle Nestabilities die and the berries of the image were covered with Baby Bling Pearls.

Pieces of Father Christmas Pink Paislee Patterned Paper were adhered to  1 3/4″ x 3 3/4″ pieces of white cardstock. May Arts Crochet Lace was adhered over the horizontal paper piece before a border was stitched around the edges of the patterned paper. May Arts Organdy Ribbon was tied around the card to keep it closed. The image was adhered to the left panel with dimensionals.

A sentiment from Meet Me Under The Mistletoe was stamped in Tuxedo Black on a piece of white cardstock cut and embossed with with a Classic Circle die. It was sponged with Antique Linen Distress ink and the part of the image used for the main panel was stamped over the sentiment with the same color. The edges of the sentiment panel were paper pierced.

Parts of a Finesse Pearl Swirl along with more Baby Bling pearls finish off the card front.

The inside of the card is decorated with more Father Christmas paper stitched to white cardstock pieces. I left the diamond piece blank for a personal message.

Here is the original Diamond Fold tutorial video for the visual learner:

[youtube]https://www.youtube.com/watch?v=QzPyoUja4DI[/youtube]

Thanks so much for stopping by! Have a wonderful day.
Hugs and smiles


Beauty in the Spotlight! If you haven’t tried the Spotlight technique — the goal is to make just part of your image POP! For this fun-filled challenge, let’s use this technique and ‘spotlight’ only a portion of your image with color! Link up your Bringing Back Beautiful Challenge creation HERE to enter. If you upload to SCS, please use the keyword BBB11. You have until June 30th to enter! As we unveil our challenge for next month, we’ll share our True Beauties – those card makers who wowed us with this challenge! Winners will be featured on the Flourishes Blog and will receive a True Beauty blog button to display proudly on their blog!


Sorry my post comes up a bit late…..I totally missed that today is the first Monday of the month. I spend the weekend in the backyard, reading two out of a Trilogy of Fantasy books. Now I am on withdrawal. I have to wait until the last book is written (Wardstone Trilogy, if anyone is interested. If you liked the Sword of Truth and Wheel of Time series, you will like this one!)

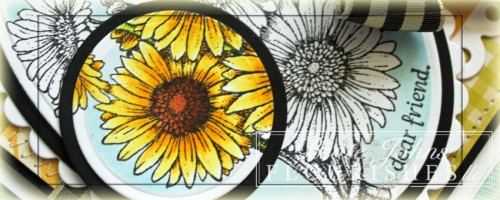
For my sample I chose still one of my favorite Flourishes sets, the Gerber Daisies. I stamped the image twice on Neenah Solar White cardstock with Tuxedo Black Memento ink. One image was cut and embossed with the second largest Petite Oval Nestabilities die, the second only partial with a Circle Nestabilities die.

The partial image was colored with Copic Markers (Y13, Y15, Y17, E97, E99, E29, YG01, YG03, YG17). The images were masked, the die put back in place and the outside of the daisies were sponged with Tumbled Glass Distress ink. Both shapes were layered on black cardstock, cut and embossed with the next size oval/circle die.

The circle layers were adhered to the oval ones before all layers were adhered to a White Scallop Oval layer, cut and embossed with the largest of the Petite Scallop Oval Nestabilities dies.
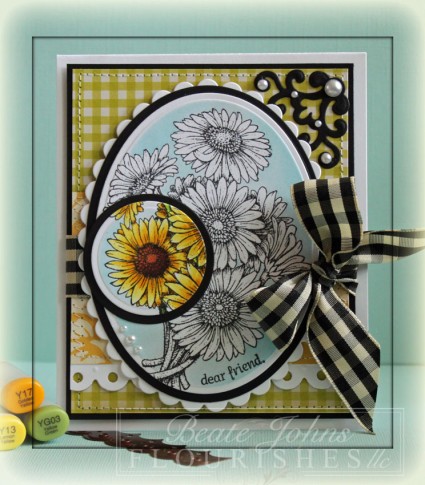
A 4″ wide strip of white cardstock was cut and embossed with one of the Classic Scallop Borderabilities dies and adhered stitched under a 2 1/2″ x 4″ piece of October Afternoon Thrift Shop patterned paper. A 4″ x 5″ piece of Weathervane paper was stitched to a 3/16″ bigger piece of black cardstock. The strip was adhered over these layers and May Arts Gingham Ribbon was tied around it.

The image layers were adhered to the layers with dimensionals. Since an additional layer for a sentiment would make this card look too crowded, I stamped dear friend ,also from the Gerber Daisies set, directly on the lower right hand side of the image oval.

A small border decoration was cut and embossed with one of  the new Parisian Accent dies out of black cardstock and adhered to the top right of the card. Snow Kaisercraft Pearls on the accent as well as under the spotlight portion of the image finish of the card front. Everything was adhered to the card base, a 4 1/2″ x 11″ piece of white cardstock folded in half, with dimensionals.


Check out what the rest of the design team has created!
Cindy
Heather
Julie
Kathy
Yvonne
Laura

Thanks so much for stopping by! I apologize for being so late today. With the kids last school day being tomorrow, Orthodontist appointments, house inspection and grocery shopping….I just couldn’t get it done. I can’t believe the packers are coming in three weeks. Or should I say I hope we get packers to come. We still don’t have an official date. Military…sigh!

Have a great evening.
Hugs and smiles

The Beauty of a Flower! They say April showers bring May flowers, so let’s show off those beautiful blossoms! This month’s Bringing Back Beautiful Challenge is to be inspired by those gorgeous botanicals every stamper loves! Link up your Bringing Back Beautiful Challenge creation here to enter. If you upload to SCS, please use the keyword BBB10. You have until May 31st to enter! As we unveil our challenge for next month, we’ll share our True Beauties – those card makers who wowed us with this challenge! Winners will be featured on the Flourishes Blog and will receive a True Beauty blog button to display proudly on their blog!

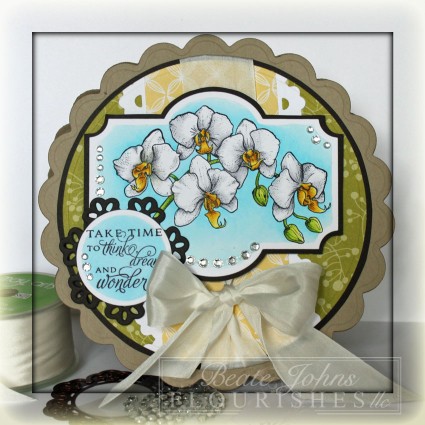
For my sample today I used the new Orchids set. I love this big branch of gorgeous flowers. I haven’t seen too many orchids, so I googled Orchid images and picked a white/yellow one for my color sample. As layout I used Silke’s sketch for last week’s Timeless Tuesday Challenge.

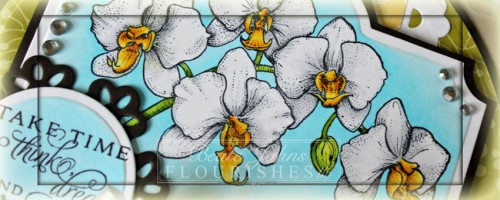
I stamped the image in Tuxedo Black Memento Ink on Neenah Solar White cardstock, cut it with a Label 21 Nestabilities die and colored with Copic Markers (Blossoms: N0, N1, Y13, Y15, Y17   Stem: YG00, YG01, YG03, YG17    Sky: B0000, B000, B00).  The image was adhered to a piece of Canyon Brown cardstock that was hand cut into a slightly bigger layer.

Two strips of white cardstock were cut and embossed with Floral Doily Accents border die. The istrips were adhered to a 2 1/4″ wide strip of Echo Park Springtime paper. That was adhered to a square piece of Springtime paper.  All the layers were cut and embossed with a Grand Circle Nestabilities dies. The circle was adhered to a piece of Canyon Brown cardstock that was hand cut to a slightly bigger layer. May Arts Silk Ribbon was tied around the vertical layer before  the layers were adhered to the card base, Kraft cardstock cut and embossed with Grand Scallop Circle Nestabilities.

The sentiment is also from the stamp set Orchids. It was stamped in Tuxedo Black Memento Ink on White cardstock, cut and embossed with Circle Nestabilities and colored with Copic Markers (B000, B00). The layer was adhered to a piece of Canyon Brown cardstock, cut and embossed with a Floral Doily Motif die. Clear Kaisercraft Rhinestones finish off the card.

Be sure to check out the rest of the team by clicking on over to see…..

  • Cindy Coutts
  • Heather Jensen – will be up a little late, she lives in tornado affected Alabama, please keep her in your prayers!!
  • Julie Koerber
  • Kathy Jones
  • Laura Fredrickson

  • Thanks so much for stopping by! Have a wonderful day!
    Hugs and smiles
     

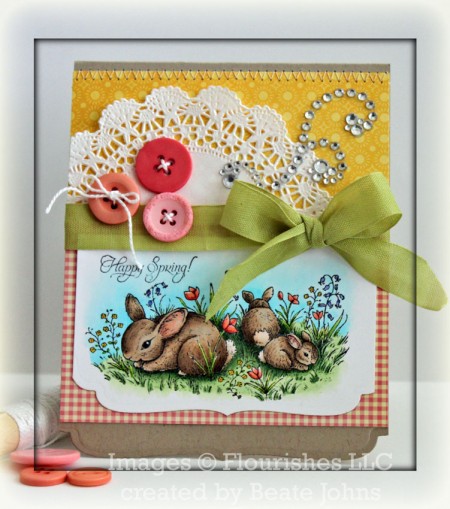
    The Beauty of Springtime Colors! Soft shades that remind us of spring flowers sprouting from the ground – these shades are the focus of this month’s BBB challenge! The color choice is yours!Link your Bring Back Beauty Challenge card here to enter. If you upload to SCS, please use the keyword BBB09. You have until April 30th to enter! As we unveil our challenge for next month, we’ll share our True Beauties – those card makers who wowed us with this challenge! Winners will be featured on the Flourishes Blog and will receive a True Beauty blog button to display proudly on their blog!

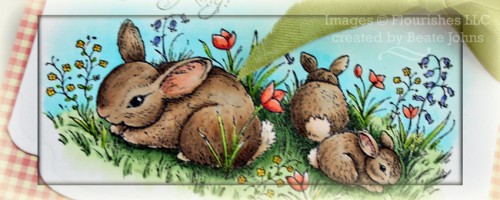
    For my card I used Spring is Sprung again. I LOVE everything about this set. The bunny image, the bird image, the flower and the sentiments.

    I stamped the image on a 3 7/8″ wide piece of Solar White cardstock with Tuxedo Black Memento ink. The bottom of the image panel was cut and embossed with a Grand Label 4 Nestabilities die. I had seen that on one of Debbie Olson‘s cards and LOVED the idea.  The image was colored with Copic Markers ( Bunnies: E40, E41, E42, E43, E44, R00, R20    Grass: G20, G21, G24   Tulips: R11, R12, R14, YG21, YG23, YG25   Bell Flowers: B63, B66    Tiny Flowers: Y13, Y17    Sky: B0000, B000, B00).

    Two pieces of Pink Paislee’s Hometown summer paper were adhered together forming a 4 1/4″ x 4 3/4″ layer. Part of a doily was adhered to the left hand side and Cotton linen Green ribbon was tied around where the layers meet. The image was adhered under the ribbon. Three different color pink buttons were stitched to the left hand side with embroidery floss.

    A 4 1/4″ x 11″ piece of Kraft cardstock was folded in half. The lower edges were cut with the next size Grand Label 4 Nestabilities die before the layers were adhered to it. The upper edge was stitched on to create more interest. A Recollections Rhinestone swirl finish off the card front.

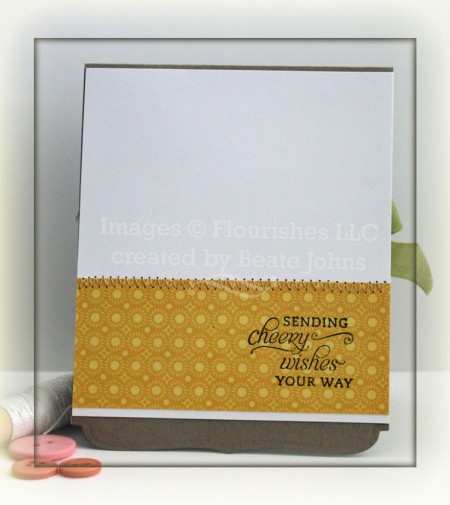
    The inside of the card is kept simple. A 1 3/4″ x 4 1/4″ strip of Hometown summer paper was stitched to a 4 1/4″ x 4 3/4″ piece of white cardstock before it was adhered to the inside of the card. A sentiment from Spring Is Sprung was stamped in Tuxedo black on the right hand side of the strip.

    Be sure to check out the rest of the team by clicking on over to see…..


    Thanks so much for stopping by! Have a wonderful day!
    Hugs and smiles
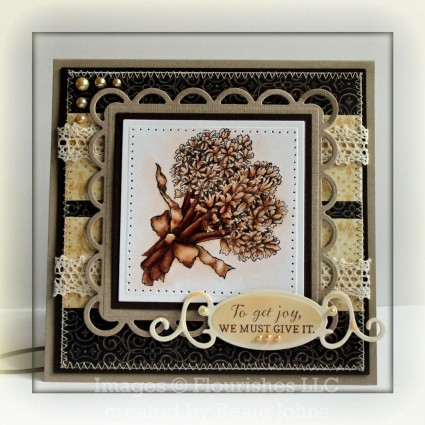
    Have you ever used neutral colors to bring out the depth in one of your coloring projects? Well, let’s kick it up a knotch and show you just how beautiful your stamped creations can be without any color at all! That’s right, this challenge is to color up your card with neutrals – shades of grey, sepia tones or even black and white! Link up your Bringing Back Beautiful Challenge card here to enter. If you upload to SCS, please use the keyword BBB08. You have until March 31st to enter! As we unveil our challenge for next month, we’ll share our True Beauties – those card makers who wowed us with this challenge! Winners will be featured on the Flourishes Blog and will receive a True Beauty blog button to display proudly on their blog!

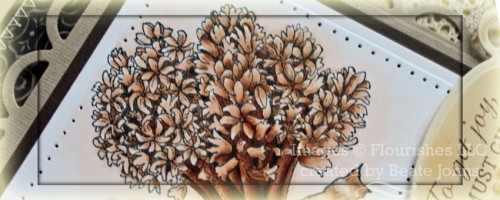
    For my sample I decided to try my hand on a Sepia card. I had already tried black and white on this and this card. I stamped an image from Flourishes new stamp set Hyacinth in Tuxedo Black Memento Ink on Neenah Solar White cardstock.

    The image was cut and embossed with Classic Square Nestabilities die and colored with Copic Markers (E0000, E29, E30, E31, E33, E35, E37, E39). It was layered on a piece of Canyon Brown cardstock, cut and embossed with the next size Classic Square Nestabilities die and the edges were paper pierced. The layers were then adhered to a piece of Textured Kraft cardstock, cut and embossed with the largest Lacey Square Nestabilities die.

    Two strips of 1 1/2″ x 5″ Graphic 45 Baby 2 Bride Patterned Paper were adhered to a 5″ square of 7 Gypsies Morocco Journey. The edges of the paper were sanded before the layers were stitched to a 3/16″ bigger piece of Canyon Brown cardstock.

    Two strips of May Arts Crochet Lace were placed over the horizontal strips before the layers were adhered to the  card base; a 5 1/2″ x 11″ piece of Kraft cardstock, folded in half.  The image square was adhered to the card front with dimensionals.

    1/2 of one of the quotes from the set was stamped in Rich Cocoa Memento Ink on a piece of Classic Cream cardstock, cut and embossed with a Fancy Tag die. The label was airbrushed with Copic Marker B30.To finish off the card Latte Kaisercraft Pearls were added to the sentiment tag as well as the top right corner.

    For the inside of the card A 5″ square of Neenah White cardstock was adhered to a 3/16″ bigger piece of Canyon Brown cardstock. The image used on the front, was stamped in Antique Linen Distress ink a bit off center. The second part of the sentiment was stamped over it in Rich Cocoa Memento ink.

    A 1 1/2″ strip of Graphic 45 paper was adhered to a 1 5/8″ strip of Marocco Journey paper. Both strips were adhered to the lower right of the panel before the panels were stitched together. A Stitched Lace Flower topped with a Stampin’ Up! Antique Brad was adhered to the left of the paper strips.

    Be sure to check out the rest of the team by clicking on over to see…..


    Thanks so much for stopping by! Have a wonderful day!
    Hugs and smiles

    © 2012 fresh & fun Suffusion theme by Sayontan Sinha