I am excited to be joining in the Gina K. Designs Design Team December Inspiration Blog Hop! Gina and the Design Team will inspire you with many beautiful ideas, and as you hop through their blogs, make sure to leave a comment on each of them because a few random comments will be chosen and those stampers will each win a grab bag of Gina K. Designs products! To see the full list of winners, check the Big News forum at Stamp TV a couple of days after the hops.

The new Melanie Muenchinger set called Lots of Letters  is just perfect for my new love of Clean and simple cards. It  is available in both clear photopolymer and red rubber.

This is the first letter and number set from Gina K. Designs and is packed with frames and elements that will help your stamped cards, pages or personalized designs shine!   Gina K. also carries matching Silhouette Studio cut files for only 99 cents each which make creating beautiful and professional cut designs with these stamps a breeze. The square and circles images are also perfect for your dies and punches, fitting perfectly in a ¾” or larger die or punch.

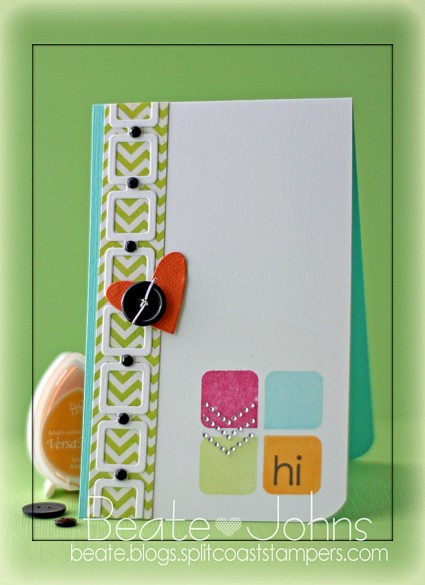
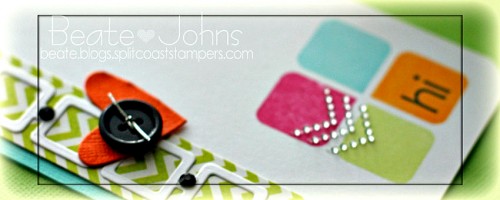
I created this card not just for Melanie’s blog hop, but also as an entry for the Keen on Neon Moxie Fab World Challenge.  I started with a 3″ x 5″ piece of white cardstock. The bottom right corner was rounded before I stamped the square stamp with the one rounded edge  four times in the right corner  (once in Mango Madness VersaMagic ink, once in Key Lime VersaMagic ink, once in Sea Breeze VersaMagic and once in Rose Bud Memento Ink). Hi was stamped in the orange square with Tuxedo Black Memento Ink.


More white cardstock was cut and embossed with MFT’s Retro Squares Die-namic die and adhered over a thin strip of MME Life of the Party patterned paper (old pack…I wish I had more. Love the funky colors). The white cardstock piece was adhered to the right hand side of the  card base, a 3 1/2″ x 11″ piece of Patina Fourz Bazzill cardstock, folded in half. The retro square strip was adhered to the left hand side, leaving only about 1/4″ of the Patina base showing.

A heart was cut out of orange Core’dinations cardstock with the smallest heart from Hearts a Plenty Die-namics die. It was topped with a button that was tied on with silver cord. The heart was adhered slightly above the center of the retro squares strip. Black rhinestones were added to the square strip and silver chevron rhinestones to the colorful stamped squares to finish off the card.

Please see Melanie’s blog for the full link list of blog hop participants! Also, if you come back tomorrow, you will see another card created with the Lots of Letter sets and with leftovers from what I used (or tried to use) on this car).  And this afternoon, I am posting some super exciting Splitcoaststampers news here! I am tickled pink about this!

Thanks so much for stopping by! Have a wonderful day!
Hugs and smiles

It’s my turn to share on the Spellbinders blog again. This time I used a Medallion Die D-Lites die. I created the cards for the current CAS-ual Fridays challenge (use Kraft) and the CAS(E) this sketch challenge.

I hope you have time to check out the post! Thanks so much for stopping by! Have a wonderful day!
Hugs and smiles
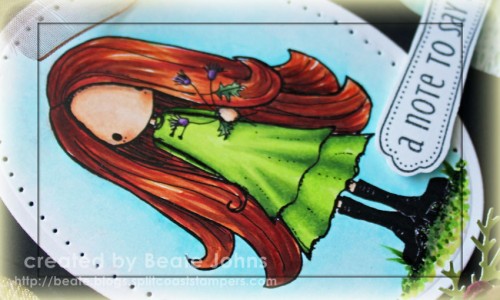
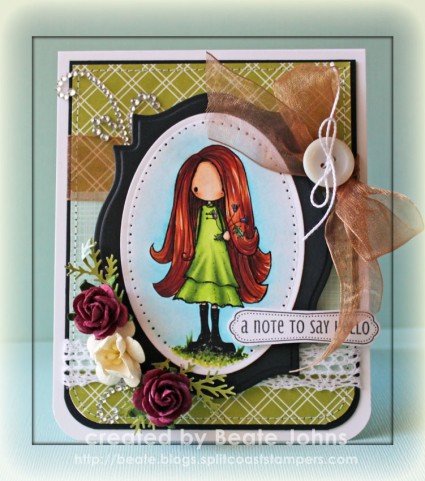
Here is another card that I created quite a while ago and didn’t make it for publication. It’s a darling digital image from Tiddly Inks called Always the Flower Girl. The image was printed with a Laserjet Printer on a piece of Neenah Solar White cardstock, cut and embossed with a Petite Oval Nestabilities die and colored with Copic Markers (Dress: YG01, YG03, YG17   Skin: E50, E51, E53   Hair: E97, E99, E09, E18   Thistles: V12, V17, Lavendar Spica Pen, G21, G26, G28   Ground: YG21, YG23, YG17, E30, E31, W3, W5    Sky: B0000, B000, B00). The image was adhered to a piece of black cardstock that had been cut and embossed with a Label 18 Nestabilities die and the edges of the oval were paper pierced.

A 2 1/4″ x 3 15/16″  piece of Echo Park Walk in the Park patterned paper was adhered over a 3 15/16″ x 5″ piece of the same paper pack. The bottom corners were rounded before the paper was stitched to a 3/16″ bigger piece of black cardstock.  White Crochet Lace was adhered underneath the paper strip and gold organdy Ribbon was tied above it before the layers were adhered to the card base, a 4 3/8″ x 11″ piece of Solar White cardstock folded in half.

The image layers were adhered to the card base with dimensionals. Wild Orchid Crafts Flowers were added to the lower left corner of the image. A sentiment from Friendship Notables 2 was stamped in Tuxedo Black Memento Ink, cut out and adhered to the lower right corner. A button was tied to the ribbon bow with embroidery floss and parts of a Finesse Rhinestone Swirl were added to the upper left corner and underneath the flowers.

Thanks so much for stopping by! Have a wonderful day.
Hugs and smiles


Hello and welcome to Day 2 of our June Rubber & Die Release Showcase!

On Wednesday (20 June) Whimsy Stamps released this month’s new rubber designs, new Shapeology dies and new Shape EZ by TLC. From then until 26 June the Whimsy Stamps DT and Special Guests are showcasing these fabulous new goodies with a daily mini blog hop and I am part of today’s hop!

Each mini blog hop has a new release prize hidden somewhere along the way and you have 24hrs to enter each prize draw.

To be entered into today’s mini blog hop prize draw, be sure to leave a comment on ALL of the DT’s posts listed below by 12.00PM EST tomorrow. All winners will be announced on the Whimsy blog on 27 June.

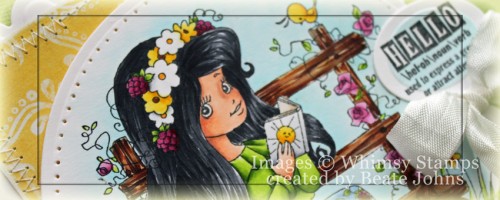
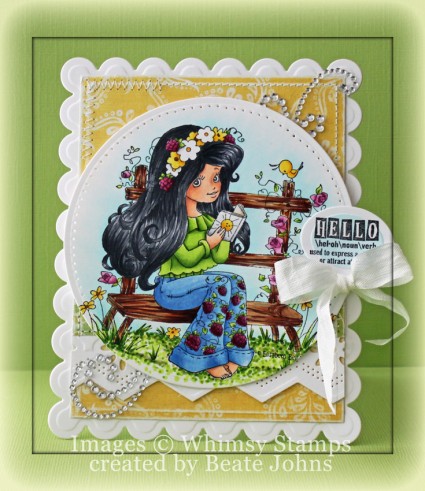
For my card I stamped Elisabeth Bell’s new Blossom Berry Sitting Pretty image in Tuxedo Black Memento Ink on Neenah Solar White cardstock, cut and embossed her with the smallest of the Grand Circle Nestabilities and colored with Copic Markers( Skin: E000, E00, E01, E11   Hair: C3, C5, C7, C9   Pants: B21, B23, B24, YG01, YG03, YG17, RV55, RV66, RV69   Shirt: YG01, YG03, YG17   Bench: E31, E34, E37, E29, W3    Flowers/Bird: Y13, Y15, Y17, RV52, RV55, RV66   Ground: YG01, YG03, YG17, E31, W3    Background: B0000, B000). The edges of the circle were paper pierced.

Two pieces of Echo Park Paradise Beach patterned paper were cut with a  Grand Rectangle Nestabilities die.  The edges were sanded and stitched before seam binding was tied around it.  The layers were adhered to a card base, cut and embossed with a Grand Scallop Rectangle die out of  Solar White cardstock.

One of the new Definition Notables 4 sentiments was stamped in Tuxedo Black on Neenah White cardstock, cut and embossed with a Classic Oval Nestabilities die and colored with Copic Marker B0000.  The oval was adhered right over the seam binding bow. Parts of a Silver Finesse Rhinestone Swirl finish off the card.

To take a peek at today’s fabulous new release creations, please click on the links below…

Remember that the entire new release is available to buy right now from the Whimsy Stamps store along with all your Whimsy favourites.

Thanks for stopping by and don’t forget to pop back to the Whimsy blog tomorrow for more new release creations!
Hugs and smiles

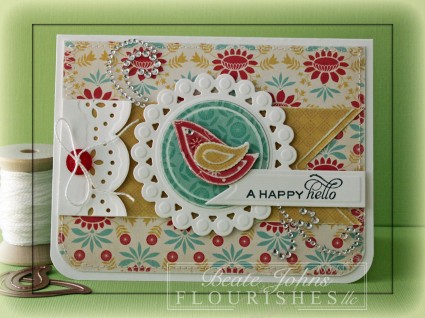
Becky Fleck has new card sketches on her Pagemaps site today. I created this card with one of those gorgeous new sketches as well as one of her Spellbinders die packs.

For my sample I used Cosmo Cricket Baby Jane paper. I cut and embossed pieces with Pagemaps Whimsy dies and  sanded the edges to create the bird. Another piece of Baby Jane paper was cut and embossed with a Standard Circle Nestabilities die. Again the edges were sanded before the circle was adhered to a piece of Neenah Solar White cardstock, cut and embossed with a Tear Drop Circle Nestabilities die.

The bottom corner of a 4″ x 5 1/4″ piece of Baby Jane paper were rounded before the edges were sanded and stitched. The layer was adhered to the card base, a 5 1/2″ x 8 1/2″ piece of white cardstock, folded in half.  The left side of a Baby Jane paper strip was cut and embossed with a  Classic Square Nestabilities die to create a banner edge. The strip was adhered to the center of the card layers. A short strip of white cardstock was cut and embossed with a Classic Scallop Edgeabilities as well as a Classic Decorative Insert 5 die. The white paper strip was adhered over the left hand side of the strip and topped with a button.

A sentiment from Flourishes Tag Lines was stamped in Tuxedo Black Memento Ink on white cardstock that had been cut and embossed with a Nested Lacey Pennants die. The sentiment was adhered to the right hand side of the card. Parts of a  Finesse Rhinestone Swirl finish off the card.

Thanks so much for stopping by! Have a wonderful day.
Hugs and smiles

In today’s Weekly Inkling we had the Smackin’ Acetate technique as the technique from the Archive. It was a tutorial I wrote a long time ago and needed an update BAD.

For my sample I used my new Distress Markers (Wild Honey, Shabby Shutter and Tumbled Glass) on Whisper White cardstock. I tried it with Neenah and Glossy cardstock, but Neenah was too soft and Glossy to slick. Whisper White seems to work best.

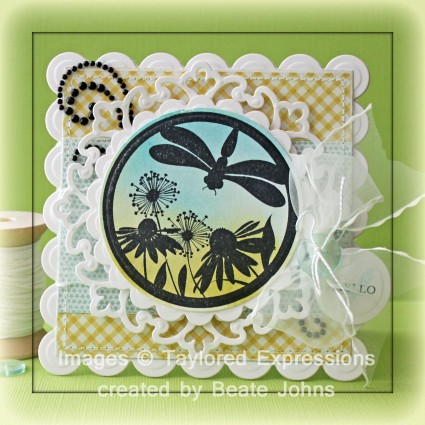
Once the background was dry, an image from Taylored Expressions Embrace Beauty was stamped over it withJet Black Archival ink. The image was cut out with a  Standard Circle Nestabilities die. The image was layered  first on a piece of Neenah Solar White cardstock cut and embossed with a Scalloped Circle Nestabilities die, then on more Solar White cardstock, cut and embossed with one of the Parisian Motifs die.

A strip of  My Mind’s Eye Follow your Heart Be Amazing patterned paper was adhered to a bigger square of the same paper pack. The paper was cut and embossed with one of the  Grand Square Nestabilities die. The edges were sanded and stitched.May Arts ribbon was threaded through the bigger layer before the layers were adhered to the patterned paper with dimensionals. The layers were then adhered to the card base, Solar White cardstock, cut and embossed with a Grand Scallop Square Nestabilities die.

A sentiment from Make it Amazing was stamped in Jet Black Archival Ink on a piece of Solar White cardsttock cut and embossed with a Home Sweet Home die pack. It was tied to the bow with embroidery thread and a button. Parts of a black Finesse Rhinestone swirl finish off the card.

Here is a video for the visual learner:

[youtube]https://www.youtube.com/watch?v=7CoGjuqa1nw[/youtube]

Thanks so much for stopping by! Have a wonderful day.
Hugs and smiles

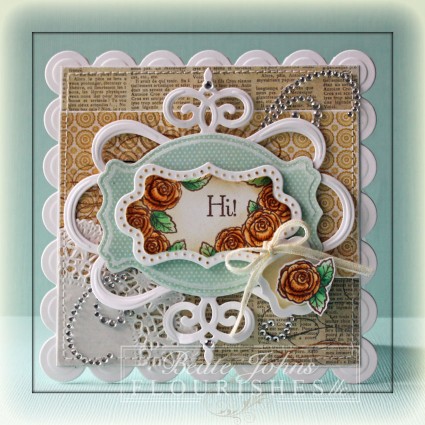
Today is the second release day of Flourishes new stamps. It’s a really fun set. You can use the images to decorate tags to go with the bigger matching images from other Flourishes sets, or you can use the tiny images to create wreath or borders for other shapes.

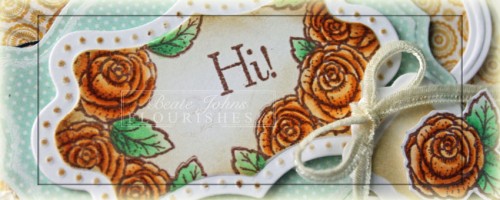
For my card I started out cutting and embossing a piece of Neenah Solar White cardstock with a die from the Orchard Harvest Tags & Accents pack. The rose image and leaves from the Tiny Flowers and Tags stamp set were stamped in Rich Cocoa Memento Ink and colored with Copic Markers (1/5th YR31- custom marker, YR21, YR23, YG41, YG45). The label was sponged first with Antique Linen, then lightly with the Vintage Photo Distress ink.

A piece of My Mind’s Eye Lost & Found 2 Sunshine patterned paper was cut and embossed with another of the die from the Orchard Harvest Tags & Accents pack. The edges of the paper were sanded and the sentiment layer was adhered over it with dimensionals.

Another piece of white cardstock was cut and embossed with a die from the Twisted Metal Tags & Accents pack. The sentiment layers were adhered over it.  A 2 1/4″ x 4″ piece of Sunshine paper was adhered to a 4″ square of the same paper pack. The edges were sanded and part of a paper doily were adhered to the lower left hand corner of the layers. A border was stitched around the edges and the papers were adhered to the card base, a piece of white cardstock cut and embossed with the smallest of the Grand Square Nestabilities dies.

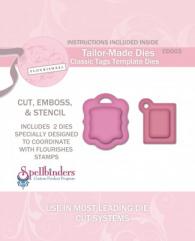
White cardstock was cut and embossed with one of the new Tailor-Made Classic Tags die and the center was sponged with Antique Linen. A rose was stamped and colored like the ones on the label, cut out and adhered to the tag with dimensionals. Thin May Arts Ribbon was tied around the tag opening and the tag was adhered to the lower right of the sentiment label.  Baby Bling Rhinestones on the biggest die cut and parts of a Finesse Rhinestone swirl finish off the card.

Would you like to win the Tiny Flowers and Tags stamp set?  All you need to do is leave a comment on each of the blogs below.  Why? You need to try to figure out….

One of the ladies on our link list below will be picking a name from the comments on her blog post today. We don’t know which one it is… so the more blogs you leave comments on, the more chances you have to win!
Happy hopping, friends!

DID YOU KNOW YOU COULD WIN OUR ENTIRE FEBRUARY RELEASE? Have you checked out Flourishes’ B&W+1 Challenge?  Just click HERE to find out how to play! You can also play in the Noon Time Challenges! All challenges will close this Friday at 5 PM EST.

Thanks so much for stopping by! Have a wonderful day.
Beate

Hello and welcome to Day two of our December Rubber Die Release Showcase!

On Wednesday (14 December) Whimsy Stamps released this month’s rubber designs and new shapeology dies. From then until 21 December the Whimsy Stamps DT and Special Guests are showcasing these fabulous new stamps and dies with a daily mini blog hop.

Each mini blog hop has a new release prize hidden somewhere along the way and you have 24hrs to enter each prize draw. To be entered into today’s mini blog hop prize draw, be sure to leave a comment on ALL of the DT’s posts listed below by 12.00PM EST tomorrow. All winners will be announced on the Whimsy Inspirations blog blog after 12.00PM EST on 21 December.

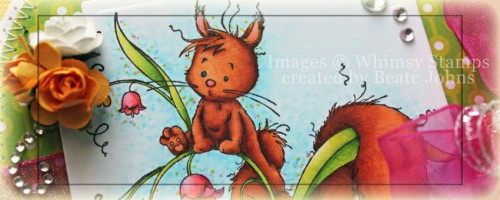
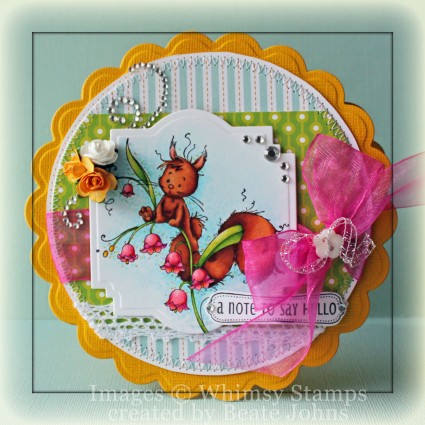
For my first sample of this new release I used the darling Fluffy on the Lily stamp from Wee stamps. It was stamped in Tuxedo Black Memento Ink on Neenah Solar White cardstock. The image was cut and embossed with a Label 22 Nestabilities die and colored with Copic Markers (Fluffy: E93, E95, E97, E99    Leaves: YG21, YG23, YG17    Flowers: RV21, RV23, RV25, Y13, Y17, YR15   Background: B0000, B000, B00, B01).

Two pieces of Echo Parks Summer Days paper were cut and embossed with a Grand Circle Nestabilities.  The layers were stitched to a slightly larger hand cut white cardstock circle after White Crochet Lace was adhered over the lower edge of the horizontal strip. White Organdy ribbon was colored with Copic Marker RV25, tied around the horizontal layer and topped with a white flower button, tied on with Silver Curling ribbon. Three Zva Creative Mini Flowers were tied together and adhered under the upper left hand corner of the image layer, which was then adhered over the ribbon with dimensionals.

A sentiment from Whimsy’s new Friendship Notables 2 was stamped in Tuxedo Black Memento Ink on Solar White cardstock cut out and adhered to the lower right edge of the image. The layers were adhered to the card base, a piece of Coredinations cardstock, cut and embossed with a Grand Scalloped Circle die. Rhinestones and part of a Finesse Rhinestone swirl finish off the card.

To take a peek at today’s fabulous new release creations, please click on the links below…

Ellie Stover
Erin Bailey
Pops 

Remember that the entire new release is available to buy right now from the Whimsy Stamps store along with all your Whimsy favorites.

Thanks so much for stopping by! Have a wonderful day.
Hugs and smiles

© 2012 fresh & fun Suffusion theme by Sayontan Sinha