Hello and welcome to Day four of Whimsy Stamps November Rubber & Die Release Showcase!

On Wednesday (21 November) Whimsy Stamps released this month’s new rubber designs, Shapeology dies, Whimsy Designer Paper packs, Shape EZ templates and *new* Whimsy Prints pre-coloured toppers. From then until 27 November the Whimsy Stamps DT and Special Guests are showcasing these fabulous new goodies with a daily mini blog hop and I am part of today’s hop!

Each mini blog hop has a new release prize hidden somewhere along the way and you have 24hrs to enter each prize draw.

To be entered into today’s mini blog hop prize draw, be sure to leave a comment on ALL of the DT’s posts listed below by 12.00PM EST tomorrow. All winners will be announced on the Whimsy blog on 28 November.

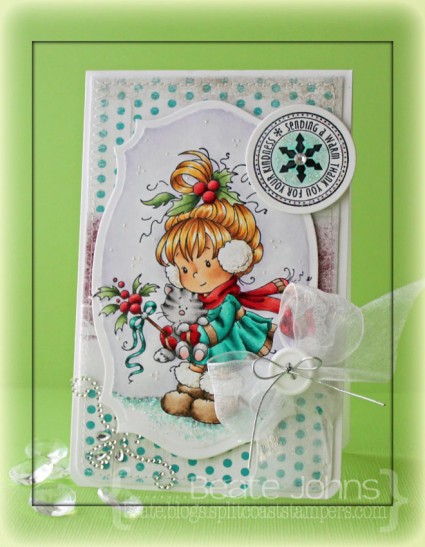
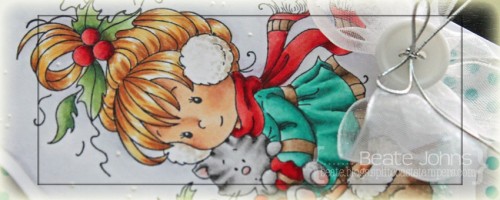
For my card today I used the new Wee image Berry. It was stamped in Tuxedo Black Memento Ink on Neenah Solar White cardstock that had been cut and embossed with the second largest Spellbinders™ Label Twenty-Five Nestabilities® die and colored with Copic Markers (coat: BG11, BG13, BG15, BG18   coat/boots/scarf: E41, E42, E43, E44   Scarf/Berries: R32, R35, R39   Holly Leaves: G40, G43, G46   Skin: E50, E21, E34    Hair: Y21, Y23, E33   Cat: T0, T1, T3, T5, R20   Ground: BG10, BG11, T0, T1    Background: C0, C1, BV00o0). White Opal Liquid Pearl spots were added to the background, Stardust Glitter over the ground.

A 2″ x 3 1/4″ strip of  Whimsy Winter Blues paper were adhered over a 3 1/4″ x 5 1/4″ piece of the same paper pack. The bottom corners were rounded and the edges were sanded and stitched. May Arts white organdy ribbon was tied around the horizontal strip was tied around the paper before it was adhered to the card base, 3 1/2″ x 11″ solar white cardstock, folded in half. The ribbon was topped with a white button, tied on with silver cord.

A sentiment from Snowflake Mini Letter Seals was stamped in Tuxedo Black ink on white cardstock and cut and embossed with a Standard Circle Nestabilities die. The center was colored with Copic Marker BG10 and BG11. The image was adhered to the card base with foam adhesive squares, the sentiment was adhered to the upper right of the image. A rhinestone from a Sleek Strips Silver Rhinestones was added in the center of the snowflake and Stardust Stickles was placed over the colored part of the sentiment panel. Part of a Fancy That! Border Bling on the bottom right corner finishes off the card.

To take a peek at today’s fabulous new release creations, please click on the links below…

Bev RochesterSpecial Guest
Erin Bailey
Heidy
Simonne
Tammy Louise

Remember that the entire new release is available to buy right now from the Whimsy Stamps store along with all your Whimsy favorites.

Thank you so much for stopping by! Have a wonderful day!
Hugs and smiles

If you would like to join Whimsy Stamps as their Guest Designer for the January 2013 release, please CLICK HERE for all the details. Entries close at 12.00pm on 28 November.

Hello and welcome to Day one of Whimsy Stamps November Rubber & Die Release Showcase!

First of all I want to wish all my American readers a Happy Thanksgiving. I hope you have a wonderful day with your family. Let me just tell you how thankful I am for all my readers. It still boggles my mind that so  many of you subscribe to my blog. I am extremely thankful for all of you and LOVE it when you let me know what you think about my creations.

On Wednesday (21 November) Whimsy Stamps released this month’s new rubber designs, Shapeology dies, Whimsy Designer Paper packs, Shape EZ templates and *new* Whimsy Prints pre-coloured toppers. From then until 27 November the Whimsy Stamps DT and Special Guests are showcasing these fabulous new goodies with a daily mini blog hop and I am part of today’s hop!

Each mini blog hop has a new release prize hidden somewhere along the way and you have 24hrs to enter each prize draw.

To be entered into today’s mini blog hop prize draw, be sure to leave a comment on ALL of the DT’s posts listed below by 12.00PM EST tomorrow. All winners will be announced on the Whimsy blog on 28 November.

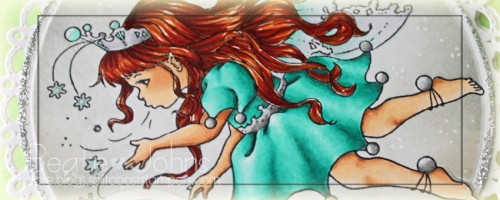
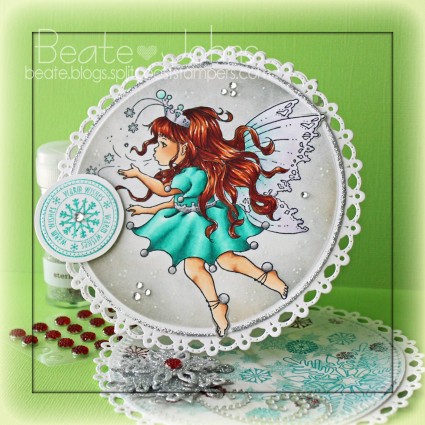
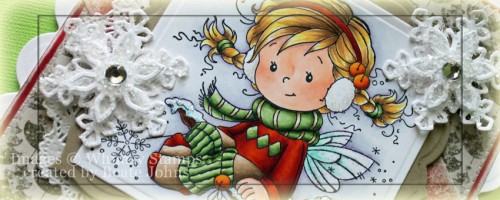
For my card today I used Crissy’s darling new Snow Fairy Princess. It was stamped inTuxedo Black Memento Ink on Neenah Solar White cardstock that had been cut and embossed with the smallest Spellbinders™ Grand Circles Nestabilities®. The image was colored with Copic Markers (Dress: BG11, BG13, BG15, BG18, N0, N1, N3     Wings: BG10, BG11, BV0000, BV000     Skin: E97, E99, E09, E18    Skin: E50, E21, E34), masked and sponged first with London Fog, then a bit with Toffee Crunch Memento inks.

The edges of the circle were inked with VersaMark ink, sprinkled with Sticky Embossing Powder, heated and Martha Stewart Sterling Glitter was added over it. Little dots were added with a white gel pen.  Subtle sparkle was added with a clear spica pen, more sparkle was added to the wings with Frost Smooch Glitz.

A sentiment from the new Snowflake Mini Letter Seals was stamped in Turquoise Gem VersaMagic Ink on white cardstock and embossed with iridescent ice embossing powder and cut and embossed with a Standard Circle die. It was adhered to the image layer with foam adhesive squares.

The card base was created as a Twisted Easel card, cut and embossed out of Neenah Solar White cardstock with the smallest of the Grand Decorative Circle Nestabilities dies. A piece of Whimsy Winter Blues Patterned Paper was cut with the smallest Grand Circle Nestabilities die,  the edges were sanded and adhered to the inside of the card.

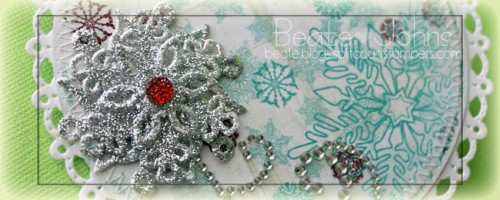
Solar White cardstock was cut and embossed with the three smallest Create-a-Flake Four Shapeabilities® dies. The snowflake pieces were covered with the Emboss It Dabber. Sticky embossing powder was added, heated and the snowflakes were covered with Sterling Glitter.  They were stacked together with foam adhesive squares and topped with a Queen & Co Twinkle Goosebumps.  The sparkly snowflake was adhered to the bottom of the inside of the card. Part of a Finesse Rhinestone Swirl was adhered to the snowflake. Rhinestones from a Sleek Strip Silver Rhinestone were added to the card front to finish off the card.

To take a peek at today’s fabulous new release creations, please click on the links below…

Ann Vento
Deb Routledge – Special Guest
Debbie Eastman
Michele Roos – Special Guest
Sylvia Blum

Remember that the entire new release is available to buy right now from the Whimsy Stamps store along with all your Whimsy favorites.

Thank you so much for stopping by! Have a wonderful Thanksgiving day!
Hugs and smiles

If you would like to join Whimsy Stamps as their Guest Designer for the January 2013 release, please CLICK HERE for all the details. Entries close at 12.00pm on 28 November.

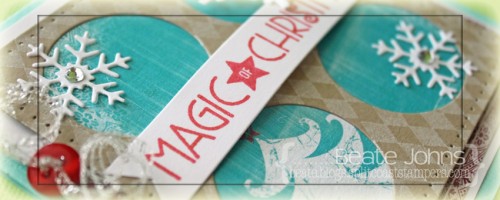
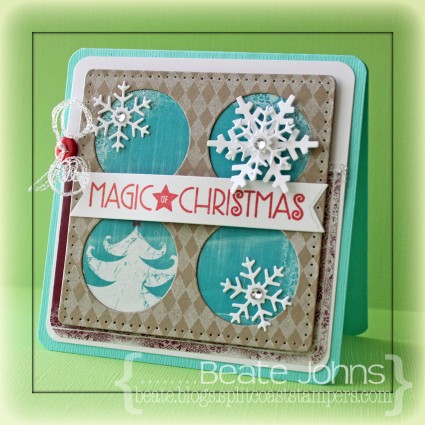
I created this card as an entry for MFT’s November Guest Designer contest. I started by cutting Kraft cardstock with the Peek-a-Boo Squared Die-namics die.  The layer was stamped with the smallest diamond background from Distressed Diamonds stamp set with Moonlight Brilliance ink.  Winter blues Whimsy paper was adhered behind the openings and the edges were pierced.

The bottom corners of a 2 1/2″ x 3 7/8″ of Winter Blues paper were rounded and adhered to a 4″ square of white cardstock with rounded corners. Silver curling ribbon was tied around the top of the paper layers with a button before all layers were adhered to the card base, a 4 1/4″ x 8 1/2″ piece of Patina Bazzill Cardstock with rounded corners. The peek-a-boo layer was adhered to the card base with foam adhesive squares.

Neenah Solar White cardstock was cut with the two smaller dies from Let it Snowflake die-namic dies, stacked and topped with a rhinestone from a Sleek Strips Silver Rhinestones. Two small snowflakes were cut out white cardstock as well. The snowflakes were adhered to the panels that didn’t have the tree .

Another piece of white cardstock was cut with a Fishtail Flag Stax and a sentiment from Seasonal Sentiments was stamped in Rocket Red Gold Brilliance Ink. It was adhered in the center of the card.

Thanks so much for stopping by! Have a wonderful day!
Hugs and smiles

P.S.: Today’s Holiday Blitz tutorial on Splitcoaststampers is written by Cindy Hall. She shows us how to create a darling telescoping snowman card. I hope you have time to check it out!

Hello and welcome to Day 2 of our September Rubber & Die Release Showcase!

On Wednesday (19 September) Whimsy Stamps released this month’s new rubber designs, Shapeology dies, Whimsy Designer Paper packs and Shape EZ templates. From then until 25 September the Whimsy Stamps DT and Special Guests are showcasing these fabulous new goodies with a daily mini blog hop and I am part of today’s hop!

Each mini blog hop has a new release prize hidden somewhere along the way and you have 24hrs to enter each prize draw.

To be entered into today’s mini blog hop prize draw, be sure to leave a comment on ALL of the DT’s posts listed below by 12.00PM EST tomorrow. All winners will be announced on the Whimsy blog on 26 September.

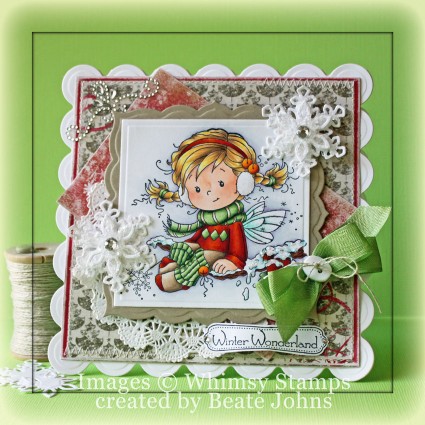
For my sample today I used the darling new Wee Image called Holly. I stamped it in  Tuxedo Black Memento Ink on Neenah Solar White cardstock . It was colored with  Copic Markers (Skin: E000, E00, E01, BV00 Hair: Y11, YR21, E43 Scarf/Stockings G40, G43, G46 Shirt/socks/berries: YR15, R05, R08, R27 Pants/socks: E41, E42, E43, E44   Leaves: G21, G24, G28   Branch: E23, E27, E29, E97    Wings: Bg10, BG11   Bells: Y35, Y38, E97    Snow: B000, B000    Ear muffs: W0, W1    Background: C0, C1, BV00) and it was cut and embossed with the largest of the Classic Square SM dies. The square was adhered to kraft cardstock, cut and embossed with the largest Label Twenty-Six die.

Vintage Christmas Paper was cut and embossed with the second smallest Grand Square Nestabilities die. The edges were sanded and stitched before it was adhered to white cardstock, cut and embossed with a Grand Scallop Square Nestabilities die. A 2 1/2″ x 4 5/8″ piece of Vintage Christmas paper was sanded and adhered diagonally over the card front. A paper doily was adhered to the lower left corner and the image layers were adhered to the center of the layers with foam adhesive squares.  Glitter was glued over the snow with Glossy Accents, and sparkle was added to the wings with  Frost Smooch Glitz.

Snowflakes were cut and embossed out of white cardstock, stacked with foam adhesive squares and topped with Vintage Glass Glitter Shards. They were added to the edges of the image. Green seam binding was tied into a double bow and topped with a button to be placed to the lower right side of the image.

A sentiment from the new Holiday Notables 2 was stamped in Tuxedo Black on white cardstock. It was cut out and adhered to the lower right of the card front. A piece of Fancy That! Border Bling on the top left finished off the card front. It was then adhered to the card base, white cardstock, folded in half and cut and embossed with the same Grand Scallop Square Nestabilities die.

To take a peek at today’s fabulous new release creations, please click on the links below…


Remember that the entire new release is available to buy right now from the Whimsy Stamps store along with all your Whimsy favorites.

Thanks for stopping by and don’t forget to pop back to the Whimsy blog tomorrow for more new release creations! Have a wonderful day!
Hugs and smiles
© 2012 fresh & fun Suffusion theme by Sayontan Sinha