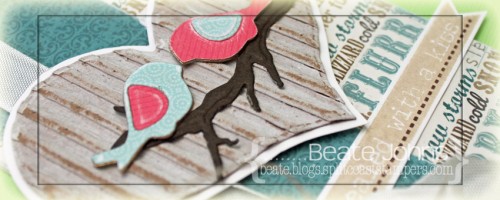
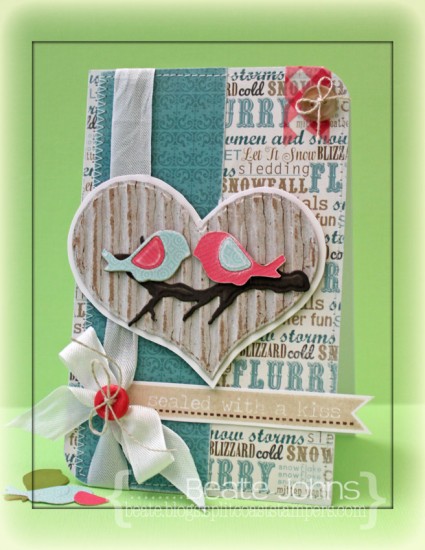
When I received the new blanks and Bezel matching dies from Spellbinders I had to try them out right away.  I used the Birds one die to cut patterned paper. The edges were sanded before the pieces were adhered to Bird blanks.  Brown cardstock was cut and embossed with the branch die from Cherry Blossoms.

Corrugated cardboard was cut with the largest of the new Heart One dies. The cardboard was painted with Snow Cap Paint Dabber and then sanded. The heart was adhered to white cardstock and cut out before the branch and birds were adhered in it’s center.

A 1 3/4″ x 5 1/2″ piece of Winter Fun patterned paper was adhered to a 3 1/2″ x 5 1/2″ of patterned paper from the same paper pack. Seam binding was tied around the vertical strip and topped with a button, tied on with Linen Thread.

A sentiment from GinaK. Designs Mistletoe Memories was inked with Wheat and Jumbo Java VersaMagic ink on white cardstock and cut out. It was adhered next to the seam binding bow.

The top right and bottom left corner were rounded before Washi tape topped with a button on the top right finish off the card.

Thanks so much for stopping by! Have a wonderful day!
Hugs and smiles

Becky and Melanie thought it would be great fun to team up for a little Holiday Hop today. We are showcasing Becky’s new set, “Warm Woolen Mittens” along with Becky’s new cut file “Grand Banners” and “Grand Banners – Winter Sentiments” and Melanie’s newest set, “Lots of Letters” as well as some of her other recent favorites.

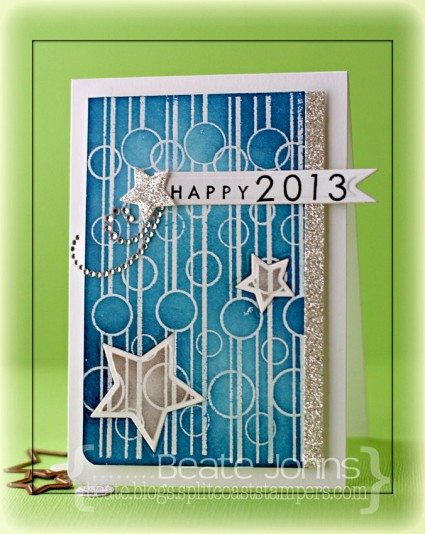
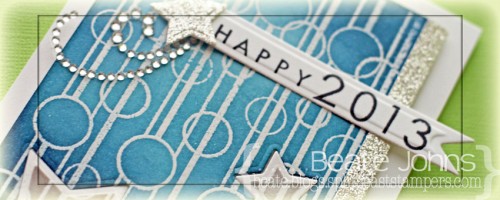
For my card I stamped one  of the patterns from Pretty Patterns in VersaMark ink on a 3″ x 5″ piece of Neenah Solar cardstock. It was embossed with clear embossing powder and stars were cut and embossed out of the lower half with the two smallest dies from the Star Nestabilities set. I had seen Jennifer McGuire create a card with this technique and had wanted to try that out ever since.

The bottom left corner was rounded before the background was sponged first with Teal Zeal, then with Nautical Blue Memento Ink. The stars were sponged with London Fog Memento Ink while the dies were still on the cardstock.

The card base is a piece of 3 3/4″ x 11″ piece of Neenah Solar White cardstock folded in half. Again the bottom left corner was rounded. The background and the stars were adhered to the card base with adhesive foam squares.  A 1/4″ x 5″  silver glimmer paper (Stampin’ Up!) strip  was adhered to the right hand side of the background. A small star was cut out the same paper.

The word happy is from the stamp set Inspiration Mosaic. It was stamped in Tuxedo Black Memento Ink on a strip of white cardstock. 2013 was stamped behind it with numbers from the new Lots of Letters set. The sentiment was cut out with a Pennant die. The glitter star was adhered to the left of the sentiment and both were adhered to the upper half of the card. Part of a Finesse Rhinestone swirl finish off the card.

Make sure you visit everyone’s blog to leave a comment and be entered to win a clear “I do!” and “Beyond Baskets” stamp set! A winner will be announced Thursday.

Becky Oehlers (Illustrator of Warm Woolen Mittens)

JJ Bolton

Laurie Schmidlin

Latisha Yoast

Michelle Woerner

Richard Breaks

Vera Yates

Tosh Leyendekker


Thanks so much for looking! Have a wonderful day!
Hugs and smiles

This week on the Spellbinders blog it was all about Gift ideas. I had some 7Gypsies 6″ x 6″ Shadowboxes for quite a while and thought it would be great to alter one. I hope you have time to check out my post with step by step instructions HERE. I used a picture of my kids from 10 years ago. They were so cute when they were little.  Altering items is definitely out of my comfort zone. Let me know what you think.

Thanks so much for stopping by! Have a wonderful day!
Hugs and smiles

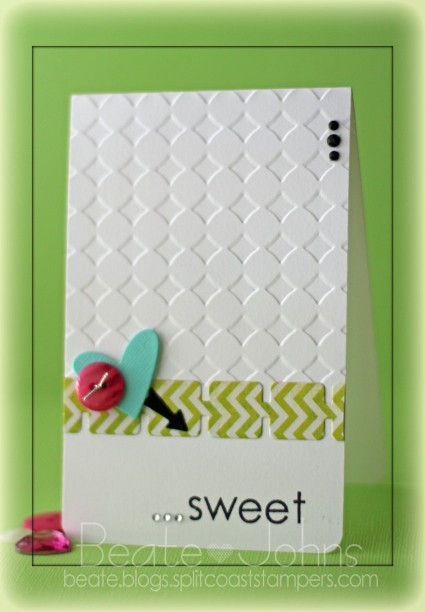
While creating yesterday’s card, I cut a strip of the MME Lime Twist Life is a Party Paper with the second die from MFT’s Retro Square Die-namics dies. It was too pretty to throw away, so I created another card with it. The card base is a 3 1/2″ x 11″ piece of  Neenah Solar White cardstock, folded in half. The upper 3/4 (and a bit of the back) was embossed with the Simplicity M-Bossabilities folder and that Life is a Party paper strip was adhered where the embossing ended.

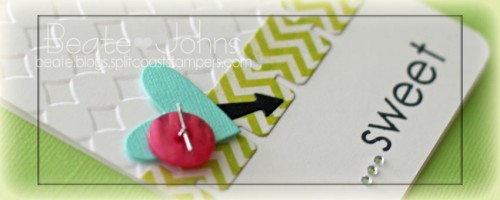
A heart was cut out of Patina Fourz Bazzill cardstock with the smallest heart from Hearts a Plenty Die-namics die. It was topped with a pink button, tied on with silver cord and adhered with foam adhesive squares to the left hand side of the retro strip. A tiny arrow from MFT’s Flags & Tags Die-namics set was cut out of black cardstock and adhered to the right of the heart, pointing to the sentiment.

The sentiment was stamped with Melanie’s new Lots of Letters set in Tuxedo Black Memento Ink. The bottom corners of the card were rounded. Black and silver Rhinestones from Want2Scrap finish off the card. This card is another entry for the Keen on Neon Moxie Fab World Challenge.

Thanks so much for stopping by! Have a wonderful day.
Hugs and smiles

I am excited to be joining in the Gina K. Designs Design Team December Inspiration Blog Hop! Gina and the Design Team will inspire you with many beautiful ideas, and as you hop through their blogs, make sure to leave a comment on each of them because a few random comments will be chosen and those stampers will each win a grab bag of Gina K. Designs products! To see the full list of winners, check the Big News forum at Stamp TV a couple of days after the hops.
The new Melanie Muenchinger set called Lots of Letters  is just perfect for my new love of Clean and simple cards. It  is available in both clear photopolymer and red rubber.

This is the first letter and number set from Gina K. Designs and is packed with frames and elements that will help your stamped cards, pages or personalized designs shine!   Gina K. also carries matching Silhouette Studio cut files for only 99 cents each which make creating beautiful and professional cut designs with these stamps a breeze. The square and circles images are also perfect for your dies and punches, fitting perfectly in a ¾” or larger die or punch.

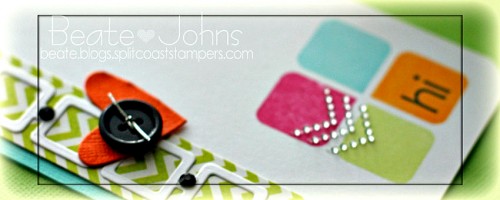
I created this card not just for Melanie’s blog hop, but also as an entry for the Keen on Neon Moxie Fab World Challenge.  I started with a 3″ x 5″ piece of white cardstock. The bottom right corner was rounded before I stamped the square stamp with the one rounded edge  four times in the right corner  (once in Mango Madness VersaMagic ink, once in Key Lime VersaMagic ink, once in Sea Breeze VersaMagic and once in Rose Bud Memento Ink). Hi was stamped in the orange square with Tuxedo Black Memento Ink.
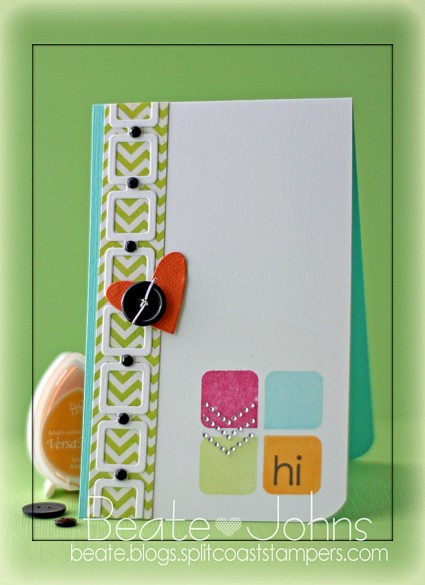

More white cardstock was cut and embossed with MFT’s Retro Squares Die-namic die and adhered over a thin strip of MME Life of the Party patterned paper (old pack…I wish I had more. Love the funky colors). The white cardstock piece was adhered to the right hand side of the  card base, a 3 1/2″ x 11″ piece of Patina Fourz Bazzill cardstock, folded in half. The retro square strip was adhered to the left hand side, leaving only about 1/4″ of the Patina base showing.

A heart was cut out of orange Core’dinations cardstock with the smallest heart from Hearts a Plenty Die-namics die. It was topped with a button that was tied on with silver cord. The heart was adhered slightly above the center of the retro squares strip. Black rhinestones were added to the square strip and silver chevron rhinestones to the colorful stamped squares to finish off the card.

Please see Melanie’s blog for the full link list of blog hop participants! Also, if you come back tomorrow, you will see another card created with the Lots of Letter sets and with leftovers from what I used (or tried to use) on this car).  And this afternoon, I am posting some super exciting Splitcoaststampers news here! I am tickled pink about this!

Thanks so much for stopping by! Have a wonderful day!
Hugs and smiles
I created this card a while ago for one of the Hope You Can Cling To challenges on Splitcoaststampers. It’s perfect for our new Crafty Friends Challenge, to use a sentiment as the focal point of the card.

Are you playing along with us? If not, you’re missing out on the chance to lift the spirits of women battling breast cancer at MD Anderson, and also on more than $6500 in prizes from your favorite crafty companies. So what are you waiting for? Get to stamping!

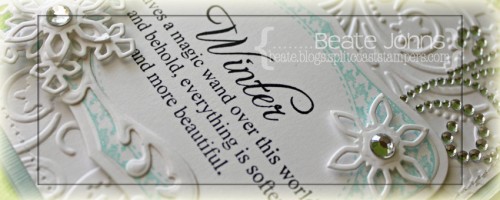
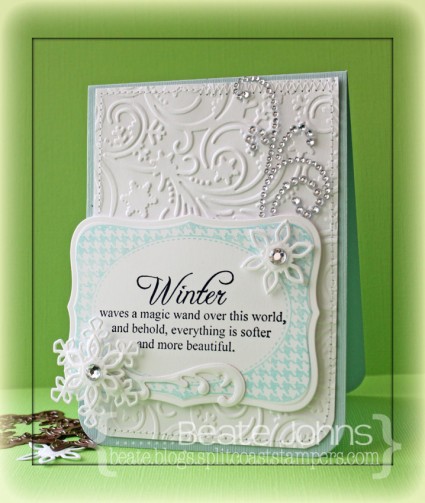
For my card I started by stamping the a frame from Lovely Labels 1 in Sea Breeze VersaMagic Ink on Neenah Solar White cardstock. It was cut out with a Label 18 Nestabilities die. A sentiment from Winter Wonderland was stamped in Jet Black Archival ink in the center of the label.

The bottom corners of a 3 3/4″ x 5 1/4″ piece of white cardstock were rounded before it was embossed with the Holiday Magic M-Bossabilities folder and it’s edges were stitched. The layer was adhered to the card base, a 4″ x 11″ piece of Seasalt Canvas Bazzill cardstock, folded in half. The sentiment label was adhered slightly hanging over the right hand side with foam adhesive squares.

Snowflakes were cut with Create-a-Flake 4 dies out of white cardstock and adhered to the upper left and lower right of the sentiment label. A Flourish out of white cardstock, cut with a the Ornate Artisan Tags and Accents die, was adhered to the right of the double stacked snowflake and rhinestones were added to the center of each snowflake. Part of a Finesse Rhinestone swirl finish off the card.

Check out my fellow Crafty Friends for more Sentimental inspiration:


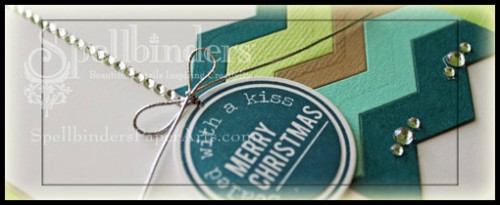
It’s my turn to share a video post on the Spellbinders blog today. Next week it’s all about Edgeabilities on the Spellbinders blog. I thought it would be cool to create Chevron strips with the Ric Rac die from the Classic Edge One die kit.

The current CAS-ual Fridays challenge called us to make a masculine card. I think even with the rhinestones I added, this card fits the bill.

I hope you have time to check out the card and video. Thanks so much for stopping by! Have a wonderful weekend!
Hugs and smiles


It’s my turn to share on the Spellbinders blog again. This time I used a Medallion Die D-Lites die. I created the cards for the current CAS-ual Fridays challenge (use Kraft) and the CAS(E) this sketch challenge.

I hope you have time to check out the post! Thanks so much for stopping by! Have a wonderful day!
Hugs and smiles

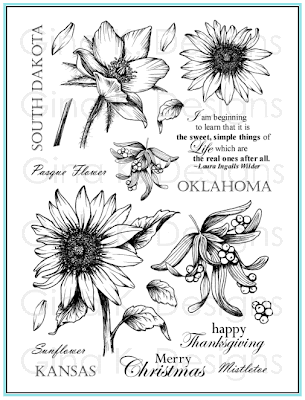
Today I am joining in as a special guest of Melanie Muenchinger in the Gina K Designs October Inspiration blog hop, showcasing the newest stamp set from Gina K Designs, Stately Flowers 5. Stately Flowers 5 is the fifth in a series of hand drawn official state flowers, and is available for purchase in both premium quality clear photopolymer and red rubber.
This set includes flowers for Oklahoma, South Dakota, and Kansas, but the mistletoe and sunflower have been specifically grouped together with all your upcoming fall and winter holiday cardmaking needs in mind, and the sentiments to match!


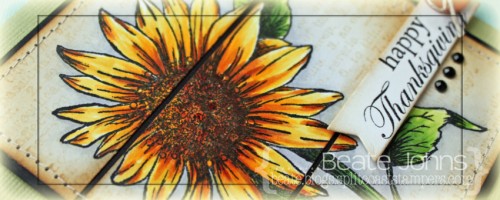
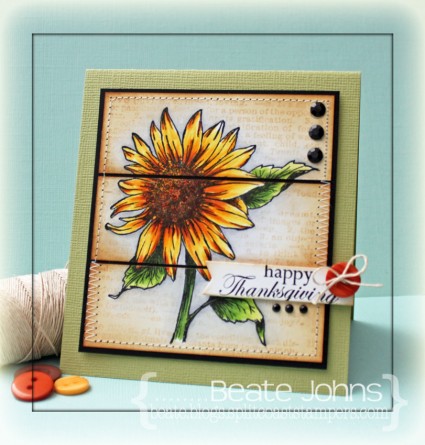
I am excited to be hopping with Melanie today. For my first card I started with by stamping the sunflower in Tuxedo Black Memento Ink on 3 1/2″ x 3 3/4″ piece of white cardstock. It was colored with Copic Markers (Y13, Y15, Y17, E97, E99, YG21, YG25, YG63, YG67, C00, C1, BV20). The image was masked, then a background was stamped over it in Antique Linen Distress ink. The image was cut in three 1 1/4″ wide strips and the edges were sponged with Antique Linen and Vintage Photo Distress ink.

I ran the strips through my Xyron and adhered them to a slightly bigger piece of black cardstock. The edges of the layers were stitched. The layers were adhered to the card base with foam adhesive squares, a 4 1/4″ x 9 1/2″ piece of Lizzard Bazzill cardstock folded in half.

A sentiment from the set was stamped on a piece of white cardstock, cut with one of the Sentiment Strip Die-namic dies. The edges were lightly sponged with Vintage Photo Distress Ink. A button was tied to the upper right hand side of the sentiment strip. The strip was then adhered to the lower right side of the card. Black Rhinestones finish off the card.

I created a second card with that set with last week’s Color Challenge on SCS.

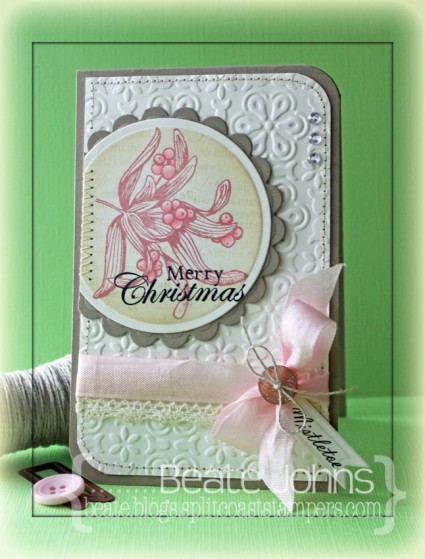
I started by stamping the Mistletoe image in Pink Petunia VersaMagic ink on Neenah Natural White cardstock. It was cut and embossed with a Standard Circle Nestabilities die. The die was kept over the cardstock, the image was masked and the bigger sentiment was stamped over the circle with Antique Linen Distress ink. The edges were sponged with the same color. The image was adhered to a piece of Kraft cardstock, cut and embossed with a Scallop Circle Nestabilities die. Part of the right side was cut off and the edge was stitched.

A 3 1/4″ x 5 1/4″ piece of Natural White cardstock was embossed with the Elegance M-Bossabilities folder. The bottom left and top right corner  were rounded before the edges of the layer were stitched and the circle layer was adhered to the top left. A sentiment was stamped on to the circle layer with Versafine ink.

May Arts Crochet Ribbon was adhered to the lower part of the layer. Pink Seam binding was tied above it.  A Spellbinders Pennant die was used to cut and emboss more Natural White cardstock. The word Mistletoe was stamped on it before it was tied to the bow with Linen thread and a button. Everything was adhered to the card base, a 3 1/2″ x 11″ piece of Kraft cardstock, folded in half. Three rhinestones on the top right edge finish off the card.

Be sure to visit the illustrator of Stately Flowers 5,
today for more samples with her set,
as well as inspiration from the lovely talented 
who is also guest designing this month!
For a full link list of participating designers,

Thanks so much for stopping by! Have a wonderful day!
Hugs and smiles
Welcome to the monthly NinaB Designs team blog hop. NinaB Designs is a product designer for a few paper crafting companies including Spellbinders, Want2Scrap and Penny Black, and The Craft’s Meow.

For this month’s hop, Nina challenged the team to create an ornament or tags, which will come in handy in the upcoming holidays.

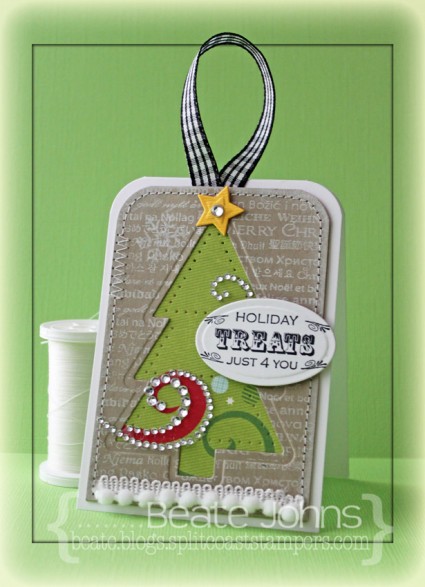
I created a little tag card that worked great for the Free For All Challenge on Friday, which was to use a negative die cut shape.  I started with a 2 3/4″ x 4″ piece of Kraft cardstock. The top corners were rounded and the Christmas Tree from Sweet Folk Art was cut and embossed in it’s center. Next a background strip from GinaK Designs Vintage Borders was stamped over it with Brilliance Moonlight White ink and the edges were sponged with the same ink.

A slightly smaller piece of Carta Bella Merry & Bright patterned paper was adhered behind the kraft cardstock. The tree kraft die cut was used as a template to add a pierced border on the patterned paper. The edges of the stitched and a piece of white pompom ribbon was adhered to the bottom. Gingham ribbon was taped behind the Kraft cardstock before it was adhered to the card base, a 3″ x 8 1/2″ piece of Neenah Solar White cardstock, folded in half with it’s top corners rounded.

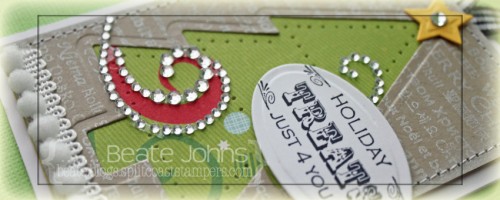
A sentiment from Winter Mittens was stamped in Jet Black Archival ink and cut and embossed with an insert die from theFancy Framed Tag One dies. The sentiment panel was adhered to the card with foam adhesive squares. Yellow cardstock was cut and embossed with the small star die from Sweet Folk Art. It was adhered to the top of the tree. Parts of a Finesse Rhinestone swirl were added to the tree and one rhinestone from aSleek Strips Silver Rhinestoneswas added to the center of the star to finish off the tag card.

The NinaB Designs team is giving away these TWO PRIZE PACKAGES:

Prize #2 includes 2 retired sets from Layers of Colors stamps:
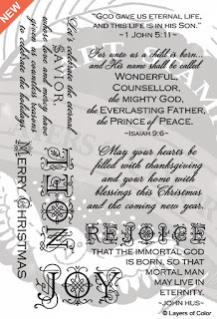
Christmas Verses 

Beautiful Lace

Winners will be picked randomly from 2 of the designers’ blogs:
Everybody is welcome to comment and be eligible to win. The winners will be announced on  October 22 on Nina’s Blog, where you will also find all the relevant info regarding the giveaways.Finally, please consider liking the following Facebook pages that are represented on today’s hop, so you don’t miss the latest news and happenings:

Penny Black Inc.
Thank you for stopping by! Have a wonderful day!
Hugs and smiles
 

© 2012 fresh & fun Suffusion theme by Sayontan Sinha