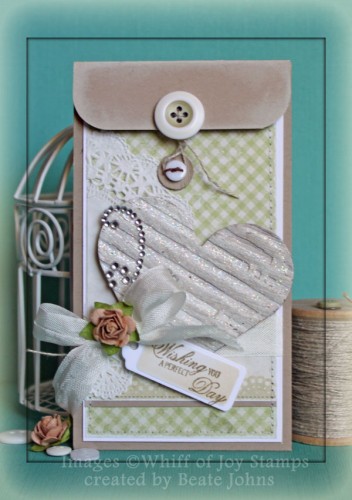
I created this card at the end of November for a color challenge on Splitcoaststampers. The colors were White, Kraft and Pear Green. Having just received an order with Simple Stories Baby Steps Paper, I knew I wanted to use the green crosshatch patterned paper for it.


I started with a 3″ x 12″ strip of Kraft cardstock and scored it at 5 1/2″ and 11″. The corners of the 1″ flap were roundedAdirondack Snowcap ink was dragged across the edges of the card front, flap and inside of the card.

A 2 1/2″ x 5″ piece of that cross hatched paper was adhered to a 1/4″ piece of Neenah Solar White cardstock. A 1 1/4″ x 2 1/2″ piece of the same paper pack was adhered over the green layers and the edges of the big layer were stitched. Part of a Paper Doily was adhered to the upper left hand side. Seam Binding was tied around the horizontal layer and topped with a Recollection Flower.

A piece of corrugated cardstock was painted with White Acrylic Paint Dabber , embossed with Iridescent Ice Embossing Powder (Stampin’ Up!) and cut embossed with a Classic Heart Nestabilities die. The heart was adhered next to the bow and topped with part of a Finesse Rhinestone Swirl.

A sentiment from Elizabeth Bells’ Accessories and Sentiment collection was stamped in Rich Cocoa Memento ink on a piece of Neenah Solar White cardstock, cut and embossed with a Tag Trio die (retired). The inside of the tag was sponged with Antique Linen Distress ink. The tag was tied onto the bow with Linen Thread.

Butterscotch Waxed Ribbon was used to tie a tiny button to a 1/2″ Kraft circle. It was adhered underneath the flap. A bigger button was threaded with Linen thread and adhered on to the flap. I left Linen Thread hanging off the big button so I could use that to tie the flap card shut.

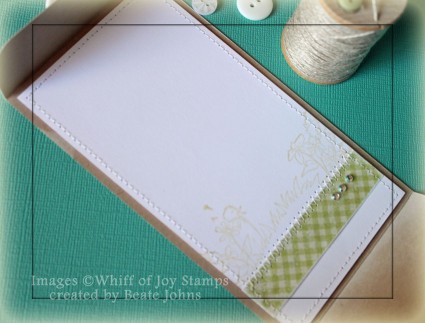
For the inside of the card a 1/2″ x 2 3/4″ strip of patterned paper was stitched to the lower edge of a 2 3/4″ x 4 3/4″ piece of white cardstock. A background stamp from the same set was stamped over the paper strip in Antique Linen. Three baby Bling Rhinestones on the right of the paper strip finish off the inside of the card.

Thanks so much for stopping by! Have a wonderful day.
Hugs and smiles


Today’s Timeless Tuesday Challenge Hostess is Maki.  She is challenges us to use the same imageto make two cards/projects with two totally different look, style theme or colors.

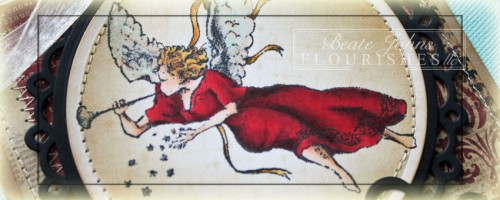
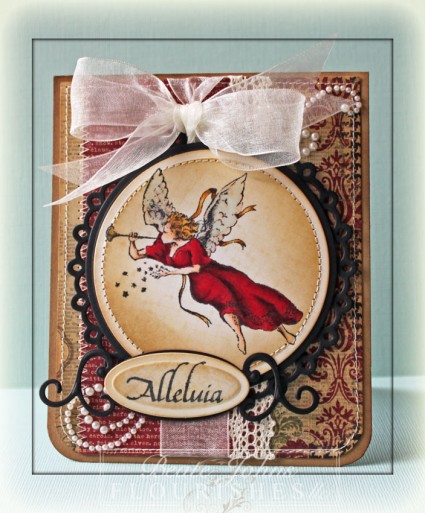
For my samples I chose the Alleluia Angel.  For my card, I stamped the image in Tuxedo Black Memento Ink on Neenah Solar White cardstock. The image was cut and embossed with a Standard Circle Nestabilities die, colored with Copic Markers (Skin: E0000, E00, E01, E31   Dress: R35, R37, R39   Hair: Y21, Y23, E33   Trumpet and Ribbon: YR21, YR23, YR24) and sponged with Antique Linen and Vintage Photo Distress ink. The image was first stitched to a slightly bigger black cardstock circle, then adhered to a piece of black cardstock, cut and embossed with the largest of the new Picot Edge Circle Nestabilities dies.

A piece of Crochet Lace was adhered to a 2 1/2″ x 5 1/4″ piece of 25 Days of Christmas paper. The bottom corners of a 4″ x 5 1/4″ piece of paper from the same paper pack were rounded, the edges of the paper were sponged with Vintage Photo ink and paper/lace strip were adhered to the layer. The edges of the layers were stitched and Ivory Organdy Ribbon was tied around the vertical strip.

The card base is a 4 1/4″ x 11″ piece of Kraft paper folded in half. Again the bottom corners were rounded and the edges were sponged with Walnut Stain Distress ink.  The layers were adhered ot the card base and dressed up with part of a Finesse Pearl Swirl. A sentiment from the set was stamped in Tuxedo Black ink on a piece of Solar White cardstock cut and embossed with a Petite Oval Nestabilities die. The oval was sponged with Vintage Photo ink before it was adhered t o a piece of black cardstock, cut and embossed with a Fancy Tag Die. The sentiment was adhered underneath the angel layers.

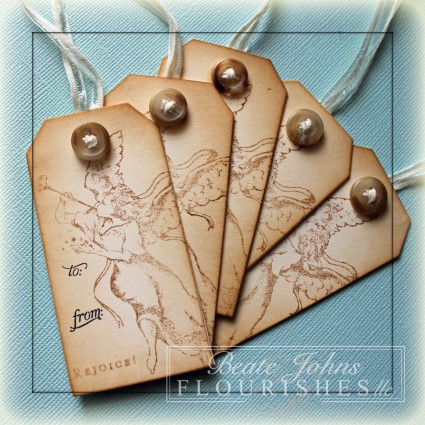
My second project I kept really simple. I used the angel to decorate small tags.

The tags were cut with Tim’s Tiny Tabs & Tag die.The tags were sponged with Vintage Photo ink and the angel and sentiment were stamped in second generation of that ink. The To and From stamps are from A Gift For You.  They were stamped in Jet Black Archival ink. A button was threaded with thin May Arts ribbon and adhered over the tag hole. Another tag was adhered to the back to keep the ribbon and button in place.

Thanks so much for stopping by! I hope you have time to participate in the challenge. Check out my fellow Timeless Tuesday Challenge Members for more inspiration:

Cindy Haffner
Heather Jensen
Maki Jones
Mona Pendleton
Silke Ledlow
Tammy Hershberger
and
December Guest Designer Theresa Pollack

Have a wonderful day!
Hugs and smiles

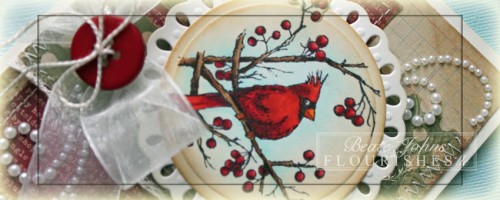
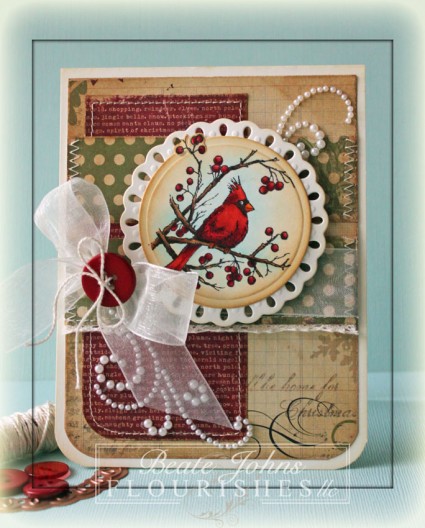
Today challenge is easy and fun. Silke gave us a beautiful sketch to work with. For my sample I stamped the Cardinal from Flourishes Christmas Classics in Tuxedo Black Memento Ink on Neenah Classic White cardstock. The image was colored with Copic Markers (Cardinal and berries: R08, R27, R29, R59  Beak and feet: YR15, YR18, R08   Branches: E55, E57, E57   Background: B0000) and cut and embossed with a Classic Circle Nestabilities dies along with the Out of the Box Technique.

The edges of the image layer were sponged with Vintage Photo Distress ink before the image was layered on a piece of Classic White cardstock, cut and embossed with the second largest Tear Drop Circle Nestabilities dies. The edges of that circle were slightly sponged with Antique Linen Distress Ink.

The edges of a 2 1/4″ x 4 3/4″ piece of 25 Days of Christmas Simply Stories Patterned Paper were sanded and sponged with Vintage Photo Distress ink before they were stitched and adhered to a 4″ x 5 1/4″ piece from the same paper pack. The bigger piece had been sanded and sponged as well.

Two 1 1/4″ x 4″ different patterned 25 Days of Christmas paper strips were also sanded and sponged before they were stitched as horizontal layers over the other papers. One of the strips  had a piece of Ivory Crochet Lace stitched underneath.  May Arts Ivory Organdy Ribbon was tied around that layer, tied into a bow and topped with a Basic Grey button, tied on ivory embossing thread.

The layers were adhered to the card base, a 4 1/4″ x 11″ piece of Classic White cardstock folded in half. The bottom corners were rounded. A Finesse Pearl Swirl ,cut apart and adhered partly to the lower left, partly to the upper right hand corner,  finishes off the card.

Please check out my fellow Timeless Tuesday Challenge members for more samples and inspiration:

Cindy Haffner
Heather Jensen
Maki Jones
Mona Pendleton
Silke Ledlow
Tammy Hershberger
and
December Guest Designer Theresa Pollack

Thanks so much for stopping by! Have a wonderful day!
Hugs and smiles


This month the challenge is to create a winter/holiday creation. Link up your Bringing Back Beautiful Challenge creations at the Flourishes Blog. If you upload to SCS, please use the keyword BBB17. You have until December 31th to enter! As we unveil our challenge for next month, we’ll share our True Beauties – those card makers who wowed us with this challenge! Winners will be featured on the Flourishes Blog and will receive a True Beauty blog button to display proudly on their blog!


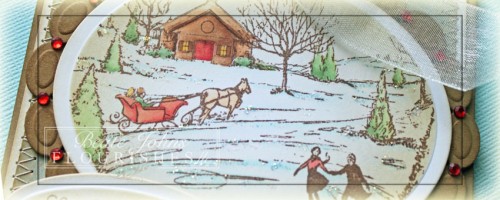
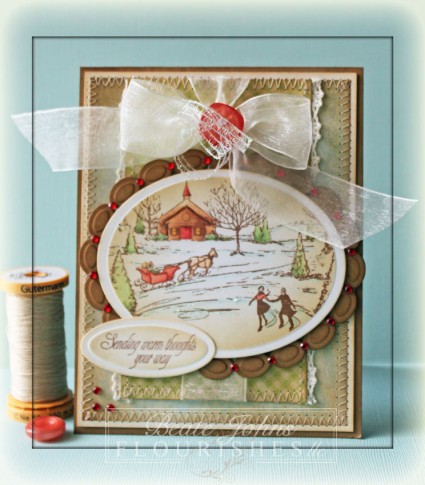
For my card I pulled out the Christmas Post card stamp set. I stamped it in Rich Cocoa Memento Ink on a piece of Neenah Solar White cardstock, cut and embossed with the largest Classic Oval Nestabilities die. The image was colored with Copic Markers ( Horse E50, E51   House: E21, E23   Trees: G20, G21   Bushes: YG61, YG63   Reds: R20, R21, R22) and the edges were sponged first with Antique Linen, then with Vintage Photo Distress ink.

The image was layered on a piece of Kraft cardstock that had been cut and embossed with a Beaded Oval Nestabilities die  that had been sponged with Vintage Photo Distress ink. The snow in the image was highlighted with Diamond Stickles and Red Baby Bling was added in between each beaded oval piece.

Two pieces of May Arts Crochet Lace were stitched to a 2 3/4″ x 4 3/4″ piece of Baby Steps Simple Stories Patterned Paper after the edges of the paper were sponged with Vintage Photo Ink. The edges of a 3 3/4″ x 5″ piece of the same paper pack were sponged with Vintage Photo ink before they were stitched to a 1/4″ bigger piece of Neenah Solar White cardstock that had been sponged with Antique Linen ink.

Ivory Organdy Ribbon was tied around the smaller layers before they were adhered to the bigger layers. The ribbon bow was topped with a button, tied on with iridescent curling Ribbon.  The main image was adhered over the layers with dimensionals and everything was adhered to the card base, a 4 1/4″ x 11″ piece of Kraft cardstock, folded in half and sponged with Vintage Photo.

A sentiment from the Vintage Postcard stamp set was stamped in Rich Cocoa Ink on a piece of Neenah Solar White cardstock, cut and embossed with the smallest Petite Oval Nestabilities die. The layer was sponged with Antique Linen Distress ink. It was adhered to the lower left of the image. Three small red bling Rhinestones on the bottom left corner finish off the card.

Check out what the rest of the design team has created!

Thanks so much for stopping by! I hope you have time to participate in the challenge. Have a wonderful day!
Hugs and smiles

© 2012 fresh & fun Suffusion theme by Sayontan Sinha