Did you see the new images Tiddly Inks released? They are so cute. For my card I used the new Happy Mail images. They were arranged, printed out on Neenah Solar White cardstock and cut and embossed with the Out of the Box Technique as well as the second smallest of the new 5″ x 7″ Matting Basics A Spellbinders Paper Arts.

The image was colored with Copic Markers (Skin: E50, E21, E33, R20    Hair: YR24, E99, E39, E18   Dress/Bird/Flower: Y13, Y15, Y17, YR15   Mailbox: E31, E34, E29, W3, W5, BV20, BV23, BV25   Flower Center: E99, E09    Grass: YG01, YG03, YG17)  and the edges were sponged first with Summer Sky, then with Bahama Blue Memento Ink. The image was adhered to a piece of black cardstock that had been cut and embossed with the second smallest of the new 5″ x 7″ Detailed Scallops Spellbinders die.

A 2″ x 3 5/16″ piece of My Mind’s Eye Six by Six A Mother’s Love was adhered to a 3 5/16″ x 5 5/16″ piece from the same paper pack. The edges were sanded and stitched before the layers were adhered to the card base, a 3 1/2″ x 11″ piece of Solar White cardstock, folded in half.

The sentiment from Happy Mail was printed out and cut and embossed with a new die from the Charmed I’m Sure Spellbinders Shapeabilities® die. A button was tied to the left hand side of the tag with silver cord before it was adhered to the upper right hand corner of the image layer.

The card works wonderful the current Tiddly Inks Challenge (anything goes.

Thanks so much for stopping by! Have a wonderful day!
Hugs and smiles


Edna’s Hope You Can Cling to challenge is to create a card with five words on it. I pulled out quite a few sets before I settled on the words and dies for my entry. I wanted to use different fonts for my adjective, so I used three different sets.

I started by cutting you and are out of Neenah Solar White cardstock with MFT’s High Rise Alpha Lowercase dies. I stamped a word from each First Class Friend, Complimentary Greetings and Well Worn My Favorite Things stamp sets in Jet Black Archival ink and cut them out.

The card base is a 3 1/2″ x 11″ piece of Kraft cardstock, folded in half. The bottom corners were rounded. A 2 1/4″ x 5 1/2″ wide strip of My Mind’s Eye The Sweetest Thing Tangerine paper was to the center of the card front. A strip of white paper was cut with the Squiggle Border and adhered to the right hand side of the paper strip. The words were adhered in it’s center.

Two small hearts were cut out of black and white cardstock with a die from the Notched Tag stamp and die set. Another heart was cut out of Tangerine paper with the smallest of the Hearts A Plenty Die-namic die. An arrow was cut out of black cardstock with one of the Lead the Way dies. They were used to dress up the card. Tiny black rhinestones from a Baby Bling rhinestone pack finish off the card.

Thanks so much for stopping by! Have a wonderful day!
Hugs and smiles

I created this card for a color and sketch challenge on Splitcoast. I also wanted to try out the Eggshell Mosaic Background that was published  a few weeks back.

My heart started as a piece of Neenah Solar White cardstock, cut with a Classic Heart Nestabilities die. I adhered egg shells with Multi Medium Matte Glue.  Once the glue dried, I sprayed the shells with Perfect Pearls Glimmer Mist and added Alcohol Inks (Butterscotch, Sunset Orange, Wild Plum and Pool). More Perfect Pearls was sprayed and then the heart was set aside. Once it dried, another layer of Multi Medium glue was added, this time the glossy kind.

The card base is a 3 1/2″ x 11″ piece of Solar White cardstock, folded in half. The bottom corners were rounded. Marigold Tattered Angels Mist was sprayed in the center of the card front. Next a background script from My Favorite Things First Class Friend was stamped in Dandelion Memento Ink.

One of the little circle images was stamped in Jet Black Archival ink on white cardstock and punched out with a 3/4″ circle punch.  The wavy part of the post mark was stamped on the left side of the card. The heart was adhered to the right hand side , the circle sentiment placed so hangs slightly off the left of the card, right over the postmark wave.

First class was stamped in Jet Black on white cardstock and cut out. Friend is part of a sentiment and was stamped to the left side. The First class was adhered slightly over it. A paper pierced row on the right next to the heart finish off the card.

Thanks so much for stopping by! Have a wonderful day!
Hugs and smiles

The new Crafty Friends Challenge is super easy. Charmaine is the hostess and she is asking you to incorporate dry embossing into your project. I combined the challenge with yesterday’s Hope You Can Cling to Challenge.

I started out by embossing a 3″ x 5″ piece of Neenah Solar White cardstock with the Simplicity M-Bossabilities folder. The bottom right and top left corners were rounded. The layer was stitched to a 3/16″ bigger piece of black cardstock, before it was adhered with foam adhesive squares to the card base, a 3 1/2″ x 11″ piece of textured Kraft cardstock, folded in half.

Three butterflies were cut out of My Mind’s Eye Honey patterned paper, topped with rhinestones from a Sleek Strips Silver Rhinestones. Another piece of Honey paper was cut and embossed with a Spellbinders Nested Pennants die. The edges were sanded and stamped with a sentiment of MFT’s Thanks a Bunch Stamp set in Jet Black Archival ink.

A flourish was cut out of black cardstock , adhered to the left hand side of the Pennant sentiment strip and topped with a yellow button.

Check out my fellow Crafty Friends for more Halloween inspiration:


Thanks so much for looking! I hope you have time to join us in the challenge. It’s easy and fun! Have a wonderful week!
Hugs and smiles

The second challenge during VSN last week was to create something with an image with wheels. I searched through my stamps and found a scooter from one of Unity’s Kit of the Month.

I stamped it twice in Jet Black Archival Ink, once on Neenah Solar White cardstock, once on Pink Paislee Spring Jubilee Patterned Paper. They were both cut out and the patterned paper was adhered over the white cardstock image. The image was colored with Copic Markers and a few rhinestones from a Sleek Strips Silver Rhinestones .

A green piece of patterned paper was cut in a slope and adhered to a blue paper piece from Spring Jubilee paper. The edges were stitched before the layers were adhered to the card base, white cardstock, folded in half.  White cardstock was cut with MFT Cloud Die-namics die.  Two clouds were added to the scene and highlighted with Stardust Stickles.

A piece from the notebook paper I still had from the last challenge was cut into banner shape by hand . A sentiment from the same KOM from Unity was stamped on the banner and it was adhered to the upper left hand side. A button was threaded with Honeydew Twine and adhered on the top edge of the banner.

VSN only gives you 45 minutes per card. That’s not a lot of time for me, so this card as well as the ones the next few days will be CAS cards. Very much out of my comfort zone.

Thanks so much for stopping by!
Hugs and smiles

On Wednesday a new Product Focus was published on Splitcoaststampers. This time we got to review the Perfect Squares Tool. So when I was creating a card for last Sunday’s Featured Stamper Challenge, I used that tool to cut and score my layers.

The Featured Stamper was Angela R. I hope you have time to check out her gallery on SCS. She creates beautiful cards. For my case I chose this cad of hers. I kept the layout, but changed the topper and the ribbon. I also added a little bling. Just a little. 🙂

I started by stamping the Butterfly from Taylored Expressions Make it Amazing in Jet Black Archival Ink and cut it out. The frame from the same set was stamped with Jet Black Ink on Neenah Solar White cardstock. The frame was hand cut before a flower image was inked with Sky Blue and New Sprout Memento Markers and stamped in it’s center. A few dots in each color were added before the butterfly was adhered over the flower with Scor-Tape (under the body), and double stacked foam adhesive (under the wings).

A 3 1/4″ white cardstock square was cut and a border was embossed 1/8″ in. A sentiment from Make it Amazing was stamped to the lower right side with Jet Black ink. Honeydew Twine was threaded through a black button and tied around the layer before it was adhered to the card base with dimensional. The card base is a 3 3/4″ x 7 1/2″ piece of Kraft cardstock, folded in half.

The image layers were adhered to the card with foam adhesive squares. Three rhinestones from a Sleek Strips Silver Rhinestone and Frost Smooch Glitz over the butterfly finish off the card.

Thanks so much for stopping by! Have a wonderful day!
Hugs and smiles

I created a really quick card with the new Unity Good Day Sunshine image. I thought it didn’t need extra layers or bling.

I stamped the image with Jet Black Archival Ink on a piece of Echo Park Springtime paper. It was cut into a 3 1/2″ long strip. White May Arts Crochet Lace was adhered underneath the strip, Two buttons were stitched to the upper left edge of the strip before the strip was adhered to a 3 1/2″ x 11″ piece of Sunflower Bazzill paper, that was folded in half to create the card base. The sentiment from the set was stamped on the bottom right.

What do you think? Is it too plain? Have a wonderful day!
Hugs and smiles

Today’s tutorial on Splitcoaststampers is for a Side Step card variation, the Circular Side Step card. For my sample I stamped the darling Ebony from The Greeting Farm in Tuxedo Black Memento Ink once on Neenah Solar White cardstock, once on pink paper from Echo Parks Summer Days collection. The shirt and head band were colored on the patterned paper, the rest on the white cardstock with Copic Markers (Hair: YG01, YG03, YG17   Skin: E000, E00, E01, E11   Shirt/Headband: RV25, RV29, RV69   Skirt: C3, C5, C7   Skull: W00, W1). The headband and shirt were cut out and adhered to the image stamped on cardstock, which was then cut out as well.

White cardstock was cut and embossed with the largest Splendid Circle die and blue patterned paper from Summer Days with the third largest  Standard Circle Nestabilities die. The patterned paper was sanded, then stitched to the Splendid Circle center. Ebony was adhered over the circles with dimensional adhesive.

The card base was cut and embossed out of white cardstock with the second largest Grand Circle Nestabilities die. Patterned paper strips from the Summer Days paper pack were adhered together, cut and embossed with that same circle die. The edges were sanded and then the paper was cut on the embossed edge. For the cuts on the right hand side I placed the paper over the card base and used a stylus to trace the cut lines. Next I cut 1/8″ along that traced line. The edges were stitched before the paper was adhered to the card front. Ribbon was tied around the edge of the first step and tied into a bow. A skull from the shirt was stamped again on white cardstock, cut out and adhered over the bow. The image was adhered over the big part of the card base with dimesional adhesive and part of a Finesse Rhinestone Swirl was adhered under the bow.

The tag and postage image from Tea-rrific clear stamp image were stamped in black ink on Summer Days paper and cut out. They were adhered on top of each other with another skull image and taped the the back step of the card.

In the center two pieces of Summer Days paper were cut and embossed with the bigger heard from the new Folk Art die set. The edges were sanded. The hearts were adhered to the center step and topped with two of the bigger rhinestones from a Sleek Strips Silver Rhinestones pack.

Here is a video for the visual learner:

[youtube]https://www.youtube.com/watch?v=HlALbWF4MRc[/youtube]

Thanks so much for stopping by! Have a wonderful day!
Hugs and smiles

It’s time for Kraftin’ Kimmie August Release Blog hop. For my card I used another Candy Girl. This image is called Fabby Flossy. She was stamped on Tuxedo Black Memento Ink on Neenah Solar White cardstock. It was cut and embossed with the second largest of the Resplendent Rectangles die. It was colored with Copic Markers (Cotton Candy: BG10, BG11, BG13   Skin: E000, E00, E01 ,E11   Hair: Y32, E33, E37, E39   Dress/Roses: RV10, R81, R83, R85   Ground: W0, W1, W3, W5, W7, W9) and  sponged with Antique Linen Distress Ink.

A piece of Pink Paislee Spring Jubilee patterned paper was cut and embossed with the largest Resplendent Rectangle die. The embossed edges were sanded and then cut along the embossed line. It was adhered to the card front, white cardstock with the same die.

A sentiment from the set was stamped in Tuxedo Black on white cardstock that had been cut and embossed with an insert die from the Fancy Framed Tag One. It was sponged with Antique Linen before it was adhered to the upper right hand side of the image. Rhinestones from a Sleek Strip Silver Rhinestones pack finish off the card.

Check out the creations from the other design team members. Just click on the froggy image to find the links.


Thanks so much for stopping by! Have a wonderful day!
Hugs and smiles

It’s a day of partying and celebration! Flourishes turned five this month and we want YOU to help us celebrate! Today we’re ushering in a 2-4-6-8, Help Flourishes Celebrate Day with challenges at 2, at 4, at 6 and at 8PM! If you missed our 2PM Challenge, just click HERE or if you didn’t tune in at 4PM, just click HERE to catch up! If you play, we have some FUN goodie bags for our winners! Are you ready for the 6PM Challenge?

HOW TO PLAY: This challenge is about adding sprinkles onto your card or creation — Glitter? Beads? Flower Soft? You choose! Just sprinkle on some fun and you’ll be in the running! Use Flourishes stamps if you have them — your entries will count twice. If you don’t have Flourishes stamps, play along anyway, you could win some! If you upload to SCS, please use the keyword FLLCIS5C. You have until August 31st to enter and can enter as many times as you like!

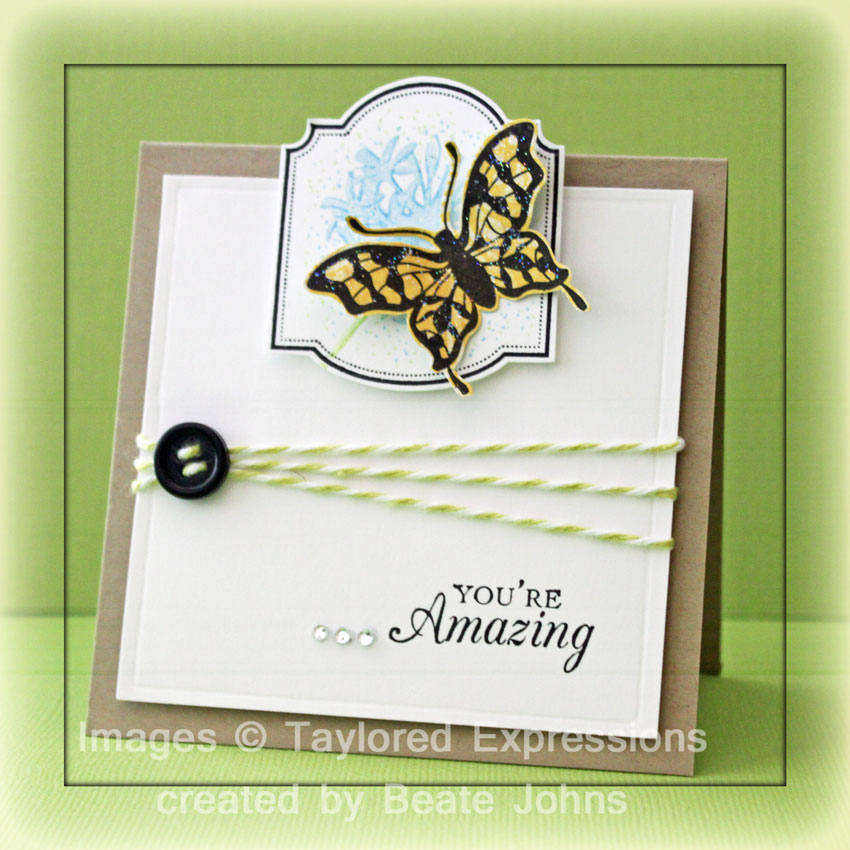
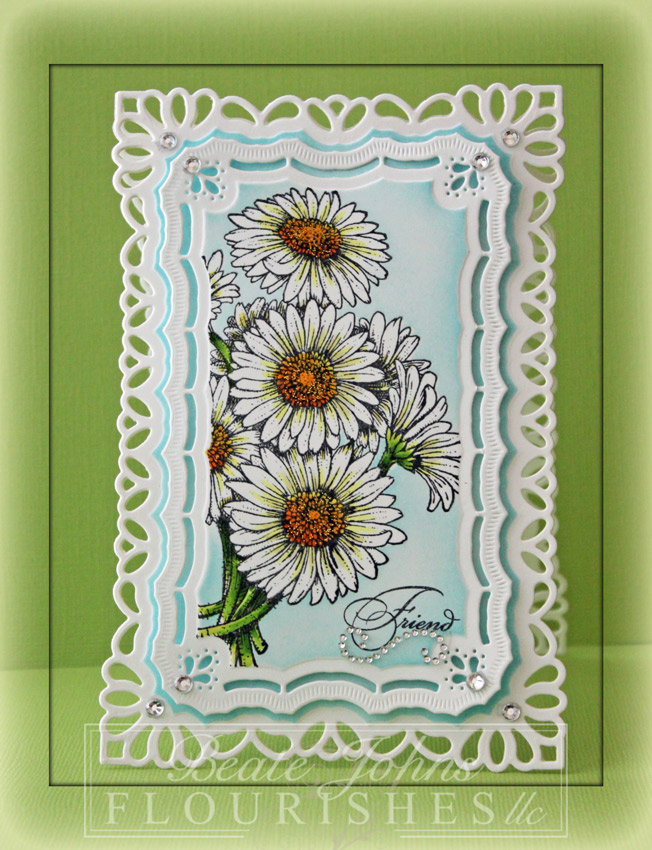
For my sample I thought I use the Gerber Daisies image again. I LOVE that image. It looks great if you use it partially or completely. I stamped the image in Tuxedo Black Memento Ink on a piece of white cardstock, that had been cut and embossed with the second largest of the Resplendent Rectangles dies. The image was colored with Copic Markers (Y11, Y13, Y15, Y17, YR16, YG17, YG21, YG23, YG25, W1, W3).

The die was placed back over the layer, the Gerber Daisies were masked and Tumbled Glass Distress ink was sponged over the white spots. I added Goldrush Smooch Glitz over the center of each flower to add some sparkle!

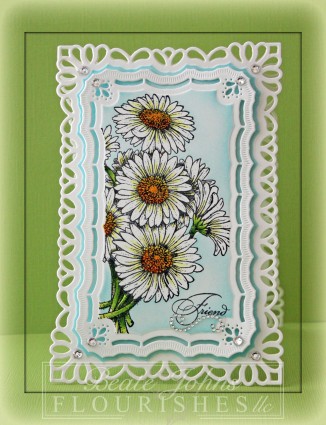
The card base and card front were cut and embossed with the largest Marvelous Rectangle die. The embossed part of the card front was sponged with Tumbled Glass ink before the image layer was adhered with dimensional adhesives.

A sentiment from the Gerber Daisies image was stamped in the lower right of the image layer. Rhinestones in each corner finish off the card.

I hope you have time to play along. If you need some inspiration, be sure to hop on over and see what the other designers created for this challenge:

Cindy Haffner

Danielle Kennedy

Pat Adam – honorary DT Member today!

The OFFICIAL Rules…..

  • Simply create a card and sprinkle on an embellishment of some kind!
  • Entries need to be in by Friday, August 31 by 5 PM EST
  • Those that use Flourishes stamps will be counted twice for their entry
  • You must link your creation on this post using our inlinkz widget in order to qualify
  • You must have a link to our challenge in your blog or gallery post
  • Please DO NOT combine challenges.
  • If you upload to SCS, please use the keyword FLLCIS5C
  • We’ll announce the winners Tuesday, September 4th at noon CST!

HOW CAN YOU WIN?

Play in this challenge and that counts as one entry for a stamping prize pack (including stamps and other goodies!) Play in all five and you will be entered toward our grand prize! Winners will be drawn randomly but if your card is one of our designers’ faves, your work will be added to our Customer Cards Gallery on Pinterest for all to see! So get those fingers inky and join us for our birthday bash!

Take note… the next challenge is coming your way in just 2 hours… at 8PM CST! See you then!

Thanks so much for stopping by! I have a wonderful day!
Beate

© 2012 fresh & fun Suffusion theme by Sayontan Sinha