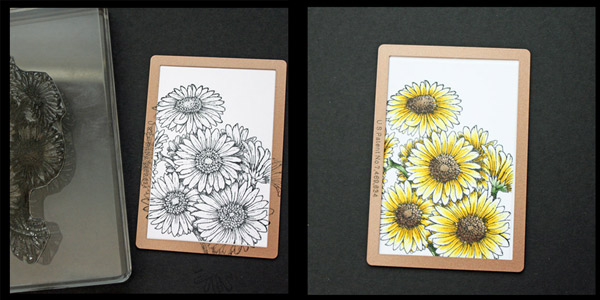
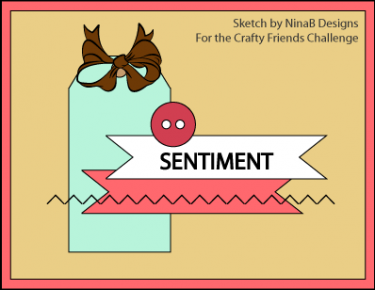
We are back from our summer break.  Our first challenge after the break is a sketch. Nina is the hostess. It was a hard sketch for me and I just took it as a guide. I definitely didn’t follow it 100%

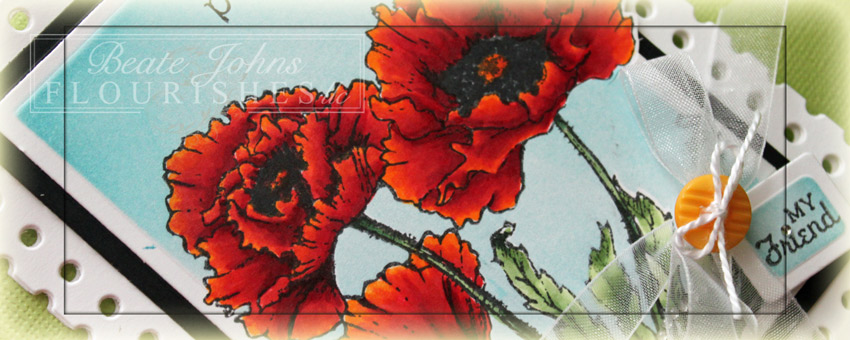
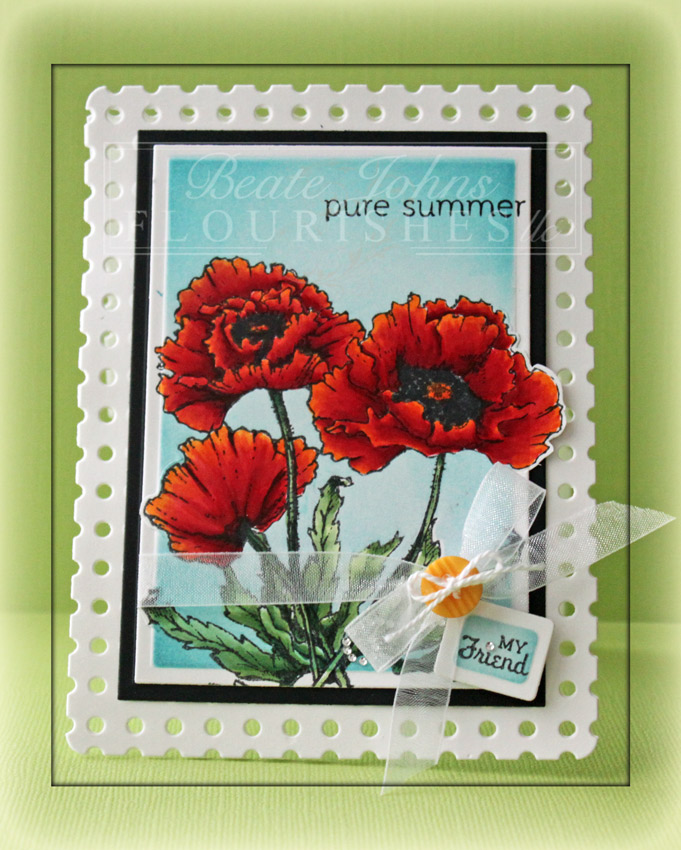
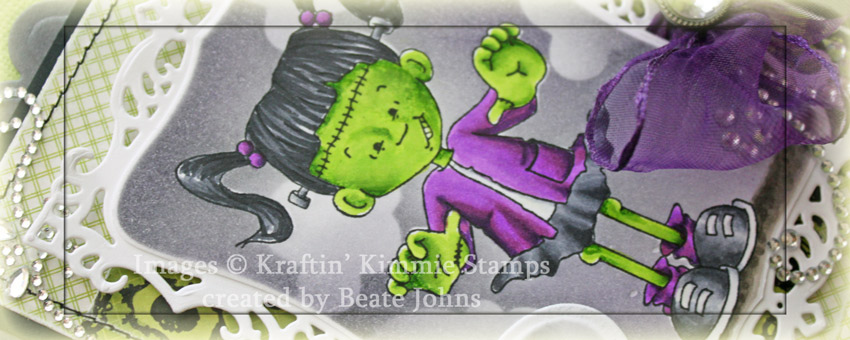
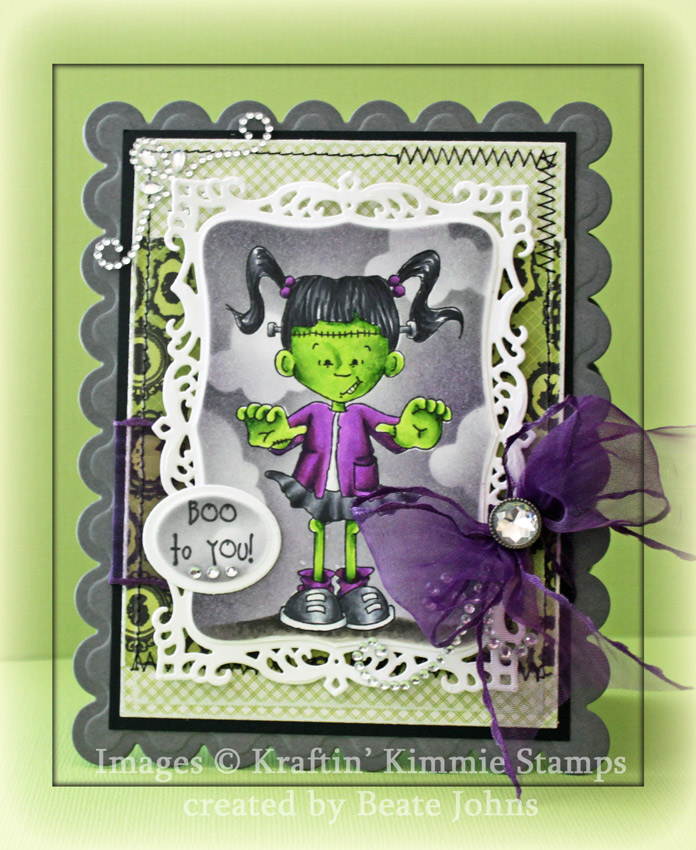
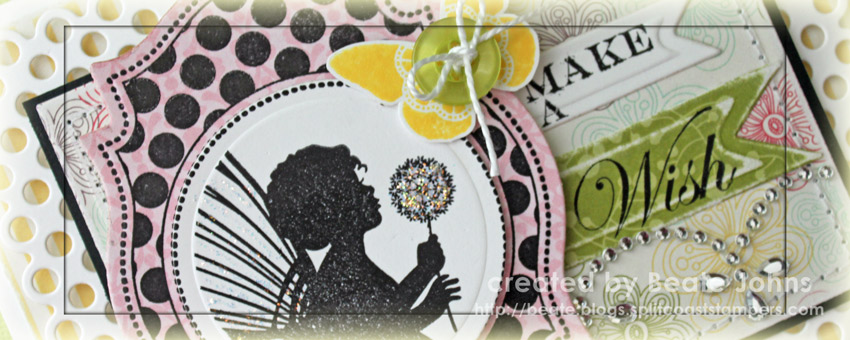
I started out by stamping an image from The Craft’s Meow’s Lovely Label 18 in Jet Black Archival Ink on a piece of Echo Park Springtime paper. It was cut and embossed with the 2nd largest Label 18 Nestabilities Nestabilities die. A piece of Neenah Solar White cardstock was cut and embossed with the 3rd smallest of the Standard Circle (lg) Nestabilities dies. It was first stamped with the center of the same Lovely Label 18 die. Next the die was placed back on the cardstock circle and part of the image from Butterfly Kisses was stamped in the center.

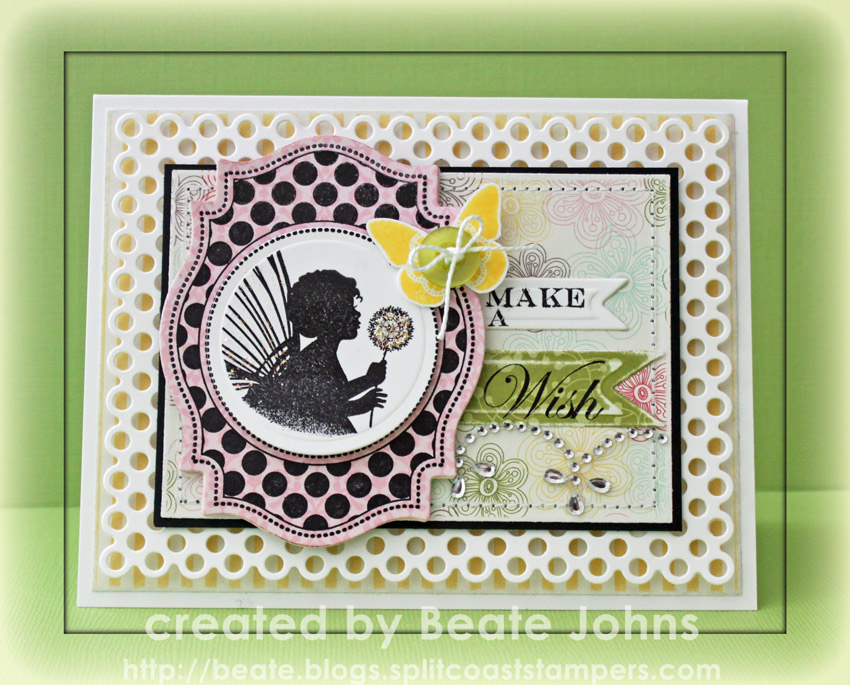
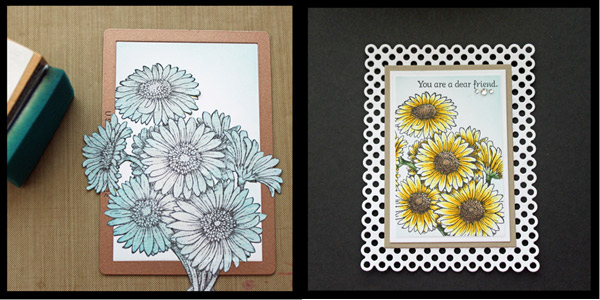
Another piece of EP Springtime paper was cut and embossed with the third largest of Card Creator Matte B die. The edges were sanded before it was stitched to a slightly bigger piece of black cardstock. Both layers were adhered to piece of white cardstock, cut and embossed with the largest Card Creator Polka Dot die.

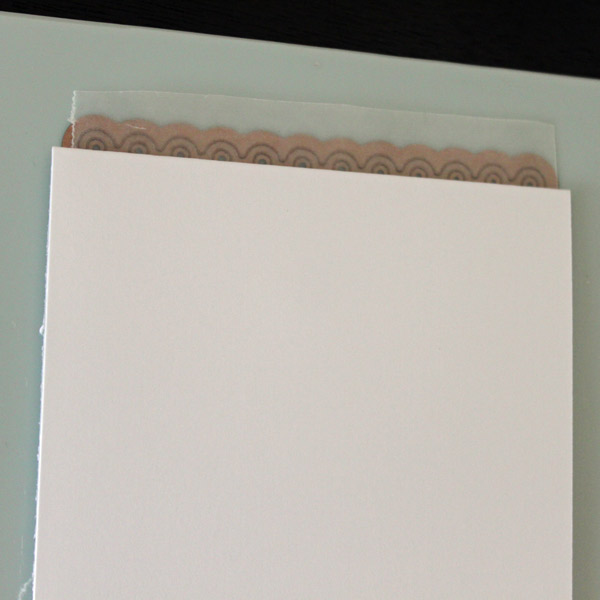
A piece of Springtime paper and a piece of white cardstock were cut and embossed with two  Nested Lacey Pennant dies. The patterned paper was sanded before part of a sentiment from Butterfly kisses was stamped on both. They were adhered next to the image layer, which had been adhered to the left hand side of the Card Creator layers with dimesional adhesive. Part of a Fancy Waves! Border Bling was adhered underneath the patterned paper pennant.

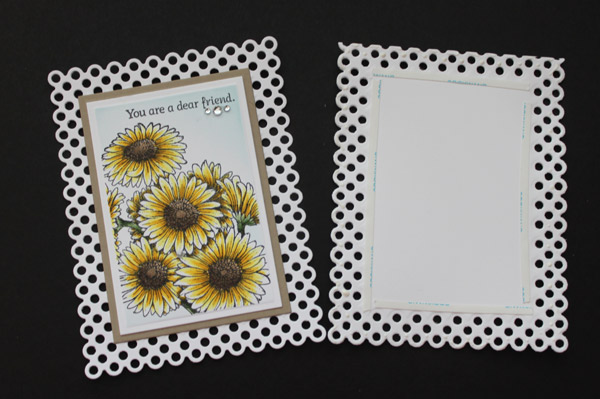
The butterfly of the same set was stamped in Dandelion Memento Ink was on white cardstock, cut out and topped with a button. The butterfly was adhered to the image layer on the right hand side.  Stardust Stickles was added over the dandelion and the butterfly wings.

I was too lazy to cut a card base with the largest Polka dot die, so I made my card base out of a 5 1/2″ x 8 1/2″ piece of white cardstock, folded in half. I added another layer of Springtime paper over the card base, measuring by 4″ x 5 1/4″.

I hope you have time to create a card for the challenge! I am so excited we are back. And check out my fellow challenge members gorgeous creations!

Have a wonderful Sunday! Hugs and smiles

I can’t believe my guest designer stint with Kraftin’ Kimmie Stamps is already over. Time seems to fly now that school has started again. Today’s challenge is to create a scene. I made it easy on myself and used a stamp that already looks like a scene when you stamp it. It’s an image from Emilie Goulet’s new Too Cute to Spook 1 set.

The image was stamped in Tuxedo Black Memento Ink once on Neenah Solar White cardstock and once onEcho Park Hello Summer patterned paper. Both images were colored with Copic Markers (Pumpkins: YR00, YR12, YR15, YR18, R08   Leaves: G20, G21, G24, G28   Skin: E000, E00, E01   Shirt: E41, E42, E43, B91, B93, B95  Pumpkin Eyes: E50, E51, E53).  The image on the patterned paper was cut out with scissors and adhered to the image on the white cardstock, which was cut and embossed with a Card Creator Matte B die.

The images were masked and a circle mask was adhered to the upper left corner. With the die still on the cardstock, the image was sponged with Broken China and Chipped Sapphire Distress Inks . Next the circle mask was taken off and that area was sponged with Mustard Seed Distress Ink. The layer was then adhered to black cardstock, cut and embossed with a Card Creator Matte A die.

A piece of Hello Summer paper was cut and embossed with another Matte B die, sanded and stitched to a piece of black cardstock, cut and embossed with the next larger Matte A die. Ribbon was tied around the layers before the image layers were adhered with dimensional adhesive. The layers were adhered to the card base,  5 1/2″ x 8 1/2″ cardstock from the Emerald Coast Color Made Easy collection.

A sentiment from the set was stamped on a piece of Solar White cardstock, cut and embossed with the smallest of the Nested Lacey Pennants dies. Four rhinestones from a Sleek Strips Silver Rhinestones were adhered underneath the sentiment before the pennant was adhered to the upper left corner. Part of a Finesse Rhinestone Swirl above the bow finish off the card.

I hope you have time to check out the other designers samples and participate in the challenge. Have a wonderful weekend!
Hugs and smiles

Today the Flourishes Design Team focuses on the stamp set Poppy Patch. For my sample  stamped several images of that set in Tuxedo Black Memento Ink on white cardstock. It was cut and embossed with the third largest Card Creator Matting B Basics die and the Out of the Box technique. The image was colored with Copic Markers (YR04, R24, R29, R39, G20, G21, G24, G28) and sponged first with Tumbled Glass, then with Broken China Distress Ink.

The image was adhered to black cardstock, cut and embossed with the third largest of the Matte A Basic dies.  Ribbon was tied around the lower part of the layers. Another piece of white cardstock was cut and embossed with a Tailor-Made Classic Tag Template die. The center of the tag was sponged with Broken China ink and a sentiment from Passion Flower was stamped in it’s center. The tag was tied to the bow along with a button. The card base was cut and embossed out of white cardstock with the largest of the Card Creator Faux Postage dies.

Check out what my fellow design team member have created today:

Thanks so much for stopping by! Have a wonderful weekend
Hugs and smiles

Can you believe we are getting close to Halloween already? Crazy how fast time flies. Me….I am looking forward to next Friday when school starts again. Don’t tell my kids I said that. LOL. I am more creative when I have the house to myself. Today the Kraftin’ Kimmie gang is introducing the Halloween Lulu stamp set. You can find links to the blogs of the participants by clicking on the inlinkz link on the bottom.

For my sneak peek sample I stamped Frankenstein Lulu inTuxedo Black Memento Ink on Neenah Solar White cardstock cut and embossed with the second largest Decorative Label Eight Nestabilities die die. The image was colored with Copic Markers (Skin: YG01, YG03, YG17   Hair, Skirt, Sneakers: C3, C5, C7, C9, C10   Jacket, Socks: V04, V06, V09   Ground: W3, W4, W5, W7, W9). It was then masked. The die was placed back over it and cloud masks were added that had been cut with Spellbinders Whimsy die dies. The background was then sponged first with Black Soot, then with Dusty Concord Distress Ink.

Two pieces of Pink Paislee’s Phantom paper (it is still one of my favorite paper packs) were cut and embossed with the second largest Card Creator Matte A die. The edges were sanded before the layer was stitched to black cardstock that had been cut and embossed with the largest Card Creator Matte B die.

May Arts ribbon was colored with Copic V09 Marker and tied around the patterned paper layers before everything was adhered to the card base, cut and embossed with the second smallest Grand Scallop Rectangle die out of Basic Gray cardstock. The bow was topped with a rhinestones brad.

The sentiment is also from the new Halloween Lulu set. It was stamped on white cardstock, cut and embossed with an insert die from the Fancy Framed Tags Two dies. The sentiment layer was sponged just like the image layer background and adhered to the lower left of the image. Part of a Finesse Rhinestone swirl under the bow and  Fancy That! Border Bling on the top left corner finish off the card.

Check out the blog posts of all the Kraftin’ Kimmie Design team members by clicking on the inlinkz button:

Thanks so much for stopping by! Have a wonderful day!
Hugs and smiles

Hi everyone! I am excited to be able to show you a new die coming out soon.  I LOVE the new Card Creators dies that Spellbinders™ is launching! They are perfect for creating wonderful shaped cards. Today I get to show you the Polka Dot Card Creators die. I used the largest one to create the base for this card.


Supply List:

  • Spellbinders™ Grand Calibur machine
  • S5-133 Card Creators A2 Polka Dots (MSRP $29.99)
  • S5-131 Card Creators A2 Matting Basics A (MSRP $29.99)
  • S5-132 Card Creators A2 Matting Basics B (MSRP $29.99)
  • Flourishes Gerber Daisies
  • Want2Scrap Silver Sleek Rhinestones Strip

I started by cutting and embossing a piece of white cardstock with the largest Polka Dot die. Because the die is so intricate, I placed a piece of wax paper over the die before placing the cardstock over it. It helps getting the die cut out of the die after it is cut and embossed.

Another piece of white cardstock with the fourth largest of the Basic A dies and a Kraft cardstock with the third largest Basic B die.

The card base and the Kraft piece of cardstock were taken out the die; I left the white rectangle in the die.

The image was stamped to the white card piece with the die still over it. The image was colored with Copic Markers (Flowers: Y11, Y13, Y15, W3    Flower Center: E42, E43, E44, E47    Leaves: YG61, YG63, YG67).

The image was masked, and then the edges were sponged. The image was first adhered to the Kraft layer, then to the card base.  A sentiment from the same stamp set was stamped on the upper right side and the word friend was underlined with rhinestones from a Sleek Silver Rhinestones Strip from Want2Scrap.

A piece of white cardstock was folded in half to create the card base. Again a piece of wax paper was placed over the die before the cardstock was added. When cutting card bases with dies, make sure you do NOT cut the folded part. Place it so that it lies inside the die.

I added Scor-Tape to the inside of the card base and liquid glue on the outer parts. Then the pieces were adhered to finish the card.

These dies not only look good as a card base, but also as layers on cards. I created another card sample to show the smaller dies off.  I used the longer and thin die to create covers for Hershey nuggets. Those are a great way to dress up chocolate quickly .

The Sneak Peek: Spellbinders™ Summer Spectacular! Begins on June 21st and will end on June 28th, 2012. It consists of 24 individual prizes and one grand prize drawing.  Enter the Sneak Peek: Spellbinders™ Summer Spectacular! by visiting the participating blogs each day.

At the end of each blog post, click on the “Enter HERE” to open the entry form. You may only enter once from each blog each day.

Spellbinders™ will randomly draw one winner from each participating blog to receive that blog’s newly revealed dies. The Grand Prize Winner will be randomly drawn from the pool of entrants who sent entry forms from each and every participating blog during the 48 hours each blog was open. For the full list of official rules please click RULES.

Day Two of this contest is now closed. Please visit SpellbindersPaperArts.com for more inspiration.

**Enter the contest by clicking HERE**

Thanks you so much for stopping by! I hope you have time to check our the other blog hop participants today and during the entire time of the Spellbinders Summer Spectacular Blog hop.

Cindy Echtinaw

Sherry Cheever

Have a wonderful day! Hugs and smiles

© 2012 fresh & fun Suffusion theme by Sayontan Sinha