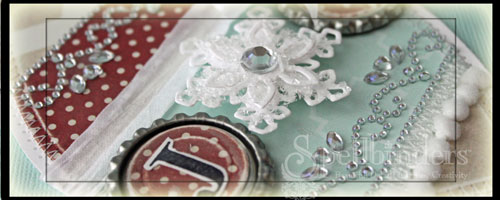
It’s time to post on the Spellbinders blog today. This week’s theme is to show you “Things you can do with the Grand Calibur”. For me it’s mostly cutting paper and cardstock, but today I pulled out bottle caps that had been in my stash for quite a while and used them as part of a Christmas Ornament.

I hope you  have time to check out the entire ornament and the step by step instructions on the Spellbinders Blog. Thanks so much for stopping by! Have a wonderful day.
Hugs and smiles


Today’s Flourishes sneak peek is for the set called Joy is in the Air. I used one of the images for a tin ornament, which was the Holiday Blitz tutorial on Splitcoaststampers on Tuesday this week.
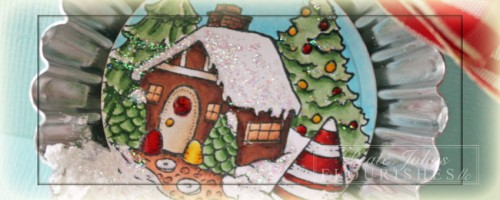
I stamped the house image in Tuxedo Black Memento Ink on a piece of Neenah Solar White cardstock, that had been cut and embossed with a Classic Circle Nestabilities die. The image was colored with Copic Markers (House: E21, E23, E25, E27, E29    Trees: YG61, YG63, YG67    Door/Beams: E40, E41, E42   Reds: R08, R27, R39   Yellow: Y13, Y15, Y17   Sky: B0000, B000, B00). Stardust Stickles was added over the snowy parts, Glossy Accents over the Christmas lights in the tree and gumdrops next to the door.
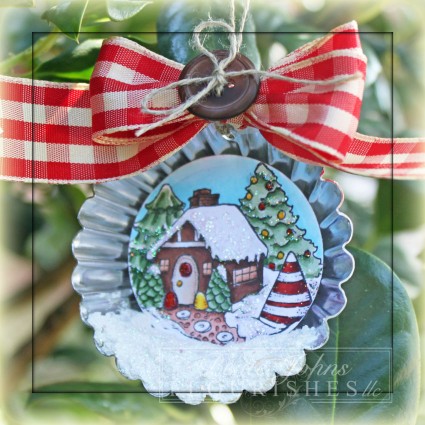

The image was adhered in a Tart Tin with dimensionals. SnowTex was adhered on the bottom of the tart tin and glitter was added over it while it was still wet.

A hole was punched in the top of the in and Linen Thread was tied through the hole. A ribbon was tied with May Arts gingham ribbon, topped with a button and tied to the Linen thread.

Make sure to check the Flourishes blog to find links to all the other projects made with this set by other Design Team Members and find out how to win the new release sets.

Thanks so much for stopping by! Have a great day!
Hugs and smiles

Today there are four new tutorials on Splitcoast! Three are for the new Holiday Dies from Spellbinders review. Let me just say that I love them. This years shapes are wonderful! A huge snowflake pendant, mittens, ornaments, trees, hearts, swords and so much more. I will be surprised if I don’t own most of them before they are discontinued.

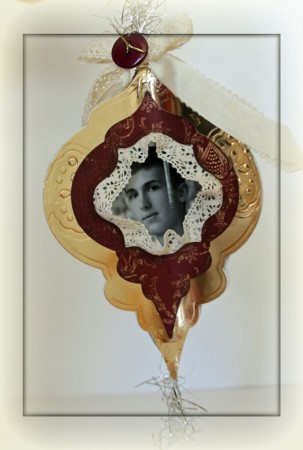
Today I want to show you a created with the help of Julie Overby’s Heirloom Photo Ornament tutorial. I think it makes a GREAT present to grand parents. I used World Win Gold Card Stock and Bo Bunny Christmas paper (I purchased at my LSS).

The gold cardstock was first cut and embossed with the largest of Spellbinders Heirloom Ornament dies. Next the ornament was embossed with Fair Isle Borderabilities. The Bo Bunny patterned paper was cut with the second biggest die along with the Label 13 Nestabilities. Once it was cut, the paper was sponged with Vintage Photo, then the edges were sponged with Walnut Stain Distress ink.

The patterned paper piece  was adhered over the gold card stock and the window was cut through the gold paper with the same Label 13 Nestabilities die. Lace (Stampin’ Up!) was adhered to the edge of the window and photos of my kids were adhered behind it.

The steps were repeated two times for three sides. The sides were adhered together with Scor-Tape as well as Zip-Glue. Tinsel (from LSS) was adhered in the center. A bow was created with lace and silk ribbon and topped with a Basic Grey  button.

Here is a video for the visual learner:

[youtube]https://www.youtube.com/watch?v=eP3B25b2L_M[/youtube]

Thanks so much for stopping by! Have a wonderful day! Hugs and smiles

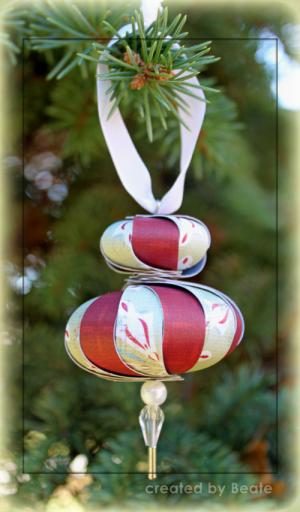
Today’s Holiday Blitz tutorial is for a double ball ornament. It was written by Carol Dunstan. It’s an easy, fast and fun project that I plan on repeating with Rebecca. I think she will enjoy making some of these ornaments.

doubleballornamentbeate.jpg

That hatpin, pearl and glass bead are all from Stampin’ Up!’s Pretties kit. The paper is from My Mind’s Eye The Merry Days of Christmas Pack. The ribbon is White Taffeta ribbon.

Here is a quick video for the visual learner:

[youtube]https://www.youtube.com/watch?v=3sIjt8ulWHc[/youtube]

© 2012 fresh & fun Suffusion theme by Sayontan Sinha