Last Tuesday’s Color Challenge on Splitcoast was a tough one for me: Pacific Point, Wild Wasabi and So Saffron.

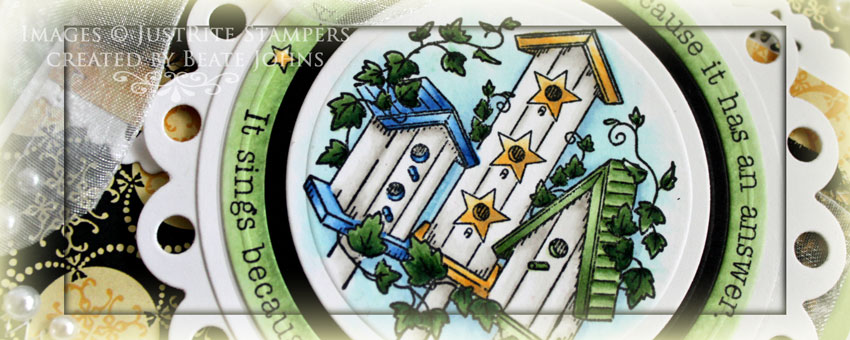
I decided to use an image from JustRite Stampers new Birdhouse set, that I had just received in the mail. I stamped the image in Tuxedo Black Memento ink on Neenah Solar White cardstock, cut and embossed it with Circle Nestabilities dies and colored it with Copic Markers (Green house: G40, G21, G24, Yellow House: Y21, Y23, W2, Blue House: B21, B23, B26, House bottoms: W00, W1, W2, Leaves: G21, YG63, YG67).

The image was layered several time. The bottom base is a piece of White cardstock cut and embossed with the largest Eyelet Circle Nestabilities die. It was topped with the sentiment circle. In it’s center was first a black cardstock circle and finally the image center.

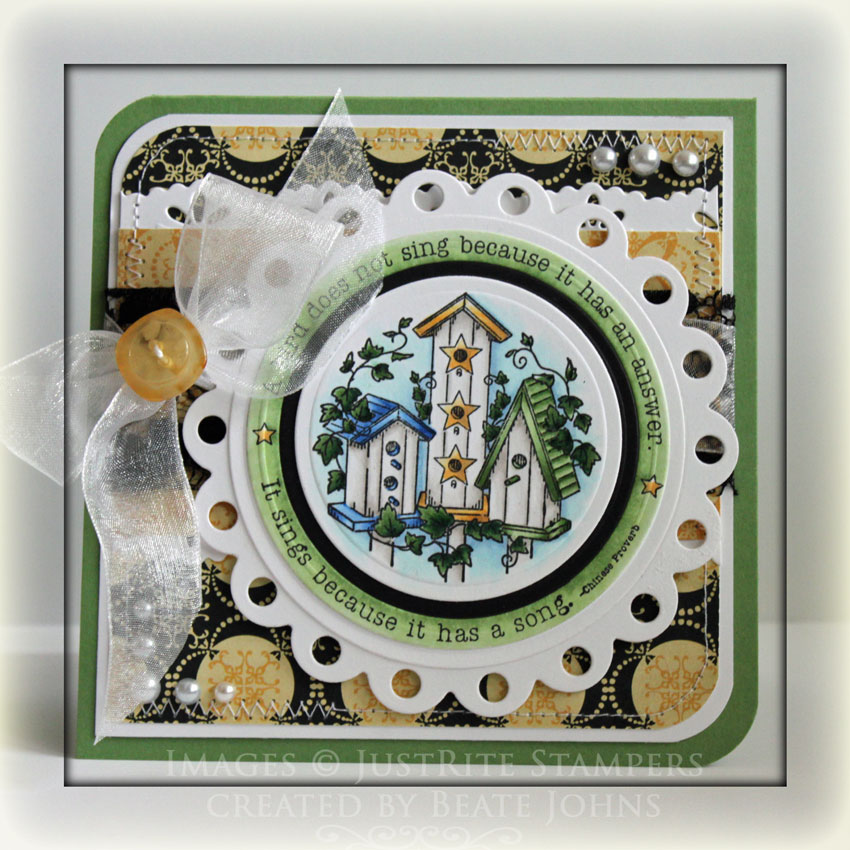
A 4 3/8″ long white cardstock strip was cut and embossed with the Eyelet Borderabilities die. The strip was cut in half and adhered top and bottom to a 2 1/4″ x 4 3/8″ piece of Circa 1934 Cosmo Cricket patterned paper piece. That layered strip was adhered to a 4 3/4″ square of paper from the same paper pack. The top left and bottom right corner were rounded before the layer was stitched to a 3/16″ bigger piece of white cardstock.

May Arts black lace was adhered over the horizontal strip before White Organdy ribbon was tied over it. The bow was topped with a Cosmo Cricket Button. The card base is a 4 7/8″ x 9 3/4″ piece of Wild Wasabi, folded in half with to of the corners rounded. Snow Kaisercraft pearls on the top right and bottom left finish off the card.

Thanks so much for stopping by! Have a wonderful day!
Hugs and smiles

jffwildfloweralcoholwide.jpg

This is a card I just gave up on. I made it for a color challenge on SCS. I really liked the center piece, but I just couldn’t finish the card in a way that I was happy with . For the center piece I added a few drops of Gold Metallic Alcohol ink fixative on my craft sheet. Then I added Wild Plum, Butterscotch and Rust Alcohol Ink close by and then topped it with Blending solution. I dropped a piece of Glossy cardstock glossy side down into the mix and twisted it.

Once the background was dry I stamped the Wildflower from Just For Fun Stamp with Jet Black Archival ink. I cut the image out with Classic Circle Nestabilities. It was layered on a slightly bigger black cardstock circle.

jffwildfloweralcoholcc271.jpg

The circles were layered on So Saffron Designer Paper that had been cut with Label 1 Nestabilities, that had been stitched to a slightly bigger black layer in that shape. A Kraft Taffeta bow was attached with a glue dot on the left hand side of the image. A small butterfly was punched out of Dusty Durango cardstock with a Martha Stewart Butterfly punch. It was sponged with Rusty Hinge Distress ink, adhered to the center piece and topped with Gold Liquid Pearls.

The card base is a quite big. I kept on adding layers because it just didn’t quite look right. I ended up having a 4 7/8″ x 9 3/4″ piece of Basic Black cardstock as card base. It was topped with a 4 1/2″ square of Dusty Durango cardstock that was sponged with Rusty Hinge Distress ink. On top of that is a 4 3/16″ Kraft cardstock square. The edges were distressed.

The sentiment is from Flourishes Tag Lines stamp set. It was stamped on Jet Black Archival ink. It was cut with Petite Oval Nestabilities and layered on a sponged Dusty Durango scallop oval. To tie in the Gold Liquid Pearl on the butterfly, I added a few more on the sentiment.

jffwildfloweralcoholinside.jpg

For the inside I used the same layers as on the card front. I swapped out the So Saffron Designer paper for So Saffron cardstock. I ran out of that paper. I stamped the Wildflower image in Rusty Hinge on the right hand side and added another butterfly.

Thanks so much for stopping by. Have a wonderful Memorial day! Hugs and smiles

jffencausticwide.jpg

Birgit Edblom wrote another fantastic tutorial for SCS today. This time for Encaustic Painting on cards. I ordered  some Encaustic wax (check this site, they have great videos too) because I LOVE the way her samples looked. Sunday I had time to play. It is so much fun! I have a lot of finished backgrounds sitting here waiting to be turned into cards. Rebecca had fun too. I even got my oldest son to try the technique. Hey…it’s melting wax and then putting it on glossy cardstock with an iron. It’s pretty darn cool!

jffencausticfrontbj.jpg

I created my background with a mix of blue and white wax on top and brown and black on the bottom of the glossy cardstock. The tree stamp is from Just For Fun and was stamped with Jet Black Archival ink on top of the background. It was then cut with Label 1 Nestabilities. My Nestabilities die got a bit messy from that. I think next time I will cut the glossy cardstock first, then try the technique.

The card base is a 4 1/4″ x 9″ piece of Kraft cardstock folded in half. A 3 15/16″ square of Vanilla cardstock was embossed with Cuttlebug’s Script Texture Embossing Folder, the edges were distressed and it was stitched to a 4 3/16″ square of Basic Black cardstock.

For the sentiment I cut two ovals with the smallest Petite Oval Nestabilities die. One was cut out of Vanilla cardstock, the other was cut out of Kraft cardstock. The Vanilla Oval was cut down right next to the embossed edge and stamped with a partial quote from Verve’s Beautiful You stamp set. It was first adhered to the Kraft oval, then to the main image. A double bow was tied out fo twine and adhered to the sentiment layer with a small spot of Glossy Accents.

jffencausticinside.jpg

As always I used the same size layers for the inside as for the card front. On the vanilla layer I stamped the Tree in Frayed Burlap Distress Ink on the lower right hand side. If I would do it again, I think I would use a blue ink to tie the blue of the front in some more. Over the tree image I stamped the entire sentiment in Jet Black Archival ink. I partially stitched that layer to the black layer underneath.

You can try this technique with Crayola Crayons. The wax won’t be as thick, but it works. I hope you try this out. It is very FUN, but BEWARE! It is addicting!

Have a wonderful day! Hugs and smiles

jffsflowertriplechallengewi.jpg

I made this card for three different challenges. It feels so good to be back participating in the challenges. I made this card for yesterday’s Free for All Challenge on Splitcoast, Just For Fun Stamps Color Challenge and Our Craft Lounge’s Sketch challenge.

I started by stamping Just For Fun Stamps Queen Anne’s Lace in Jet Black Archival Ink on Neenah Solar White cardstock. The image was cut out with Label 8 Nestabilities and sponged with Wild Honey, Faded Jeans and Peeled Paint Distress inks while the die was still placed over the cardstock. Highlights were added with a white gel pen. It was adhered to a scalloped rectangle that I cut to the size I needed with the Long Scallop Rectangle Nestabilities.

jffsflowertriplechallengebj.jpg

The card base is a 4 1/4″ x 11″ strip of Neenah Solar White cardstock folded in half. A 3″ x 3 1/2″ square of Pink Paislee’s 350 Degree paper was distressed, sponged with Wild Honey and adhered to a 3 3/4″ x 5″ piece of paper from the same paper pack. Then the layers were attached to a 3 15/16″ x 5 3/16″ piece of Basic Black cardstock.

White May Arts Lace was wrapped around the layers. A small hole was punched on the right side of the image and white organdy ribbon (Michaels) was tied through it.  Five Pearl colored Kaisercraft Pearls were added to the top right of the image. To balance everything out I added the sentiment on the lower left.

The sentiment is from OCL’s Life Is stamp set. I thought the script of that set would go Fabulous with the image. It was stamped in Jet Black Archival ink on Neenah white cardstock and cut out with Petite Oval Nestabilities. I sponged Wild Honey over it while the die was still over the cardstock.

jffsflowertriplechallengein.jpg

For the inside of the card I stamped the Queen Anne’s Lace in Faded Jeans Distress ink on Baja Breeze cardstock. The edges of the layer were distressed and sponged with Tumbled Glass Distress ink. It was stitched to a 3 15/16″ x 5 3/16″ piece of Basic Black cardstock and adhered to the inside of the card.

I hope you have a great weekend! Thanks for stopping by. Hugs and smiles

jffglittertreewide.jpg

Last week I redid the Glitter Puzzle tutorial. At Ranger U, we got to play with a lot of Stampers Anonymous as well as Just For Fun Rubber stamps. I fell in love with this tree  from Just For Fun Stamps and had to it right away.

jffglittertreebeate.jpg

My card base is a 4 1/4″ x 11″ piece of Dusty Durango cardstock folded in half.  The card front was sponged with Rusty Hinge, then stamped with the script and swirl from Mini Ornates in Walnut Stain Distress ink. The edges were sponged with Walnut ink.

For the main image I adhered a double sided adhesive sheet to cardstock, then cut it with Nestabilities Label 8. The glitter background was created with Martha Stewart glitter. The tree was stamped with Black Stazon. The sentiment was stamped with Walnut Stain ink on Neenah Solar White cardstock. It was punched out with a label punch from Stampin’ Up! It was sponged with Rusty Hinge and a bit of Walnut Stain Distress inks. The May Arts striped ribbon was attached with a Jump Ring through a Washer.

Here is a video for the visual learner:

[youtube]https://www.youtube.com/watch?v=5KN4b04GJ3s[/youtube]

Thanks so much for stopping by. Have a wonderful day! Hugs and smiles

© 2012 fresh & fun Suffusion theme by Sayontan Sinha