I am sorry I am posting late. Saturday is my lazy day! I layed in bed and read a book until 8 a.m., went for a walk, chatted with neighbors, answered emails, layed outside and read some more and then stamped my card for today. It’s a good day!
Today begins our second Holiday Blitz Tutorial week over on SCS. Make sure to go to the home page every morning to check out the new tutorial. I will try to post a sample here every day, but I must confess, I might chicken out a time or two, hmm…..I mean, I might not have time to make a sample every single day! LOL
Today’s today is written by Lori Craig. She shows how to cut and dry emboss with Nestabilities and the Wizard Die cut machine. Under Variations you will find a file listing sandwich stacks for the other die cut machines.
We added a new gallery listing all the Holiday Blitz galleries (with links to each tutorial) from last year and will add a new gallery every day until next Sunday.
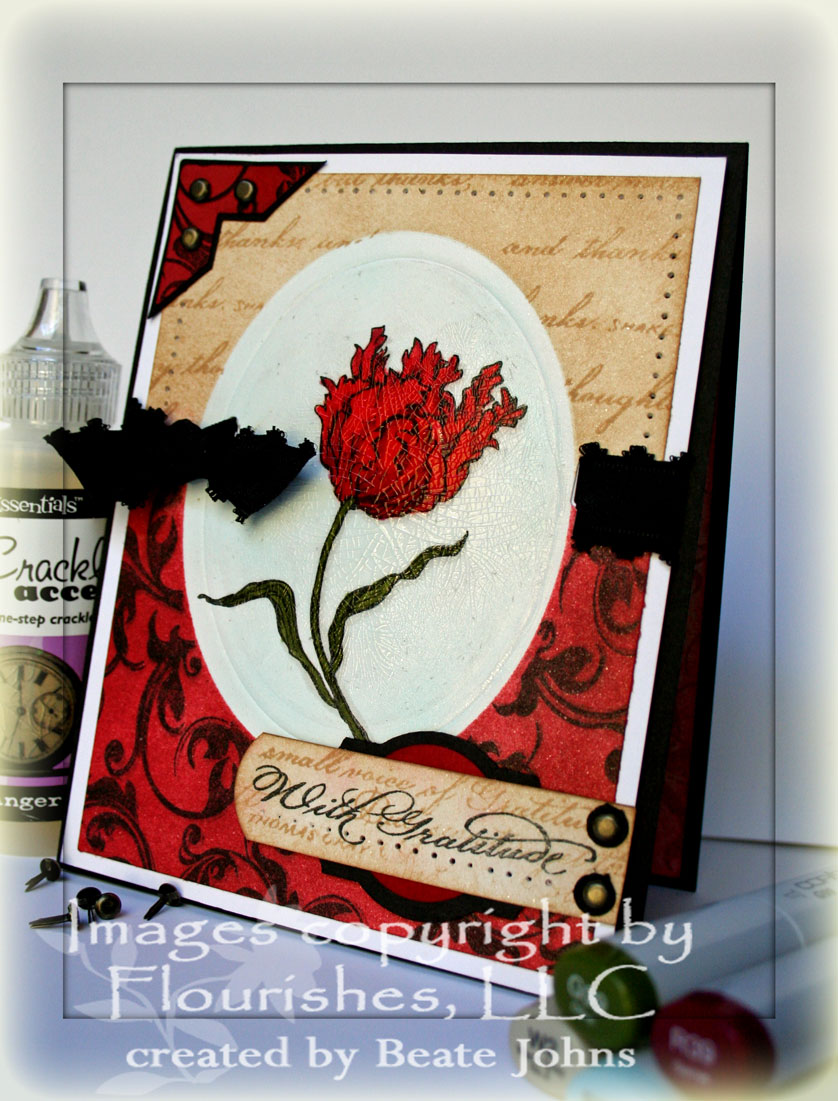
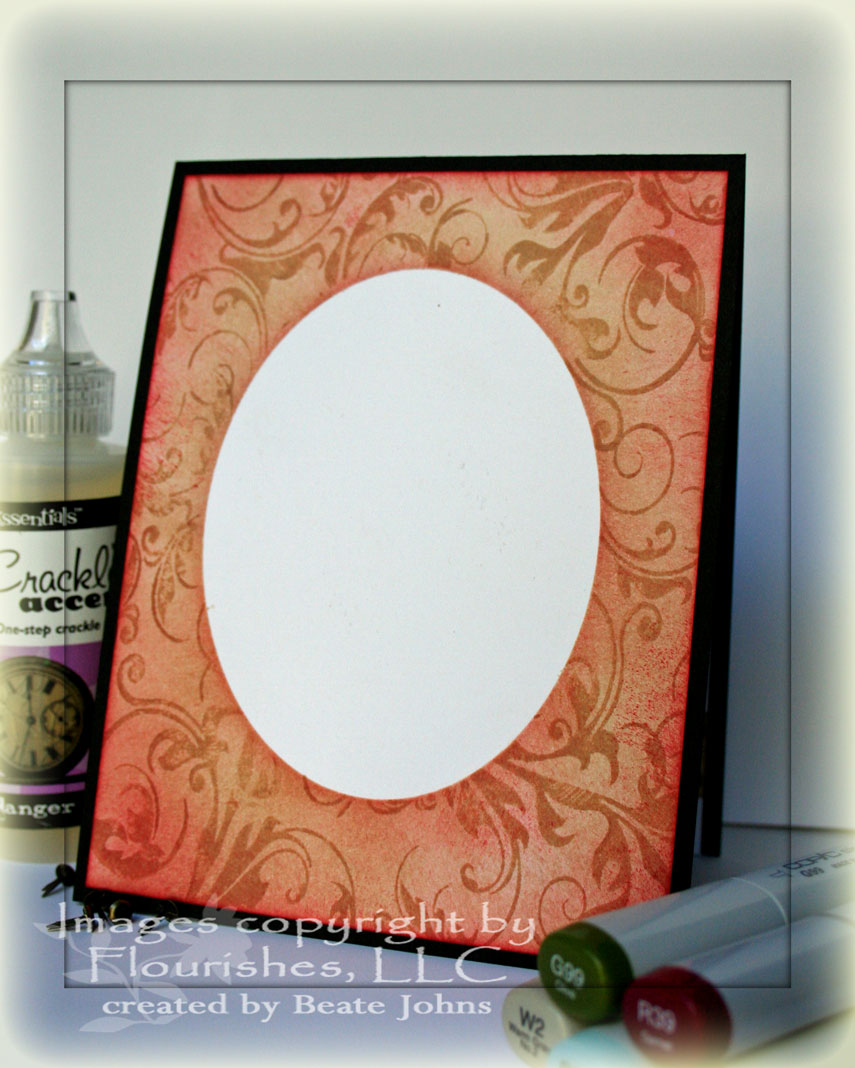
I started out by dry embossing an oval frame into a 3 3/4″ x 5″ piece of Shimmery White cardstock. I cut me an oval mask with one size bigger oval Nestabilities, taped it over my frame with removable adhesive and stamped the Damask Background in Brilliance Graphite Black Ink on the lower 2/3s of the cardstock. I hit the image with my heat gun until it was dry, then sponged Riding Hood Red ink over it.
Next I covered the stamped section and stamped the script from Thank you in Creamy Caramel on the top. I sponged the area with Creamy Caramel as well and paper pierced the edge of the Creamy Caramel area.
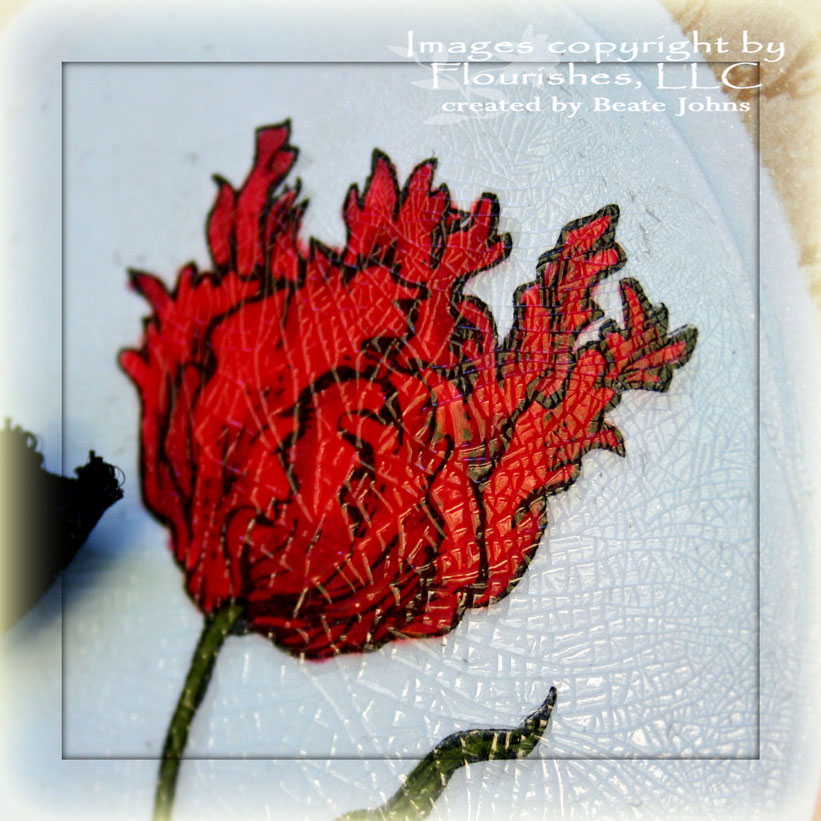
The flower from the Thank you set was stamped in the center of my oval frame.
I cut a mask for the flower, covered it up, covered up the stamped areas with my reverse mask and air brushed the inside of the oval with Copic B000.
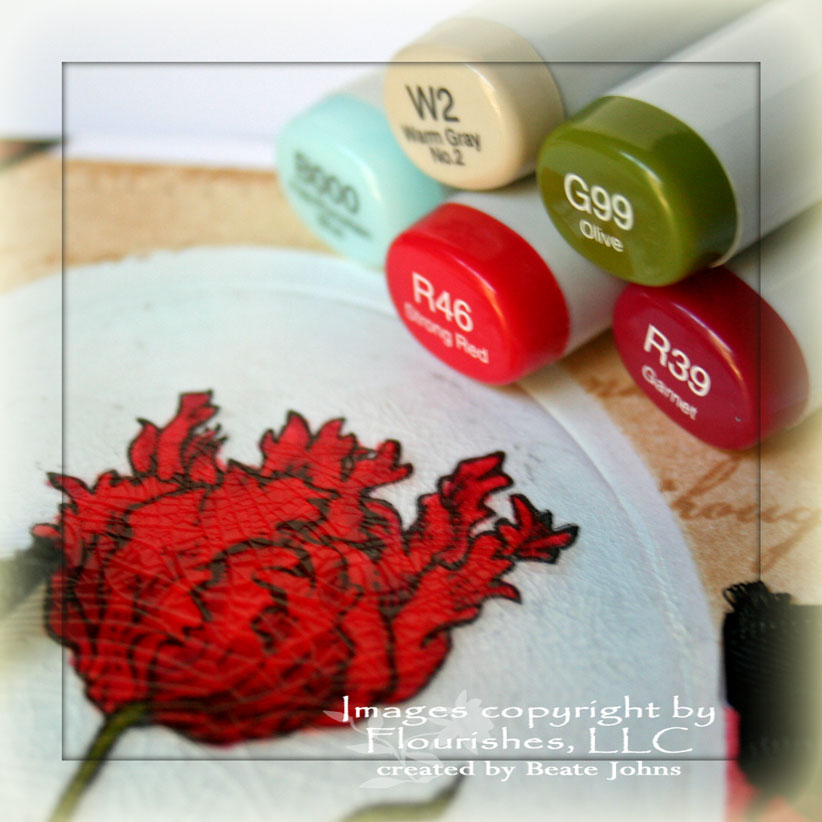
The flower was colored with Copics (R39, R46, G99, W2). Crackle Accents was applied over the entire oval area and set aside to dry (that’s when I went outside to read. It takes a while for the crackle to appear. I wanted to use this product for quite a while now. This weeks Way to Use it Challenge gave me a good reason to dug it out of my supplies.
The flower was colored with Copics (R39, R46, G99, W2).
Crackle Accents was applied over the entire oval area and set aside to dry (that’s when I went outside to read. It takes a while for the crackle to appear.
I wanted to use this product for quite a while now. This weeks Way to Use it Challenge gave me a good reason to dug it out of my supplies. The stamped and sponged layer was adhered to a 4″ x 5 1/4″ piece of Whisper White cardstock.
I punched two ribbon slots next to my oval and thread black scalloped ribbon through it. A double photo corner was added to the top left. The bigger piece was punched out of Basic Black cardstock, the smaller one out of Riding Hood Red. The red one was sponged with Riding Hood Red, then stamped with Damask in Black Graphite Ink. Three Antique Brass brads finish the corner off.
The sentiment was stamped in Black on a 3/4″ wide strip of Shimmery White cardstock. The left edge was rounded with a 1″ circle punch, the piece was sponged with Creamy Caramel and overstamped with the script from Thank you. The strip was centered on a sponged 1″ Riding Hood Red circle and a black Designer Label punch. The end of the strip was lined up with the end of the white layer. Two 1/4″ black circles were added to the right end of the strip. Those were topped with Antique Brass brads.
I love that Denise always shows the inside of her cards, so I thought I start doing it as well (If I do something special for the card inside). For this inside, I used my oval mask again.
I stamped the Damask background in Creamy Caramel on a 4″ x 5 1/4″ piece of Whisper White cardstock and sponged it first with Creamy Caramel, then with Riding Hood Red.
Have a great evening! Hugs and smiles