Some of you had a few questions about my little book yesterday. The book comes together fast and is easy. So I made another one and wrote a tutorial for it.

 reba-book-finished-front001.jpg

This time I used Fancy Pants stamps and paper. If you are interested viewing the tutorial, click on more. Some of the images are blurry. I have to apologize for that. My new stamp room is dark even during the day. I need to run out and buy some daylight bulbs.


Continue reading »

creative-imaginations-purse-close.jpg

….was decorating a Sonia handle purse with Paper, stickers and printed acetate from Narratives Oceanside collection. Purse and paper can be found in the Creative Imaginations shop. You can also find Bare Element merchandise at Eclectic Paperie.

I thought this paper was perfect for the pictures I took this March when we went to the beach.

I traced the sides of the purse onto the scrapbook paper and cut it out. Then I added Aegan Blue DewDrop ink on the edges of the purse and let it dry.

I used mod podge to adhere the paper to the purse. Then I added sticker and StarDust stickles (front sand dollar) and added another mod podge layer. The clear round stickers are from A Muse. You can find them in Ellen Hutson’s store.

ci-purse-top-inside.jpg

I only covered the inside lid with matching paper. I left the rest of the inside blank.

Check out the special gallery Creative Imaginations started for the SCS design team. You will find some incredible work there!

If you are interested in viewing my matching scrapbook pages, click on more.

Continue reading »

I already played! I am so excited. As soon as I got up I checked the sketch challenge. That’s how excited I was to be able to do challenges again.

Today’s challenge is the Sketch Challenge. Roxie picked a card  of my friend Rainy, aka purplewinkle. It’s a great sketch for bigger images. When I saw that I was thinking….big images? What do I have? Well…I just got those BIG flowers from Fancy Pants. I was itching to play with those anyway! So here is what I came up with:

fancy-pants-big-flower-sc12.jpg

All images are Fancy Pants stamps from the Pollen Dust and Simply Stated collections. I used Tea Leaves, Red Magic and Midnight black Versamagic Dew Drops for ink. The black brad and the black ribbon are from Starlitstudio.

The big flower is cut out and added to the green swirls and ribbon. The smaller flower is cut out and layered over the big one and topped of with the black brad.

The celery cardstock panel are stamped with the same swirl images as the main panel. I added some speckles to the main panel with the Spritzer tool from Stampin’ Up! and celery and black marker.

I am having a great start to what will be a fun day (I think/hope). It is supposed to rain here all day long, but that’s okay. I wanna stamp!

Joanne Basile contacted me earlier this week and asked if I could make a card for her Breast Cancer Fundraiser. I decided to make a little pink book with my new Bind it All.

 I got heavy weight coasters out and glued Fancy Pants Patterned paper on  with Mod Podge. After adding a layer of Mod Podge over the paper, I wanted to punch holes through it. Well….heavy coasters don’t go in the Bind it all! I couldn’t believe it. I tried to squash the coaster in there, but they wouldn’t budge. I was a bit stumped. I really liked the cover I had made.

I finally used my eyelet hole puncher and made two holes close together.  Now question to you? Should I wait until I have medium coasters and make it again, or do you think I could still send it to Joanne.

fancy-pants-pink-book.jpg

Papers and stamps are Fancy Pants. The light brown ink is Gingerbread VersaMagic DewDrops, the black ink is Versamagic Dew Drops as well. The pink color is acrylic paint dauber from Adironacks. May Arts Ribbon is from Starlitstudio. Ink and Stamps are from Eclectic Paperie. Bling is from Michael’s $1 bin.

The rest of the day I was working on my secret stamping. I am almost done! My goal is to finish up tomorrow! I am so excited about that, I am smiling from ear to ear. It’s so nice to see the finish line on a big project!

I just finished taking all the pictures for next week’s tutorial on Splitcoast. Many of you wanted to see this tutorial, so that’s why I picked it for the Anniversary addition of our newsletter. Can you believe next week will be issue #52 coming out already? Make sure you are subscribed to it. There will be prizes!!!


five-in-one-template-box-fi.jpg

Next week I will show you how to make the five in one template box as shown at the Stampin’ Up! regional in Houston. I used my gorgeous Magnolia paper from My Mind’s Eye, as well as Pumpkin Pie and Chocolate Chip cardstock from Stampin’ Up! Ribbon is May Arts. The stamps are from Fancy Pants Brush bloom collection and I used Versamagic Dew Drop ink. Eclectic Paperie is carrying the stamps and ink and will soon have that paper as well!

five-in-one-template-box-top-view.jpg

Here’s a better view of the tag. Look Charmaine…I actually used a bit of that ribbon! 🙂

Remember this box I made?

one-sheet-box-finished-smaller.jpg

The tutorial was just posted on Splitcoaststampers. Check it out. Once you made the box once or twice, the folding is easy peasy! Try with a piece of copy paper first until you feel comfortable with the folds. I can’t wait to see the gorgeous boxes you will come up with.

I had to get my new toys out again. I can’t have new stuff sitting here and not use it. My deadline for the secret stamping is still far off. I can squeeze some fun stuff in in between.

blog-friend-book-crate-pape.jpg

I started with two 4″ coasters. I think those are medium weight. I adhered Crate paper from the Girly girl selection to both sides of the coaster with Mod Podge. I clipped the corners of the paper with scissors and sanded all around the edges with a Sanding block from Stampin’ Up!. Then I added a layer of Mod Podge to seal the paper.

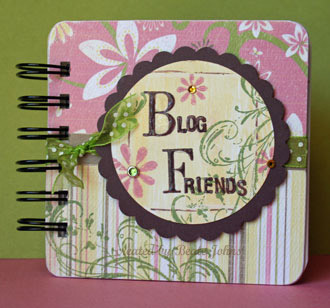
For the main image I started with a Whisper White circle and brushed Barely Banana craft ink refill over it with the big watercolor brush. I am very much into using craft ink and craft refill right now. I guess the Adirondack Acrylic Paint Dauber inspired me to reach for my craft ink more again.

Next I used white craft ink refill and a small watercolor brush to add a white line on each side of the circle. Then I used my gorgeous Fancy Pants Brush Bloom stamps with Tea Leaves Versamagic Dew Drop ink to add swirls to the sides and Pink Petunia for the flowers. Once the flowers and swirls were stamped, I added a thin line of Jumbo Java Dew Drop ink next to my white lines.

Blog Friends is stamped with Stampin’ Up!s Typeset Alpha Upper and Rough Edge Alpha in Java Dew Drop ink.

During my shopping spree in San Antonio with Jenn I picked up some Bling Brads. I added a small one in my big flower, and Amuse Creative Candy in the center of my two small flowers. After my flowers were dressed up, my words looked to flat. So I added a layer of Crystal Effect over them.

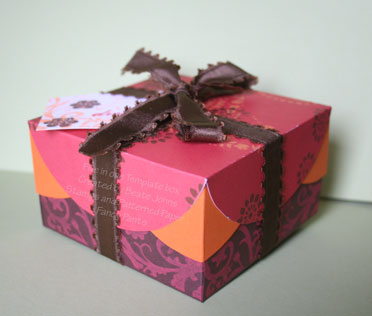
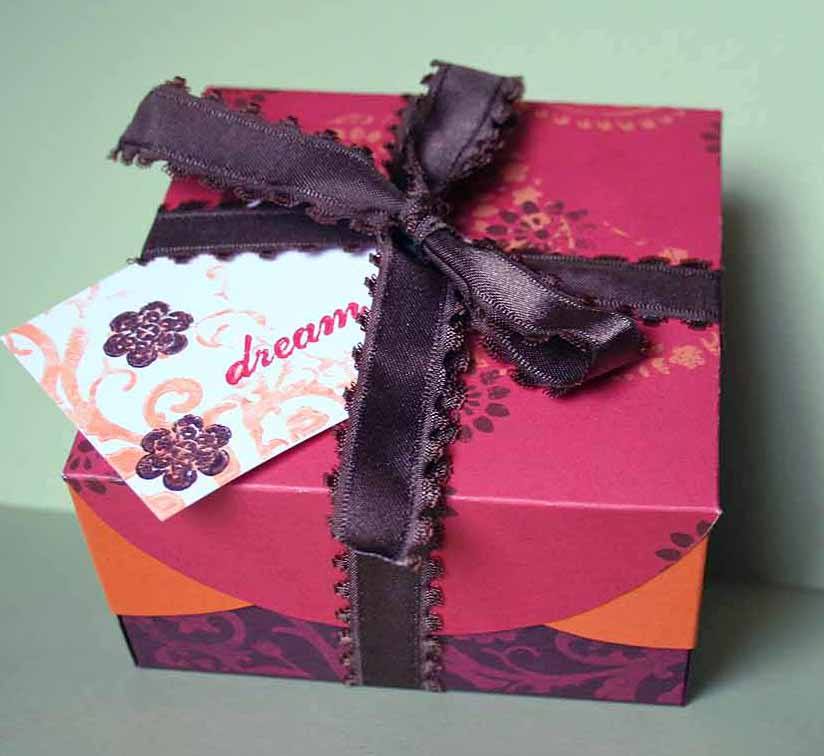
The ribbon is May Arts Ribbon (what else).

I then punched my covers with my new Bind-it-All. And wouldn’ t you know it, I goofed. My first cover was punched crooked. So I had to make a second. Then I punched my back cover….and punched it the wrong way. I tell you….my stamping would go a lot faster, if I wouldn’t make all those silly mistakes. When I finally had my front and back cover finished, it was time to create some pages.

blog-friend-book-crate-paper-open.jpg

I have a bunch of Confetti white cardstock, so I used that. I cut my cardstock in 4″x4″ squares and used my corner rounder on each corner. Then I used the swirl stamped that I had already used on the front page for each page.

I really like the way it turned out. Now I have to clean off the big mess on my table and maybe get one more “have to do” project done!

While working on the One Sheet box, I messed up and had to redo it. I still had the center piece leftover. So I turned it into this little 4″ square card.

fancy-pants-bella-brush-bel.jpg

I bought those bling brads at Scrapbook Heaven back in San Antonio! I am loving all my new stuff.

Again….I used Fancy Pants stamps on the cool Caribbean cardstock with white acrylic paint dauber.  But before I did that, I used the dauber directly on the cardstock to achieve a painted looking background. The center image is inked up with Sea Breeze and Black Dew Drops. Charmaine told me you can use the Dew Drop ink with a blender pen to color in images. That’s what I did to the flower. I love the flower image. Well, I love the swirls and every other stamp in the Bella Brush set too. It’s so beautiful, it takes your breath away.

© 2012 fresh & fun Suffusion theme by Sayontan Sinha