Little Darlings stamps is releasing a new collection today called Spring is in the Air. To introduce the four new darling stamps, the design team and a few guest designers are having a blog hop. The hop coincides with the Little Darlings challenge and the theme Spring Colors.

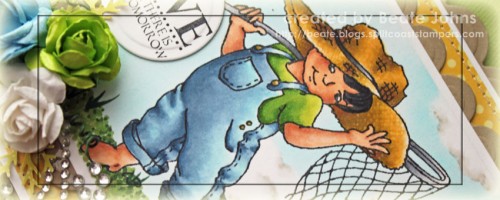
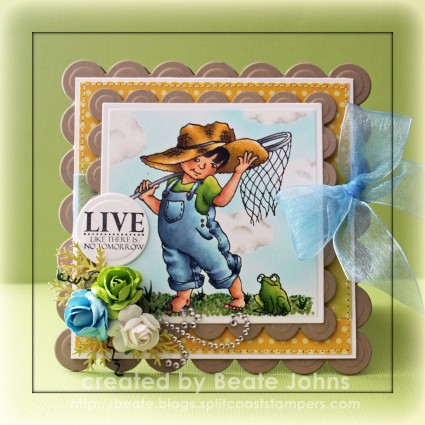
For my first sample I used the new image called Buddies. It was stamped in Tuxedo Black Memento Ink on a piece of white cardstock, cut and embossed with the largest Classic Square Nestabilities die. The image was colored with Copic Markers (Skin: E00, E11, E13  Hair: N5, N7, N9   Jeans: B0000, B91, B93, B95, B97   shirt/frog: YG21, YG23, YG17   Hat: Y23, Y26, Y28, E33   Net: C00, C1, C3, C5    Ground: G43, G46, E31).

It was masked, cloud masks were added and the background was airbrushed with Copic Marker BG01.  Shading was added to the clouds with Copic Markers W00, W0 and W1. The square was adhered to a piece of Kraft cardstock, cut and embossed with the largest Scallop Square Nestabilities die.

A 2 3/4″ x 4 1/2″ strip of Pebbles Happy Go Lucky Patterned paper was adhered to a 4 1/2″ square of Pebbles May Bouquet Collection. The layers were stitched to a 3/16″ bigger piece of Solar White cardstock. Blue Organdy Ribbon was tied around the horizontal strip before the image was adhered over the center with dimensionals.

The wires of three Zva Creative flowers were twisted together. The ends were rolled up with the help of my paper piercer. Branches punched out of Pebbles paper were added to the flower bouquet and it was adhered to the lower left corner of the image. Part of a Finesse Rhinestone Swirl was adhered next to the flowers.

A sentiment from Whimsy’s Treasured Moments Tickets stamp set was stamped in Tuxedo Black Ink over a piece of cardstock that had been cut and embossed with a Standard Circle Nestabilities die. The sentiment was adhered above the flowers. The layers were adhered to the card base, Kraft cardstock cut and embossed with the second smallest  Grand Scallop Square Nestabilities die.

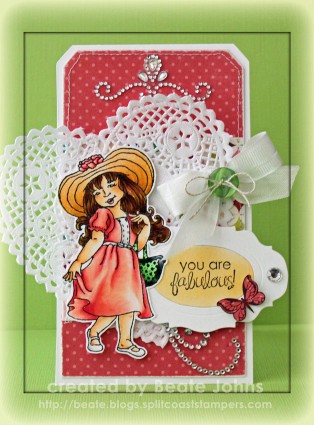
For my second card I used the image Isn’t She Lovely. The girl was stamped in Tuxedo Black Ink on Solar White cardstock and colored with Copic Markers (Skin: E50, E51, E53    Hair: Y26, E33, E35, E37   Dress: R30, R32, R35    Shoes and Trim: W00, W0, W1   Hat: YR20, YR21, YR23    Purse: YG11, YG13, YG17). The image was cut out and set aside.

The card base was cut out of Solar White cardstock with the Tim’s large tag die. A piece of the new Echo Park Graceful This & That paper was cut slightly smaller. The edges were sanded and another piece of the same paper pack was added as a horizontal strip. The edges were then stitched and seam binding was tied around the strip. A heart doily was adhered to the left hand side of the card. The image was adhered over the doily with dimensionals.

A sentiment from Whimsy’s Friendship Ticket Sentiments was stamped over the oval that had been cut with the Large Tage and bookplates die. The oval was airbrushed with Copic Marker YR20, placed back into the bookplate frame and adhered partially under the girl frame. A butterfly from the same set was stamped on the same paper used for the card base and cut out. It was adhered to the lower right of the sentiment panel.

To finish off the card a button was tied on over the bow with Linen thread. One of Nina’s gorgeous new Fancy That Want2Scrap Border bling was adhered to the top of the card. A Rhinestone was added the right hand side of the bookplate and part of a Finesse Rhinestone Swirl underneath it.

Check out what the other designers have created with the new stamps:

Little Darlings Challenge Blog
Jane
Angela
Alberto
Vicky
Janiel
Mindy
Sheri
Sara
Ruby
Angela

Make sure you stop by the Challenge blog. One of the commenters there will receive blog candy!

Do you like the images I used today? Leave me a comment and I will pick a winner on Thurday morning with the help of random.org.

Thanks so much for stopping by! Have a wonderful day!
Hugs and smiles


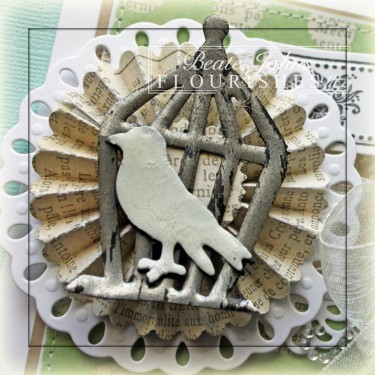
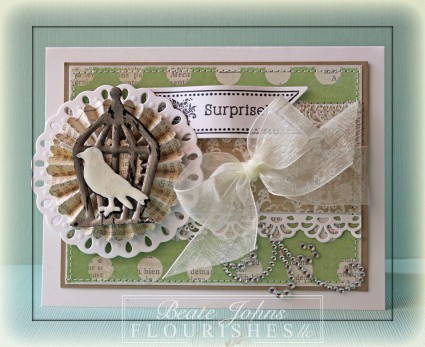
Today’s Timeless Tuesday challenge hostess is Maki. Her challenge is to use a Bird image and/or elements for your creation. I had recently seen the Faux Tarnished Metal technique on Shelly Hickox blog and wanted to try it out. I started by cutting Grunge paper with Tim’s Mini Bird & Cage set. I used the FauxTarnished Metal technique for the cage and the Crazed Porcellain technique on the bird.

I cut a strip of MME Lost & Found 2 Blush Patterned Paper with the Mini Paper Rosette Decorative Strip Die. The Rosette was adhered to a piece of Neenah Solar White cardstock, cut and embossed with a  Tear Drop Circle die and the bird and cage were adhered on top of the rosette.

A 3 1/2″ x 4 3/4″ piece of Rosy Patterned paper was sanded and stitched to a 3/16″ bigger piece of Kraft cardstock. A 4 3/4″ long strip of white paper was cut with the Faux Crochet Dienamic die. A 2″ x 4 3/4″ strip of Rosy paper was sanded the Faux Crochet Strip was adhered under underneath the paper strip. The strip was adhered over the stitched layers and Ivory Organdy Ribbon was tied around the horizontal strip.

The layers were adhered to the card base, a 5 1/2″ x 8 1/2″ piece of Solar White cardstock, folded in half. The bird layers were adhered to the left hand side with dimensional. A pennant was cut and embossed with a Nested Pennant die and stamped with images from the Birthday Pennant stamp set. Part of a Finesse Rhinestone Swirl finish the card off.

Check out my fellow Timeless Tuesday Challenge Members for more inspiration:

Cindy Haffner
Heather Jensen
Maki Jones
Mona Pendleton
Silke Ledlow
and
February Guest Designer Tera Fujan

Thanks so much for stopping by! Have a wonderful day!
Hugs and smiles


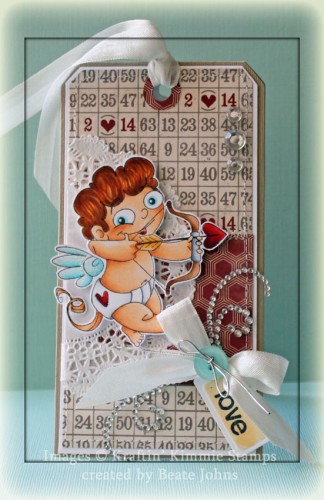
Today’s Kraftin’ Kimmie Challenge is to create a tag. I changed it up just a little bit and created a Tag card. I started by folding 12″ textured Kraft cardstock in half and cut a tag card base with  Tim’s large tag die.

A 2 1/4″ x 2 3/4″ piece of My Mind’s Eye Love Me Patterned Paper was adhered to a 2 1/4″ x 5 3/4″ piece from the same paper pack. The layers were stitched to a 3/16″ bigger piece of Neenah Solar White cardstock. Seam Binding was tied around the horizontal strip. The bow was topped with a button that was tied on with silver cord. That silver cord tied on a tiny tag with part of one of the sentiments from the new Lots of Love 2 set stamped in Tuxedo Black Memento Ink. The embossed part of the tag was colored with Copic Markers 1/5th YR31 (mixed 1/5th of YR31 refill with 4/5th of Blending solution in an empty marker).

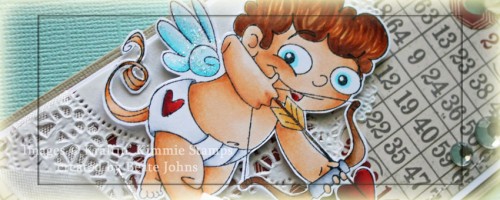
Part of a paper doily was adhered to the left side of the layers and topped with the Cupic from Lots of Love 2. It had been stamped on Neenah Solar White cardstock, colored with Copics (Skin: E50, E51, E53   Hair: YR31, E97, E99, E31    Eyes/Wings: BG0000, BG000, BG01    Hearts: R22, R27, R39   Bow: E30, E31, E33, C0, C1, C3) and cut out. The wings were covered with Stardust Stickles .

The layers were adhered to the tag base and dressed up with part of a Finesse Rhinestone Swirl and additional Rhinestones.
A small slit was cut at the card fold and seam binding was threaded through there and the tag hole.

The inside of the tag was kept pretty simple. Just a white layer along with more Love me paper.

Thanks so much for stopping by! Have a wonderful day.
Hugs and smiles

Today I want to share a tag with you I created for one of the VSN challenges on Friday. We were to incorporate Music in our project. With all the gorgeous paper out there, it was an easy challenge. Since I had just gotten my latest Ranger product order, I had to try that out right away.

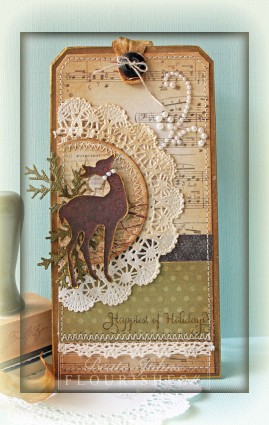
I started by cutting a tag with Tim’s Tag die out of Kraft cardstock. The edges of the tag were sponged with Walnut Stain Distress ink.

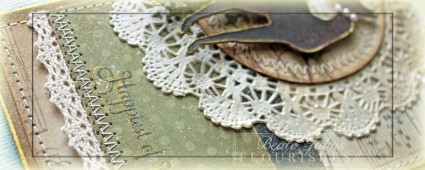
2 7/8″ wide pieces of  MME Lost & Found Christmas were adhered to make a slightly smaller layer. The edges were sanded and sponged them with Vintage Photo Distress ink before the layers were stitched to the tag base. A paper doily as cut, sponged with Vintage Photo ink and topped with a partial circle of the Lost & Found Christmas paper.

The doily was adhered to the left hand side of the age. Finesse Pearl swirl piece were adhered to top right of the doily. A sentiment from Flourishes Sentimental Christmas was first stamped in Tsukineko’s Delicata Gold ink, then in Tuxedo Black Memento Ink on the lower right corner of the green paper strip. The same gold ink was used to add a gold edge to the tag base.

A lightweight coaster as well as a dark red piece of paper from the Christmas collection were cut with Tim’s Mini Reindeer die. The patterned paper was sanded. Both the paper as well as the coaster edges were sponged with Vintage Photo ink before the paper was adhered to the coaster reindeer. Small branches were cut out of Core’dinations paper with Tim’s Festive Greenery die. The paper was sanded before both the branches as well as the reindeer were adhered over the doily layers.

The tag was sprayed with Biscotti Perfect Pearls Mist and a few more pearls were added to the reindeers neck. Seam Binding was dyed with Vintage Photo Distress Reinker and sprayed with more Biscotti Perfect Pearls mist before it was tied under a black button and adhered to the top of the tag.

Thanks so much for stopping by!
Have a wonderful day!
Hugs and smiles


© 2012 fresh & fun Suffusion theme by Sayontan Sinha