I am excited to be a guest designer for Kraftin’ Kimmie Stamps this month! My gig starts out easy with today’s Kraftin’ Kimmie challenge . Use heat or dry embossing on your project. Since making my first tag for the Flourishes Timeless Tuesday challenge this week, I was itching to create another tag.

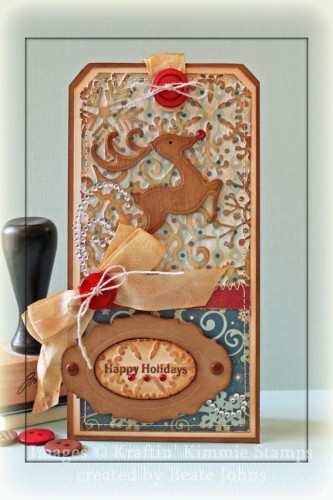
For this one I started out with embossing a 2 /3″ x 4″ piece of Winter Park Patterned paper with a Snowflake  Embossing Folder. The raised snowflakes were sanded and the sponged with Vintage Photo Distress ink. Two more 2 3/4″ wide pieces of the same paper pack were sanded and stitched to a 3″ x 6″ piece of Neenah Solar White cardstock that had been sponged with Vintage Photo ink. The layers were adhered to a piece of Kraft cardstock that had been cut with Tim’s large tag die.

For the sentiment panel I cut a piece of white and Kraft Cardstock with Tim’s Tag die. From the white piece I used the inner oval of the sentiment label. A sentiment from Kraftin’ Kimmie’s Holiday Sentiments was stamped in Rich Cocoa Memento Ink in it’s center. Then it was embossed with the same embossing folder used for the Winter park paper and sponged with Vintage Photo Distress ink. From the Kraft cardstock I used the outer part of the label. It was also sponged with Vintage ink and two brown brads were added. The panel was adhered with dimensionals to the lower part of the card.

I dyed some seam binding with Vintage Photo Distress Re-inker and water. It was turned into a bow and a button was tied on with Linen Thread. Parts of a Finesse Swirl were added above the bow and underneath the sentiment label. Three red Baby Bling Rhinestones were added under the sentiment.

As focal point for the upper part of the tag, I cut and embossed a piece of textured Kraft cardstock (Stampin’ Up!) with a Fanciful Holiday Shapeabilities die. It was sponged with Vintage Photo ink and a red Baby Bling Rhinestone was added to it’s nose. More dyed seam binding was attached to another red button and adhered to the top of the tag.

Thanks so much for stopping by! I hope you have time to participate in the challenge.
Have a great weekend!
Hugs and smiles

Today’s Timeless Tuesday challenge hostess is Cindy Haffner. The Challenge is:  Use any image stamp your heart desires, just make sure you include these embellishments on your project: Tag, Flowers and Ribbon!

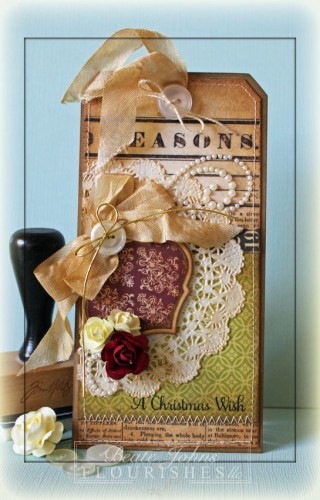
I heard tag and thought it would be fun to create a tag for this challenge. I started by cutting a tag with Tim’s Tag die out of Kraft cardstock. The edges of the tag were sponged with Walnut Stain Distress ink.

2 7/8″ wide pieces of Echo Parks Times and Seasons were stitched together into a slightly smaller layer. The edges were sanded and sponged with Vintage Photo Distress ink before the layers were adhered to the tag base. A paper doily as cut, sponged with Vintage Photo ink and adhered to the left hand side of the age. Finesse Pearl swirl pieces were adhered to top right and lower left of the doily. A sentiment from the new Flourishes set Petals and Peace was stamped in Jet Black Archival ink on the lower right of the green layer.

A leight weight coaster was cut and embossed with a Holiday Tag die. The same die was used to cut a red piece of Times and Seasons paper. The edges of the paper were sanded and it was cut at the embossed line. Both pieces were sponged with Vintage Photo before the paper was adhered to the coaster piece.

Seam binding was sponged with Vintage photo before it was tied into a double bow and topped with a button. The bow and button were tied to the ornament with gold cord (Stampin’ Up!).  Zva Creative Mini flowers were added underneath the ornament. More sponged seam binding topped with a button on top of the tag finish off my project.

Please check out my fellow Timeless Tuesday Challenge members for more samples and inspiration:

Cindy Haffner
Heather Jensen
Maki Jones
Mona Pendleton
Silke Ledlow
Tammy Hershberger
and
November Guest Designer Miriam Napier

Thanks so much for stopping by! Have a wonderful day!
Hugs and smiles
Mona is today’s challenge hostess. She asked us to use the Double Embossing Technique.  That’s not an easy technique for me, just because it is geared towards CAS cards. Those are absolutely NOT my strength. LOL

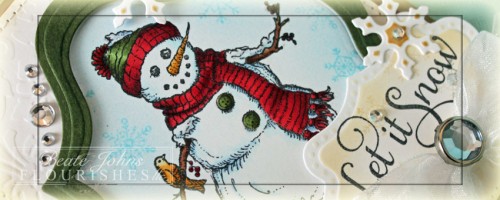
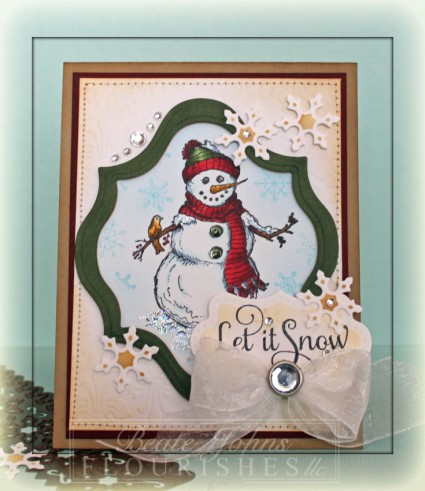
For my sample I embossed my background with Provocrafts Brocade Embossing Folder. The opening were blocked with cardboard pieces cut with a Label 13 Nestabilities die. The snowman from Warm Winter Wishes was stamped in the “un-embossed” center with Tuxedo Black Memento ink and was colored with Copic Markers (R35, R37, R59, R39, G82, G94, G99, BG0000, E23, E25, E27, YR 21, YR23, YR24).  I chose the colors for last weeks color challenge on Splitcoaststampers.

The outside of the layer was masked and the center sponged with Tumbled Glass Distress ink. The same ink was used to stamp snowflakes from Warm Winter wishes around the snowman.

Stardust Stickles was added to the snow on the ground and the extra snow on the snowman and its button were coated with Glossy Accents. A frame was cut and embossed out of Artichocke paper with Label 13 Nestabilities dies.  The stamped layer was stitched to a slightly bigger Cherry Cobbler cardstock piece and the frame was attached over the image with dimensionals.

A sentiment from a soon to be released Sentimental Christmas stamp set was stamped in Tuxedo Black ink over a piece of cardstock, that had been cut and embossed with a die from the new Twisted Metal Tags & Accent die pack. The panel was sponged with Antique Linen and snowflakes were stamped over it in the same colors.

A strip of white cardstock was cut and embossed with the Snowflake Borderabilities dies. The snowflakes from that border were sponged with Vintage photo Distress ink and adhered to the card base with dimensionals.  They were topped with Want2Scrap Rhinestones.

A bow was tied out of May Arts Organdy Ribbon, topped with a Recollections Rhinestone brad and adhered under the sentiment panel. Last everything was adhered to the card base, a 4 1/4″ x 11″ piece of Kraft cardstock folded in half.

Please check out my fellow Timeless Tuesday Challenge members:

Cindy Haffner
Heather Jensen
Maki Jones
Mona Pendleton
Silke Ledlow
Tammy Hershberger
and
November Guest Designer Miriam Napier

as well as Flourishes Design Team members

Christine Okken
Danielle Kennedy

and Jan Marie Caruso.

Thanks so much for stopping by! I hope you have time to participate in the challenge. Have a wonderful day!
Hugs and smiles
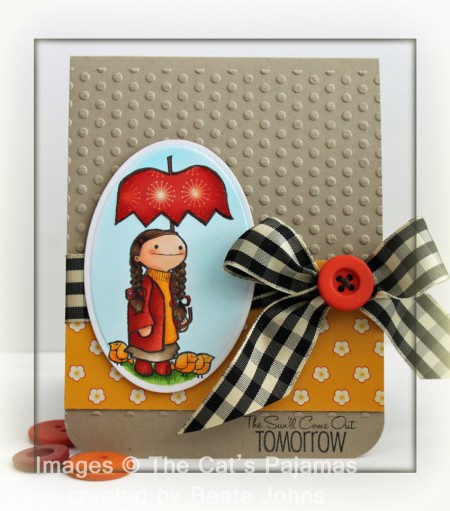
I just received my order from the newest The Cat’s Pajama release stamps in the mail and had to try it out right away. Yesterday was a mini VSN over on SCS. One of the challenges posted was to create a two layer card with an uplifting message. We had to use Tan somewhere on the card.

If I don’t see sunshine every so often, I get all mopey. So the sentiment I used on this card would definitely cheer me up.

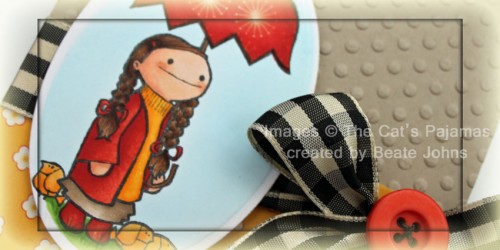
I stamped the girl from Spring Rain on Express It! Blending card in Tuxedo Black Memento Ink and cut and embossed it with Petite Oval Nestabilities. Next I colored the image with Copic Markers (Boots, Coat, Umbrella Shading: R05, R08, R27, Sweater, Chicks: Y32, Y38, Skirt: E42, E43, E44, Hair: E33, E35, E25, E29, Skin: E00, E01, E11, Grass: YG23, YG25, YG17), masked the girl and chicks and airbrushed the background with Copic Marker BG01. I added a few grass blades with a Prismacolor Pencil.

I stamped the umbrella on Cosmo Crickets Garden Variety paper, cut it out and shaded it with Copic markers before adhering it over my main image.


The card base is a 4 1/4″ x 11″ piece of Kraft cardstock. It was folded in half and the edges were cut with the W R Memory Keepers Cropadile Corner Chomper, and the card front was embossed with Provo Craft’s Polka Dot Embossing Folder.

A 2″ x 4 1/4″ strip of Garden Variety paper was adhered to the card base and the sentiment from Spring Rain was stamped in Tuxedo Black Memento Ink on the lower right hand corner. May Arts black gingham ribbon was tied around the upper edge of the paper strip and topped with a Basic Grey button to finish off my card.

Boy, I can’t tell you how hard it is for me to make a two layer card. I hope you have a wonderful day! I am afraid to go out. This morning it was MINUS 4 degrees, it’s now a whopping 14. BRRRRRR…..just a bit too cold for me.

Hugs and smiles

fllcangelicloveflowerpotwid.jpg

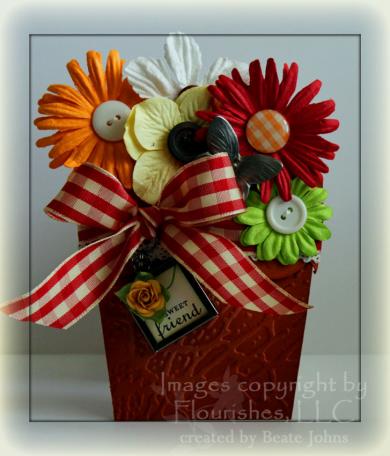
Another VSN challenge card. This time the challenge was to create a Flower Pot Pocket card. Boy….don’t look at that video. It was the first one I ever created for SCS. It took me a day to shoot and a day to edit. It goes so much faster now.

fllcangelicloveflowerpotbea.jpg

My Flower Pot was created out of Dusty Durango cardstock. The cardstock was embossed with Tim’ Cracked Texture Fades and sponged with Rusty Hinge Distress Ink. the rim was cut with the Jumbo Scallop Borderabilities. Lace and Red Gingham Ribbon was tied around the pot. A 1″ Memory Frame was attached to the ribbon with Jump Rings. Inside is a greeting from Flourishes Angelic Love stamp set. A small Prima Flower was adhered over the sentiment.

fllcangelicloveflowerpotins.jpg

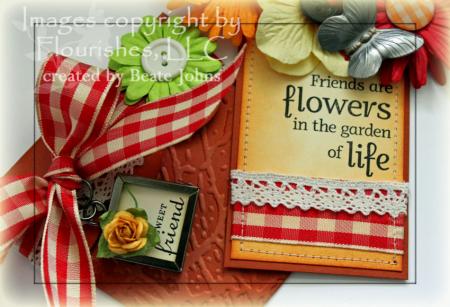
The tag base is a strip of Dusty Durango cardstock. Very Vanilla cardstock was sponged with Wild Honey Distress Ink, topped with Gingham Ribbon and Lace and stitched to the Durango base. The sentiment is from Flourishes Nasturtiums set in Tuxedo Black Memento Ink. Different Prima Flowers were topped with Buttons and brads and attached to the tag base. A great metal Butterfly from Allie Gower tops off the card.

Thanks so much for stopping by! Have a wonderful day! Hugs and smiles

unitywhitelilacbracketwide.jpg

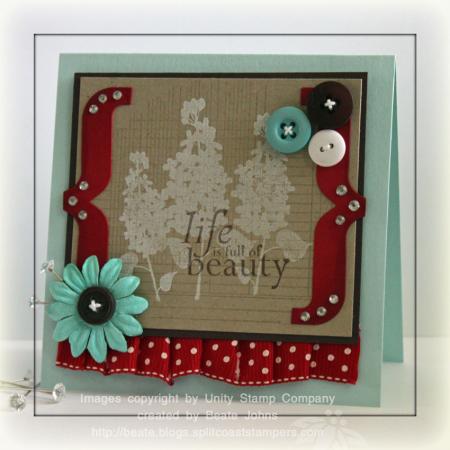
It’s another Friday. Time for Friends with Flair! I LOVE this new store kit from Unity! It’s absolutely gorgeous! I used it for a VSN challenge on SCS. In this challenge we were asked to used Watermark Ink.

I started with a 3 1/4″ x 3 3/4″ piece of Kraft cardstock. The background stamp from Moments in Bloom was stamped in Watermark Ink. Next the Lilacs were stamped over it in Adirondack Snow Cap ink.  On top of that I stamped the sentiment in Walnut Stain Distress ink.

Brackets were cut with Stampin’ Up!’s Bracket die out of Wild Cherry cardstock. The outer edges were darkened with a Versamarker. Those were decorated with buttons, Tiny Twinkles and a Prima flowers with Maja Roads Trinket Pins.

unitywhitelilacbracketsbeat.jpg

Red polka dotted ribbon was ruffled and sewn to the bottom of a 3 3/8″ x 3 15/16″ piece of Chocolate Chip cardstock. The Kraft layer was adhered on top of that.  The card base is a 4 1/2″ x 9″ piece of Sno Cone cardstock was folded in half and used as a card base.

Make sure you check the Unity blog to find a link to all Friends for Flair Participants or hop on over to Lisa’s blog. She is next. Thanks for stopping by! Have a great day! Hugs and smiles

bellakindnesswide.jpg

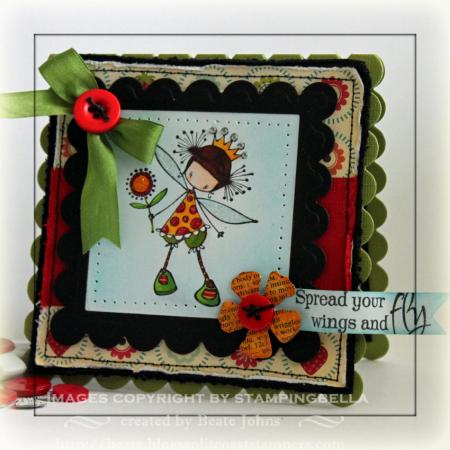
All my playing with MFT stamps got me hooked on cute images. I usually don’t think I am any good at cute cards, but they are so much fun! So I stamped Maisy Ketto with Tuxedo Black Memento Ink on Solar White Neenah Cardstock and colored her with Copic Markers ( C1, YR000, YR00, Y35, Y38, R27, R29, BG000, E19, E25, YG17, YG25). Originally I had tried to turn this into a magic card, but I didn’t like the way it looked, so I finished the card for Thursday’s Way to Use it Challenge.

bellakindnessflywt270.jpg

The card base was cut out of Old Olive Textured Cardstock with Stampin’ Up!’s Big Shot Scalloped Square die. The edges of a 3 7/8″ square of October Afternoon Fly A Kite Paper were distressed. A 1 3/4″ wide strip of textured Real Red cardstock was adhered to square before it was stitched to a 4 1/8″ square of Basic Black cardstock.

A Scallop Square Frame was cut with Square Nestabilities. The edges of the image layer were sponged with Tumbled Glass Distress Ink and paper pierced before the frame was adhered. Stardust and Orange Stickles were added to the image and Tiny Twinkles adhered to ther crown. A bow made out of 1/2″ wide olive Silk Ribbon was adhered to the top left of the frame with a red button on top.

I don’t have any Bella sentiments yet, so I used one from Verve’s Beautiful Kindness. It was stamped on a 1/2″ wide strip of Solar White cardstock with Tuxedo Black Memento Ink. the edges were sponged with Tumbled Glass and the left edge was punched with my Photo Corner Punch (SU). It was attached to the lower right side of the frame. The flower was cut out of a Grunge Paper, that was covered with dictionary pages. The flower was colored with the yellow Copics I had used on the image. A red button was attached to the flower center with black waxed Linen thread.

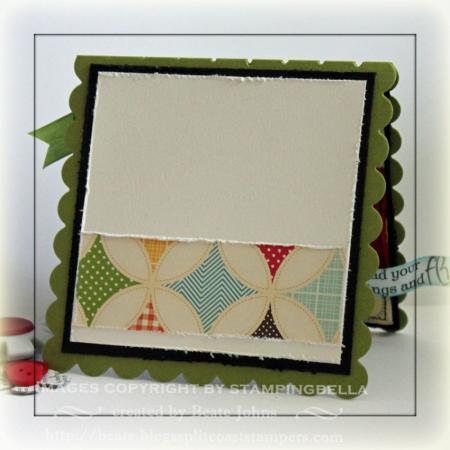
bellakindnessinside.jpg

The inside was decorated pretty simple. I just can’t leave card insides completely blank anymore. It seems unfinished.

mftfloppyfeltcloudwide.jpg

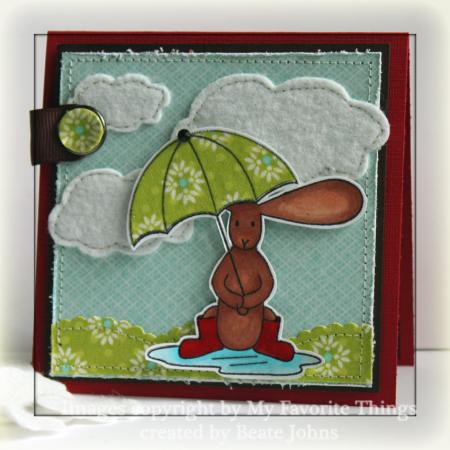
Did I mention that I love the new MFT Die-namics cloud and scallop die I have? Dang they are so cute!!! For this sample I wanted to try out how the dies cut the fabric and felt ….. the answer is…LIKE BUTTER. I did have to run the felt through the machine twice to make sure it cut all the way through. It was cheap 29 cent felt from Michaels.

mftfloppyfeltcloudbj.jpg

I taped my fabric border and felt flowers to a 3 3/4″ square of My Minds Eye Just Dreamy 2 paper and stitched it to a 3 15/16″ square of Chocolate chip cardstock. The felt clouds were also stitched to the layers for extra texture.  A 1/2″ circle was punched out of fabric adhered to cardstock (okay, it didn’t cut all the way through, but after punching it left a mark and I cut it with scissors). It was adhered to Stampin’ Up! Build A Brad. It was attached to the layers on the upper left hand side with a small strip of Chocolate Chip Grosgrain ribbon. Everything was attached to a 4 1/4″ x 8 1/2″ piece of textured Real Red cardstock folded in half with dimensionals.

I stamped Rainfall Flopsey in Black Memento ink on Neenah Solar White cardstock and colored it in with Copic Markers (BG000, BG01, R27, R29, E11, E13, E15). I stamped the umbrella on fabric, cut it out and layered it on the cutout umbrella. I added Glossy Accents over the boots and the puddle and adhered Flopsey to the card with dimensionals.

mftfloppyfeltcloudinside.jpg

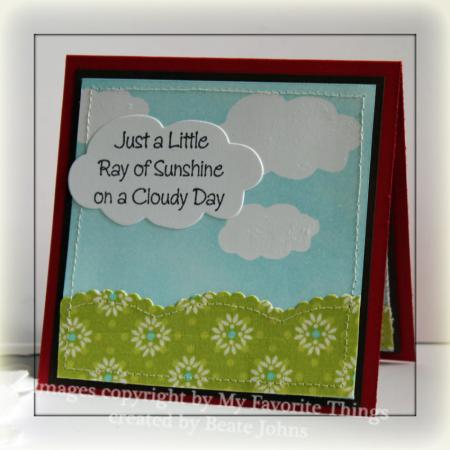
For the inside of the card I adhered my cloud masks to  a 3 3/4″ square of Whisper White cardstock and sponged Tumbled Glass Distress Ink over the cardstock.. A strip of fabric that had been cut with the scalloped scallop die-namics  was adhered to the bottom of the square, then the square was stitched to a 3 15/16″ square of Chocolate chip cardstock.

I couldn’t fit a sentiment to the front of the card, so I stamped it on the largest cloud die cut with Black Memento ink and adhered it over the sponged clouds.

Thanks so much for stopping by! Have a wonderful day! Hugs and smiles

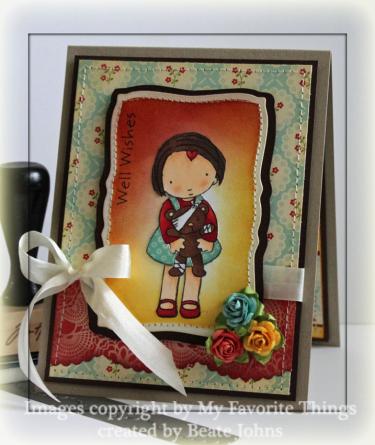
mftpigetbetterwide.jpg

I created this card for a Featured Stamper Challenge week after last.  Michelle, aka eliotstamps, was the featured stamper and I picked this card from her gallery to case. I also cased Cindy Lawrence idea of sponging the Nestabilities shape behind the Pure Innocence image.  I saw it on a card of hers and had to try it out.

I cut a piece of Neenah White cardstock with a curved rectangle Nestabilies die, left the die on and sponged the entire piece with Wild Honey and Aged Mahogany Distress ink. Next I layered it on a piece of Chocolate Chip cardstock that had been sponged with Walnut Stain Distress ink. I cut around in shape of Nestabilities die cut to create a second layer.

mftpigetbetterfs169.jpg

The image is from My Favorite Things Pure Innocence Better get Better stamp set. It was stamped in Tuxedo Black Memento Ink on Neenah Solar White cardstock and colored with Copic Markers (E51, E53, E47, E57, R24, R29, W2). The dress was paper pieced with October Afternoon The Thrift Store Patterned Paper.

The card base is a 4 1/4″ x 11″ piece of Kraft cardstock folded in half. Next is a 3 15/16″ x 5 3/16″ piece of sponged Chocolate chip cardstock topped with a 3 3/4″ x 5″ piece of Thrift Store paper. The red horizontal strip is from the same paper pack and was cut with the Scalloped Scallop Die-namics border die. 1/2″ Silk Seashell Ribbon was tied around the layers. The card was finished off by three small Prima Flowers.

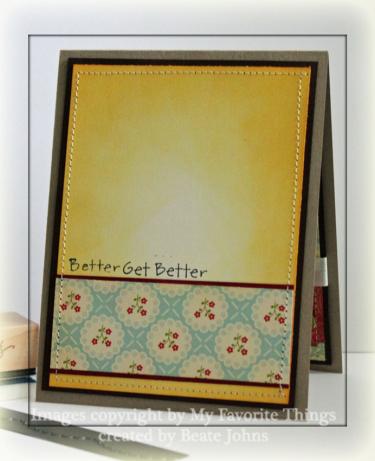
mftpigettbetterinside.jpg

The inside of the card is pretty simple. I kept the same measurements and layers like the card front.  A 1 1/8″ x 3 3/4″ piece of October Afternoon Paper was adhered to a 1 1/4″ x 3 3/4″ piece of Ruby Red cardstock that had been sponged with Aged Mahogany Distress ink. The white cardstock layer had been sponged with Wild Honey.

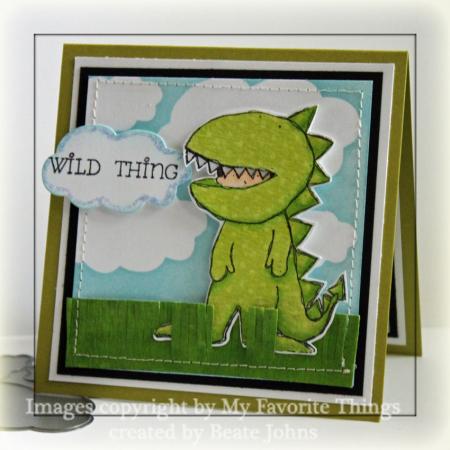
I don’t know about you, but whenever I see Wild Thing, I start hearing the song in my head: “Wild Thing, you make my heart sing…”. While I was stamping with My Favorite Things new stamp set Loveosaurus, I heard that song the entire time.

mftlovasauruswildthingbj.jpg

For this card, I used a sponged cloud cardstock I created when I shot the video for this technique. I cut the cardstock down to a 3 1/2″ square. It was layered to a 3 3 3/4″ square of Chocolate Chip cardstock that had been sponged with Walnut Stain Distress ink. I cut a 7/8″ x 3 1/2″ strip of My Mind’s Eye Penny Lane patterned paper, colored it with a copic marker and cut the top edges into grass. I sewed the layers together and adhered them to a 3 15/16″ square of Whisper White cardstock.

The Loveosaurus was stamped twice with Black Memento Ink, once on Neenah Solar White cardstock, once on Penny Lane cardstock. Both were cut out, adhered on top of each other and colored with Copics ( E51,  E53, E47, YG21, YG23, YG25). The teeth were covered with Glossy Accents. The image was adhered to the card front with dimensionals.

The sentiment was also stamped in Tuxedo Black ink on a medium size cloud. The cloud was attached with dimensionals and outlined with Waterfall Stickles.

mftlovasaurusinside.jpg

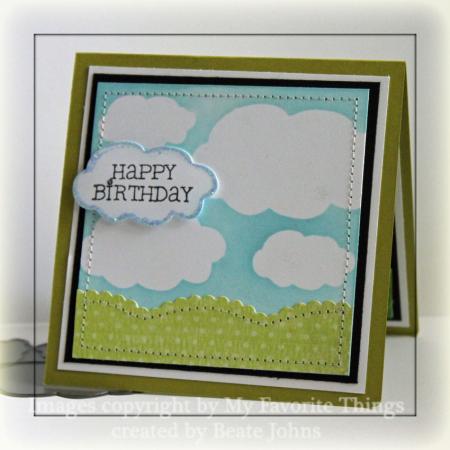
For the inside of the card I used the same layers and measurements as on the card front. I cut another piece of Penny Lane paper, this time with the Scalloped Scallop border Die-namic die. Happy Birthday was stamped in Black Memento Ink on a medium size cloud and attached to the inside of the card with dimentionals and outlined with Waterfall Stickles.

© 2012 fresh & fun Suffusion theme by Sayontan Sinha