The coming week is all about Halloween projects on the Spellbinders blog. So for my video post today I thought I share how to make this little treat bag. I hope you have time to check it out and tell me what you think. I also posted a couple of pictures of Rebecca there.

Thanks so much for stopping by!
Have a wonderful weekend! Hugs and smiles

I have a quick tutorial on the Spellbinders blog today showing off how to use M-Bossabilities (or any other embossing folder) to create a Pergamano look.

I hope you have time to hop on over an check it out. Have a wonderful day!
Hugs and smiles

It’s my turn to share a video tutorial on the Spellbinders blog. The coming week will be all about weddings and I am showing how to create a box that could be used for bridesmaid gifts or small wedding gifts (gift cards, jewelery). I hope you have time to check it out and let me know what you think. Comments on the Spellbinders blog are very appreciated.

Thanks so much for stopping by!
Have a great weekend! Hugs and smiles

May Flowers is the topic of this weeks topic at the Spellbinders blog. I created a flower out of Crepe paper for my post. Please check out the entire post and step by step instructions HERE.

Have a great day!
Hugs and smiles

It’s my turn to share on the Spellbinders blog today. And since it’s Saturday, it’s a short video explaining how I created this wall hanging. For an image of the entire project and the video, please check this blog post.

Thanks so much for stopping by! Have a wonderful weekend!
Hugs and smiles

Here is another card I created for the latest Product Review. We were lucky enough not only to receive two of the new M-Bossabilities folder, but also one of the new Cut, Fold and Tuck dies for the review. I know….my job is tough. LOL

Remember years ago when the Lattice border was the big hit on cards? These dies remind me of that, except for they are floral, star or scalloped shaped. To showcase the Round About Cut, Fold and Tuck I received, I started adding Tumbled Glass Distress Ink over a piece of Neenah Solar White cardstock. I cut the piece with the smallest of the die, then stamped one of the stamps from Large Doily stamp set in Broken China Distress ink.

After folding and tucking the cut pieces over it was adhered over a piece of white cardstock, cut and embossed with a Tear Drop Circle Nestabilities die.  A piece of October Afternoon Modern Homemaker paper was cut and embossed with a Blossom Tag & Accent die and layered on another white cardstock, cut and embossed with another die from the Blossom Tag & Accent die pack.

A piece of white cardstock was cut with a  Grand Circle Nestabilities die and embossed with the gorgeous  Elegance M-Bossibilities folder. A strip of October Afternoon Weathervane paper was cut with the same circle die and stitched to the white circle.   A sentient from the Large Doily set was stamped to the lower right of the strip. Yellow Organdy Ribbon was tied above the sentiment. The bow was topped with a button, tied on with Linen Thread.

The card base was cut and embossed with a Grand Scalloped Circle Nestabilities die out of MFT’s Berrylicious cardstock. Rhinestones and part of a Finesse Rhinestone Swirl finish off the card.

Thanks so much for stopping by! Have a great weekend!
Hugs and smiles

I haven’t played along the Waltzingmouse Sketch challenge. When I saw yesterday’s sketch I just had to play. A heart inside a circle? LOVE that!

I cut and embossed a heart with a Classic Heart Nestabilities dies out of Cosmo Cricket Odds & Ends paper. It was sanded and adhered to a scalloped heart cut and embossed out of  Neenah Solar White cardstock with a Classic Scalloped Heart die.

A 2″ wide strip of Odds & Ends paper was adhered to another piece of the same paper pack. The paper was cut and embossed with the smallest of the Grand Circle Nestabilities die. The edges of the paper were sanded and the layers were stitched to a piece of Solar White cardstock that had been hand cut into a slightly larger circle. White Crochet Lace was adhered to the left hand side of the vertical strip before the layers were adhered to the Kraft cardstock card base, cut and embossed with a Grand Scalloped Circle Nestabilities die.

The heart layers were adhered to the left hand side of the card. A sentiment from You’re Lovely was stamped in  Tuxedo Black Memento Ink on a piece of Solar White cardstock, cut and embossed with a Fancy Tag die. The inner part of the sentiment was sponged with Antique Linen Distress ink and two small flowers of that set were stamped in the same color for added texture.

The sentiment was adhered to the lower left of the image and three small Zva Creative Flowers were adhered to the lower left of the sentiment. Parts of a Finesse Rhinestone Swirl finish off the card.

Thanks so much for stopping by! Have a wonderful day! I am helping my husband put the finishing touches on painting our living room. It looks so much better now then it did when he started.
Hugs and smiles

This weeks  “From the Archives Tutorial” was Faux Leather with Masking Tape. It was a challenge at the VSN last week and I thought I better give the tutorial a make-over before that.

Masking tape was adhered to a 3 1/2″ x 4 3/4″ piece of white cardstock, sponged with Vintage Photo Distress ink and embossed with clear embossing powder. A 2″ x 4 11/16″ strip of October Afternoon Campfire paper was ahdered over it before the layers were stitched to a  3/16″ bigger piece of white cardstock. Linen thread was wrapped around the horizontal layer and was topped with an October Afternoon button. Two more OA buttons were stitched to the top left screen, along with a button from my Mom’s creation.

The sentiment is from Waltzingmouse Stamps set Back in the Saddle. It was stamped in Brilliance Coffee Bean ink on white cardstock. It was cut and embossed with a classic Circle Nestabilities die. The center was sponged with Antique Linen Distress ink. The rodeo cowboy image from the same set was stamped in the center of the circle with Antique Linen ink. The image was layered on a piece of Canyon Brown cardstock, cut and embossed with a Beaded Circle Nestabilities die.

The layers were adhered to the card base, a 4 1/4  x 11″ piece of Sno cone cardstock . A border was paper pierced around the image layers.

Here is a video for the visual learner:

Thanks so much for stopping by! Have a wonderful day.
Hugs and smiles

Okay….so I  am about 10 hours late posting, but I did it. Here is my sample for today’s sketch challenge at the Waltzingmouse Blog.

I started out by picking one of the gorgeous patterns of Cosmo Cricket’s Odds & Ends paper. The blue on top of the card was cut with a Grand Label 4 Nestabilities die and adhered to a 4 1/4″ x 5 1/4″ piece of the same paper (other side side). The bottom corners were rounded with the Corner Chomper and a border was sewn around the edges.

May Arts Gingham ribbon was tied around the blue layer before the layers were adhered to the card base, a 4 1/2″ x 11″ piece of Kraft cardstock folded in half. The bow was topped with a heart cut out of burlap and a button.

A sentiment from Waltzingmouse Rescue Remedies Additions was stamped in Walnut Stain Distress ink on a piece of Natural White cardstock, cut and embossed with a Parisian Accents die. The center was sponged with Antique Linen and the edges with just a hint of Frayed Burlap Distress Ink. A decorative swirl from Fanciful Phrases was stamped on top and bottom of the sentiment with Antique Linen.  Baby bling pearls and a pearl swirl from Want2Scrap finish off the card.

Thanks so much for stopping by! I hope you have time to play with the sketch! It’s a fun one. Have a wonderful Saturday!
Hugs and smiles

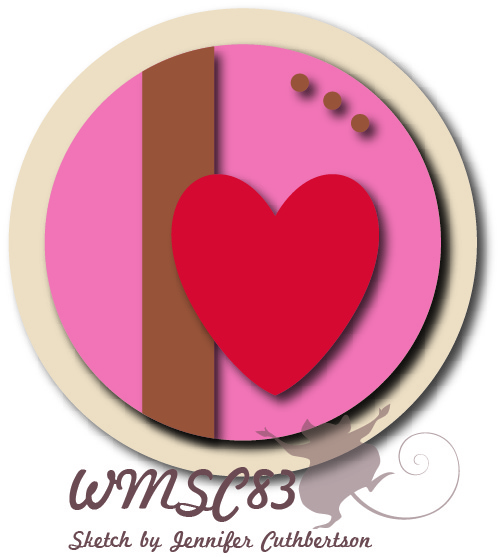
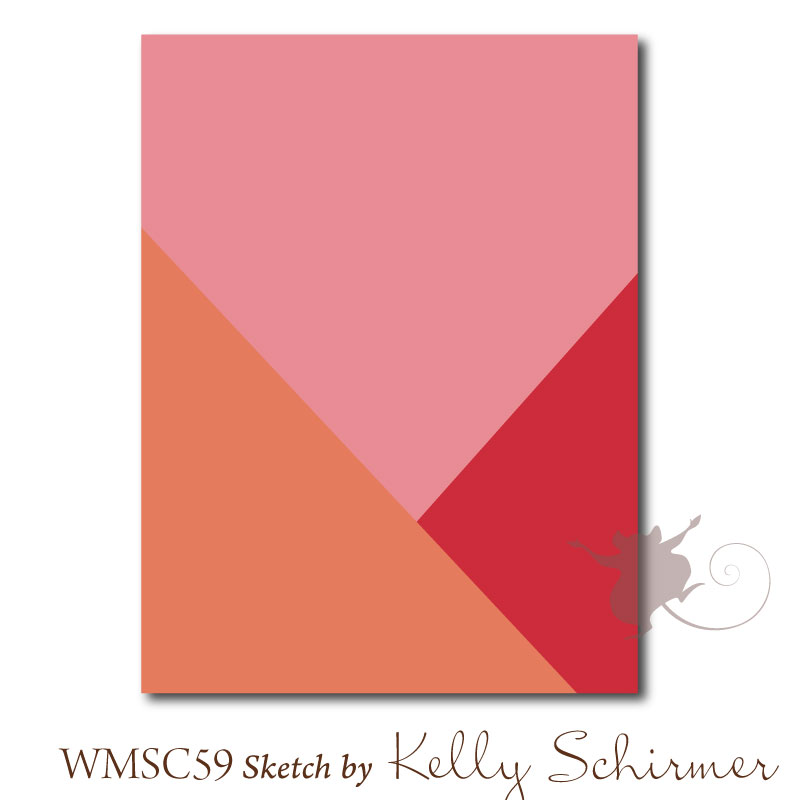
I am finally back in the swing of things…that includes getting back to my weekly challenges. I love participating in the Waltzingmouse sketch challenges. I like to combine the sketches with the Moxie Fab World Tuesday Trigger. Somehow they always work together.

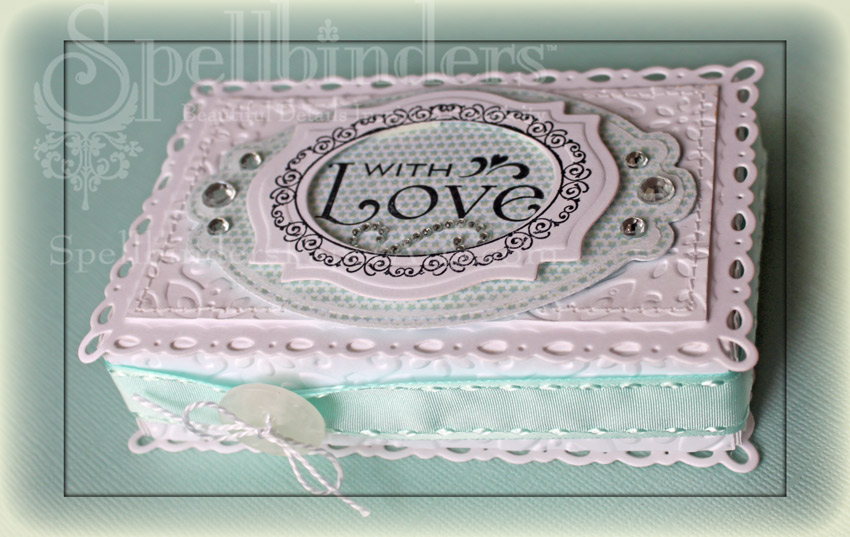
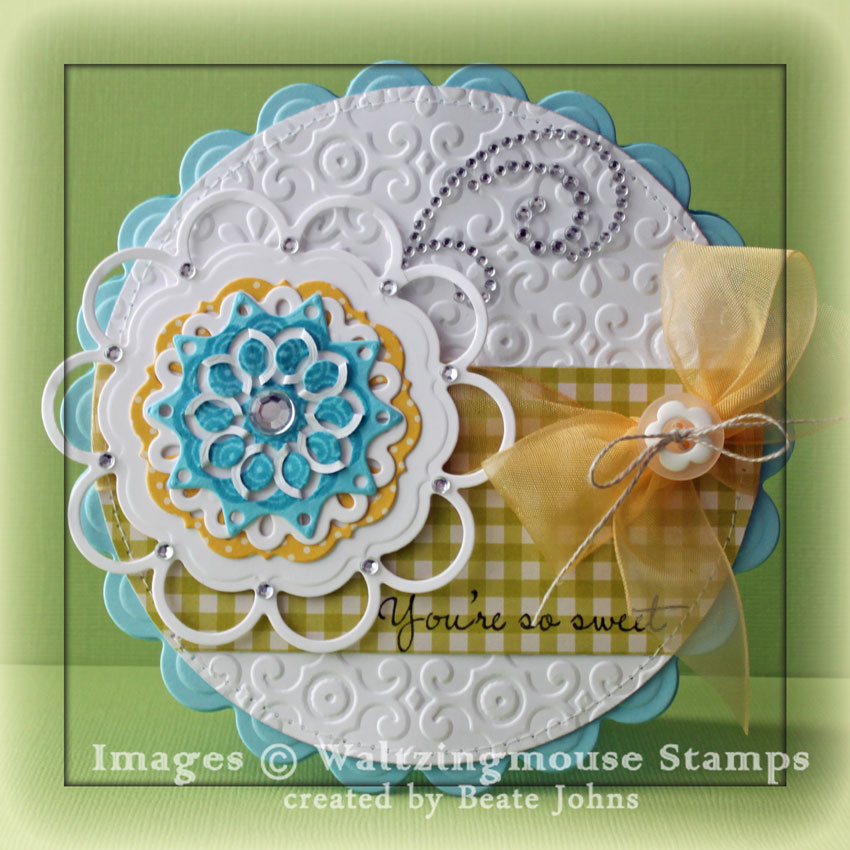
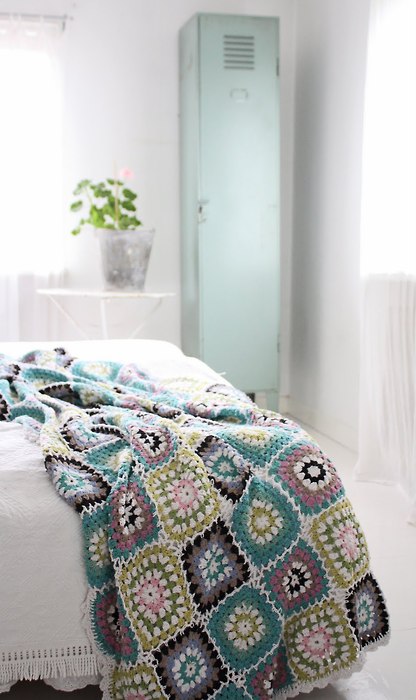
The crochet squares in the inspiration photo have little “knobs” that reminded me of the beaded part of Spellbinders Beaded dies. I loved all the white and light blue in the image and went with that. I didn’t have paper that went completely perfect with it, but I thought Melissa Frances 5th Avenue paper worked pretty well.

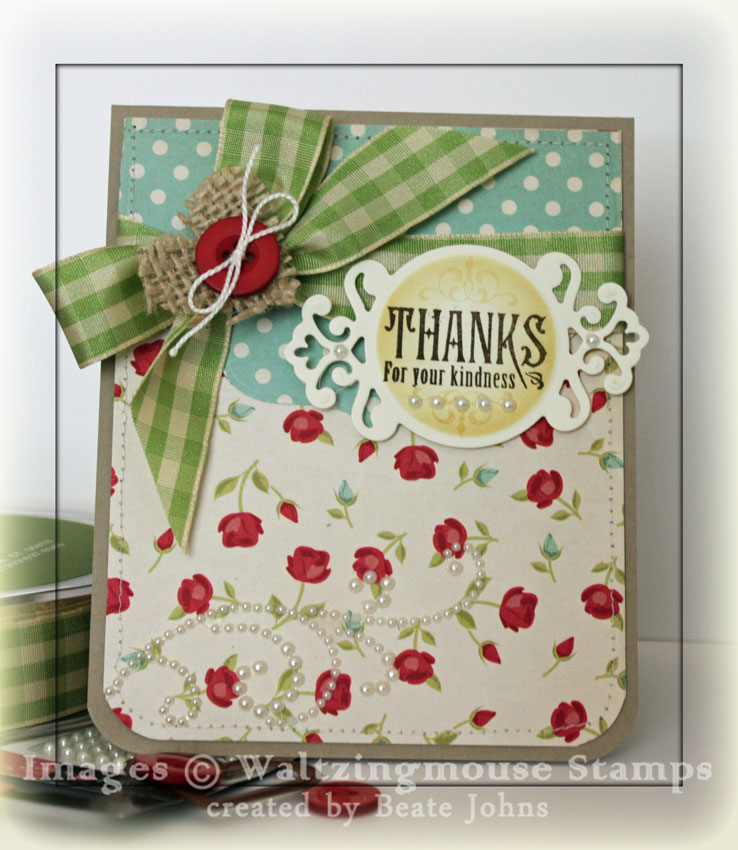
Two 3″ x 4″ pieces of polka dotted paper were cut diagonally to . The diagonal edge was stamped with a stamp from Waltzingmouse Oval – Classic Frames set in Jet black Archival ink. Neenah Solar White cardstock strips were cut and embossed with one of the Parisian Accent die and adhered under the diagonal part of the triangles. The layers were adhered to a 4″ x 5″ piece of patterned paper, also from the 5th Avenue paper pack.

The top right corner was rounded with the corner chomper. The layers were adhered to a 1/4″ bigger piece of black cardstock before the edges of the triangle pieces were paper pierced. Black Silk ribbon was tied around the layers before those were adhered to a card base, a 4 1/2″ x 11″ piece of Solar White cardstock. Again the top right corners of the black as well as the card base layer were rounded.

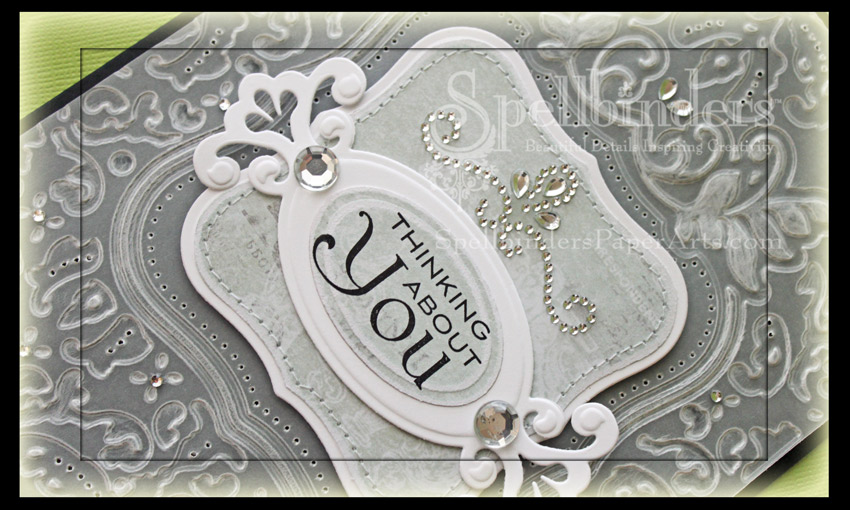
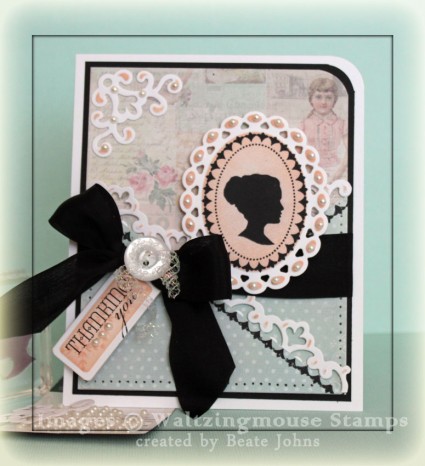
The sentiment is from Waltzingmouse Cameo to Go stamp set. White cardstock was cut and embossed with the largest of Spellbinders Tag Trio (retired, sorry), sponged with Tattered Rose Distress ink and stamped with the same ink with a stamp from Waltzingmouse Cameo Creations. The sentiment was stamped in the center with Jet Black Archival Ink. The tag was tied to the ribbon bow with Iridescent Curling ribbon from May Arts and topped with one of Tim Holtz Buttons.

The Cameo and frame stamps are both from the Cameo Maker set. They were stamped in Jet Black Archival ink, let dry and then cut and embossed with the second largest die from the Beaded Oval Nestabilities set. With the die still on the layer was sponged with Tattered Rose ink. The layer was adhered to the card base with dimensionals.

Another piece of white cardstock was cut and embossed with a die from the Parisian Accent pack. The corner swirl was sponged with Tattered Rose ink and adhered to the top left of the card base. Want2Scrap Baby Bling White Pearls on the tag, Cameo Oval and corner swirl finish off the card.

I hope you have time to play with us this weekend! Make sure to check out the rest of the team for more inspiration!

Have a wonderful weekend! We are going to watch Rise of the Planet of the Apes and  (hopefully) pick up my sewing machine from the store. I painfully missed it for this card . Paper  piercing is just NOT the same.

Hugs and smiles

© 2012 fresh & fun Suffusion theme by Sayontan Sinha