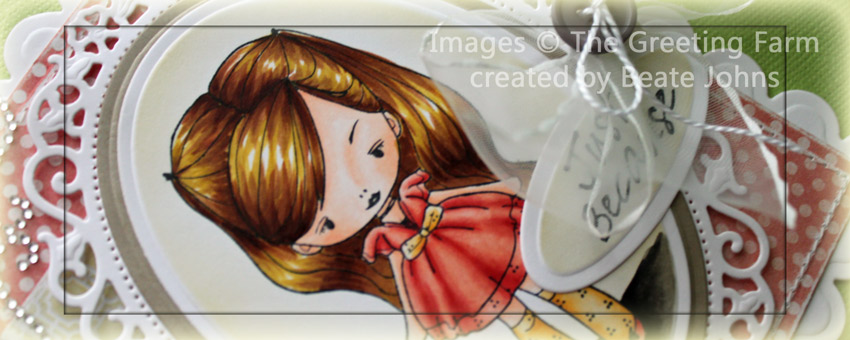
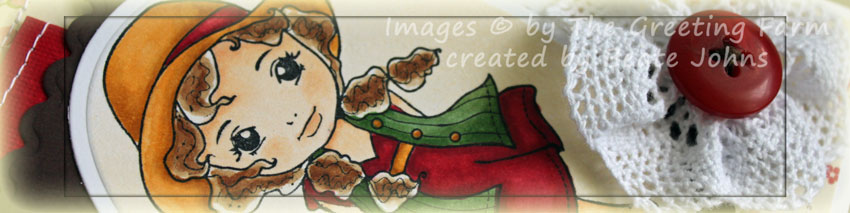
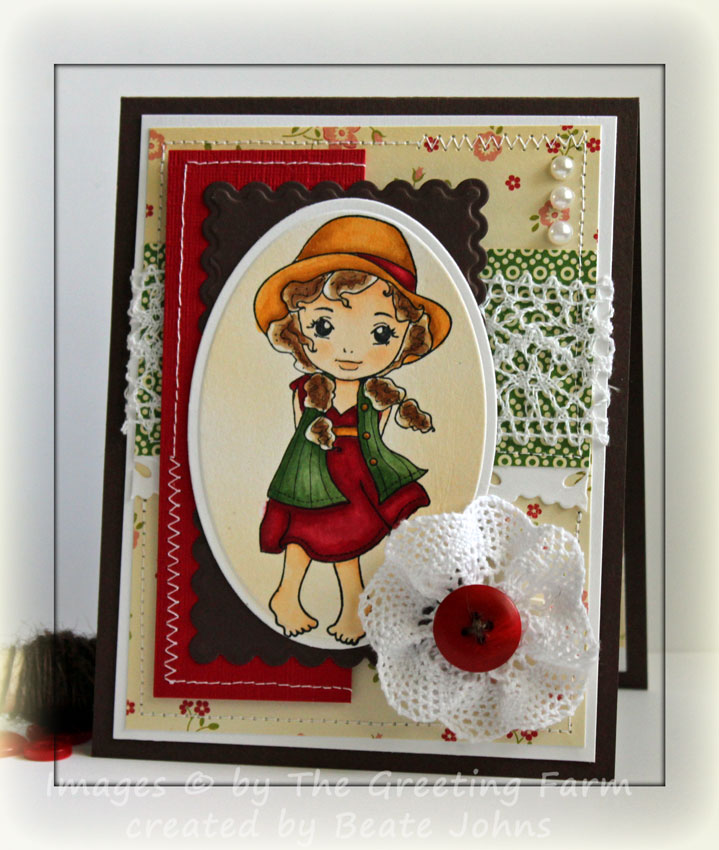
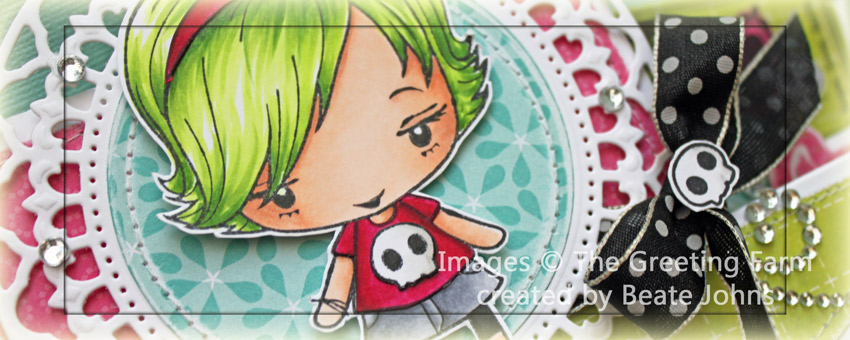
Today’s tutorial on Splitcoaststampers is for a Side Step card variation, the Circular Side Step card. For my sample I stamped the darling Ebony from The Greeting Farm in Tuxedo Black Memento Ink once on Neenah Solar White cardstock, once on pink paper from Echo Parks Summer Days collection. The shirt and head band were colored on the patterned paper, the rest on the white cardstock with Copic Markers (Hair: YG01, YG03, YG17   Skin: E000, E00, E01, E11   Shirt/Headband: RV25, RV29, RV69   Skirt: C3, C5, C7   Skull: W00, W1). The headband and shirt were cut out and adhered to the image stamped on cardstock, which was then cut out as well.

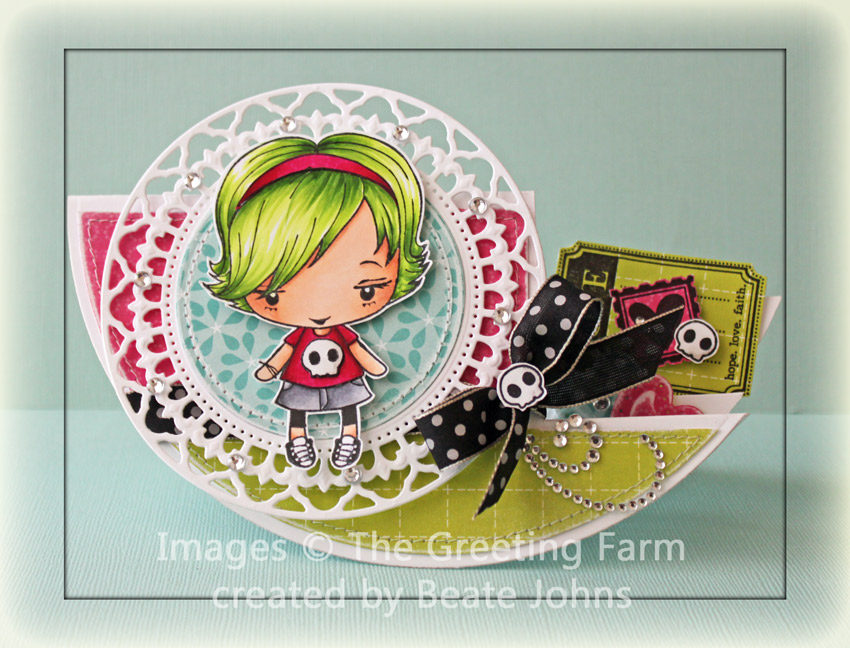
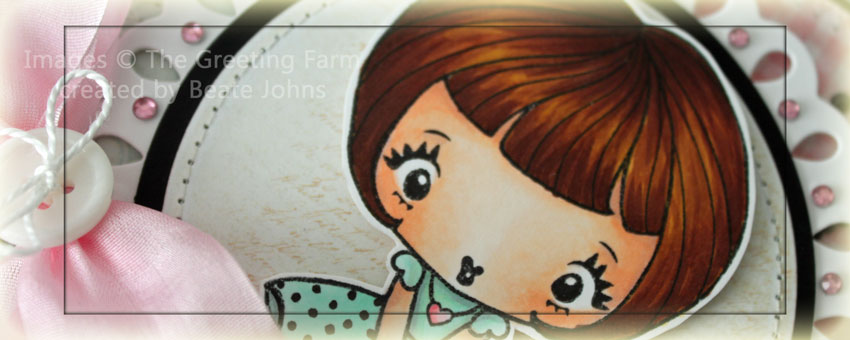
White cardstock was cut and embossed with the largest Splendid Circle die and blue patterned paper from Summer Days with the third largest  Standard Circle Nestabilities die. The patterned paper was sanded, then stitched to the Splendid Circle center. Ebony was adhered over the circles with dimensional adhesive.

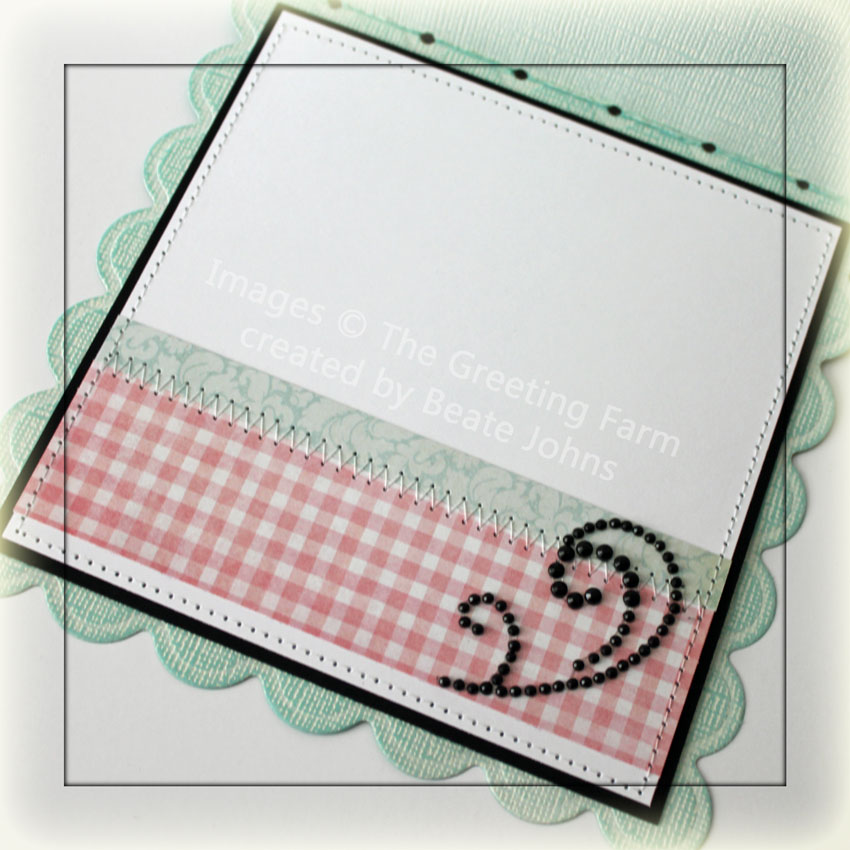
The card base was cut and embossed out of white cardstock with the second largest Grand Circle Nestabilities die. Patterned paper strips from the Summer Days paper pack were adhered together, cut and embossed with that same circle die. The edges were sanded and then the paper was cut on the embossed edge. For the cuts on the right hand side I placed the paper over the card base and used a stylus to trace the cut lines. Next I cut 1/8″ along that traced line. The edges were stitched before the paper was adhered to the card front. Ribbon was tied around the edge of the first step and tied into a bow. A skull from the shirt was stamped again on white cardstock, cut out and adhered over the bow. The image was adhered over the big part of the card base with dimesional adhesive and part of a Finesse Rhinestone Swirl was adhered under the bow.

The tag and postage image from Tea-rrific clear stamp image were stamped in black ink on Summer Days paper and cut out. They were adhered on top of each other with another skull image and taped the the back step of the card.

In the center two pieces of Summer Days paper were cut and embossed with the bigger heard from the new Folk Art die set. The edges were sanded. The hearts were adhered to the center step and topped with two of the bigger rhinestones from a Sleek Strips Silver Rhinestones pack.

Here is a video for the visual learner:

[youtube]https://www.youtube.com/watch?v=HlALbWF4MRc[/youtube]

Thanks so much for stopping by! Have a wonderful day!
Hugs and smiles

It was my turn to create a tutorial for Splitcoaststampers. I decided to create a tutorial on how to create shaped cards. I still get a lot of questions on how to do that. For my sample card I used the darling Blush Babette image from The Greeting Farm. It was stamped  in Tuxedo Black Memento Ink on Neenah Solar White cardstock. The image was cut and embossed with a Petite Oval Nestabilities die and colored with Copic Markers (Skin: E000, E00, E01 Hair: Y26, E33, E35, E37 Dress: R11, R12, R14 Socks: YR30, YR31 Ground: W3, W5, W7, W9).

The image was sponged with Antique Linen Distress Ink before it was adhered first to a piece of Kraft cardstock, cut and embossed with the next size bigger piece of Petite Oval Nestabilities die, then on white cardstock, cut and embossed with the largest  Floral Oval Nestabilities die.

Two pieces of My Mind’s Eye Follow Your Heart Be Happy paper were cut and embossed with a Grand Rectangle Nestabilities die. The edges were sanded, stitched and May Arts ribbon was tied around the horizontal strip. The paper was adhered to the card base, white cardstock, cut and embossed with a Grand Scallop Rectangle die. The ribbon was topped with a button, tied on with embroidery thread.

Three little flowers (Michaels) were adhered to the lower left corner of the image. The sentiment from Blush Babette was stamped in Tuxedo Black on a piece of white cardstock, cut and embossed with the smallest of the Petite Oval Nestabilities die. The sentiment was adhered underneath the bow.  Fancy That! Border Bling on the top right and part of a Silver Finesse Rhinestone Swirl on the lower left finish off the card.

Here is a video for the visual learner:

[youtube]https://www.youtube.com/watch?v=ywQbvpPkvF4[/youtube]

Thanks so much for stopping by! Have a wonderful day!
Hugs and smiles

A couple of month ago Joanne ran a Technique Challenge called Layered cards. It had a great response and we had a lot of requests for a tutorial for that card after that challenge. So today we are posting the Telescoping Card in the resource section.

For my sample I used stamps from The Greeting Farms Clearly Christmas Stamp set. The images were stamped on Neenah Solar White cardstock with Rich Cocoa Memento Ink and colored with Copic Markers (Sleigh: R24, R27, R29, R39, E97, E99, E37   Stars: Y15, Y17, E97). The images were cut with Classic Circle Nestabilities and first sponged with Antique Linen Distress ink
, then a bit with Vintage Photo Distress ink.

I left a large part of the Sleigh circle open to write a note in and stamped snowflake images from Clearly Christmas with Antique Linen over the open areas. The gifts from the sleigh were stamped twice on different paper from Echo Parks Season’s Greetings. The gifts were shaded with Copic Markers (YG21, YG25, YG17, B000, B02), cut out and adhered over the main image. Stardust and Yellow Stickles were added to the sleigh image.

The sleigh circle was first stitched to a slightly bigger Canyon Brown cardstock circle, then to a piece of cardstock, cut and embossed with a Beaded Circle Nestabilities die.

The tree image was first stitched to a Kraft cardstock circle, then on a piece of Cherry Cobble cardstock (Stampin’ Up!) cut and embossed with a Jumbo Circle Nestabilities die and lastly on an Echo Park Season’s Greeting Paper circle.

For the top layer the sentiment circle was first layer on Kraft cardstock circle, then on a patterned paper circle and lastly on a piece of Neenah Solar White cardstock cut and embossed with a smaller Beaded Circle Die. Stardust Stickles was added over the snowflake and Baby Bling Rhinestones were added on each bead but one, that holds the brad connecting it to the medium size circle layers.

Here is a video for the visual learner:

[youtube]https://www.youtube.com/watch?v=ik-t2AXlZSo[/youtube]

Thanks so much for stopping by! Have a wonderful day!
Hugs and smiles

Today’s tutorial is written by the wonderful Cindy Lawrence. She shows us how to tailor an envelope or as she puts it “Hip to be a Square”.

For my card that matches the tailored envelope I started by stamping the owl from The Greeting Farm’s Forest Friends in Tuxedo Black Memento Ink on Neenah Solar White cardstock. The image was colored with Copic Markers (R00, R01, R02, R05, E41, E42, E43, E44 G00, G02, G05, E50) and cut out. I chose the owl image so the card would work for Patty’s Hope you Can Cling To challenge.

A frame was cut and embossed with a Fancy Tag 3 and Classic Oval Nestabilities die out of Stampin’ Up!’s Soft Suede cardstock. The owl was adhered to the frame and a Baby Bling Rhinestone was adhered to each end.

The card base is a 4″ x 8″ piece of Solar White cardstock scored in half. The bottom corners were rounded.

A 3/4″ x 4″ piece of Cosmo Cricket Clementine paper was stitched slightly over a 2 1/2″ x 4″ piece of the same paper pack.  A 1 1/2″ wide strip of white cardstock was embossed with Cuttlebug’s Polka Dots embossing folder and adhered under the layers. Everything was taped to the card base.

A sentiment from the set was stamped on a piece of white cardstock that had been cut and embossed with the smallest of the Petite Oval Nestabilities die and airbrushed with Copic Marker R02. It was adhered to the lower right edge of the horizontal layers. Baby bling was lined up under the sentiment and  part of a Finesse swirl was adhered slightly over it. The frame with owl was adhered to the card base with dimensionals.  Stardust Stickles over the pink feathers of the owl finishes off the card.

Thanks so much for looking! Have a wonderful day.
Hugs and smiles

Today’s tutorial is for a fun fold I called Side Spring card. Instructions were posted back in 2005 in a forum post on SCS and a recent post from Dawn reminded me of it.

For my card I started out with a 5 1/2″ x 8 1/2″ piece of Kraft cardstock. The patterned paper is from the Echo Park Victoria Garden Paper pack. The strip on the left hand side measures 1 1/4″ x 4 1/2″. A sentiment from The Greeting Farm’s new Clear Set Build-a-Onesie Boy was stamped with Tuxedo Black Memento Ink directly on to the paper strip. Part of a Finesse Silver Rhinestone Swirl was adhered over to sentiment.

For the main image I stamped the onesie image on a piece of Neenah Solar White cardstock, colored it with Copic Markers (RV0000, RV10, N0, N1) and cut it out. A piece of white cardstock was cut and embossed with one of the Eyelet Square Nestabilities dies. A 2 3/8″ square of Victoria Garden paper was stitched to it after the corners were rounded. The image was adhered to the square with dimensionals. Three Silver Baby Bling Rhinestones on the left corner finish off the card front.

For the inside a 5/8″ x 4 5/16″ long patterned paper strip was adhered to a 2 9/16″ x 4 5/16″ piece of white cardstock. A small image from the same set was stamped to the right hand side of the strip with Tuxedo Black Memento ink.

Here is a video for the visual learner:

[youtube]https://www.youtube.com/watch?v=7nMekwqD3XE[/youtube]

Have a wonderful day! Thanks so much for stopping by!
Hugs and smiles

Isn’t this image darling? I used Stella from The Greeting Farm for Jimmi’s Hope You Can Cling To Challenge. She gave us this sketch to  use.

I new I wanted to use Stella and new dies and build my card around that.  I started by stamping the image in Tuxedo Black Memento Ink on Neenah Solar White cardstock. It was colored with Copic Markers ( Skin: E0000, E00, E01, BV00   Hair: YR24, E39, E29   Dress: G0000, G00, C2   Heart and shoes: RV00, RV10, RV13).

A piece of MME Lost & Found Two Blush Paper was cut and embossed on Classic Circle Nestabilities dies. It was stitched to black cardstock piece that had been cut and embossed with the next size circle die. A piece of white cardstock was cut and embossed with the largest of the Tear Drop Circle Dies. Pink Baby Bling Rhinestones were added between each tear drop. Stella was cut out and adhered to the center of the circles with dimensionals.

A 4 3/4″ square of Blush paper was stitched to a 3/16″ bigger piece of black cardstock. A 4 1/8″ mint green square of Blush cardstock was cut in half diagonally. It was stitched to a slightly bigger white cardstock triangle. A black cardstock was cut and embossed with the Lace Doily Accents Border die. The strip was adhered under the triangle layers before those were adhered to the lower left of the card front.

Before the image was adhered to the layers with dimensionals, pink silk ribbon was run through one of the tear drops and tied around the layers. The bow was topped with a button that was tied on with embroidery floss. A black Rhinestone Flourish was cut apart and adhered to the lower left and upper right of the layers.

The card base was cut and embossed with one of the Grand Scallop Square Nestabilities die out of Whitewash Core’dination cardstock. A sentiment from Sweet ‘n Sassy Stamps Simple Pleasures was stamped in Tuxedo Black Memento Ink on a white cardstock piece, cut and embossed with Classic Circle dies. It was layered on a slightly bigger black cardstock circle, adhered to the lower right of the main image. Pink Baby Bling was added underneath.

The inside of the card was kept pretty simple. Extra pieces of Blush paper were adhered to a 4 1/2″ square of white cardstock before they were stitched to a 1/4″ bigger piece of black cardstock. Another part of the black Rhinestone swirl was adhered to the lower right of the layers.

Thanks so much for stopping by! Have a wonderful day!
Hugs and smiles

tgflaundrythinkingwide.jpg

Check out this cute stamp! I had a blast coloring her the other night. I thought it would make a great “Thinking of you” card. The image is from The Greeting Farm. It was stamped with Black Soot Distress Ink on Neenah Solar White cardstock and colored with Copic Markers ( E00, E03 skin, R43, R35, R46 hairband, slippers, blanket, E99, E37, E18 hair, B0000, B32, B34, blanket, YR31, Y35, W3 laundry, YG01, YG03, YG25, C3 shirt and laundry, N1, N3, N5 ground, B0000 background) and cut out with Petite Oval Nestabilities.

tgflaundrythinkingofyoubeat.jpg

The card base is a 4 1/4″ x 11″ piece of Early Espresso Cardstock (Stampin’ Up!) folded in half. A 2″ x 3 3/4″ x 5″ strip of Seaside October Afternoon paper was adhered to a 3 3/4″ x 5″ piece of the same collection . A 3 3/4″ long strip of Espresso cardstock had been cut and embossed with Eyelet Borderabilities and layered underneath the horizontal strip. The layers were stitched to a 3 15/16″ x 5 3/16″ layer of white cardstock.

I didn’t have the right color ribbon for my card, so I colored light blue ribbon with B34 Copic Marker. After it dried, it was tied around the horizontal layers and topped with a white Basic Grey Button.  The sentiment is from the Ippity set Just Wanted to Say. It was stamped on Neenah Solar White cardstock with Black Soot Distress ink and then cut and embossed with Petite Oval Nestabilities. The inner part of the oval was colored with B0000 Copic Marker. To finish off the card I added three red buttons on the lower right.

The inside of the card is decorated really simple. Another 3 Espresso strip was cut and embossed with Eyelet Borderabilities and adhered under a 1 3/8″ x 3 15/16″ strip of Seaside October Afternoon paper. Both were adhered stitched to a 3 15/16″ x 5 3/16″ White cardstock piece that was then taped to the inside of the card.

Thanks so much for stopping by! Remember, if you are in or close to Columbus, come and see me tomorrow at DickBlick. I am a bit nervous about demoing Copic markers there for the first time EVER! I would love to see some friendly faces.

Hugs and smiles

tgffirstizzysc286wide.jpg

I love this little girl stamp. I told Rebecca moves out and starts college, she might become my favorite daughter. LOL It is my only Greeting Farm stamp so far, but I will get some more with my next order from Inspiration Emporium. I was excited they added the TGF stamps to their inventory. I had this stamp since January, but just recently used her for the first title (hence the time).

I stamped Izzy in Tuxedo Black Memento Ink on Neenah Solar White cardstock and colored it with Copic Markers (it’s been so long, I forgot the colors…sorry!). It was cut out with Petite Oval Nestabilities and airbrushed with a light colored Copic Marker.

tgffirstizzysc286beate.jpg

The card base is a 4 1/4″ x 11″ piece of Chocolate Chip cardstock folded in half. A 3 3/4″ long strip of Neenah Solar White cardstock was cut with the Eyelet Borderabilities and adhered underneath a 1 3/4″ piece of Thrift Store paper. May Arts White Crochet Trim was adhered above the green strips before the layers were stitched to a 3 15/16″ x 5 3/16″ piece of White cardstock.

A 1 5/8″ x 4 1/2″ piece of textured Real Red Cardstock was stitched on three sides and layered over the card front. Over that is a scalloped rectangle cut out of Chocolate Chip cardstock with Long Rectangle Nestabilities. The image was adhered over that.

White Crochet Trim (JoAnn’s) was stitched together and one side was pulled together and turned into a flower. I topped with a red Basic Grey button. Three Champagne Kaisercraft Pearls were adhered to the top right to finish off the card front.

tgffirstizzysc286inside.jpg

For the inside of the card I layered a 1 3/4″ x 3 15/16″ piece of Thrift Store paper over an Old Olive strip cut with Eyelet Borderabilities and then on a 3 15/16″ x 5 3/16″ piece of Whisper White cardstock. The layers were stitched together before they were adhered to the inside of the card.

Thanks for stopping by. Have a great day! Hugs and smiles

© 2012 fresh & fun Suffusion theme by Sayontan Sinha