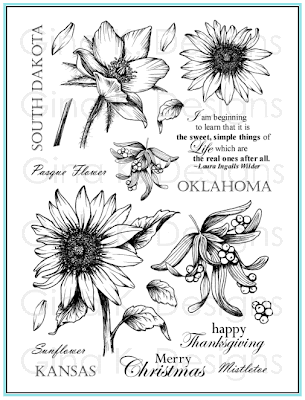
Today I am joining in as a special guest of Melanie Muenchinger in the Gina K Designs October Inspiration blog hop, showcasing the newest stamp set from Gina K Designs, Stately Flowers 5. Stately Flowers 5 is the fifth in a series of hand drawn official state flowers, and is available for purchase in both premium quality clear photopolymer and red rubber.
This set includes flowers for Oklahoma, South Dakota, and Kansas, but the mistletoe and sunflower have been specifically grouped together with all your upcoming fall and winter holiday cardmaking needs in mind, and the sentiments to match!


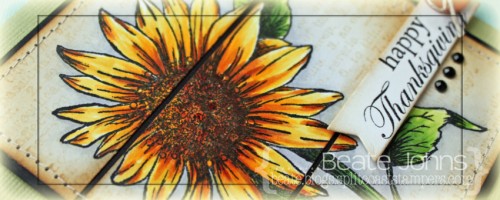
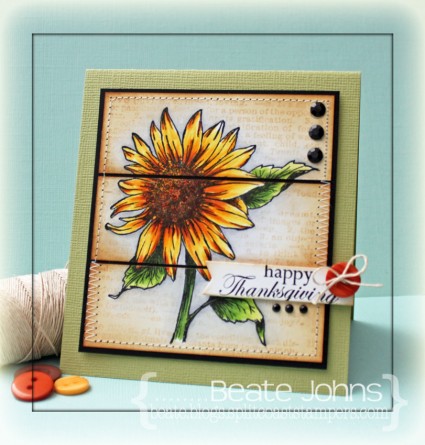
I am excited to be hopping with Melanie today. For my first card I started with by stamping the sunflower in Tuxedo Black Memento Ink on 3 1/2″ x 3 3/4″ piece of white cardstock. It was colored with Copic Markers (Y13, Y15, Y17, E97, E99, YG21, YG25, YG63, YG67, C00, C1, BV20). The image was masked, then a background was stamped over it in Antique Linen Distress ink. The image was cut in three 1 1/4″ wide strips and the edges were sponged with Antique Linen and Vintage Photo Distress ink.

I ran the strips through my Xyron and adhered them to a slightly bigger piece of black cardstock. The edges of the layers were stitched. The layers were adhered to the card base with foam adhesive squares, a 4 1/4″ x 9 1/2″ piece of Lizzard Bazzill cardstock folded in half.

A sentiment from the set was stamped on a piece of white cardstock, cut with one of the Sentiment Strip Die-namic dies. The edges were lightly sponged with Vintage Photo Distress Ink. A button was tied to the upper right hand side of the sentiment strip. The strip was then adhered to the lower right side of the card. Black Rhinestones finish off the card.

I created a second card with that set with last week’s Color Challenge on SCS.

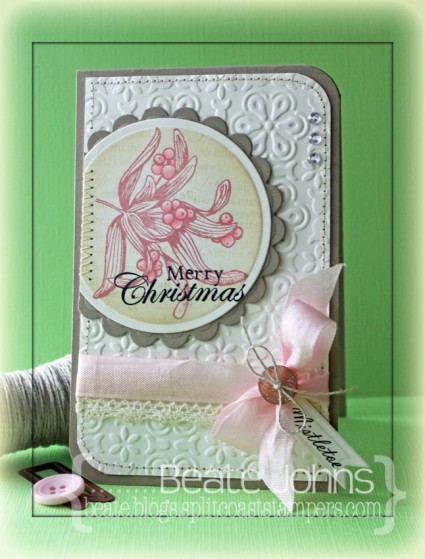
I started by stamping the Mistletoe image in Pink Petunia VersaMagic ink on Neenah Natural White cardstock. It was cut and embossed with a Standard Circle Nestabilities die. The die was kept over the cardstock, the image was masked and the bigger sentiment was stamped over the circle with Antique Linen Distress ink. The edges were sponged with the same color. The image was adhered to a piece of Kraft cardstock, cut and embossed with a Scallop Circle Nestabilities die. Part of the right side was cut off and the edge was stitched.

A 3 1/4″ x 5 1/4″ piece of Natural White cardstock was embossed with the Elegance M-Bossabilities folder. The bottom left and top right corner  were rounded before the edges of the layer were stitched and the circle layer was adhered to the top left. A sentiment was stamped on to the circle layer with Versafine ink.

May Arts Crochet Ribbon was adhered to the lower part of the layer. Pink Seam binding was tied above it.  A Spellbinders Pennant die was used to cut and emboss more Natural White cardstock. The word Mistletoe was stamped on it before it was tied to the bow with Linen thread and a button. Everything was adhered to the card base, a 3 1/2″ x 11″ piece of Kraft cardstock, folded in half. Three rhinestones on the top right edge finish off the card.

Be sure to visit the illustrator of Stately Flowers 5,
today for more samples with her set,
as well as inspiration from the lovely talented 
who is also guest designing this month!
For a full link list of participating designers,

Thanks so much for stopping by! Have a wonderful day!
Hugs and smiles

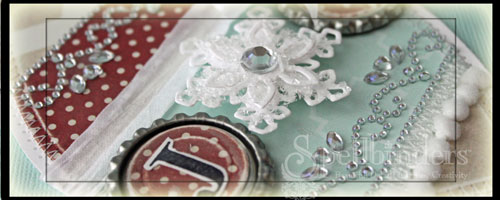
It’s time to post on the Spellbinders blog today. This week’s theme is to show you “Things you can do with the Grand Calibur”. For me it’s mostly cutting paper and cardstock, but today I pulled out bottle caps that had been in my stash for quite a while and used them as part of a Christmas Ornament.

I hope you  have time to check out the entire ornament and the step by step instructions on the Spellbinders Blog. Thanks so much for stopping by! Have a wonderful day.
Hugs and smiles

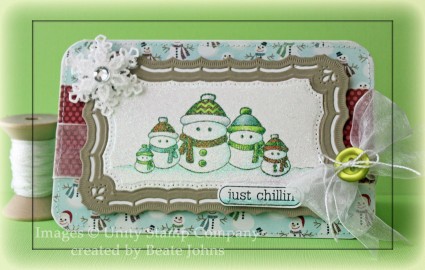
It’s Friday that means it’s Friends with Flair time at the Unity Blog.  I thought I share a card I made during the last VSN. This one was for Lori’s Glitter Window Challenge. I stamped the cute snow man family image from the Stamp of the week club Just Chillin’ stamp set  in  Tuxedo Black Memento Ink on Neenah Solar White cardstock. It was colored with Copic Markers (YG01, YG03, YG17, R05, R27, R39, BG70, Bg72, BG75, C00, C1, C3, BG0000, BG10) and cut and embossed with one of the Resplendent Rectangles Nestabilities die.

After cutting a frame out of Kraft cardstock with the same and the next size up Resplendent Rectangle dies, I realized that the regular glitter window technique wouldn’t work so well for these shapes. So instead I ran the image layer face down through my Xyron machine and rubbed loose glitter all over.  The frame and the image layer were adhered on another piece of Solar White cardstock and cut down to the size of the Kraft cardstock layer.

The card base was created out of a 9 1/2″ x 6″ piece of white cardstock, folded in half with the edges rounded.  the card front was covered with My Mind’s Eye Winter Wonderland paper patterned paper. White organdy Ribbon was tied around the layers and the bow was topped with a button tied on with embroidery thread.

The image was adhered over the card front with foam adhesive squares. The sentiment was stamped in Tuxedo Black ink on white cardstock, cut out and adhered to the lower right of the image. The lower part of the sentiment panel was colored with Copic Marker BG10 and topped with Stardust Stickles.

White cardstock was cut and embossed with two small Create a Flake 4 Spellbinders dies. They were adhered together with more foam adhesive square. A rhinestone was added to the center of the flake. It was then covered with Glossy Accents and Vintage Glass Glitter Shards were sprinkled over it. The snowflake was adhered to the top left of the image to finish off the card.

Thanks so much for stopping by! Have a wonderful weekend!
Hugs and smiles

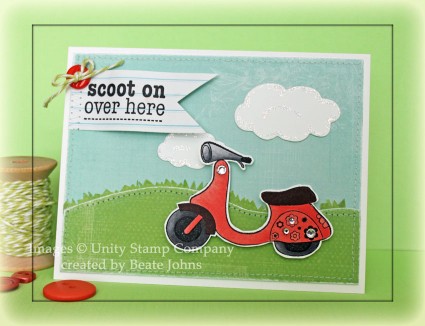
The second challenge during VSN last week was to create something with an image with wheels. I searched through my stamps and found a scooter from one of Unity’s Kit of the Month.

I stamped it twice in Jet Black Archival Ink, once on Neenah Solar White cardstock, once on Pink Paislee Spring Jubilee Patterned Paper. They were both cut out and the patterned paper was adhered over the white cardstock image. The image was colored with Copic Markers and a few rhinestones from a Sleek Strips Silver Rhinestones .

A green piece of patterned paper was cut in a slope and adhered to a blue paper piece from Spring Jubilee paper. The edges were stitched before the layers were adhered to the card base, white cardstock, folded in half.  White cardstock was cut with MFT Cloud Die-namics die.  Two clouds were added to the scene and highlighted with Stardust Stickles.

A piece from the notebook paper I still had from the last challenge was cut into banner shape by hand . A sentiment from the same KOM from Unity was stamped on the banner and it was adhered to the upper left hand side. A button was threaded with Honeydew Twine and adhered on the top edge of the banner.

VSN only gives you 45 minutes per card. That’s not a lot of time for me, so this card as well as the ones the next few days will be CAS cards. Very much out of my comfort zone.

Thanks so much for stopping by!
Hugs and smiles

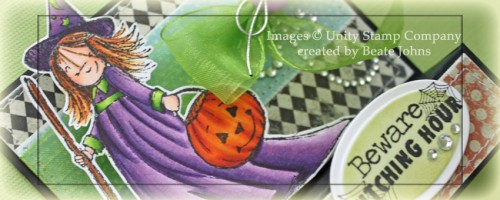
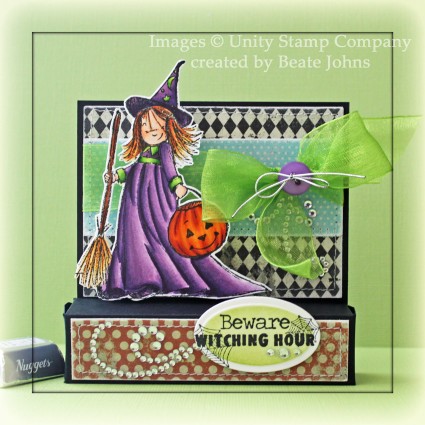
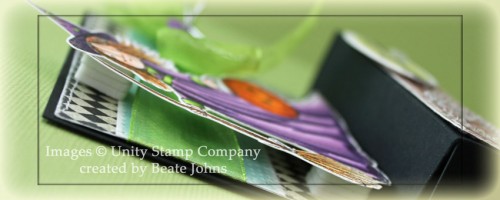
Today’s tutorial was written by the wonderful Patti Gilliam. She is sharing on how to create a darling little box, with a flat back, that allows you display your artwork. I popped my Witch up on four dimensional adhesives, so the box part acts like a stage for her to stand on.

To begin with I stamped Phyllis Harris darling A Tiny Witch in Tuxedo Black Memento Ink on Neenah Solar White cardstock and  colored her with  Copic Markers (Skin: E000, E00, E01, BV10    Hair: Y23, E97, E99   Dress: V12, V15, V17, V09, YG01, YG03, YG17   Broom: E33, E39, YR21, YR23, YR27   Pumpkin: YR12, YR15, YR04, YR27). The witch was cut out and set aside.

The box base was created out of black cardstock. Two pieces of Echo Park Mischievous Patterned Paper were cut to a 3 13/16″ length. The blue strip measures 1 3/8″, the black piece 2 7/8″. Both pieces were sanded before the blue strip was adhered over the bigger black piece and the edges were stitched. May Arts Ribbon was tied around the blue strip and the bow was topped with a button, tied on with a silver cord.

The layered paper was adhered to the back of the box with Scor-Tape and the Witch was adhered over the ribbon. I stacked 4 foam adhesive squares on top of each other so my witch would stand off a bit.

A 7/8″ x 3 13/16″ strip of Mischievous paper was sanded and stitched before it was adhered to the front. A sentiment from the set was stamped in black ink on white cardstock that had been cut and embossed with one of the insert dies from Fancy Framed Tag One set. The center was sponged with Pear Tart Memento Ink before the oval was adhered to the right hand side of the box part. Three rhinestones from a Sleek Strips Silver Rhinestones pack were adhered underneath the sentiment and part of a Finesse Rhinestone Swirl was added next to the sentiment and under the bow.

Here is  video for the visual learner:


I hope you try it out!! This is a fun and super easy box. Thanks so much for stopping by!
Hugs and smiles

P.S.: I hope you are subscribed to Splitcoaststampers Weekly Inkling. Simon Says Stamp has a discount code in there for subscribers. 25% off!!!

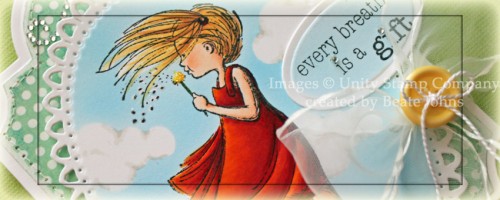
My post today on Spellbinders Paper Arts Blog is all about how I create the clouds behind my images.  I hope you have time to check it out.

For my image I used the darling new Unity Image (created by Phyllis Harris) called Every Breath. It was stamped in Tuxedo Black Memento Ink on Neenah Solar White cardstock. The image was colored with  Copic Markers (Dress; YR04, R24, R29, R39 – same colors I used for last weeks poppies   Skin: E000, E00, E01, E11    Hair: Y21, Y23, E33    Sand: E31, E33).

I hope you have time to check it out. Thanks so much for stopping by! Have a wonderful day!
Hugs and smiles
Hi there! Sorry I am so quiet lately. Another book series has me in it’s grip. I have to stop reading once this one is over and get back in my stamping groove.

It’s my turn to share on the Spellbinders blog today. This week is all about techniques and I used the new Hexagon dies to create a quilted background. I hope you have time to check out the entire photo tutorial.

Thanks so much for looking! Have a wonderful day!
Hugs and smiles
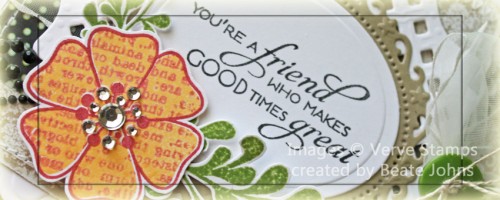
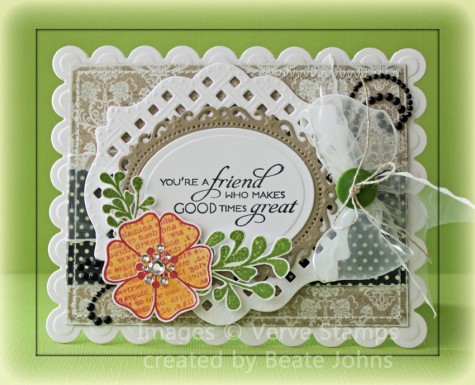
I created this card as a sample for the video tutorial for the Kissing technique. I started by inking the solid stamp from Verve’s Great Friend set in Cantaloupe Memento ink and Unity’s Giving it All Meaning Background stamp in Rhubarb Stalk Memento Ink. Next the solid stamp was pressed to the background stamp and then stamped on Neenah Solar White cardstock. Stems were stamped in Bamboo Leaves Memento Ink. Both the flowers and branches were cut out.

A sentiment from Great Friend was stamped in Tuxedo Black Memento Ink on a piece of Solar White cardstock, that had been cut and embossed with a Classic Oval Nestabilities die. The oval was first layered on Kraft cardstock, cut and embossed with the second largest Floral Oval Nestabilities die, then on a piece of white cardstock that had been cut and embossed with a Lattice Motif die.

Two pieces of My Mind’s Eye Lost & Found Two Rosy Patterned paper were cut and embossed with a Grand Rectangle Nestabilities die. The edges were sanded and stitched before May Arts ribbon was tied around the layers. The sentiment panel and flower were adhered over it with dimensional adhesive. The layers were taped to the card base, white cardstock cut and embossed with a Grand Scallop Rectangle die. Parts of a black Finesse Rhinestone and Sleek Strips Silver Rhinestones and Silver Baby Bling Rhinestones finish off the card.

Here is a video for visual learner:

[youtube]https://www.youtube.com/watch?v=2Zzw9YIdFiI[/youtube]

Thanks so much for stopping by! Have a wonderful day.
Hugs and smiles

Here is another project I created with the Faber-Castell products.

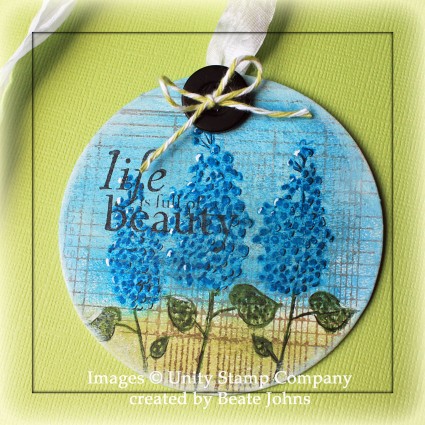
I started by painting a chipboard circle with gesso to prime it. Next the grit background from Moments in Bloom was inked with Nougat Big Brush Pen and stamped over the chipboard. Once it dried, blue metallic and pistachio gelato were rubbed over the circle and smoothed out with a finger tip.

Flowers from Moments in Bloom were inked with the Cobalt Turquoise and Chrome Green Big Brush Pen and stamped over the grid. Once that dried, the same pens were used to add more detail. Small black lines were added with the Fine Artist Pen and highlights with more gesso (I used my paper piercer to apply it). The sentiment, also from the same set, was inked up with the Black PITT Big Brush Pen and stamped over the flowers.  More gesso was used to soften the edges of the circle.

Ribbon was run through the hole in the chipboard, topped with a button and tied on with Honeydew Twine. Thanks so much for stopping by! Have a wonderful day! Hugs and smiles
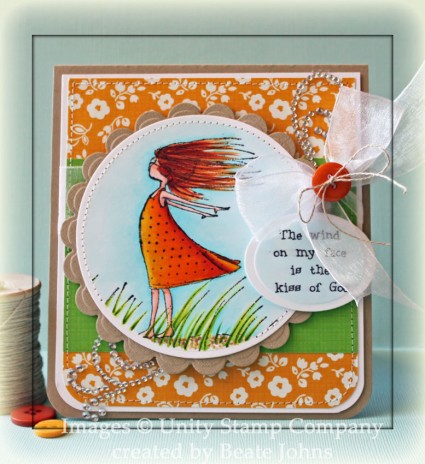
As soon as I saw the new Unity stamps by Phyllis Harris I knew I wanted them. They are so cute. Unfortunately those images are rather big. You have to use them partially or make a bigger then regular card to make them fit on to your card.

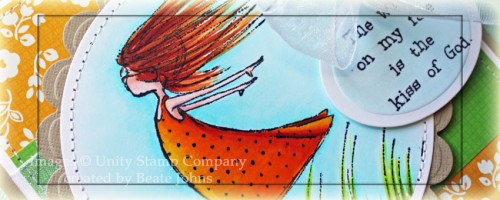
I stamped the image from Your Wings Exist in Tuxedo Black Memento Ink on Neenah Solar White cardstock , cut and embossed it with the smallest of the Grand Circle Nestabilities die and colored it with Copic Markers (Dress: Y15, Y17, YR15, YR09   Skin: R000, E01   Hair: E97, E99, E09   Grass: YG21, YG23, YG17   Ground: E31, E33, W3, W5, YG23    Sky: B0000, B000, B00). The circle was stitched to a piece of Kraft cardstock, cut and embossed with a Grand Scalloped Circle Nestabilities die.

A 3″ x 4 1/2″ piece of Echo Park Country Drive paper was adhered to a 4 1/2″ x 5″ piece of October Afternoon Seaside paper. The bottom two  corners were rounded and the paper was stitched to a 1/4″ bigger piece of Solar White cardstock. White Organdy ribbon was tied around the horizontal strip. A button was tied over the bow with Linen Thread and the image was adhered over the ribbon with dimensionals.

A sentiment from the same set was stamped in Tuxedo Black ink on a Solar White cardstock, cut and embossed with a Classic Oval Nestabilities die and colored with Copic Marker B0000. The sentiment was adhered under the bow. Parts of a Finesse Rhinestone Swirl were adhered to the lower left and upper right corner of the layers and everything was adhered to the card base, a 4  3/4″ x 11″ piece of Kraft cardstock, folded in half.

Thanks so much for stopping by! Have a wonderful weekend!
Hugs and smiles

© 2012 fresh & fun Suffusion theme by Sayontan Sinha