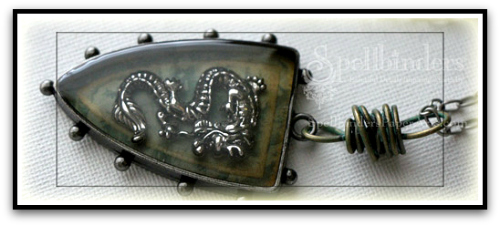
I have another post on the Spellbinders blog today. Rebecca and I created a necklace for her. It was fun and easy. I hope you have time to check out the post and let me know what you think.

Thanks so much for stopping by! Have a wonderful day!
Hugs and smiles

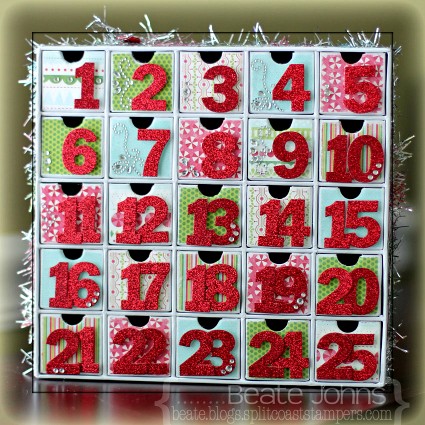
Do you have an Advent tradition? When the kids were little, I had an advent calendar that I filled with small treats every day. As they grew older we started filling the advent calendar with a little hint where the treat is hidden. My kids still love this little scavenger hunt, even though my hints are too easy for them to find (I am not good at this…but it’s the tradition that counts, right?). Well…over the moves the first advent calendar got lost and the one I made for a Splitcoast tutorial years ago, lost a few tins. It was time for a new one.

I really wanted the KaiserCraft Advent calendar to alter, but I couldn’t find it online (last minute as I am), so I ordered this Karen Foster Countdown Calendar. It comes with rubon numbers, but I didn’t use those.

I started by covering each drawer front with Carta Bella Merry & Bright paper. The drawers are tiny.I cut the papers into 1 7/16″ squares, sanded the edges and used a 1/2″ circle punch for the finger holes. I adhered the paper with Scor-Tape. I mention it because I first adhered it with Glue & Seal, thinking liquid adhesive would work better, only to have the paper just come off again.

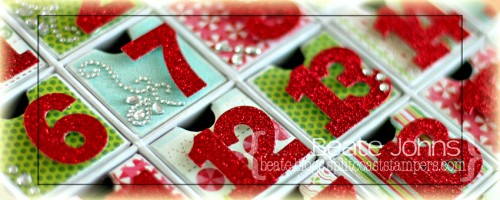
The numbers were cut out of Red Glimmer Paper (Stampin’ Up!) with By the Numbers Die-namics dies. Those were popped up with adhesive foam squares on each drawer. Rhinestones were added to add just a bit more sparkle. I bought the tinsel 2 years ago in my LSS in Ohio. It comes on a pretty wooden spool. Unfortunately I don’t know the maker of it. The sticker came off.

Thanks so much for stopping by! Have a wonderful day!
Hugs and smiles


Today’s tutorial on Splitcoaststampers is written by the wonderful Susan Roberts. She shows us how to create a flower by cutting and melting ribbon pieces. It’s perfect for winter, when my hands seem to be cold all the time. 🙂

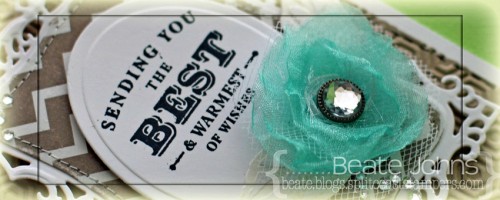
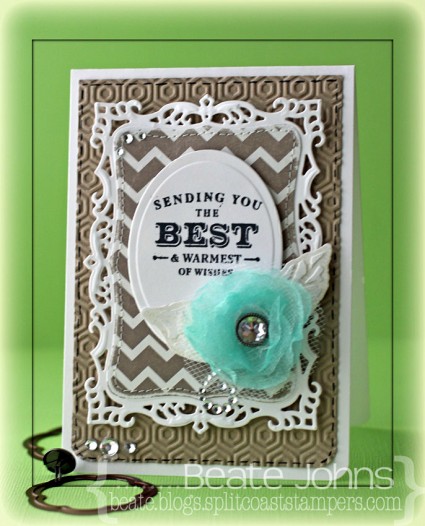
For my sample I used ribbon and tulle bought at Hobby Lobby. Both were cut with the two smallest Blossom Nestabilities® dies, heated and stuck together with a decorative brad.

A sentiment from Simon Says Stamp Apothecary Labels was stamped in Tuxedo Black Memento Ink on Neenah Solar White cardstock that had been cut and embossed with the second largest of the Classic Oval SM Nestabilities® dies.

Two pieces of Fancy Pants Country Boutique Paper were cut and embossed with the single leaf dies from the Bitty Blossoms Shapeabilities® die set. The leaves were sanded before they were adhered under the ribbon flower, who was in turn adhered to the lower half of the sentiment oval.

Another piece as well as more Neenah Solar White cardstock was cut and embossed with the second largest Decorative Label Eight Nestabilities® die. The patterned paper was sanded and cut on the embossed edge before it was stitched to the white die cut. The sentiment panel was adhered to the center of the fancy panel with foam adhesive squares.

The bottom corners of a 3 1/2″ x 5 1/4″ piece of Kraft cardstock were rounded and a faux stitched border was added with a black gel pen. The layer was then embossed with the So Trendy M-Bossabilities ® folder. It was adhered to the card base, a 3 3/4″ x 11″ piece of Solar White cardstock, folded in half with the bottom corners rounded. Rhinestones finish off the card.

Here is a video for the visual learner:

[youtube]https://www.youtube.com/watch?v=ajo7y88Rf3Q[/youtube]

Thanks so much for stopping by! Have a wonderful day!
Hugs and smiles

Are you on Pinterest? Do you pin things and tell yourself you will create something like that at one point later on? A blogging friend of mine, Kendra Wietstock, is posting a Pinterest inspired project from the first of December until the 21st on her blog. I thought I join her today.

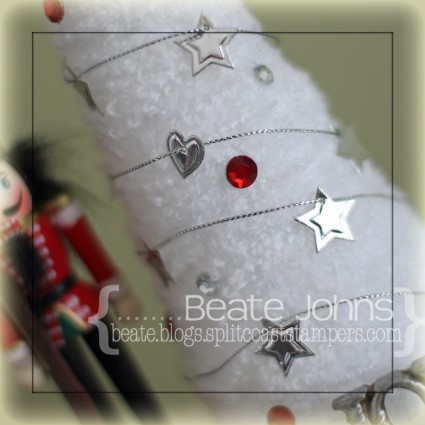
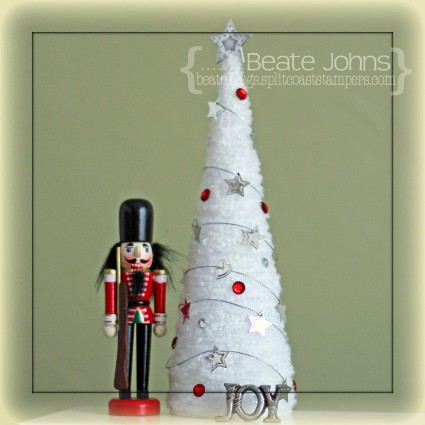
Ever since I saw a Christmas tree made out of string on Pinterest, I knew I wanted to try it. But when buying string for it, I changed my mind a bit and bought fuzzy white yarn instead. I had seen a Christmas tree decor at Target that I liked and thought I could re-create it with the string tree technique. Plus white and silver would work great with the current Moxie Fab World challenge.

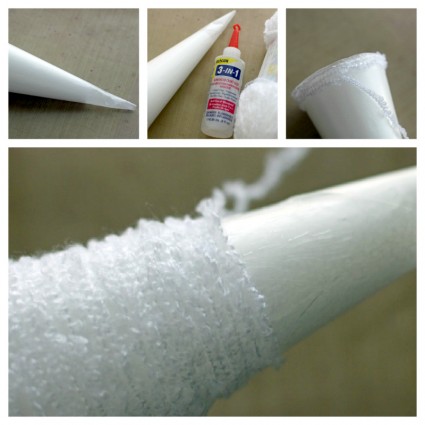
Well…it worked kind of. I wrapped a styrofoam cone with wax paper. Then started glueing the string to the cone.

Once I wrapped the entire cone and the glue was dry, I took the styrofoam cone out and tried to separate the my string tree from the was paper. Note to self: This doesn’t work the with fuzzy yarn! LOL So I stuck the styrofoam cone back in and started on the decoration.

I cut and embossed hearts and stars out of shiny silver paper (bought at a scrapbook store back in Ohio) with the small dies from Sweet Folk Art. They were strung up on silver cord and adhered to the tree. The tree was topped with a star created out of the same paper cut with the bigger star die. Red and Silver rhinestones finish off the tree.

I am happy with how it turned out, even if it’s a bit different then the pinterest idea I started out with.  Thanks so much for stopping by! Have a wonderful Sunday!
Hugs and smiles


This week on the Spellbinders blog it was all about Gift ideas. I had some 7Gypsies 6″ x 6″ Shadowboxes for quite a while and thought it would be great to alter one. I hope you have time to check out my post with step by step instructions HERE. I used a picture of my kids from 10 years ago. They were so cute when they were little.  Altering items is definitely out of my comfort zone. Let me know what you think.

Thanks so much for stopping by! Have a wonderful day!
Hugs and smiles

Today’s tutorial on Splitcoaststampers is written by Judy Maddigan and super fun. My little Santa cracked me up wobbling back and forth. I hope you try it out.
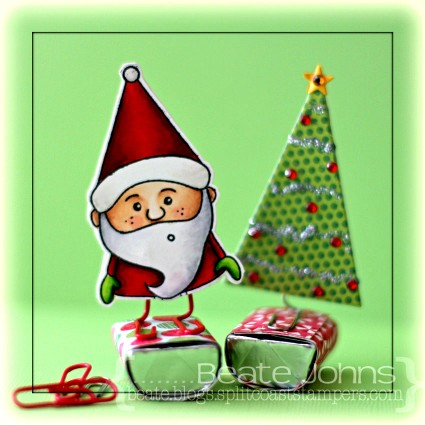
I made two samples. One really simple one with pieces cut out of Carta Bella Merry & Bright paper cut with Simon Says Stamp exclusive Christmas Trees dies. The tree was decorated with Silver Stickles and Red Baby Bling Rhinestones.  A tiny star was cut out of Desert Marigold Fourz Bazzill paper with another die from the Holiday Trees set.

The santa (from Simon Says Stamp Gnome Sweet Gnome ) was a bit more tricky, since the stamp comes only with his face, not the back.  I stamped it twice in Tuxedo Black Memento Ink on Neenah Solar White cardstockand cut them out. I flipped one over and traced the lines from the front to the back, leaving off his face and his thumbs.
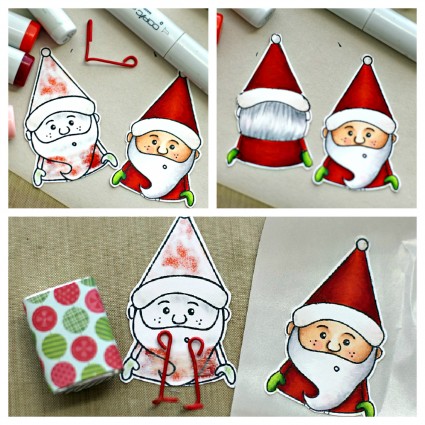
The images were then colored with Copic Markers (Red: YR09, R24, R29, R39    Mittens: YG01, YG03, YG17    Beard/Hair: N0, N1, N3   Hat trim: W00, W1   Skin: E50, E21, E34, R20). Red paperclips that had been unbend and reshaped were adhered to the inside of the back with Scor-Tape. The front was run through my Xyron and adhered over the back, hiding the paper clip ends. The Santa as well as the tree were adhered to a covered Hershey’s Nugget with Glossy Accents.

Here is a video what these little rockers do: They crack me up, especially that little Santa Gnome.

[youtube]https://www.youtube.com/watch?v=-dLGB22EbVY[/youtube]

And here is a video on how to create the rocker for the visual learner:

[youtube]https://www.youtube.com/watch?v=7CR8qa_D_c8[/youtube]

Thanks so much for stopping by! Have a wonderful day!
Hugs and smiles

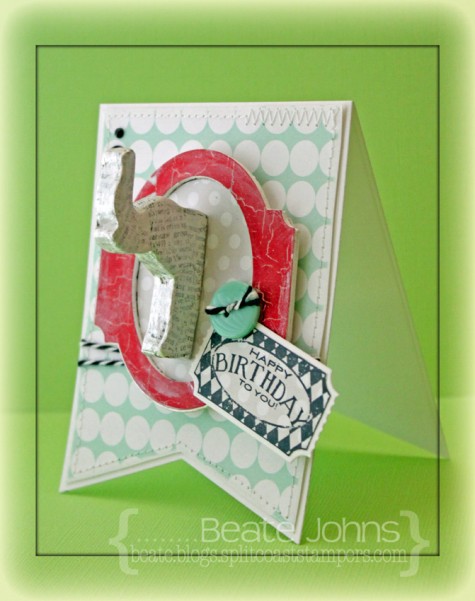
Today’s tutorial on Splitcoaststampers was created by the wonderful Shelly Hickox. She shows us how to use die cuts and turn them into 3d images. What a great idea! I had to try it out right away. Her sample is vintage prefection, so I tried to go a different route and see if it would work for a different style as well.

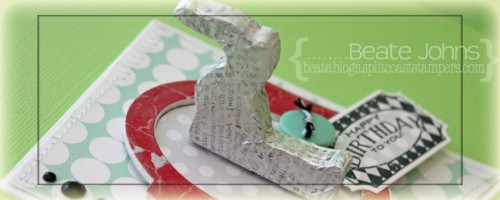
I used the elephant die from My Favorite Things Circus Spectacular and cut it 7 times out of light-weight coasters. The elephants were cut down adhered to each other with Beacon 3 in 1 Craft Glue. Once it was dry it small pieces of dictionary page pieces were adhered to the elephant with Glue N’ Seal. Once it was dry, Pearl Acrylic paint was added over it.

A frame was cut twice out of light weight coasters with the Vintage Cameo die. A piece of Fancy Pants The Good Life patterned paper was cut with the same die, adhered to the frame. The edges were painted with Acrylic Pearl Paint. Another piece of The Good life paper was adhered behind the frame and the elephant was adhered in the middle.

The card base was cut out of Neenah Solar White cardstock with the largest Stax Jumbo Fishtail Banners. More The Good Life paper was cut with the same die, sanded and cut down. The edges were stitched, Beetle Black doodlebug twine was tied around the layer before it was adhered to the card base.

A sentiment from Circus Spectacular was stamped on more The Good Life paper with Tuxedo Black Memento Ink. It was cut out and layered on Solar White cardstock, cut and embossed with the Ticket Strip Die-namics die. It was adhered on the left side of the frame and topped with a button to finish off the card.

Thanks so much for stopping by! I hope you have time to check out Shelly’s amazing tutorial and sample.
Hugs and smiles

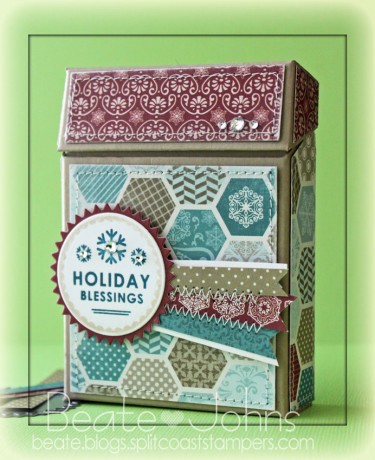
Today’s Holiday Blitz tutorial is written by Susan Culotti. She shows us how to create a flip top box (like it’s used for cigarettes or crayons). I shot the video and created this box as a sample.

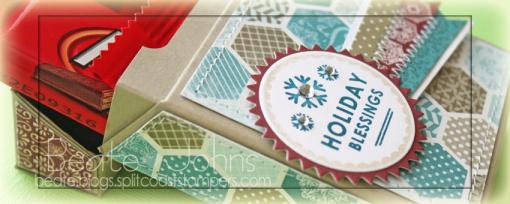
My box base is a piece of Kraft cardstock. The patterned paper used to decorate the box is from Carta Bella’s Winter Fun patterned paper. Holiday Apothecary Labels stamps and dies were used to dress up the box.  Rhinestones from Sleek Strips Silver Rhinestones finish off the box.

Here is a video for the visual learner:
[youtube]https://www.youtube.com/watch?v=5M9mODY5weM[/youtube]

Thanks so much for stopping by! Have a wonderful day!
Hugs and smiles

Today starts our 6th annual Holiday Blitz week on Splitcoaststampers! Every day for the next week a new tutorial will be published with cute Holiday ideas. Check here to find the project galleries (with links to the tutorials) from the previous Holiday Blitz weeks.

The first tutorial was created by the wonderful Deb Felts. Check out here Tiny Triangle Box tutorial.

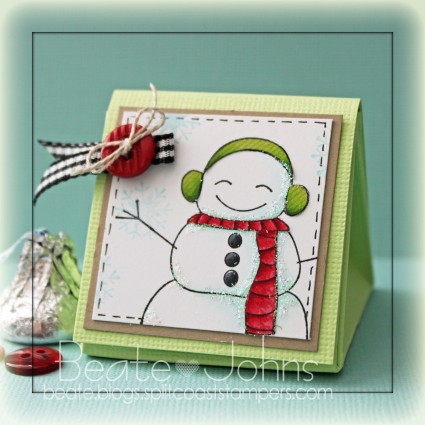
My box base was created out of Limeade Canvas Bazzill cardstock. An image from Taylored Expressions The Cool Crowd was stamped in Tuxedo Black Memento Ink on a 2 11/16″ square of Neenah Solar White cardstock. The image was stamped again on patterned paper from Carta Bella’s Merry & Bright Paper pack. Pieces were cut out and adhered to the image on the white cardstock square. The image was colored with Copic Markers (R32, R35, R39, YG01, YG03, YG17, C5, C7, C9, BG10, BG11) and a border was doodled with a Copic Multiliner. A few snowflake from The Cool Crowd were stamped on the layer with Sea Breeze VersaMagic ink.

The layer was first adhered to a 1 3/4″ square of Kraft cardstock before it was adhered to the box base. Some glitter was added to the snowman and gingham ribbon was tied to a button with Linen Thread and adhered to the upper left side of the image.

Thanks so much for stopping by! Have a wonderful day!
Hugs and smiles
Today’s tutorial on Splitcoast is written by the wonderful Stacy Morgan. She is showing us how to create little treat holder that look like Hershey’s Kisses. I shot the video and create a Halloween treat holder…What else but a Halloween project can I showcase today, right?

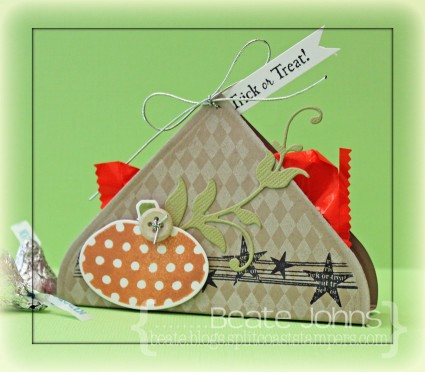
I started by cutting two hearts out of Kraft cardstock with the largest of the Classic Heart Nestabilities dies. They were first stamped with the smallest Distressed Diamonds background in Cloud White VersaMagic Ink. Once that dried, I stamped the star banner from Primitive Pumpkins over it in Jet Black Archival ink.

A pumpkin was cut out of Neenah Solar White cardstock with one of the Primitive Pumpkin Die-namic dies, and one of the pumpkins was stamped over it in Tea Leaves and Pumpkin Spice VersaMagic Ink. Lizard Bazzill Textured Cardstock was cut with the Flourish Die-namics die. The flourish and the pumpkin were adhered to the treat holder front and a button was tied to the pumpkin with silver cord.

A sentiment of the Primitive Pumpkins set was stamped in Jet Black Archival Ink on a white strip of cardstock and tied on to the Hershey’s Kiss with more silver cord.


Here is a video for the visual learner:

[youtube]https://www.youtube.com/watch?v=gpXJFFNNEfo[/youtube]

Thanks so much for stopping by! Have a wonderful Halloween!
Hugs and smiles

© 2012 fresh & fun Suffusion theme by Sayontan Sinha