Hello and welcome to Day one of Whimsy Stamps November Rubber & Die Release Showcase!

First of all I want to wish all my American readers a Happy Thanksgiving. I hope you have a wonderful day with your family. Let me just tell you how thankful I am for all my readers. It still boggles my mind that so  many of you subscribe to my blog. I am extremely thankful for all of you and LOVE it when you let me know what you think about my creations.

On Wednesday (21 November) Whimsy Stamps released this month’s new rubber designs, Shapeology dies, Whimsy Designer Paper packs, Shape EZ templates and *new* Whimsy Prints pre-coloured toppers. From then until 27 November the Whimsy Stamps DT and Special Guests are showcasing these fabulous new goodies with a daily mini blog hop and I am part of today’s hop!

Each mini blog hop has a new release prize hidden somewhere along the way and you have 24hrs to enter each prize draw.

To be entered into today’s mini blog hop prize draw, be sure to leave a comment on ALL of the DT’s posts listed below by 12.00PM EST tomorrow. All winners will be announced on the Whimsy blog on 28 November.

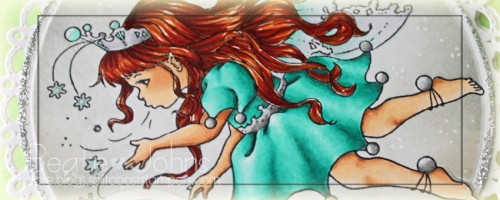
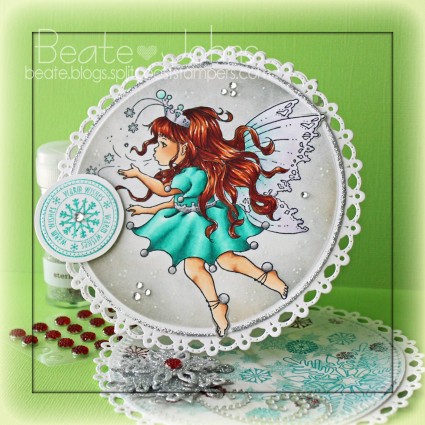
For my card today I used Crissy’s darling new Snow Fairy Princess. It was stamped inTuxedo Black Memento Ink on Neenah Solar White cardstock that had been cut and embossed with the smallest Spellbinders™ Grand Circles Nestabilities®. The image was colored with Copic Markers (Dress: BG11, BG13, BG15, BG18, N0, N1, N3     Wings: BG10, BG11, BV0000, BV000     Skin: E97, E99, E09, E18    Skin: E50, E21, E34), masked and sponged first with London Fog, then a bit with Toffee Crunch Memento inks.

The edges of the circle were inked with VersaMark ink, sprinkled with Sticky Embossing Powder, heated and Martha Stewart Sterling Glitter was added over it. Little dots were added with a white gel pen.  Subtle sparkle was added with a clear spica pen, more sparkle was added to the wings with Frost Smooch Glitz.

A sentiment from the new Snowflake Mini Letter Seals was stamped in Turquoise Gem VersaMagic Ink on white cardstock and embossed with iridescent ice embossing powder and cut and embossed with a Standard Circle die. It was adhered to the image layer with foam adhesive squares.

The card base was created as a Twisted Easel card, cut and embossed out of Neenah Solar White cardstock with the smallest of the Grand Decorative Circle Nestabilities dies. A piece of Whimsy Winter Blues Patterned Paper was cut with the smallest Grand Circle Nestabilities die,  the edges were sanded and adhered to the inside of the card.

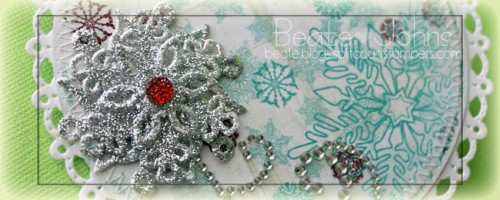
Solar White cardstock was cut and embossed with the three smallest Create-a-Flake Four Shapeabilities® dies. The snowflake pieces were covered with the Emboss It Dabber. Sticky embossing powder was added, heated and the snowflakes were covered with Sterling Glitter.  They were stacked together with foam adhesive squares and topped with a Queen & Co Twinkle Goosebumps.  The sparkly snowflake was adhered to the bottom of the inside of the card. Part of a Finesse Rhinestone Swirl was adhered to the snowflake. Rhinestones from a Sleek Strip Silver Rhinestone were added to the card front to finish off the card.

To take a peek at today’s fabulous new release creations, please click on the links below…

Ann Vento
Deb Routledge – Special Guest
Debbie Eastman
Michele Roos – Special Guest
Sylvia Blum

Remember that the entire new release is available to buy right now from the Whimsy Stamps store along with all your Whimsy favorites.

Thank you so much for stopping by! Have a wonderful Thanksgiving day!
Hugs and smiles

If you would like to join Whimsy Stamps as their Guest Designer for the January 2013 release, please CLICK HERE for all the details. Entries close at 12.00pm on 28 November.

Hello and welcome to Day 3 of our October Rubber & Die Release Showcase!

On Wednesday (24 October) Whimsy Stamps released this month’s new rubber designs, Shapeology dies, Whimsy Designer Paper packs and Shape EZ templates. From then until 30 October the Whimsy Stamps DT and Special Guests are showcasing these fabulous new goodies with a daily mini blog hop!

Each mini blog hop has a new release prize hidden somewhere along the way and you have 24hrs to enter each prize draw.

To be entered into today’s mini blog hop prize draw, be sure to leave a comment on ALL of the DT’s posts listed below by 12.00PM EST tomorrow. All winners will be announced on the Whimsy blog on 31 October.

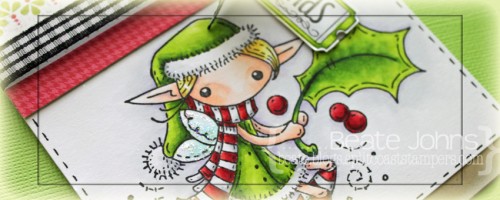
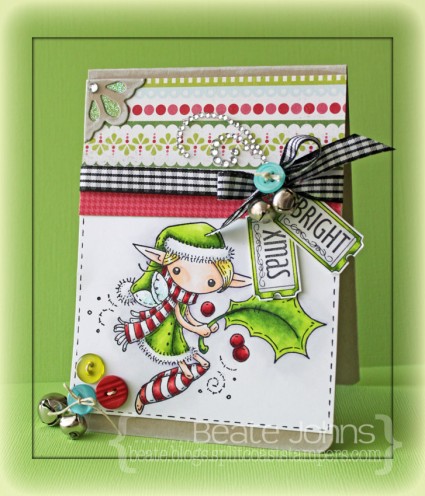
For my card today I used this super cute Meljen’s Designs Holly Christmas Fairy. She was stamped in Tuxedo Black Memento Ink on Neenah Solar White cardstock . It was colored with  Copic Markers (Reds: R32, R35, R37, R39 Greens: YG01, YG03, YG17 Skin: E0000, E00, E01 Hair: Y11, Y13, E31 Wings: BG000, BG10 Background: C00, C1, BV00). The wings were covered with Stardust Stickles and a faux stitched border added with a Copic Multiliner.

The card base is a 4 1/4″ x 11″ piece of Kraft cardstock folded in half. The edges were inked with Moonlight Brilliance ink and the bottom corners of the card were rounded. Three buttons were stitched to the bottom right corner of the image layer before it was adhered to the lower half of the card.

Two pieces of Carta Bella’s Merry & Bright patterned paper were adhered above each other . Black Gingham ribbon was tied around them before they were adhered to the card base. The ribbon bow was topped with a button and two little bells were tied underneath.

Two tickets from the new Holiday Mini Tickets were stamped in Tuxedo Black ink on white cardstock, colored with Copic Markers and cut out. The sentiments were adhered underneath the bow. Kraft cardstock was cut with a Corner die. The edges were sponged with Moonlight white ink and green Carta Bella paper was adhered underneath. Glitter was adhered over the openings. A rhinestones from Sleek Strips Silver Rhinestones was adhered on the top corner of the corner die. Part of a Finesse Rhinestone swirl above the bow finish off the card.

To take a peek at today’s fabulous new release creations, please click on the links below…

Remember that the entire new release is available to buy right now from the Whimsy Stamps store along with all your Whimsy favorites.

Thanks so much for stopping by! Have a wonderful day!
Hugs and smiles

Welcome to the Whimsy Stamps September 2012 rubber stamp and die RELEASE (Holiday Collection Part 1)!

Today, Whimsy Stamps is releasing 22 wonderful new rubber stamps & stamp sets, 5 fabulous new Shapeology dies, 2 gorgeous new Shape EZ templates and 2 stunning *BRAND NEW* 6×6 paper packs. These new goodies are available to buy right now from the Whimsy Stamps store along with all your Whimsy favorites.

From today until 25 September the Whimsy DT and Special Guests will be showcasing these new products with a daily mini blog hop. Each mini blog hop has a new release prize hidden somewhere along the way and you have 24hrs to enter each prize draw by leaving a comment on every blog listed for that day.

At the end of release week (Wednesday 26 September) we will post a Release Round-Up on the Whimsy blog. This will include a selection of DT work from the new release week together with a complete list of winners from the daily mini blog hops.

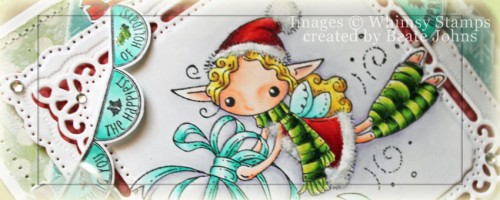
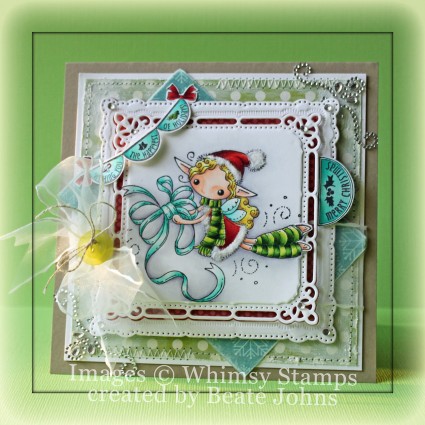
For my sample today, I had to use the darling Gift Bow Christmas Fairy from Meljen’s Design. I LOVE her fairies. I stamped the image in  Tuxedo Black Memento Ink once on Neenah Solar White cardstock and was colored with  Copic Marker (hat/jacket: R22, R24, R29, R39   Scarf: light green YG21, YG25, YG17, dark green YG23, YG17, G28   Skin: E000, E00, E01, E02, BV00    Hair: Y11, Y13, E31  Bow: BG10, BG11, BG13    Background: C00, C1, BV00).

The image was cut and embossed with the out of the box technique and the second largest Marvelous Square Nestabilities die. A piece My Mind’s Eye Winter Wonderland paper was cut and embossed with the largest of the Marvelous Square dies. A piece of Solar White cardstock was cut and embossed with the largest and second largest of the Marvelous Squares dies to create a frame. That frame was adhered over the red layer with liquid adhesive. The image layer was adhered in the center with foam adhesive squares.

A 4 9/16″ square of Winter Wonderland paper was sanded, and stitched to a slightly bigger piece of white cardstock. I added snowtex to the edges of the square to soften the green. The edges of another paper strip were sanded and adhered to the squares before the image layers were adhered with more dimensional foam adhesive. May Arts sheer ribbon was tied around the layers and topped with a button. Everything was adhered to the card base, Kraft cardstock measuring 5 1/4″ x 10 1/2″ folded in half.

The sentiment banner from Raindrop Echo Designs new Holiday Circle Pennants and another sentiment from the same set were stamped in Tuxedo Black Memento Ink on Solar White cardstock and colored with Copic Markers. The banner and Circle pennant were cut out and adhered to the card. Rhinestones from a Sleek Strips Silver Rhinestones pack were adhered to the edges of the Marvelous Squares and parts of Fancy That! Border Bling were added tot he top right and lower left corner. Sugar Sparkly Fluff was added to the rim of the jacket and hat.

To be entered into today’s mini blog hop prize draw, be sure to leave a comment on ALL of the DT posts listed below by 12:00PM EST tomorrow:

For a full reveal of this month’s fabulous release, please visit the Whimsy blog.

Thanks so much for stopping by! Have a wonderful day! Hugs and smiles

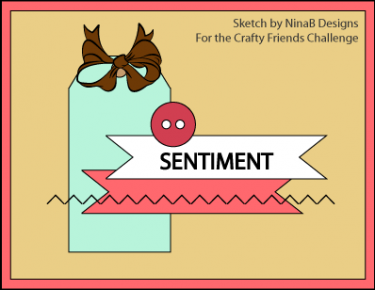
We are back from our summer break.  Our first challenge after the break is a sketch. Nina is the hostess. It was a hard sketch for me and I just took it as a guide. I definitely didn’t follow it 100%

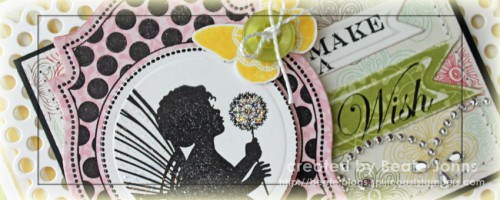
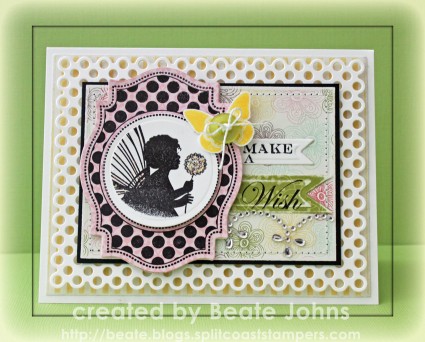
I started out by stamping an image from The Craft’s Meow’s Lovely Label 18 in Jet Black Archival Ink on a piece of Echo Park Springtime paper. It was cut and embossed with the 2nd largest Label 18 Nestabilities Nestabilities die. A piece of Neenah Solar White cardstock was cut and embossed with the 3rd smallest of the Standard Circle (lg) Nestabilities dies. It was first stamped with the center of the same Lovely Label 18 die. Next the die was placed back on the cardstock circle and part of the image from Butterfly Kisses was stamped in the center.

Another piece of EP Springtime paper was cut and embossed with the third largest of Card Creator Matte B die. The edges were sanded before it was stitched to a slightly bigger piece of black cardstock. Both layers were adhered to piece of white cardstock, cut and embossed with the largest Card Creator Polka Dot die.

A piece of Springtime paper and a piece of white cardstock were cut and embossed with two  Nested Lacey Pennant dies. The patterned paper was sanded before part of a sentiment from Butterfly kisses was stamped on both. They were adhered next to the image layer, which had been adhered to the left hand side of the Card Creator layers with dimesional adhesive. Part of a Fancy Waves! Border Bling was adhered underneath the patterned paper pennant.

The butterfly of the same set was stamped in Dandelion Memento Ink was on white cardstock, cut out and topped with a button. The butterfly was adhered to the image layer on the right hand side.  Stardust Stickles was added over the dandelion and the butterfly wings.

I was too lazy to cut a card base with the largest Polka dot die, so I made my card base out of a 5 1/2″ x 8 1/2″ piece of white cardstock, folded in half. I added another layer of Springtime paper over the card base, measuring by 4″ x 5 1/4″.

I hope you have time to create a card for the challenge! I am so excited we are back. And check out my fellow challenge members gorgeous creations!

Have a wonderful Sunday! Hugs and smiles


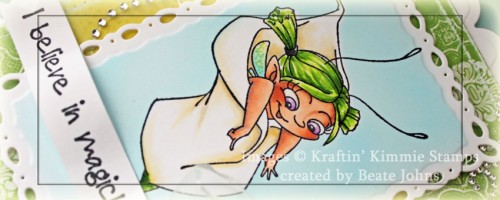
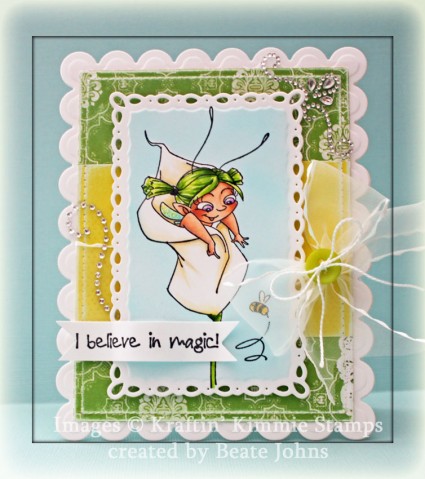
It’s release week at Kraftin’ Kimmie Stamps. Today Emily’s new set Flirty Fairies is being featured. I stamped an image in Tuxedo Black Memento Ink on Neenah Solar White cardstock. The image was cut and embossed with the second largest Romantic Rectangle die and colored with Copic Markers (Skin: E000, E01, E11 Hair: YG01, YG03, YG17  Eyes: V01, V04   Wing: YG0000, BG11  Bee: Y18  Flower: YR30, 1/5 YR31, T1). The image was masked and  airbrushed with Copic Marker B01.

A strip of Pink Paislee Spring Jubilee Patterned Paper was adhered to a bigger piece from the same paper pack. The paper was cut and embossed with a Grand Rectangle Nestabilities die. The edges were sanded , stitched and May Arts ribbon was tied around the horizontal strip. The paper was adhered to the card base, white cardstock, cut and embossed with a Grand Scallop Rectangle die.

A sentiment from Flirty Fairies was stamped on a strip of white cardstock, the edges were cut, the banner was shaped and then it was adhered to the lower left of the image (with dimensional adhesive in the center and Scor-Tape on the edges).  A button was tied over the bow with embroidery thread. The card was finished off with a piece of Fancy That! Border Bling on the top right and a piece of Endless Waves! Border Bling above the sentiment.

Please check out the Kraftin’ Kimmie blog find links to blogs of other designers that created a card with that set.

Thanks so much for stopping by! Have a wonderful day!
Hugs and smiles

Hi everyone! For all my followers that have been with me quite a while, you might remember when I first started blogging and had a weekly sketch challenge. I missed having a challenge with my friends, so I started a new one. I hope you can join us over at Crafty Friends Challenges. This challenge is just supposed to be for fun. No stress. It will be a bi-weekly challenge and the first challenge is Vintage.

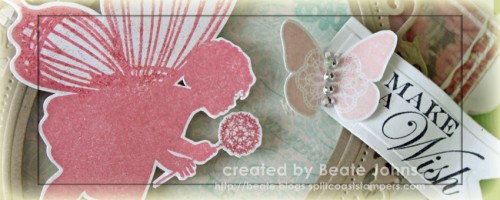
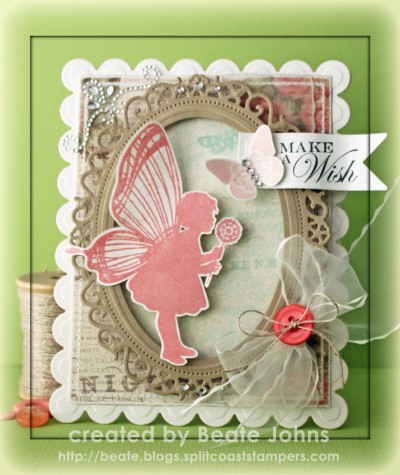
For my card I stamped the gorgeous main image from Butterfly Kisses in Pink Petunia VersaMagic ink. The image was cut out and  Frost Smooch Glitz was added over the flower and wings of the image.  A frame was cut and embossed out of Kraft cardstock with the third largest Large Petite Oval Nestabilities die and the largest Floral Oval Nestabilities die. A piece of Pink Paislee London Market Patterned paper was cut with the next size up oval. The frame was adhered over the oval with dimensional adhesive and the fairy was adhered to the left hand side of the frame.

Another piece of London Market paper was cut and embossed with the second smallest Grand Rectangle Nestabilities die, sanded and the edges were stitched. May Arts ribbon was tied around it vertically and threaded through one of the Floral Oval openings. The bow was topped with a button, tied on with a Linen Thread.  The layers were adhered to the card base, white cardstock cut and embossed with a Grand Scallop Rectangle die.

A piece of white cardstock was cut and embossed with one of the Nested Pennant dies. A sentiment from Butterfly kisses was stamped on it with Tuxedo Black Memento Ink. The pennant was shaped and adhered to the upper right hand side of the frame. The butterfly from the set was stamped in Pixie Dust Versamagic. It was cut out and adhered next to the sentiment. Rhinestones from Baby Bling and Sleek Strips Silver Rhinestones were added to the frame and the butterfly. Part of a Fancy That! Border Bling on the upper left hand corner finish off the card.

This card didn’t just work for our new challenge, but also for the current Really Reasonable Ribbon challenge, which is to use buttons and bows. I LOVE adding a button over my bows to finish them off. Oftentimes my bows look naked without that button!

Check out the creations of my fellow Crafty Friends:

Charmaine Ikach
Heather Jensen
Jenn Balcer
Linda Lucas
Nina Brackett

I really hope you have a chance to play. Like I said…it’s just for fun. Thanks so much for stopping by!
Hugs and smiles

© 2012 fresh & fun Suffusion theme by Sayontan Sinha