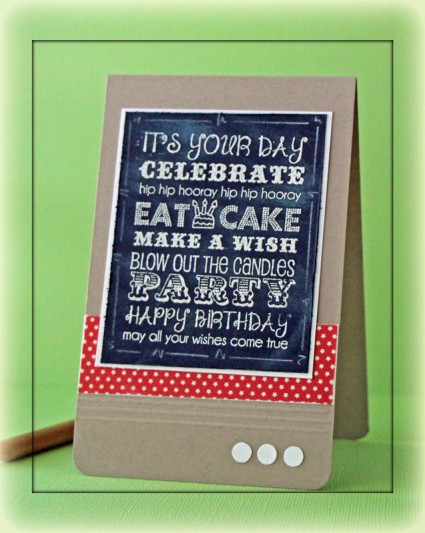
Today’s  Chalkboard tutorial on Splitcoaststampers was created by the wonderful Amy Rohl. I created the video for the technique and this is the sample I created for it.

The card measures 3 1/2″ x 5 1/2″ and was created out of Kraft cardstock. The bottom corners were rounded and some score lines were added with my Scor-Pal.

Taylored Expressions Graphic Birthday Greetings sentiment was stamped in Snow Cap Pigment ink on black cardstock. It was embossed with white embossing powder. The edges were distressed and the layer was adhered to white cardstock. A border was added with a white chalk pencil.

A piece of an old Pink Paislee paper pack was added above the score lines before the image was adhered to the card base. Three 1/4″ white circle punch outs on the bottom right corner finish off the card.

Here is a video for the visual learner:

[youtube]https://www.youtube.com/watch?v=zj1fVfmU5fs[/youtube]

I created this card also as a sample for my Hope You Can Cling to Challenge on Splitcoaststampers. It is the fourth year of our annual card drive to create cards for the MD Anderson Cancer center in Houston. Participate in challenges, send your cards to the hospital and you might win  great prizes from some of your favorite stamp companies. I hope you have time to join us.

Thanks so much for stopping by! Have a wonderful day.
Hugs and smiles

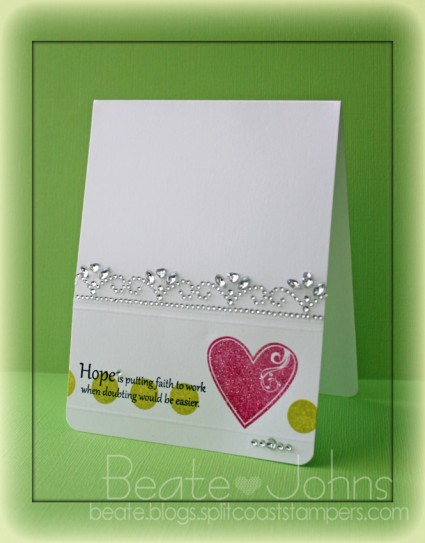
I created this card for the wonderful Bev Rousch’s Hope You Can Cling to Challenge “Shine It Out!” back in October. I was cyber stamping with Tami Mayberry a little while ago and we created cards fro the same challenges. I thought it was only right to use one of her stamp sets for my sample.

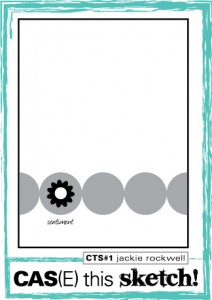
Just before that, I had found a new challenge blog with a wonderful sketch and I wanted to use that for my card. My card base is very basic, a 4 1/4″ x 11″ piece of Neenah Solar White cardstock, folded in half. The bottom corners were rounded.

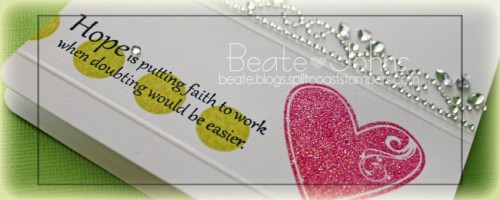
I started by inking the heart from Hopeful Hearts first with Versamark ink, then with Memento’s Rosebud ink. It was then embossed with iridescent Ice Embossing powder to add sparkle. Next I stamped the solid circle from GKD Inspiration Mosaic in Pear Tart Memento Ink 3 1/2 times on the left and once on the right of the heart. A sentiment from Hopeful Hearts was stamped over the circles on the left in Jet Black Archival ink.

I scored one line under the shapes and two lines above. Beautiful Bling Border – Beautiful Bloom was added above the top score line. 5 Rhinestones from a Sleek Strips Silver Rhinestones were adhered to the bottom right and one above an i in the sentiment to finish off the card.

Thanks so much for stopping by!
Hugs and smiles


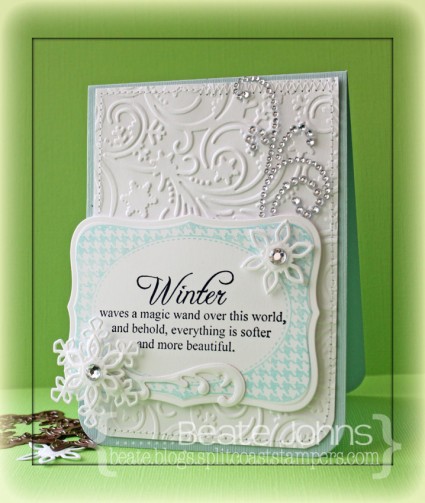
I created this card a while ago for one of the Hope You Can Cling To challenges on Splitcoaststampers. It’s perfect for our new Crafty Friends Challenge, to use a sentiment as the focal point of the card.

Are you playing along with us? If not, you’re missing out on the chance to lift the spirits of women battling breast cancer at MD Anderson, and also on more than $6500 in prizes from your favorite crafty companies. So what are you waiting for? Get to stamping!

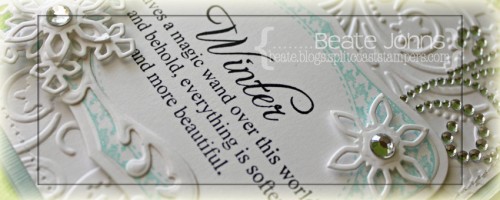
For my card I started by stamping the a frame from Lovely Labels 1 in Sea Breeze VersaMagic Ink on Neenah Solar White cardstock. It was cut out with a Label 18 Nestabilities die. A sentiment from Winter Wonderland was stamped in Jet Black Archival ink in the center of the label.

The bottom corners of a 3 3/4″ x 5 1/4″ piece of white cardstock were rounded before it was embossed with the Holiday Magic M-Bossabilities folder and it’s edges were stitched. The layer was adhered to the card base, a 4″ x 11″ piece of Seasalt Canvas Bazzill cardstock, folded in half. The sentiment label was adhered slightly hanging over the right hand side with foam adhesive squares.

Snowflakes were cut with Create-a-Flake 4 dies out of white cardstock and adhered to the upper left and lower right of the sentiment label. A Flourish out of white cardstock, cut with a the Ornate Artisan Tags and Accents die, was adhered to the right of the double stacked snowflake and rhinestones were added to the center of each snowflake. Part of a Finesse Rhinestone swirl finish off the card.

Check out my fellow Crafty Friends for more Sentimental inspiration:


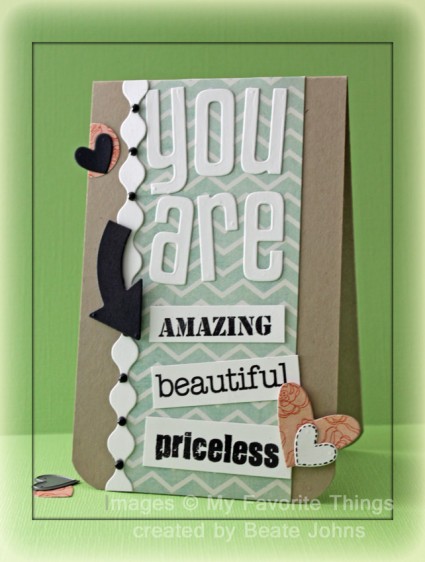
Edna’s Hope You Can Cling to challenge is to create a card with five words on it. I pulled out quite a few sets before I settled on the words and dies for my entry. I wanted to use different fonts for my adjective, so I used three different sets.

I started by cutting you and are out of Neenah Solar White cardstock with MFT’s High Rise Alpha Lowercase dies. I stamped a word from each First Class Friend, Complimentary Greetings and Well Worn My Favorite Things stamp sets in Jet Black Archival ink and cut them out.

The card base is a 3 1/2″ x 11″ piece of Kraft cardstock, folded in half. The bottom corners were rounded. A 2 1/4″ x 5 1/2″ wide strip of My Mind’s Eye The Sweetest Thing Tangerine paper was to the center of the card front. A strip of white paper was cut with the Squiggle Border and adhered to the right hand side of the paper strip. The words were adhered in it’s center.

Two small hearts were cut out of black and white cardstock with a die from the Notched Tag stamp and die set. Another heart was cut out of Tangerine paper with the smallest of the Hearts A Plenty Die-namic die. An arrow was cut out of black cardstock with one of the Lead the Way dies. They were used to dress up the card. Tiny black rhinestones from a Baby Bling rhinestone pack finish off the card.

Thanks so much for stopping by! Have a wonderful day!
Hugs and smiles

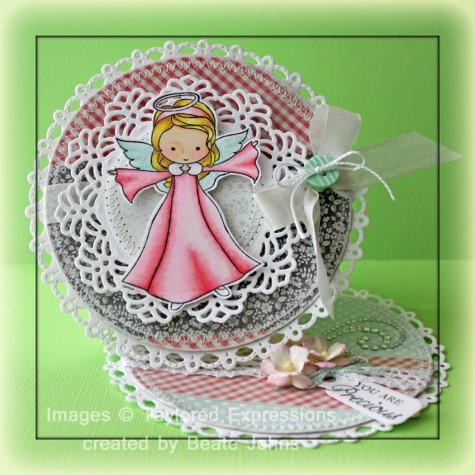
My card today is a multi-tasking card. It is a sample in this week’s tutorial for the Twisted Circular Easel card, a fun variation of the Easel card tutorial that was already in our resource section. It is also a sample for the new Spectrum Noir Marker review on SCS and a sample for Lydia’s HYCCT challenge, which was to create a card that showcases your style.

I started by stamping Taylored Expressions Moka Angel image Tuxedo Black Memento Ink on Neenah Solar White cardstock. It was colored with Spectrum Markers (Dress: PP1, PP3, PP5 Skin: FS2, FS3, FS 6 (cheeks), TN2 Wings: BT1, BG2) and cut out.  A piece of white cardstock was cut and embossed with a Vintage Lace Motif die. A piece of My Mind’s Eye Be Happy paper was cut and embossed with a Standard Circle Nestabilities die. The edges were sanded before the circle was stitched to the Vintage Lace circle.  The angel was adhered over the circles with foam adhesive squares. Stardust Stickles was added over the wings and the halo.

My Mind’s Eye Honey patterned paper was cut and embossed with the smallest Grand Circle Nestabilities die. The edges were sanded and stitched. Seam binding was tied around the layer. The bow was topped with a button, tied on with embroidery thread and the layers were adhered to a piece of white cardstock, cut and embossed with the smallest of the Grand Decorative Circle dies.  The image circles were adhered to the card front center with foam adhesive squares.

The inside of the card was also decorated with Honey patterned paper that had been cut and embossed with a Grand Circle Nestabilities die. White Crochet Ribbon was adhered around the horizontal strip before the layers were stitched.  White cardstock was cut and embossed with a tag die from the new Back to the Basic tag dies. A sentiment from Moka Angel was stitched on it with Jet Black Archival ink. Flowers and part of a Finesse Rhinestone Swirl finish off the card.

Here is a video for the visual learner:

[youtube]https://www.youtube.com/watch?v=1RoUVh0l8yM[/youtube]

Thanks so much for stopping by! Have a great day!
Hugs and smiles

Besides being World Card Making Day today is also the first day of Splitcoaststampers third annual Hope You Can Cling To (HYCCT)  event. The entire month of October we will have new HYCCT challenges. Each card made for these challenges will be mailed to the UT MD Anderson Cancer Center.

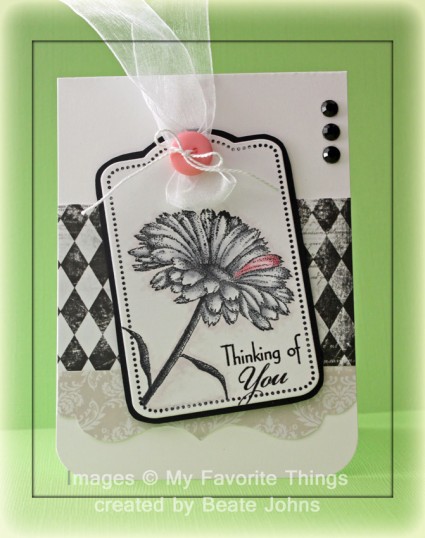
Today three challenges are posted to kick off the event. One by Lydia, one by Lori and one by me. My challenge is called Ray of Hope. Create a card with mostly in gray with a splash of color. For my sample I stamped a flower from MFT’s IB Flowers 4 inTuxedo Black Memento Ink on Neenah Solar White cardstock the image was cut with the Tag You’re It Die-namics die. A border was stamped with the matching Tag You’re It stamp set in Jet Black Archival ink.  The image was colored with Spectrum Markers (IG1, IG2, IG4, IG6, IG8, PP1, PP3, PP5),

A piece of KaiserCraft After Five Collection (came already cut in that shape) was adhered under a 2 1/4″ x 4 1/4″ piece of Bo Bunny Enchanted patterned paper on the card base, a 4 1/4″ x 11″ piece of Solar White cardstock. The bottom corners of the card were rounded.  Three black Rhinestones were added to the upper right hand side of the card.

The tag was layered on a slightly bigger hand cut black cardstock before White ribbon was tied to it with a button and embroidery thread. It was adhered to the card front with foam adhesive squares.

I hope you have time to participate in the Hope You Can Cling To challenges and create some card for the cancer center patients.

Have a wonderful day!
Hugs and smiles

This weeks “From the Archives” Tutorial in the Weekly Inkling was the Tunnel Card. I used to love these cards and I haven’t made one of them in years.

For my sample I started by creating the card front. The mannequin image of Crafty Secrets Sew Special was stamped in Rich Cocoa Memento Ink on Neenah Solar White cardstock. It was colored with Copic Markers (Corset: R00, R11, R12, R14 Body: E50, E51, E53 Stand: E21, E23, E25, E27) and cut out. Clear Spica Pen was added over the lacy part of the corset.

A piece of white cardstock was cut and embossed with a Beaded Circle Nestabilities die. A sentiment from Sew Special was stamped in it’s center with Rich Cocoa ink and the panel was sponged with Antique Linen Distress ink. Images from the same set were stamped in it’s center with Antique Linen to give it some texture. The inner edge of the circle was paper pierced.
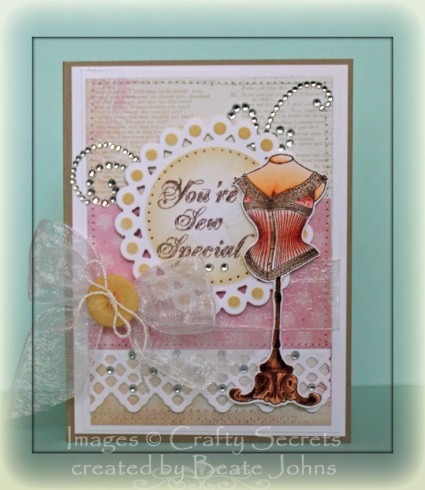
A 3 1/2″ wide strip of white cardstock was cut and embossed with a Lace Doily Accent Die. It was adhered under a 2 1/4″ x 3 1/2″ piece of MME Lost & Found Madison Street Patterned Paper which was in turn adhered to a 3 1/2″ x 5″ piece of the same paper pack. The layers were stitched to a slightly bigger piece of white cardstock.

White organdy Ribbon was tied around the horizontal layer and a yellow button was tied on top of the bow with embroidery floss. The sentiment panel was adhered over the panels with dimensionals and the mannequin was adhered slightly over it that. Baby Bling Rhinestones and a Finess Swirl finish off the card front layers. They were adhered to the card front,  a 8 1/4″ x 5 1/2″ piece of Kraft cardstock folded in half.
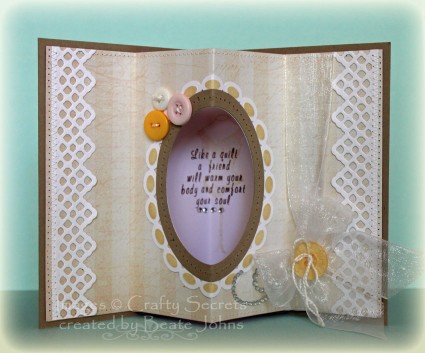
The inside of the card was created out of a 5 1/4″ x 8″ piece of MME Lost & Found Madison Street paper. It was scored at 2″, 4″, 6″ and 8″. A window was cut in it’s center with a Classic Oval Nestabilities die. A frame was cut with Beaded and Classic Oval Nestabilities dies out of Neenah Solar White cardstock and sponged with Antique Linen Distress ink. It was topped with a slim frame cut out Kraft cardstock. The Kraft frame was paper pierced before it was adhered around the window.

The top and bottom edge of the layer was stitched before two pieces of white cardstock, cut and embossed with the Lace Doily Accent die, were zig zag stitched to the side edges. Three buttons were stitched to the upper left of the frame. Before the inner layer was adhered, a sentiment was stamped in the center of a piece of  5″ x 7 3/4″ white cardstock in  Rich Cocoa Memento Ink. The mannequin image was stamped lightly over it in Antique linen. The white cardstock piece was adhered to the inside of the card, before the inner, scored layer was adhered just to the side edges of the card.

White organdy ribbon was tied on the left hand side and topped with a yellow button. I get a lot of questions on how to mail my cards. Usually I just send them in a slightly bigger envelope. This one is quite bulky because of the inside of the card. I will either mail this card unfolded in a 6″ x 9″ envelope with crimped cardstock pieces on top and bottom of the card, or in a small box along with a gift.

Here is a video for the visual learner:

[youtube]https://www.youtube.com/watch?v=V8w9waiPUKw[/youtube]

Thanks so much for stopping by! Have a wonderful day.
Hugs and smiles

I am the hostess of today’s Timeless Tuesday Challenge. I love the Out of the Box technique and use it often. I just like the look. So that’s today’s challenge. Create a card with the Out of the Box Technique.

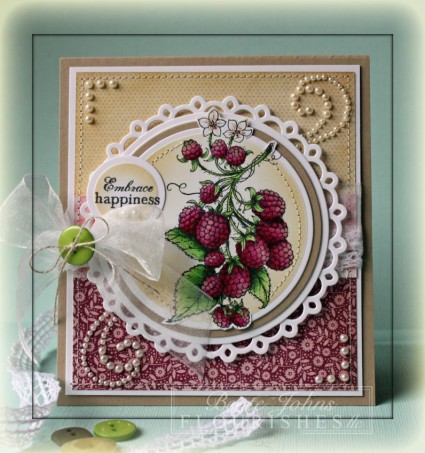
For my sample I stamped the raspberries from the gorgeous Berry Sweet stamp set in Tuxedo Black Memento ink on Neenah Solar white cardstock. It was cut out with a Classic Circle Nestabilities die and colored with Copic Markers (Berries: RV11, RV17, RV19, R39 and G21   Leaves: YG11, YG13, YG17   Flowers: E50, E51, E39) The circle was sponged with Antique Linen and a bit of Vintage Photo Distress ink before it was first adhered on a Kraft cardstock circle. A border was sewn around the image before the layers were adhered to a  slightly bigger white circle. All layers were adhered to a piece of white cardstock, cut and embossed with the biggest Picot Edge Circle Die.

Three piece of MME Lost & Found 2 Blush patterned paper were stitched to a 4 7/16″ x 5″ piece of white cardstock. May Arts Crochet Lace was adhered over the horizontal strip and a piece of white Organdy Ribbon was tied around it. The image layers were adhered over the ribbon with dimensionals, the ribbon was threaded through the Tear drop circle border and tied into a bow. A Basic Grey button was tied over it with Linen thread.

A sentiment of the set was stamped in Tuxedo Black on a small white cardstock circle. The circle was sponged like the image circle and adhered to the upper left of the bigger circle. Three Baby Bling pearls were adhered underneath the sentiment as well as more pearls on the top left and bottom right corner. Two pieces of a Finesse Pearl Swirl were adhered to the upper right and lower left of the image.


The inside of the card is pretty simple. Just another piece of white cardstock with some patterned paper strips of the paper used on the front.

Please check out my fellow Timeless Tuesday Challenge members:

Cindy Haffner
Heather Jensen
Maki Jones
Mona Pendleton
Silke Ledlow
Tammy Hershberger (is out sick, but if you have time,  stop by anyway to post her some well wishes)
and
November Guest Designer Miriam Napier

Thanks so much for stopping by! I hope you have time to participate in the challenge. Have a wonderful day!
Hugs and smiles


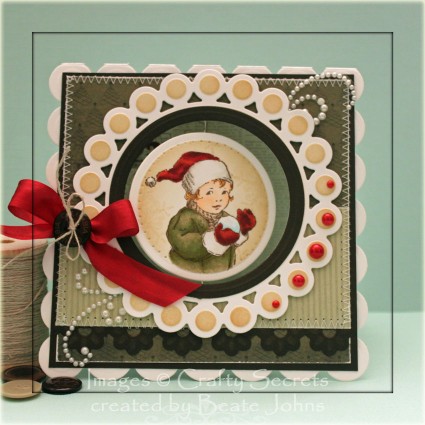
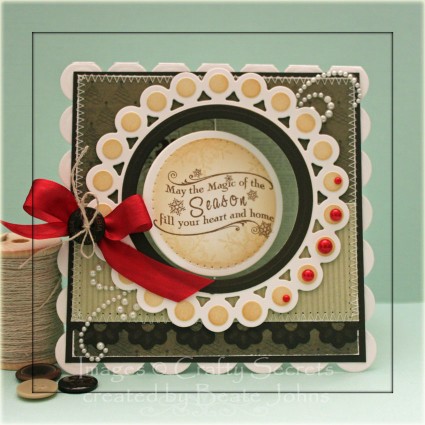
I created this card as a sample for the video tutorial for the Suspension card as well as another HYCCT challenge. Wanda is the hostess of that challenge and she challenged us to have a hanging element on your project. I thought it was the perfect occasion to create a suspension card.

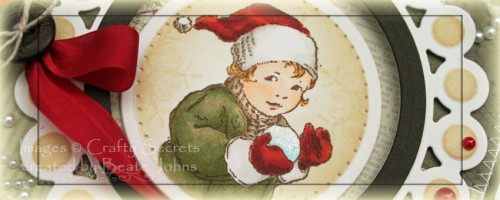
I cut and embossed two circles out of Neenah Solar White cardstock. On one I stamped an image from Crafty Secrets Winter Wishes in Rich Cocoa Memento Ink, on the other a sentiment from the same set. The image was colored with Copic Markers (Hat/Gloves: R05, R24, R29, R39 Coat: YG91, YG93, YG95 Skin: E0000, E00 Hair; Y23, E33) before it was masked and the circle was sponged with Antique Linen and Vintage Photo Distress ink. A snowflake image of that set was stamped over the circle with Antique Linen.

I created a frame for my window on the card front with a Beaded Circle Nestabilities die as well as a Classic Circle die out of Neenah Solar White cardstock. The frame was sponged lightly with Vintage Photo distress ink before a slim circle frame cut with Classic Circle dies out of Canyon Brown cardstock was added over the frame.

A strip of Canyon Brown cardstock was cut and embossed with a Floral Doily Accent die. It was adhered under a 1 7/8″ x 4  1/2″ piece of MME Lost & Found Christmas paper that was adhered to a 4 1/2″ square of the same paper pack. The layers were stitched to a 3/16″ bigger piece of Canyon Brown paper. A window was cut into the layers with a Classic Nestabilities die. It didn’t quite cut through the three layers and I used a Hobby Knife to finish the cut. A pearl swirl was cut in pieces. Part of it was adhered to the top right, part to the lower left of the window.

The card base was cut with one of the Grand Scallop Square Nestabilities dies out of white cardstock. Again a window was cut in the center with the same circle die used to cut the window in the other layers. The card front was adhered to the card base.

Here is a video for the visual learner:

[youtube]https://www.youtube.com/watch?v=i1geoRxwtEQ[/youtube]

Thanks so much for stopping by! Have a wonderful day.
Hugs and smiles
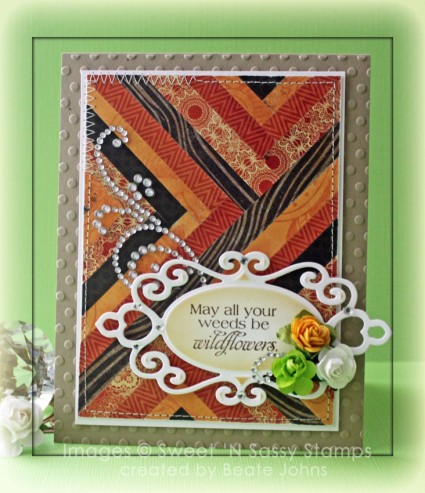
I created this card for the Moxie Fab Tuesday Trigger this week.

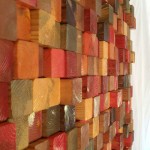
The image reminded me of a technique I had seen but never used, Herringbone technique. I saw a video a couple years back and have had the technique in the back of my mind every since. I picked some paper from MMME Stella Rose Mabel Paper and cut them in strips varying between 1/8″ and 15/16″.

A piece of cardstock was ran through the Xyron (if you don’t have a Xyron, you can just apply double sided adhesive over your entire piece of cardstock). I started  taping one of my wood grain brown paper strips diagonal across the paper piece. Next I placed another piece of the same paper pattern on a diagonal to create a T. Another piece from the same pattern was adhered to the other side of the first diagonal strip creating another T shape on the opposite side of the first. Then I filled in the four sections with paper strips of different pattern.

The paper was trimmed to a 3 1/2″ x 4 3/4″ and stitched to a 3/16″ bigger piece of Neenah Solar White cardstock. The card base is a 4 1/4″ x 11″ piece of Kraft cardstock folded in half. The card front was embossed with Cuttlebugs Polka Dot Embossing folder.

A piece of Solar White cardstock was cut and embossed with one of the Fancy Tag 2 dies. The tag was sponged with Antique Linen Distress ink and a sentiment from Sweet ‘n Sassy’s Wildflower stamp set was stamped in it’s center with Rich Cocoa Memento ink.

Two Zva Creative Flowers as well as a Recollection one were tied together and adhered to the tag before it was adhered to the card with dimensionals. Part of a Finesse Rhinestone Swirl and two pieces of Baby Bling on the tag finish off the tag.

Thanks so much for stopping by! Have a wonderful weekend
Hugs and smiles
© 2012 fresh & fun Suffusion theme by Sayontan Sinha