Yesterday we posted a new tutorial and a new Product Focus on Splitcoaststampers. The tutorial was a basic one on Inking with Markers. The product review goes hand in hand with the tutorial and is about the Distress Markers.

[youtube]https://www.youtube.com/watch?v=1mQc_9S5PQs[/youtube]

My son is coming home for Labor Day. I am so excited and can’t wait to cook all his favorite food!  🙂

Today’s tutorial on Splitcoaststampers is for a technique I first saw Jennifer McGuire use. It combines dies and embossing resist to create unique backgrounds. We call it Puzzle Piece Resist.

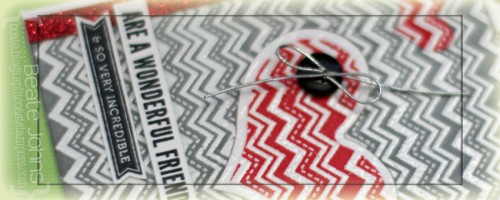
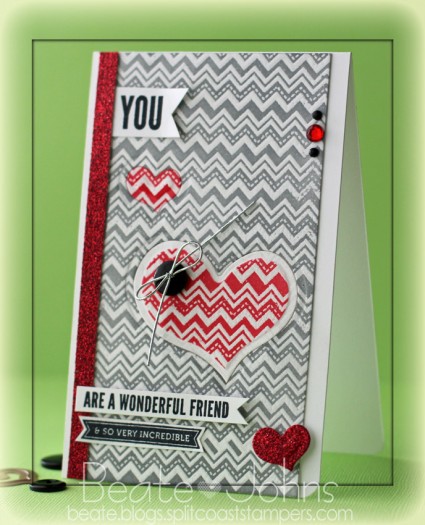
For my card I started with a 3″ x 5 1/2″ piece of Neenah Solar White cardstock. I stamped the zig zag background stamp from Simon Says Very Special stamp set in VersaMark all over the cardstock and embossed it with clear embossing powder.

Two heart dies from a new Spellbinders die set (Hearts One) were cut and embossed out of the background. The hearts were removed and the big background was sponged with London Fog Memento Ink. The big heart was sponged with the die on with Ladybug Memento Ink, the little one was sponged after the die was taken off.


The background was adhered to the card base, a 3 1/2″ x 11″ piece of cardstock, folded in half. The right hand corner of the card was rounded.  Before the big heart was adhered back into the background, a button was tied on with silver cord. The small heart was adhered back to the background as well.

A sentiment from Very Special was stamped in Tuxedo Black Memento Ink on white cardstock and cut out. Two sentiments from the new stamp set You were stamped also in black ink on white cardstock and cut out. A 1/4″‘ x 5 1/2″ strip of red Glimmer Paper (Stampin’ Up!) was adhered to the left hand side of the background strip before the sentiment pieces were adhere next and over the glimmer strip.

Red glimmer paper was cut and embossed with the small heart die. The heart was adhered to the lower right of the background strip. Red and black rhinestones on the upper right hand side finish off the card.

Here is a video for the visual learner:

[youtube]https://www.youtube.com/watch?v=M9s0jtJi7yk[/youtube]

Thanks so much for stopping by! Have a wonderful day!
Hugs and smiles

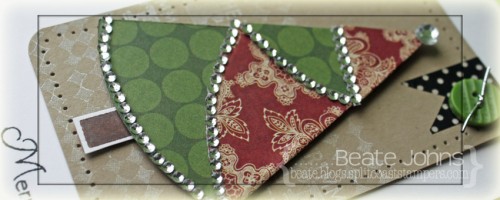
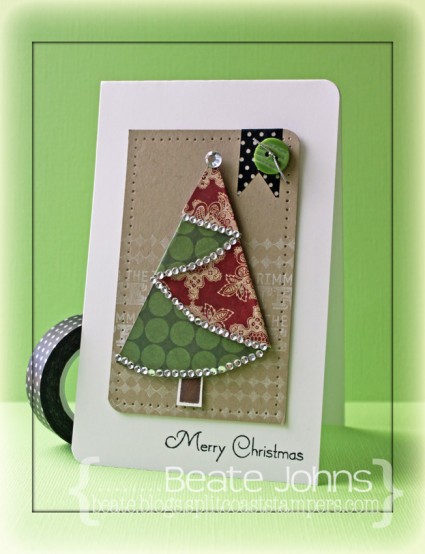
I created a quick tutorial on how to fold half circles into a Christmas tree for today’s tutorial on Splitcoaststampers.  I started out by cutting a circle out of Teresa Collins Christmas Cottage with the smallest of the Grand Circle Nestabilities die.  The circle was cut in half, folded and decorated with rhinestones.

A stamp from the Lollipop Treat stamp set was stamped in Jumbo Java VersaMagic Ink on Neenah Solar White cardstock. It was cut out and adhered under the tree.

The upper right and lower left corner of a 3″ x 5″ piece of Kraft cardstock were rounded. The bottom was stamped with a background stamps from the Lollipop Treat set and a sentiment from  Document It – December in Moonlight White Brilliance Ink. The edges were pierced before the Christmas tree was adhered with foam adhesive squares.

A piece of black polka dotted Washi Tape was adhered to the top right corner of the kraft cardstock. It was topped with a button, tied on with silver cord. The layer was adhered to the card base, a 3 1/2″ x 11″ piece of white cardstock. A sentiment from Christmas Ornaments was stamped to the lower right edges of the card with Tuxedo Black Memento Ink.

Here is a video for the visual learner:

[youtube]https://www.youtube.com/watch?v=7u8oJd3g384[/youtube]

Thanks so much for stopping by! Have a wonderful day!
Hugs and smiles

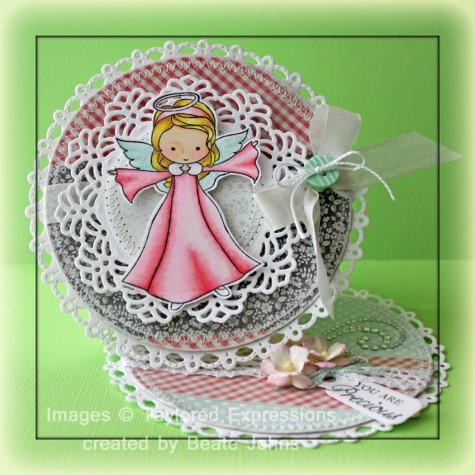
My card today is a multi-tasking card. It is a sample in this week’s tutorial for the Twisted Circular Easel card, a fun variation of the Easel card tutorial that was already in our resource section. It is also a sample for the new Spectrum Noir Marker review on SCS and a sample for Lydia’s HYCCT challenge, which was to create a card that showcases your style.

I started by stamping Taylored Expressions Moka Angel image Tuxedo Black Memento Ink on Neenah Solar White cardstock. It was colored with Spectrum Markers (Dress: PP1, PP3, PP5 Skin: FS2, FS3, FS 6 (cheeks), TN2 Wings: BT1, BG2) and cut out.  A piece of white cardstock was cut and embossed with a Vintage Lace Motif die. A piece of My Mind’s Eye Be Happy paper was cut and embossed with a Standard Circle Nestabilities die. The edges were sanded before the circle was stitched to the Vintage Lace circle.  The angel was adhered over the circles with foam adhesive squares. Stardust Stickles was added over the wings and the halo.

My Mind’s Eye Honey patterned paper was cut and embossed with the smallest Grand Circle Nestabilities die. The edges were sanded and stitched. Seam binding was tied around the layer. The bow was topped with a button, tied on with embroidery thread and the layers were adhered to a piece of white cardstock, cut and embossed with the smallest of the Grand Decorative Circle dies.  The image circles were adhered to the card front center with foam adhesive squares.

The inside of the card was also decorated with Honey patterned paper that had been cut and embossed with a Grand Circle Nestabilities die. White Crochet Ribbon was adhered around the horizontal strip before the layers were stitched.  White cardstock was cut and embossed with a tag die from the new Back to the Basic tag dies. A sentiment from Moka Angel was stitched on it with Jet Black Archival ink. Flowers and part of a Finesse Rhinestone Swirl finish off the card.

Here is a video for the visual learner:

[youtube]https://www.youtube.com/watch?v=1RoUVh0l8yM[/youtube]

Thanks so much for stopping by! Have a great day!
Hugs and smiles

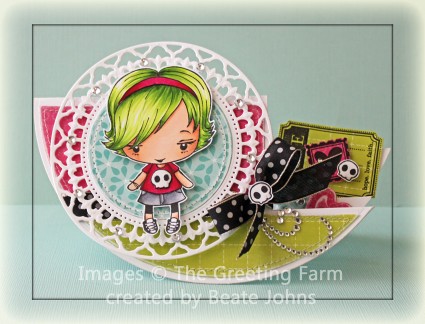
Today’s tutorial on Splitcoaststampers is for a Side Step card variation, the Circular Side Step card. For my sample I stamped the darling Ebony from The Greeting Farm in Tuxedo Black Memento Ink once on Neenah Solar White cardstock, once on pink paper from Echo Parks Summer Days collection. The shirt and head band were colored on the patterned paper, the rest on the white cardstock with Copic Markers (Hair: YG01, YG03, YG17   Skin: E000, E00, E01, E11   Shirt/Headband: RV25, RV29, RV69   Skirt: C3, C5, C7   Skull: W00, W1). The headband and shirt were cut out and adhered to the image stamped on cardstock, which was then cut out as well.

White cardstock was cut and embossed with the largest Splendid Circle die and blue patterned paper from Summer Days with the third largest  Standard Circle Nestabilities die. The patterned paper was sanded, then stitched to the Splendid Circle center. Ebony was adhered over the circles with dimensional adhesive.

The card base was cut and embossed out of white cardstock with the second largest Grand Circle Nestabilities die. Patterned paper strips from the Summer Days paper pack were adhered together, cut and embossed with that same circle die. The edges were sanded and then the paper was cut on the embossed edge. For the cuts on the right hand side I placed the paper over the card base and used a stylus to trace the cut lines. Next I cut 1/8″ along that traced line. The edges were stitched before the paper was adhered to the card front. Ribbon was tied around the edge of the first step and tied into a bow. A skull from the shirt was stamped again on white cardstock, cut out and adhered over the bow. The image was adhered over the big part of the card base with dimesional adhesive and part of a Finesse Rhinestone Swirl was adhered under the bow.

The tag and postage image from Tea-rrific clear stamp image were stamped in black ink on Summer Days paper and cut out. They were adhered on top of each other with another skull image and taped the the back step of the card.

In the center two pieces of Summer Days paper were cut and embossed with the bigger heard from the new Folk Art die set. The edges were sanded. The hearts were adhered to the center step and topped with two of the bigger rhinestones from a Sleek Strips Silver Rhinestones pack.

Here is a video for the visual learner:

[youtube]https://www.youtube.com/watch?v=HlALbWF4MRc[/youtube]

Thanks so much for stopping by! Have a wonderful day!
Hugs and smiles

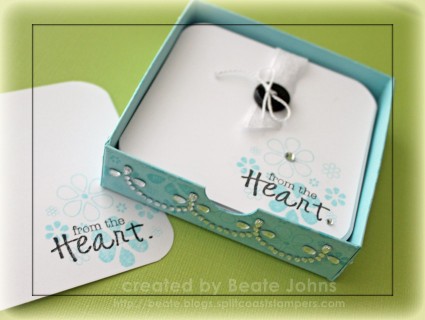
It’s my turn to share a tutorial on Splitcoaststampers today.  After creating this little note holder last month, I thought it would be a fun project for a tutorial.

This little box was created out of Berrylicious cardstock. The edges were stamped with the flower cluster from Your Next Stamp Happiness in  Tumbled Glass Distress Ink before the box was assembled. Fancy Waves! Border Bling was added to each side.

Copy paper was cut in 3 1/2″ square and the corners were rounded.. Each page was stamped with the Flower cluster in Tumbled Glass Distress ink and a sentiment from Happiness in Tuxedo Black Memento Ink.

Here is a video for the visual learner:

[youtube]https://www.youtube.com/watch?v=J2rrNjdD1fc[/youtube]

Thanks so much for stopping by! I hope you are having a great summer. As you can tell by my sporadic posting, I am enjoying mine. 🙂
Hugs and smiles

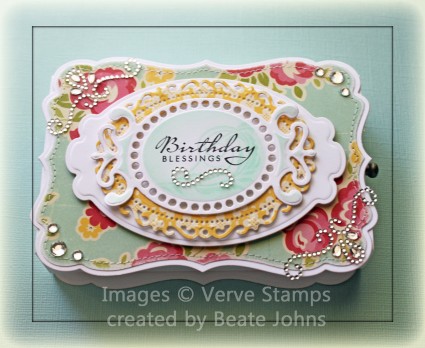
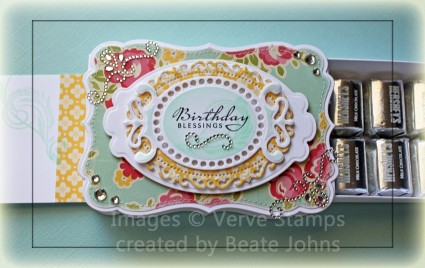
Today’s tutorial on Splitcoaststampers is for a Slider Box. When you open the drawer a slider message will appear.

A piece of Neenah Solar White cardstock was cut and embossed with a a Fancy Tag Three. The embossed part was sponged with Aqua VersaMagic ink and a sentiment from Verve’s Blessings stamp set was stamped in the center. Part of a Fancy That! Border Bling was adhered underneath.

The tag was adhered to a piece of October Afternoon Sidewalks Paper paper cut and embossed with the second largest Floral Oval Nestabilities die.  That was then adhered to another piece of white cardstock, cut and embossed with a Label 10 Nestabilities die. The layers directly over the box were cut with  the largest Label 17 Nestabilities die. The Label for the box top was covered with more October Afternoon Sidewalks paper. More Fancy That Border Bling! as well as Rhinestones from the 72 count Rhinestone bling finish off the card.

Here is a video for the visual learner:

[youtube]https://www.youtube.com/watch?v=fTyvpZLaxCQ[/youtube]

Thanks so much for stopping by! Have a wonderful day!
Hugs and smiles

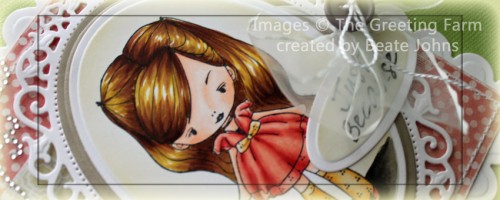
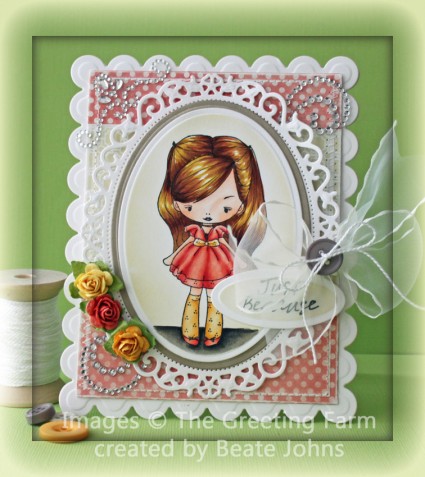
It was my turn to create a tutorial for Splitcoaststampers. I decided to create a tutorial on how to create shaped cards. I still get a lot of questions on how to do that. For my sample card I used the darling Blush Babette image from The Greeting Farm. It was stamped  in Tuxedo Black Memento Ink on Neenah Solar White cardstock. The image was cut and embossed with a Petite Oval Nestabilities die and colored with Copic Markers (Skin: E000, E00, E01 Hair: Y26, E33, E35, E37 Dress: R11, R12, R14 Socks: YR30, YR31 Ground: W3, W5, W7, W9).

The image was sponged with Antique Linen Distress Ink before it was adhered first to a piece of Kraft cardstock, cut and embossed with the next size bigger piece of Petite Oval Nestabilities die, then on white cardstock, cut and embossed with the largest  Floral Oval Nestabilities die.

Two pieces of My Mind’s Eye Follow Your Heart Be Happy paper were cut and embossed with a Grand Rectangle Nestabilities die. The edges were sanded, stitched and May Arts ribbon was tied around the horizontal strip. The paper was adhered to the card base, white cardstock, cut and embossed with a Grand Scallop Rectangle die. The ribbon was topped with a button, tied on with embroidery thread.

Three little flowers (Michaels) were adhered to the lower left corner of the image. The sentiment from Blush Babette was stamped in Tuxedo Black on a piece of white cardstock, cut and embossed with the smallest of the Petite Oval Nestabilities die. The sentiment was adhered underneath the bow.  Fancy That! Border Bling on the top right and part of a Silver Finesse Rhinestone Swirl on the lower left finish off the card.

Here is a video for the visual learner:

[youtube]https://www.youtube.com/watch?v=ywQbvpPkvF4[/youtube]

Thanks so much for stopping by! Have a wonderful day!
Hugs and smiles

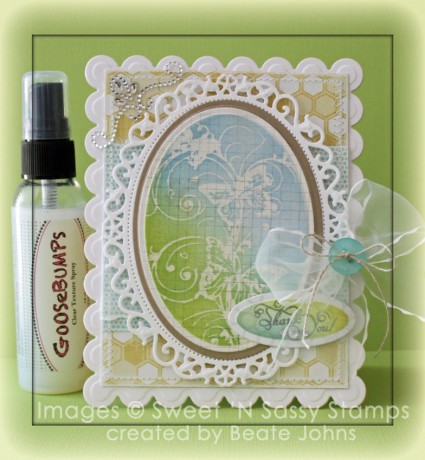
When I first saw Tsukineko’s Goosebumps Texture Spray last summer at CHA, I knew I had to have it. You can create your own resist papers. You can also add great texture to your projects.

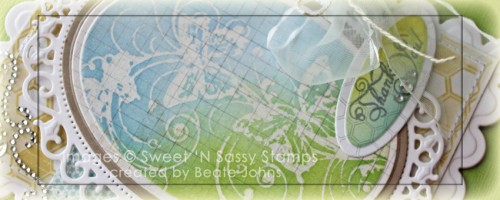
For this technique I added some Goosebumps Spray to a Blending tool. The image from the Butterfly Flourish was dabbed with the tool and stamped on  My Mind’s Eye Be Amazing Patterned paper, that had been cut and embossed with a Petite Oval Nestabilities die. After the spray dried, the image was sponged with Summer Sky and Pear Tart Memento Ink. The oval was layered first on a piece of Kraft paper cut with a Petite Oval die, then on a piece of Neenah Solar White cardstock, cut and embossed with the largest Floral Oval Nestabilities die.

Two pieces of Be Amazing paper were cut and embossed with a Grand Rectangle Nestabilities die. The edges were sanded and stitched before May Arts ribbon was tied around the horizontal strip. The bow was topped with a button, tied on with embroidery thread before the layers were adhered to the card base, white cardstock cut and embossed with a Grand Scallop Rectangle die.

More patterned paper was cut and embossed with the smallest Petite Oval Nestabilities die, sponged with Summer Sky and Pear Tart Memento Ink before the sentiment from that set was stamped in London Fog Memento Ink. Fancy That! Border Bling on the top left corner finished off the card.

Here is a video for the visual learner:

[youtube]https://www.youtube.com/watch?v=KQJ3wUPouWA[/youtube]

Thanks so much for stopping by! Have a wonderful day!
Hugs and smiles

Hi all and welcome to the final day of Flourishes’ Release Week! And, guess what? If you like what you’ve seen on our designers’ blogs, I’m happy to report that all three of Flourishes’ new sets for March are in the Flourishes store!! Just click HERE to see for yourself!

Are you ready to see our last set being revealed today? It’s a beauty with blossoms that are just about as lovely as you can get without being the real thing!

Introducing…
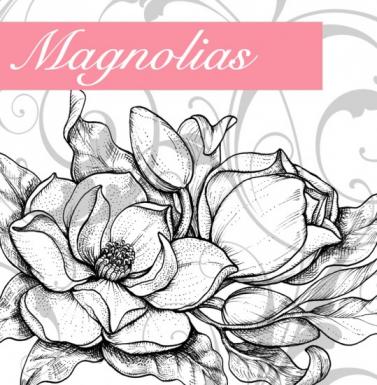
Marcella Hawley’s newest set called Magnolias features lush and sweeping flowers so sweet, you can almost smell their pure fragrance! This 4″ by 6″ set features a beautiful focal image, a corner floral piece and a border of leaves, allowing you to stamp and create accents in a whole host of ways. This set also features six touching sentiments perfect for all occasions.
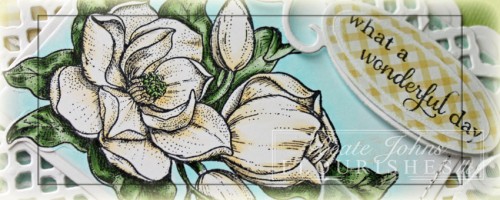
For my card I stamped the big image of Magnolias in Tuxedo Black Memento ink on white cardstock. It was cut with the largest Classic Rectangle Nestabilities die and the Out of the Box Technique and colored with Copic Markers (Petals: YR30, YR31, T1    Petal Center: YG13   Background: BG0000, BG000). The edges of the rectangle not covered with the flower were stitched.
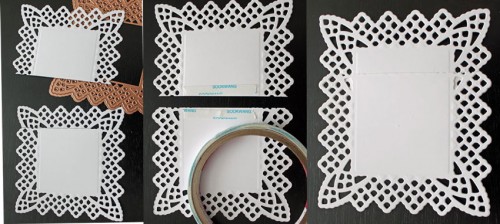
To create a lattice background for my recangle, I cut one full Lattice Doily Square and another partial square. From the full square, I cut off one side. Next I added Scor-Tape to the edge on the bottom edge of the former full square and  the cut edge of the partial square and adhered them together to create my lattice rectangle.

A 2 3/4″ x 5″ strip of My Mind’s Eye Patterned Paper was adhered to a 3 7/8″ x 5″ piece of the same paper pack. The edges were sanded and stitched. May Arts Ribbon was threaded to one of the Lattice openings before the image was adhered to the paper. The ribbon was tied into a bow and the layers were adhered to a piece of white cardstock, cut and embossed with the second smallest Grand Scallop Rectangle Nestabilities die.
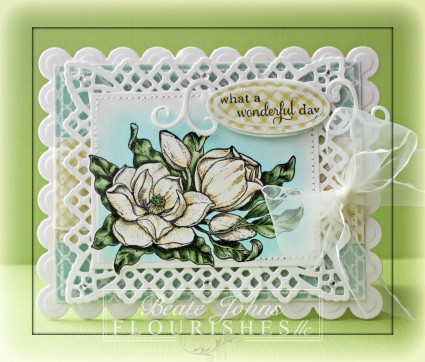
A sentiment from the set was stamped in Tuxedo black Memento Ink over a piece of MME paper, that had been cut and embossed with the smallest Petite Oval Nestabilities die. It was adhered over a piece of white cardstock, cut and embossed with a Fancy Tag die. It was adhered to the upper right of the image. A few Baby Bling Rhinestones finish off the card.

Would you like to win the Magnolias set? All you need to do is leave some love in the form of a comment on the blogs below! Why? You need to try to figure out…..

One of the ladies on our link list below will be picking a name from the comments on her blog post today. We don’t know which one it is… so the more blogs you leave comments on, the more chances you have to win!

With that bit of eye candy, you’ll surely want to see the design team’s cards and creations in full color when you take a trip over to their blogs!

DID YOU KNOW YOU COULD WIN OUR ENTIRE MARCH RELEASE? Have you checked out our Pinter-Inspiration Color Challenge? Just click HERE to find out how to play! You can also play in our Noon Time Challenges! Wednesday, we unveiled our Round and Round Challenge HERE. And, yesterday we shared the Front & Back Challenge HERE! Both are fast-paced noon time challenges that will give you yet one more chance to win our full March release! All challenges will close this Friday at 5 PM EST and winners will be announced Saturday in our Winner’s Circle blog post! So get those fingers inky and good luck!

And, don’t forget our New Release Bundle! If you buy all three sets in a bundle, you save 10% off the price. But, this offer only lasts through next Friday, March 23. So… you have to act fast! Just click HERE to see.

Thanks so much for stopping by! Have a wonderful day.
Beate

© 2012 fresh & fun Suffusion theme by Sayontan Sinha