
Funky Trees is another one of the first sets I ordered. I just love the little trees and thought the set would be perfect for 3″ x 3″ thank you cards. I love to make those little cards.
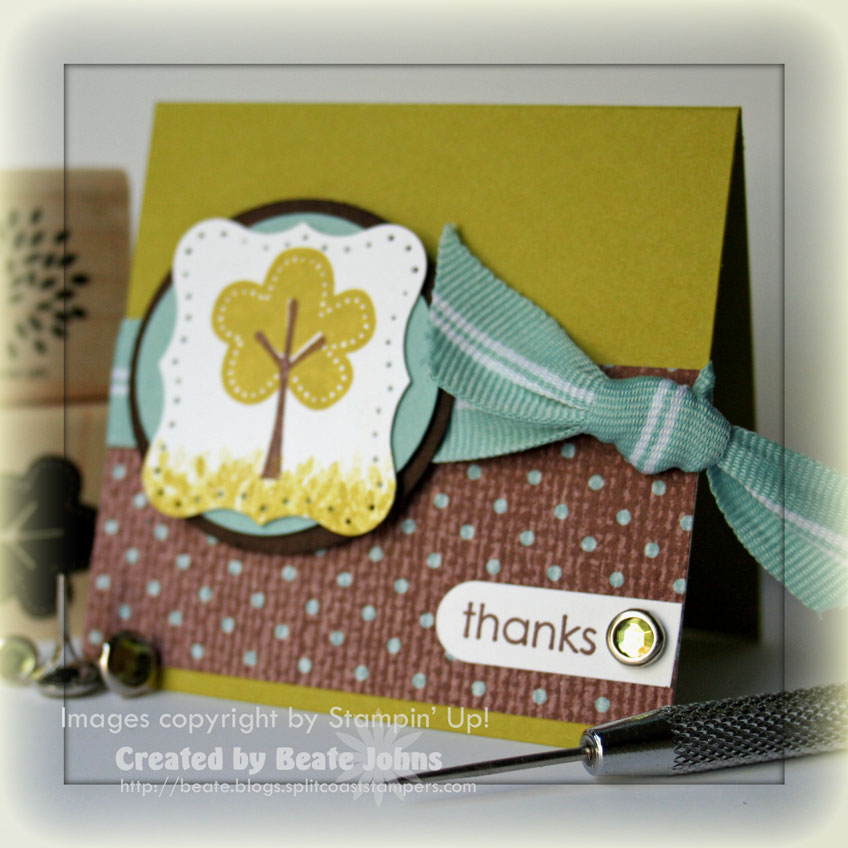
I started with a 3″ x 6″ piece of Kiwi Kiss cardstock folded in half.
The designer paper is from the Parisian Breeze Specialty Paper pack. When I ordered it I didn’t even realize that this designer paper is textured cardstock! Can I hear a big SHUT UP, please. LOVE IT!!!
The strip measures 1 5/8″ x 3″ and was adhered to the lower part of the card base. Over the paper I tied striped Baja Breeze Grosgrain ribbon.
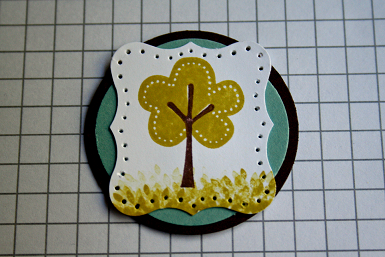
I stamped the tree top in Kiwi Kiss, the trunk in Chocolate Chip ink on Whisper White cardstock. The image was punched out with the Curvy Label punch. On the bottom I used another tree top to create the grass look in Kiwi Kiss by just stamping it over and over until I liked the look. Last I paper pierced the edge to make it look more like a mini top note die.
Just the Curvy Label alone looked too blah, so I cut two Baja Breeze 13/8″ circles in half and layered it on a 1 3/4″ Chocolate Chip cardstock circle and centered my label on that. The layers were attached with dimensionals to the main card. I took a view pictures how I pieced the circles together. You can see it by clicking on more on the bottom of the post.
The whole sentiment was too long for my tiny card, so I only inked and stamped the thanks in Chocolate Chip ink on Whisper White cardstock. It was punched out with the Window Word punch, one end was cut straight and taped to the lower right of the card. A Ice Circle Rhinestone brad finishes off this quick card.
To check out how to make the 1 3/8″ circles look better on the 1 3/4″ circle punch, click on more.

Supplies:
- One 1 3/4″ Circle Punch-out
- Two 1 3/8″ Circle Punch-outs
- Image on Curly Label Punch-out
- Paper Cutter
- Scissors
- Adhesive
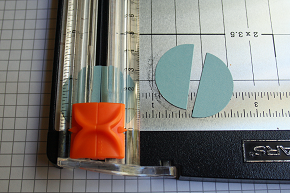
Step One:
Cut both 1 3/8″ circles in half.
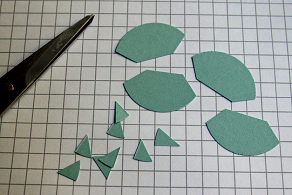
Step 2:
Cut the edges of each half circle off.
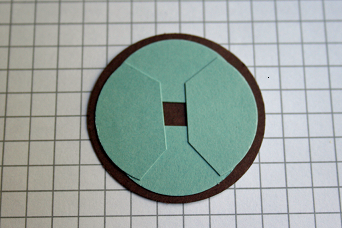
Step 3:
Adhere the half circles over the bigger 1 3/4″ circle. They won’t line up 100% perfect, but your Curly Label Punchout will cover it.
Step 4:
Tape your Curly Label punchout over the layered circles. Done! 🙂
Beate
42 Responses to “Cute little Funky Tree”
Sorry, the comment form is closed at this time.


Hi Beate! How are you? Love this card! It was one of my first stamp set purchases too for this catty! Those trees are too darn cute!
There you are again! I’m so happy to see you stamping again! I’ve missed you! 🙂 LOVE your card!
Cute little card! I love that new textured DP.
lovely card Beate and the tut is awesome. I sometimes patch my circles too. But usually I just punch 3 more of the scallop circles and tape them all together side by side to fit my circles. I like your idea too though. TFS
This is too too cute Beate – love that tree as well!! The paper is YUMMY! So glad you are stampin’ again, girlie! *STAMPIN HUGS* Alex
Wonderful card – the circle piecing is a testament to your quilting skills!
Beautiful card. I love the colors.
Very cute Beate and love that you showed how you made the circle behind the image!!!
Thanks for the insight into how you made that look! So clever!
Gorgeous, Beate!! That set (and now paper pack) is on my list (gosh I wish my DH wasn’t laid off so I could order today…lol). I totally love the colors and your circle is just too clever, girl!! Love this!!
OH It’s so wonderful to see you creating! (((HUGS))) BEEAUTIFULL I need to give some love to my stamps.. its been 3 days! LOL..
It was so nice to see your post in my google reader. I have missed all of your wonderful creations. I just signed up to be a demo last week and this set is going to be on my very first order. I can’t wait. Your card is adorable. Glad to see you stamping again. -Molly B
So glad to see you back creating Beate!!! Missing seeing your creations every day. This card is no different, absolutely darling.
What a cute card – love how you put the curvy label on the circle, and how smart to cut it to make it look better – you’re such a smart gal! 🙂
LOVE your card Beate!!!! I SO enjoy your creations and glad to see your posts when they are up, but also Happy that your hubby is back!!!! I FINALLY got to meet Cambria, which was SO exciting and I am hoping that one day I’ll meet you as well!
Hugs,
Vicki
LOVE this! Great work!
I love this cute little card, Beate! Thanks for the tutorial!
Gorgeous again Beate !
Adorable! Love the colors! 🙂
It’s good to see you back blogging and showing us your beautiful work.
Soooooo glad you are back posting! I am always inspired by what you do! I do love that Parisian Breeze paper, too. Thanks again for posting such beautiful work!
Glad to see you back!! I realize your life must be FULL with your family obligations, but it is SOOO nice to see your work again. You truly inspire…thx
what a darling card, Beate. i just love the color combination.
oh btw, glad your back 🙂
LOVE this Beate! I just ordered this set! Can’t wait to play with it now! Thanks, as always, for the inspiration!!!
Beate, I laughed out loud when I saw your title for the post..because I also call this set Funky Trees….and guess what…it’s not the name…LOL It is called Trendy Trees but I have been calling it Funky Trees all along! I guess it is misnamed!! lets start a movement to rename the set!
Very cute! TFS
I’m lovin’ this card! The colors and image are so funky and fun! 😀
Fun colors!! The Trendy Trees set was one that I knew I had to have right upon looking at the new catalogue. I can’t wait to receive my box full of new goodies. Only at the end of next week, though…
Thanks for sharing!
Cindy 🙂
mal wieder eine super Idee!!
So good to see some new posts from you! Love the way to do the circles. Thanks!
Beate,
It’s so good to see you back. Hope things are going good at home.
This card is amazing and I love the tutorial on how to make those 2 circle punches work better together. That bugged me.
Here’s wishing you and your family well.
Pam
i love these trees!! can’t wait to get mine! and i love the curley label…i need to use that more! good to see you back!!
xoxo
Cute card! Trendy Trees is the first set that caught my eye when I looked at the catalog and it will be the first set that I buy when I can afford to.
Very cute. This little card is precious and with wonderful colors and details. I’ve been eyeing this set. Oh, Beate, you enabler! Giggle…Vera’s my demo….I’m going to have to tell her you’ve (been bad); I mean you sent me!
Glad to see you’re back Beate! I’ve been calling you “beet” all these years, and am finding out your name is pronounced “be ah ta”. It will take some getting use to for me to change my pronounciation. LOL Glad to have you back – lovely card – and thanks for the tutorial.
Bless you! So have missed you – hope you are well and life is settling down a bit. Thanks for all you creativity and sharing of it.
I love making 3×3 cards! I love how you layered the circles with the tag. lovely
I agree….I LOVE this set !! It was one of the first stamp sets I ordered !! It’s soooooooo cute and versatile and completely adorable !! Love your card !!!
Too cute – Beate!!! I had to have this Set too – LOL!!!
you clever little thing, you! love this card, Beate! and YES! I’m so glad you are back to stamping! this is one of the two sets I got to! love it! tfs!
Glad to see you posting again Beate! What a great combination of colors on this card! You are making me really regret not buying that set on my first order! Love it!
wow – LOVE this card (and all your other ones too – who am I kidding!!??!?? LOL) so – another set just went on my next order list…ya know…I should just wait until all of you favorite stampers of mine do samples and then I will know WHAT I want to order in the first place…LOL tfs (as always!)
((()))Reen
This was my first SU stamp. I am having HUGE trouble lining up the trunks with the tree tops. The only thing I can think of woould be to cut out and pop up the tree top. Any ideas ?