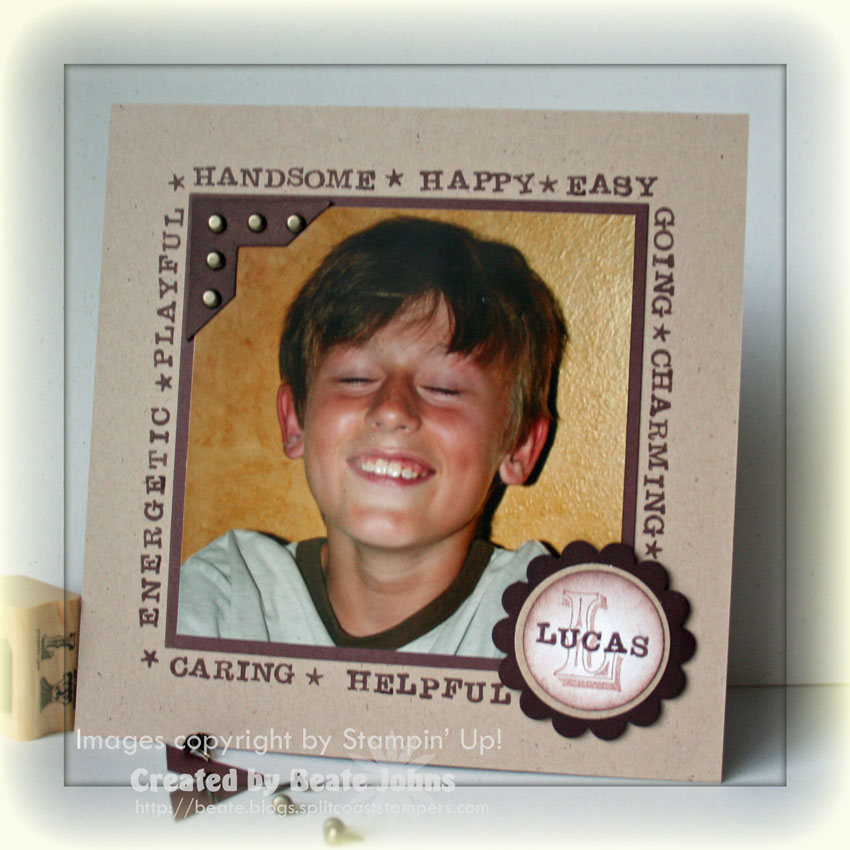
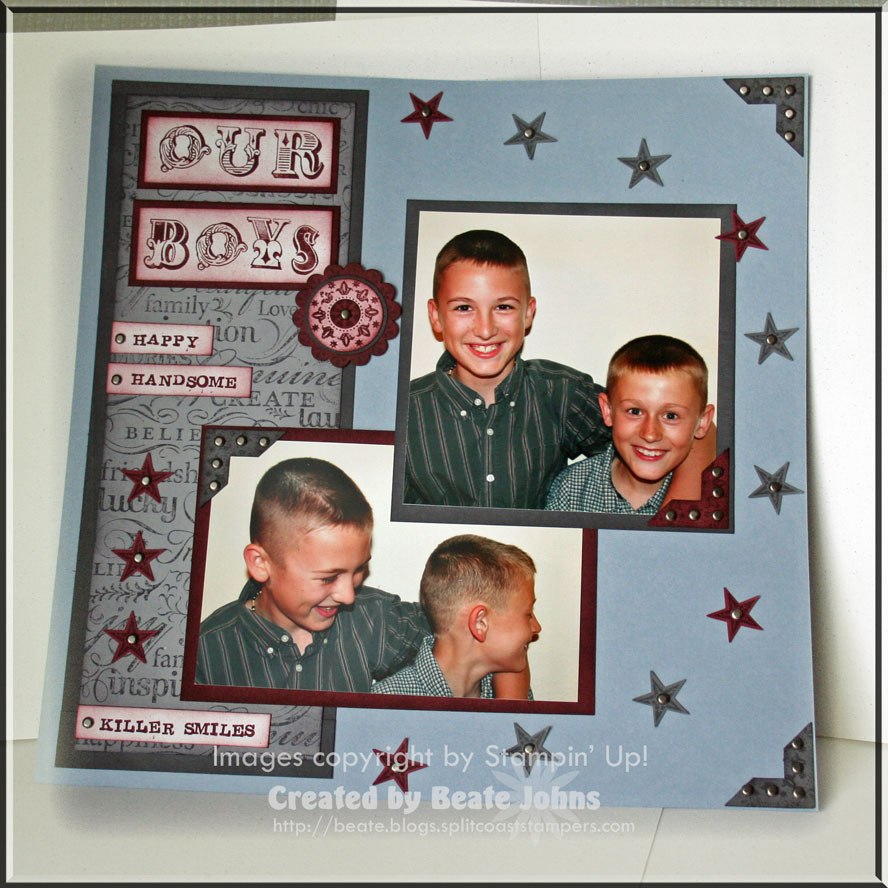
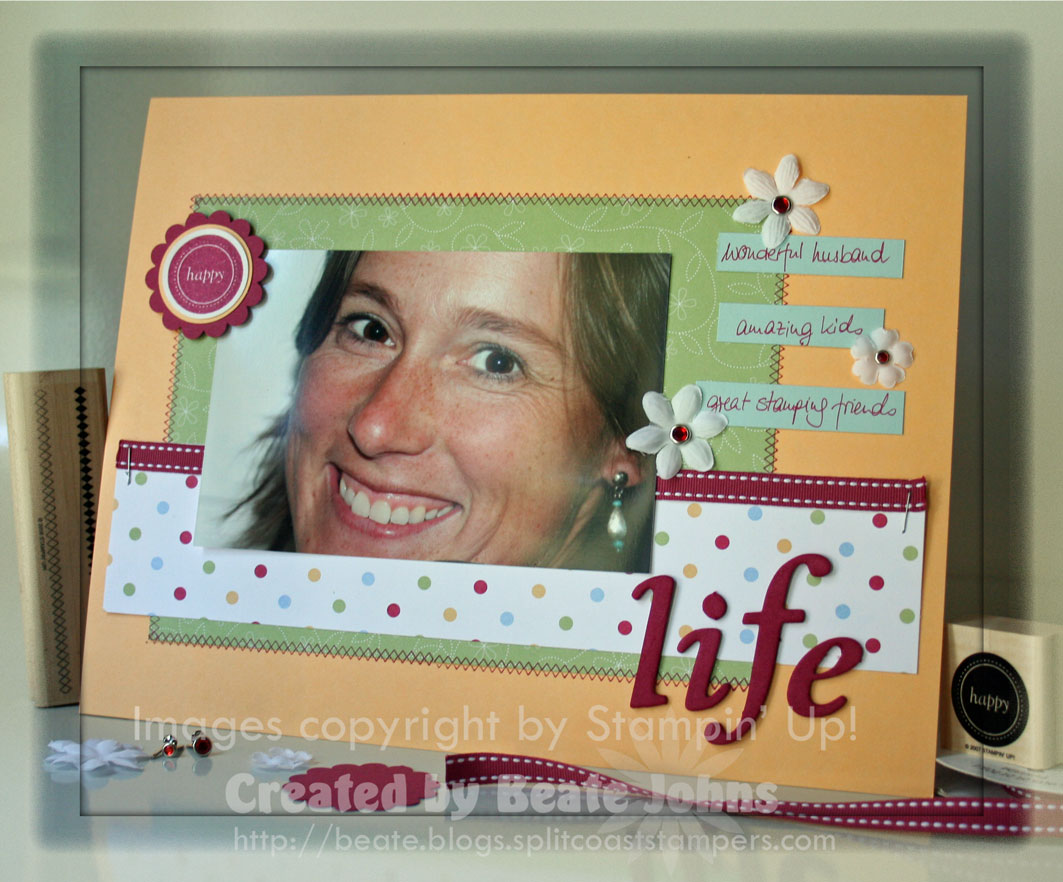
I am starting to look forward to my Scrapbook Sunday. I like to scrapbook, but I am a slow stamper and an even slower scrapbooker. So if I didn’t have this dedicated scrapbooking day on Sundays, I don’t think I would ever do it.

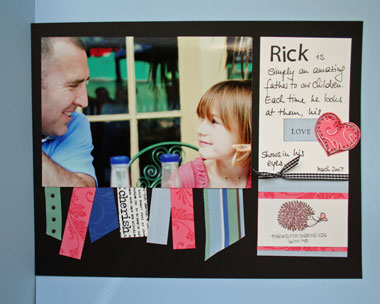
Okay, you have to bear with me. I am trying to fill Rick’s Day’s to Remember calendar. Today and the next 9 Sundays, I will just post 6″x6″ pages.

I like using the sketch challenge layout for the scrapbook page. It gives me a head start. So here is my page with this weekend’s sketch challenge.

wonderful-life-6×6-page.jpg

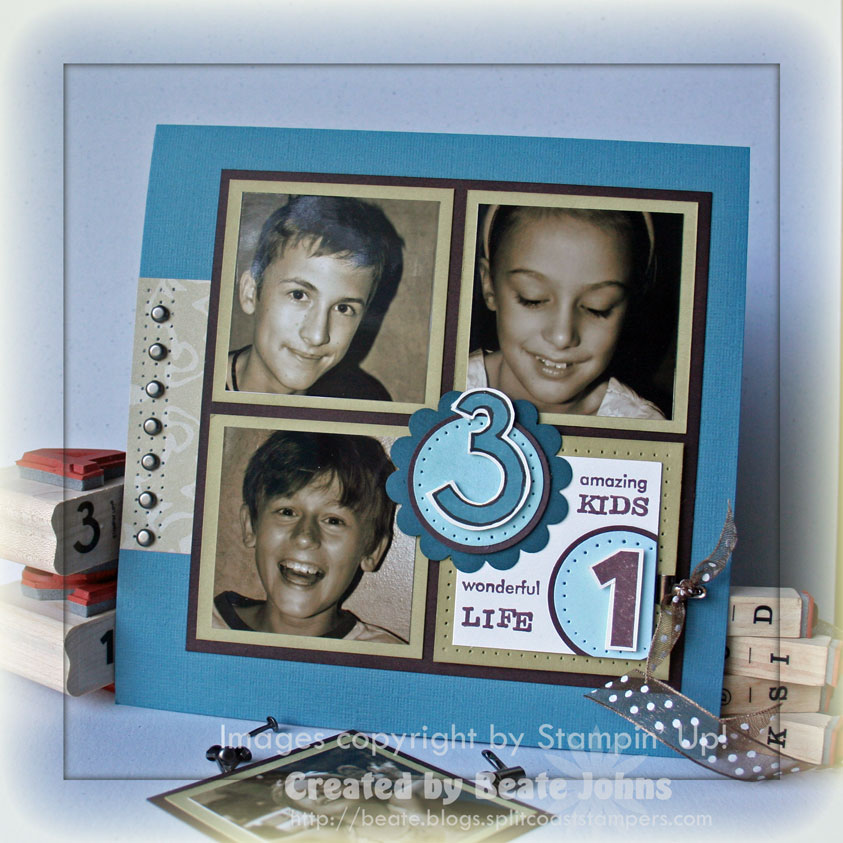
The scrapbook page is a 6″ square of textured Bayou Blue cardstock.

I cut wallet size pictures down to 2″ squares and layered them on 2 1/4″ sponged River rock squares.

Next I taped them down to sponged 4 7/8″ piece of Chocolate Chip cardstock.

I took another 2 1/4″ sponged River Rock square and paper pierced around the edges. I cut a 1 7/8″ square of Very Vanilla cardstock and stamped amazing from Amazing to Zany on the top right. Underneath I stamped Kids with the Simple Serif Alphabet.

On the bottom left of that square I stamped wonderful from Amazing to Zany and Life with the Simple Serif Alpha.

I stamped the 3 from Big Deal Numbers in Blue Bayou and the 1 from the same set in Chocolate Chip on Very Vanilla cardstock and cut them out.

I layered a sponged and paper pierced 1 1/4″ Soft Sky Circle first on a 1 3/8″ Chocolate Chip circle and then on a sponged Blue Bayou scalloped circle. I adhered the 3 with dimensionals in the center of that circle.

I took another 1 1/4″ Soft Sky circle and again layered it on a 1 3/8″ Chocolate Chip circle. I taped it partially on the bottom left of the Very Vanilla square and cut off the overhanging part. then I paper pierced around the leftover circle and added the 1 with dimensionals.

I adhered this last River Rock square with dimensionals to the Chocolate chip layer, clipped on of the small Library clips from the Holiday Mini catalog on the right hand side and tied May Arts ribbon on it.

For the Horizontal layer I cut a 1 3/4″ x 2 3/4″ piece of Holiday Harmony Designer paper and taped it in the middle of the left hand side of the page. I paper pierced three rows and added Pewter brads in every third hole in the middle row.

Like I mentioned last Sunday, I am working on a 6″ x 6″ Days to Remember Calendar. Here is one with this weekend’s sketch challenge and a picture of Lucas I took this week.

simple-serif-alpha-wsc23-lu.jpg

I had the hardest time getting him to smile at me.

In this picture he has his eyes closed, but I really liked his smile. He looks so happy!

The page base is a 6″ x 6″ piece of Kraft cardstock.

I cut the photo down to a 4″ square and layered it on a 4 1/4″ square of Chocolate Chip cardstock.

Around the image I stamped words describing my son in Chocolate Chip ink with the Simple Serif Alpha.

I added a large photo corner in the top left with five  Antique Brass brads inside and a Chocolate Chip scallop circle on the bottom left. On top of the scallop I layered a 1 3/8″ Kraft circle. I sponged the edges of a 1 1/4″ Very Vanilla circle first Creamy Caramel, then with Chocolate Chip ink. Next I stamped the L from Wild West Alpha in second generation Close To Cocoa in the center of that circle and stamped Lucas in Chococlate Chip with the Simple Serif Alpha over it.

too-cute-rebecca-august2007.jpg

I love this shot of Rebecca.

I took it on morning in August when Rebecca was getting ready for school.

Just looking at her makes my heart melt.

I am starting to make a 6″ x 6″ Days to Remember Calendar for Rick to take with him when he goes to Quatar. This will be one of it’s pages.

The scrapbook base is a 6″ x 6″ piece of Textured Groovy Guava cardstock. I used this weekend’s layout to make the page.

The paper for the half circle is from the Darling Doodles Designer paper. I used one of my soup bowls to trace the circle, cut it out, matted it with Purely Pomegranate cardstock that I scalloped with my corner rounder. Ribbon from the Fairy Tale Ribbon Originals was tied around the left side of it.

I cut the photo of sweet Rebecca down to 3 1/2″ x 5″ and layered it on Wild Wasabi cardstock.

The flowers are from the set Too Cute. They are stamped in Groovy Guava, Purely Pomegranate and Soft Sky Classic ink on Whisper White cardstock. I cut them out, added a black brad in their center and adhered them with dimensionals.

Delightful from the set It’s all Good (I always hear the actress from SNL saying it in the sketch of the one legged woman when I say or hear these words) was stamped in Purely Pomegranate on Whisper White cardstock, punched out with a 1 1/4″ circle punch and layered first on a 1 3/8″ Wild Wasabi circle, then on a Purely Pomegranate scallop circle.

wanted-handsome-boys.jpg

I made this scrapbook page with last week’s sketch.

I took these pictures two years ago when I first got my camera.

The boys still didn’t mind to get short hair cuts and they looked sooo much younger. I love those shots.

This page has the most brads I have ever put on a scrapbook page. LOL

The scrapbook page is 12″ x 12″ piece of Bordering Blue. The strip on the left side is Going Gray and Basic Gray cardstock.

The going gray cardstock was stamped with Tres Bien Background and Basic Gray ink.

The medaillon stamp and the star stamp are from Wanted.

Our boys was stamped with Collage Alpha, the other words with Simply Serif Alpha.

its-all-good-good-life-s.jpg

I feel I am totally blessed.

 I have a wonderful husband, amazing kids and great friends.

Lucas took this picture of me about a year ago and I finally scrapped it. Of course…I sent it in to Stampin’ Up! They posted a call for Event Stamping helpers last month. You had to send in one scrapbook page, one 3D item and three cards. This is the page I made for it.

The page base is a 8 1/2″ x 11″ piece of Apricot Appeal cardstock. The Certainly Celery Prints designer paper measures 6″ x 8″. I taped it down and stamped my All in a Row stamp around all four sides.

The polka dotted strip measures 2 1/4″ x 10 1/2″ and is from the Cutie Pie Designer paper pack. I stapled Purely Pomegranate double stitched ribbon to the top.

Happy is from It’s All Good, stamped in Purely Pomegranate on Shimmery White cardstock. I punched it out with the 1 1/4″ circle punch, layered it on a 1 3/8″ apricot appeal circle and on a Purely Pomegranate scallop circle punchout.

The letters for the word life are from  the Onboard Lots of Letters Chipboard assortment. I applied Purely Pomegranate ink over it with a sponge dauber and taped them on with Snail adhesive.

The journaling strips are made with Soft Sky cardstock. I wrote on it with my Rose Red marker and added three flowers from the Pretties Kit. The flower centers are Jewel brads from the Fire Circle Jewel brads pack.

baroque-motifs-arms-and-leg.jpg

I made this page with this weekend’s sketch.

I love that photo of Rebecca. We took it this spring.

It her arms and legs look super long.

My scrapbooking is rather simple. I don’t want to take away too much from the picture.

The base is an 8 1/2″ x 11″ piece of Soft Sky cardstock.

The Blue Bayou Cardstock measures 7″ x 9″ and was stamped with the Swirl from Baroque Motifs and sponged to give it more depth.

I added a large Rose Red Photo corner to the top right of the photo and added five Rhinestone brads from the Ice Collection.

The title is stamped with the Short Order Alpha on 1 1/4″ white circles. Those were layered on 1 3/8″ Soft Sky Circles and finally on Rose Red Scallop circles. I added Dazzling Diamond Glitter on top of the words with help of my glue pen. The circles with “All” and “Legs” have a paper piercing row underneath and the top circle also has a flower from the Pretties kit attached with a Rhinestone brad.

The ribbon is from the Fairy Tale Ribbon Originals and was added with Pewter Hodgepodge Hardware. The big chipboard flower is from the On Board Blossoms & Basics assortment. I added Rose Red Craft ink directly on the flower and then cut a smaller size flower out of the Soft Sky Prints Designer paper to layer on top of it. Next is small chipboard circle colored with Not Quite Navy Craft ink that was topped with another Ice Rhinestone circle brad.

The scallop border is (like always) made with my corner rounder.

Between Rick and Rebecca. It makes my heart melt just a little to see the love that they share.

fun-and-fast-notes-rick-pag.jpg

This 8 1/2″ x 11″ page is the last of my Fun & Fast Notes Scrapbook pages that I made for the Display at Denver.

I saw a scrapbook page like that in a scrapbook magazine and tried to recreate it with Stampin’ Up! supplies. I liked how theblack background and the crazy ribbon/paper fringes looked together.

The word Love is from the set Fundamental phrases, the heart is doodled. Some of the strips as well as the heart were stamped with the now retired set Finest Flourishes.
 

Here is a 12″ x 12″ page I made for the Build a Flower Tin Display board at convention.  The pictures were taking in March 2007 in San Antonio.

build-a-flower-texas-spring.jpg

I used the Monogram S and Big Deal Alpha to make the title.

I inked up the alphabet stamps with Classic Brilliant Blue ink and then used the small flower stamp from Seeing spots to kiss and twist.

If you don’t know how to do this easy and fun technique, check out my tutorial over on Splitcoaststampers\ for step by step instructions.

When Lucas was a year old, we moved from Virginia to Germany. I was excited to spend three years back in my home country. It was especially sweet because half a year before we got this assignment my Dad had been diagnosed with a certain form of Leukaemia. We knew he would only have three years to live. I felt so blessed that we got to move back “home”, so he could see my boys grow up a little.

fun-fast-notes-lucas-1997.jpg

We lived in the South of Germany, about one hour away from Stuttgart. One clear days we could see the mountains from the Schwaebische Alb from our kitchen window.

This picture makes me smile big time. Lucas was just so darn cute!  The picture was taken in a field at a deer park we used to go visit. It was only 20 minutes from our house. This saying from the Stem Sayings was absolutely perfect of this 6″ x 6″ page.

The bird from Fun & Fast Notes was stamped on Whisper White cardstock, colored with classic pads and aqua painter, cut out and mounted on a round metal edged tag.

The designer paper is from the retired Spring Flower pack. I had brushed white craft ink reinker  on the paper with my large watercolor brush, let it dry and then stamped the saying over it to make it more visible.

we lived in Virginia, our son Lucas was born. Unlike Austin, who looked nothing like he does now when he was a baby, Lucas was Lucas right away. I used one of his baby pictures for one of the scrapbook pages for the display samples for Fun & Fast Notes.

fun-and-fast-notes-lucas-ba.jpg

I picked this picture, because he is wearing a little outfit in BRILLIANT BLUE!!! I had to use it so I could get rid of some of that very obnoxious Brilliant Blue Prints Designer paper. I couldn’t believe that I really liked the page when it was done. I mean….with Brilliant blue paper and all. LOL

This page started out with a 6″ x 6″ piece of Bashful Blue cardstock. I think I stamped or wheeled something over it in White Craft ink, but I can’t remember and the photo doesn’t show. It might have been the Flannel Plaid background.

I cut a 1 3/4″ x 6″ piece of Brilliant Blue Prints designer paper and adhered it to the right hand side of the page. Next I  stamped the saying over and over in black ink on Shimmery White cardstock and added dots in between.

For the tag I stamped the Baby Buggy image in Bashful Blue on my Shimmery White tag, inked up only new baby in black, stamped that on the top of the tag and wrote the journaling with the black journaling marker over the image. I punched out a circle from the Designer paper and taped it over the top of the tag, punched a hole and added light blue organdy (retired) and black gingham ribbon to it.

Wasn’t he a CUTE baby? He turned 11 years old last month. Time flies!

© 2012 fresh & fun Suffusion theme by Sayontan Sinha