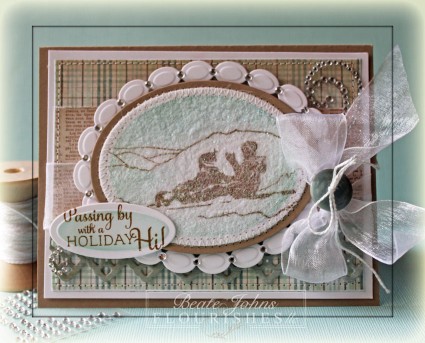
Today’s challenge hostess is Heather Jensen. She is asking us to use the Dryer Sheet Technique on your project. I love the soft look it gives to the image.

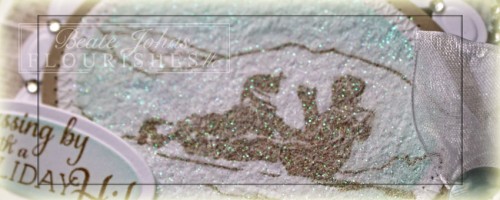
I started by stamping  an image from A Season of Celebration in Vintage Photo Distress Ink on Neenah Solar White cardstock. It was cut with Classic Oval Nestabilities dies and sponged with Tumbled Glass distress ink. A used Dryer Sheet was adhered over the image, cut to size and Glitter was added over it. The oval was stitched to a piece of Kraft cardstock that had been cut and embossed with the next size oval Nestabilities die and then adhered to white cardstock, cut and embossed with the largest Beaded Oval Nestabilities die.  A small Baby Bling Rhinestone was adhered between each of the beads.

A 2 1/3″ x 5″ piece of MME Lost & Found Portobello Road Paper was adhered 3 3/4″ x 5″ piece of the same paper pack. The layers were stitched to a 1/4″ bigger piece of cardstock.  A 5″ wide strip of  was cut and embossed with a Lace Doily Accent die and it was adhered under the horizontal strip. White May Arts Ribbon was tied around the horizontal strips. The bow was topped with a button that was tied on with embroidery floss. The layers were adhered to the card base, a 5 1/2″ x 8 1/2″ piece of Kraft cardstock, folded in half.

A piece of white cardstock was cut and embossed with the smallest Petite Oval Nestabilities dies. A sentiment from the same set was stamped on the oval and the inner part was sponged with Tumbled Glass. Part of a Finesse Rhinestone swirl was adhered over the bow and small part on the lower right, right under the sentiment panel.

Please check out my fellow Timeless Tuesday Challenge members:

Cindy Haffner
Heather Jensen
Maki Jones
Mona Pendleton
Silke Ledlow
Tammy Hershberger
and
November Guest Designer Miriam Napier

This card also works great for last weeks Do you Stack up challenge, which was to add A Splash of Blue. Thanks so much for stopping by! I hope you have time to participate in the challenge. Have a wonderful day!
Hugs and smiles

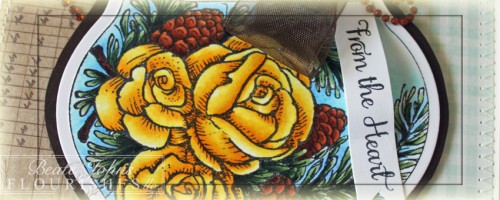
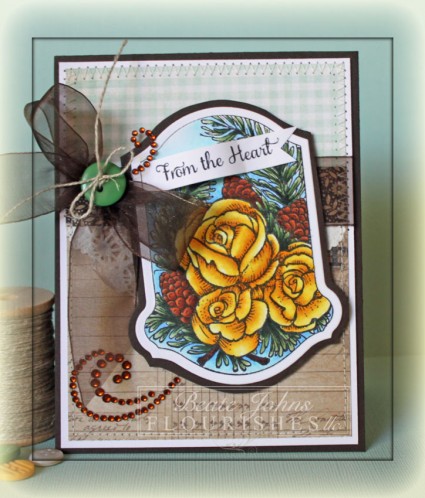
Tammy challenges us to use flags in our project. For my sample I started out with an image from Petals & Peace. It was stamped in Tuxedo Black Memento Ink on Neenah Solar White cardstock. It was cut and embossed with an Flourish exclusive Spellbinders die and colored with Copic Markers (Roses: Y13, Y15, Y17    Pine cones: E97, E99, E37   Pine bough: G21, G24, G28    background: Boooo, B000, B32).

Clear Spic pen was added over the darkest part of the roses and the image was adhered to a piece of Canyon Brown cardstock and hand cut into a slightly bigger layer.

Two 3 3/4″ long pieces of MME Lost & Found 2 Sunshine paper were adhered to a 4″ x 5 1/4″ piece of Solar White cardstock. A third strip was adhered over both pieces and part of a paper doily underneath that. The edges were stitched and brown May Arts Ribbon was tied around them. The ribbon was topped with a button which was tied on with Linen Thread.  The layers were adhered to the card base, a 4 1/4″ x 11″ piece of Canyon Brown cardstock folded in half.

A sentiment from the same set was stamped in Tuxedo Black Memento ink on a thin strip of cardstock. The right end was cut into a flag, the paper strip was bend into a wave. Parts of a brown Finesse Swirl finish off the card.

Please check out my fellow Timeless Tuesday Challenge members:

Cindy Haffner
Heather Jensen
Maki Jones
Mona Pendleton
Silke Ledlow
Tammy Hershberger
and
November Guest Designer Miriam Napier

Thanks so much for stopping by! I hope you have time to participate in the challenge. Have a wonderful day!
Hugs and smiles
 

Mona is today’s challenge hostess. She asked us to use the Double Embossing Technique.  That’s not an easy technique for me, just because it is geared towards CAS cards. Those are absolutely NOT my strength. LOL

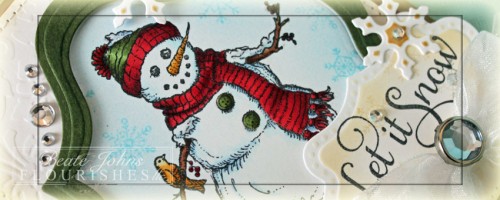
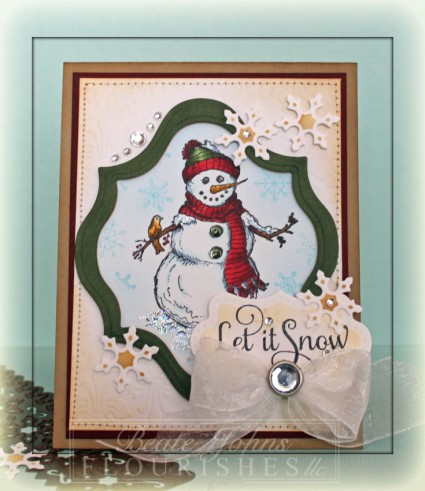
For my sample I embossed my background with Provocrafts Brocade Embossing Folder. The opening were blocked with cardboard pieces cut with a Label 13 Nestabilities die. The snowman from Warm Winter Wishes was stamped in the “un-embossed” center with Tuxedo Black Memento ink and was colored with Copic Markers (R35, R37, R59, R39, G82, G94, G99, BG0000, E23, E25, E27, YR 21, YR23, YR24).  I chose the colors for last weeks color challenge on Splitcoaststampers.

The outside of the layer was masked and the center sponged with Tumbled Glass Distress ink. The same ink was used to stamp snowflakes from Warm Winter wishes around the snowman.

Stardust Stickles was added to the snow on the ground and the extra snow on the snowman and its button were coated with Glossy Accents. A frame was cut and embossed out of Artichocke paper with Label 13 Nestabilities dies.  The stamped layer was stitched to a slightly bigger Cherry Cobbler cardstock piece and the frame was attached over the image with dimensionals.

A sentiment from a soon to be released Sentimental Christmas stamp set was stamped in Tuxedo Black ink over a piece of cardstock, that had been cut and embossed with a die from the new Twisted Metal Tags & Accent die pack. The panel was sponged with Antique Linen and snowflakes were stamped over it in the same colors.

A strip of white cardstock was cut and embossed with the Snowflake Borderabilities dies. The snowflakes from that border were sponged with Vintage photo Distress ink and adhered to the card base with dimensionals.  They were topped with Want2Scrap Rhinestones.

A bow was tied out of May Arts Organdy Ribbon, topped with a Recollections Rhinestone brad and adhered under the sentiment panel. Last everything was adhered to the card base, a 4 1/4″ x 11″ piece of Kraft cardstock folded in half.

Please check out my fellow Timeless Tuesday Challenge members:

Cindy Haffner
Heather Jensen
Maki Jones
Mona Pendleton
Silke Ledlow
Tammy Hershberger
and
November Guest Designer Miriam Napier

as well as Flourishes Design Team members

Christine Okken
Danielle Kennedy

and Jan Marie Caruso.

Thanks so much for stopping by! I hope you have time to participate in the challenge. Have a wonderful day!
Hugs and smiles
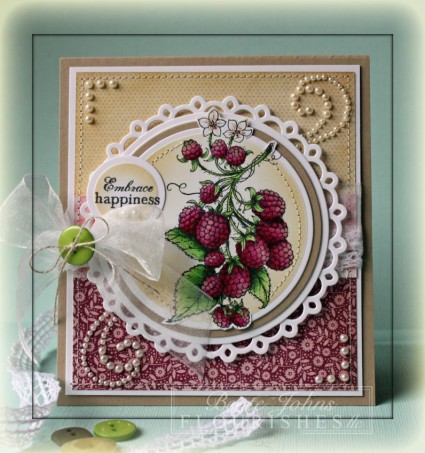
I am the hostess of today’s Timeless Tuesday Challenge. I love the Out of the Box technique and use it often. I just like the look. So that’s today’s challenge. Create a card with the Out of the Box Technique.

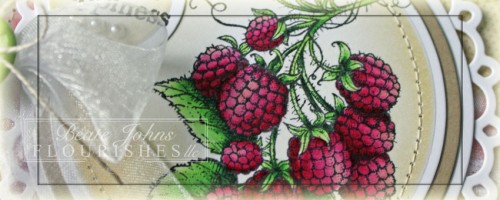
For my sample I stamped the raspberries from the gorgeous Berry Sweet stamp set in Tuxedo Black Memento ink on Neenah Solar white cardstock. It was cut out with a Classic Circle Nestabilities die and colored with Copic Markers (Berries: RV11, RV17, RV19, R39 and G21   Leaves: YG11, YG13, YG17   Flowers: E50, E51, E39) The circle was sponged with Antique Linen and a bit of Vintage Photo Distress ink before it was first adhered on a Kraft cardstock circle. A border was sewn around the image before the layers were adhered to a  slightly bigger white circle. All layers were adhered to a piece of white cardstock, cut and embossed with the biggest Picot Edge Circle Die.

Three piece of MME Lost & Found 2 Blush patterned paper were stitched to a 4 7/16″ x 5″ piece of white cardstock. May Arts Crochet Lace was adhered over the horizontal strip and a piece of white Organdy Ribbon was tied around it. The image layers were adhered over the ribbon with dimensionals, the ribbon was threaded through the Tear drop circle border and tied into a bow. A Basic Grey button was tied over it with Linen thread.

A sentiment of the set was stamped in Tuxedo Black on a small white cardstock circle. The circle was sponged like the image circle and adhered to the upper left of the bigger circle. Three Baby Bling pearls were adhered underneath the sentiment as well as more pearls on the top left and bottom right corner. Two pieces of a Finesse Pearl Swirl were adhered to the upper right and lower left of the image.


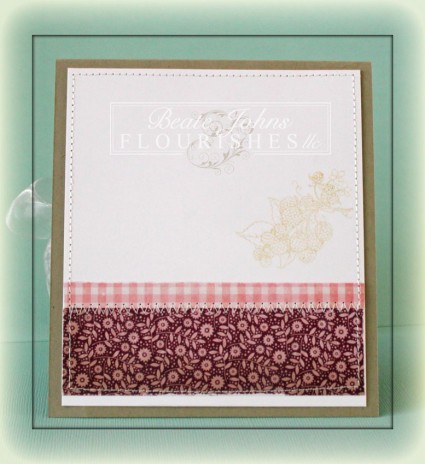
The inside of the card is pretty simple. Just another piece of white cardstock with some patterned paper strips of the paper used on the front.

Please check out my fellow Timeless Tuesday Challenge members:

Cindy Haffner
Heather Jensen
Maki Jones
Mona Pendleton
Silke Ledlow
Tammy Hershberger (is out sick, but if you have time,  stop by anyway to post her some well wishes)
and
November Guest Designer Miriam Napier

Thanks so much for stopping by! I hope you have time to participate in the challenge. Have a wonderful day!
Hugs and smiles


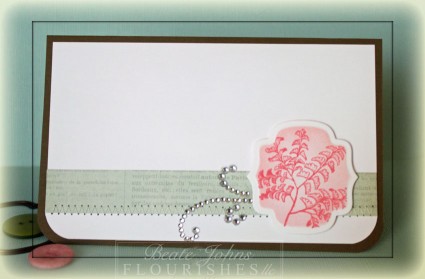
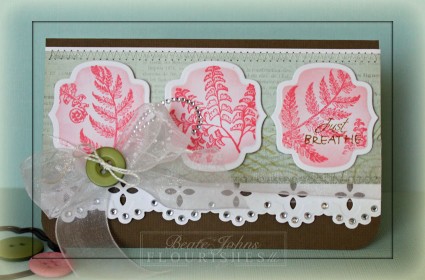
Today’s Timeless Tuesday Challenge hostess is Maki. She challenged us to use leaves and tree images, but no flowers. I combined this challenge with a Hope You can Cling to challenge. For my sample I chose to use the stamp set Ferns and Fiddles.

I cut and embossed three pieces of Neenah Solar White cardstock with a Label 9 Nestabilities die. Different ferns were stamped on each panel with Worn Lipstick Distress ink before the panels were sponged with Spun Sugar Distress ink.

The card base is a 6″ x 7 1/2″ piece of Soft Suede Textured cardstock scored at 3 3/4″. The bottom corners were rounded. A piece of white cardstock was cut and embossed with Triple Scallop Edgeabilities dies. A 2 1/4″ x 6″ piece of MME Lost and Found Market Street paper was stitched to it and May Arts Organdy Ribbon was tied around the layers. A Basic Grey Button was tied over the bow and Baby Bling was added to the scallops.

A sentiment was stamped in Brushed Corduroy Distress ink on one of the panels before the strip was adhered to the card base. Part of a Finesse Rhinestone swirl was adhered next to the bow.

The inside of the card was decorated with a strip of the same patterned paper that was used for the front along with another fern panel.

Please check out my fellow Timeless Tuesday Challenge members:

Cindy Haffner
Heather Jensen
Maki Jones
Mona Pendleton
Silke Ledlow
Tammy Hershberger
and
October Guest Designer Rosemary Dennis

Thanks so much for stopping by! I hope you have time to participate in the challenge. Have a wonderful day!
Hugs and smiles
 

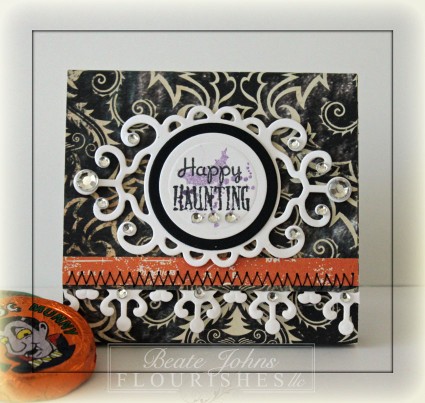
Silke is today’s Timeless Tuesday Challenge hostess and she asked us to create a Halloween project. I thought the Peek-a-boo Treat holder on SCS would work great for that. I used this sample in the video tutorial for the project.

The treat holder base is a 3 1/4″ x 9 1/4″ piece of Authentique Glowing paper. After scoring the paper a 3/8″ x 3 1/4″ strip of orange Echo Park Apothecary Emporium paper was adhered to the front flap. A 3 1/4″ wide Neenah Solar White cardstock strip was cut and embossed with an Ironwork Accent die and stitched underneath the flap.

Another Ironwork Accent die was used to cut a frame. It was layered first with a black cardstock circle, then with a slightly smaller white one. Both circles had been cut with Classic Circle Nestabilities dies. The white circle had been stamped with a sentiment from Flourishes Witching You a Happy Halloween in Tuxedo Black Memento ink. A swirl and bat from the same set had been stamped over the sentiment in second generation Dusty Concord Distress ink. The layers were adhered to the treat base and Rhinestone Bling from Want2scrap were added to finish it off.

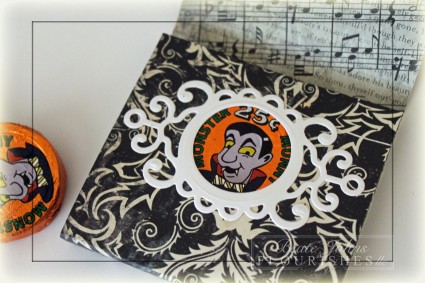
For the inside I cut another Ironwork accent frame. This time though a circle die was centered inside the die to create a frame. A slightly bigger hole was cut with another circle die into the treat holder base to create the window. The frame as well as the candy were adhered with Liquid Glue.

Here is a video for the visual learner:

[youtube]https://www.youtube.com/watch?v=ZeEumGcnb4A[/youtube]

Please check out my fellow Timeless Tuesday Challenge members:

Cindy Haffner
Heather Jensen
Maki Jones
Mona Pendleton
Silke Ledlow
Tammy Hershberger
and
October Guest Designer Rosemary Dennis

Thanks so much for stopping by! I hope you have time to participate in the challenge. Have a wonderful day!
Hugs and smiles
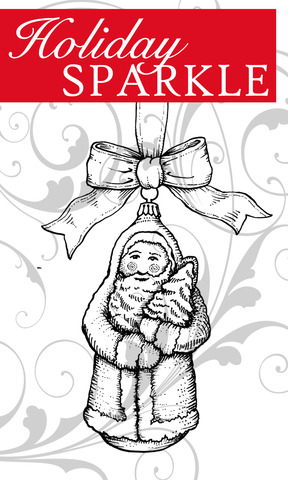
Cindy is today’s challenge hostess. Her challenge is to create an ornament or a card with an ornament image on it. All challenge team members will give you a sneak peek of the upcoming release Holiday Sparkle. A new set featuring different ornament images.

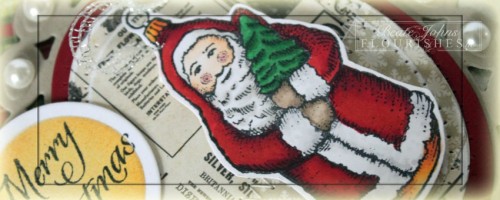
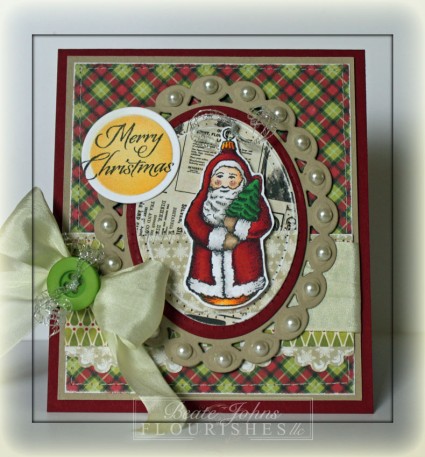
For my card I used the Santa Ornament. It was stamped in Tuxedo Black Memento Ink on Neenah Solar White cardstock, colored with Copic Markers (Skin: E50, E51, E53, R20   Hair: W00, W1, W3   coat: R08, R27, R29, R39, T0, T2   Gloves: E42, E43, E44   Ornament top and bottom: Y35, Y38, E97   Tree: G05, G07, G28) and cut out.


Two different pieces of Echo Park Season’s Greetings patterned paper were adhered together before they were cut with a Classic Oval Nestabilities die. They were stitched to a slightly bigger Ridinghood Red Cardstock circle that was adhered to a piece of Kraft cardstock cut and embossed with a Beaded Oval Nestabilities die.

Two 4″ wide strips of the same paper pack were taped together. The bottom edge was cut and embossed with a Triple Scallop Edgeabilities die. The layers were adhered to a 4″ x 5″ piece of the same paper pack. The layers were stitched to 1/4″ bigger piece of Kraft cardstock. Ivory Silk Ribbon was tied around the horizontal layers before the image layers were attached with dimensionals. The ribbon was topped with a Basic Grey button that was tied on with Silver curling ribbon.

A sentiment from another new Christmas set was stamped on a white cardstock circle. The circle was airbrushed with Copic Markers Y35 and E97 and adhered to the upper left side of the oval layers. The beaded pieces that still show were decorated with a half pearl. All layers were adhered to the card base, a 4 1/2″ x 11″ piece of Red Ridinghood cardstock piece folded in half.

Please check out my fellow Timeless Tuesday Challenge members:

Cindy Haffner
Heather Jensen
Maki Jones
Silke Ledlow
Tammy Hershberger

Flourishes Design Team Members:

Stacy Morgan
Christine Okken
Barbara Anders
Cindy Lawrence
Jan Marie Caruso
Sharon Doolittle
Danielle Kennedy
Dawn Burnworth
Julie Koerber

and

October Guest Designer Rosemary Dennis

I hope you have time to participate in the challenges. Have a wonderful day!
Hugs and smiles
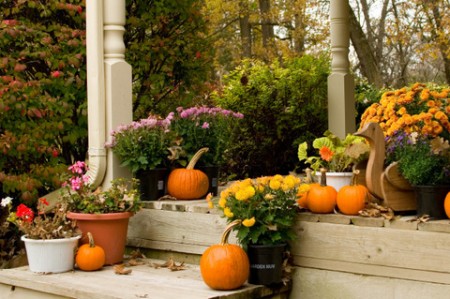
Heather is the hostess for today’s Timeless Tuesday challenge. She wants us to be inspired by this photo:

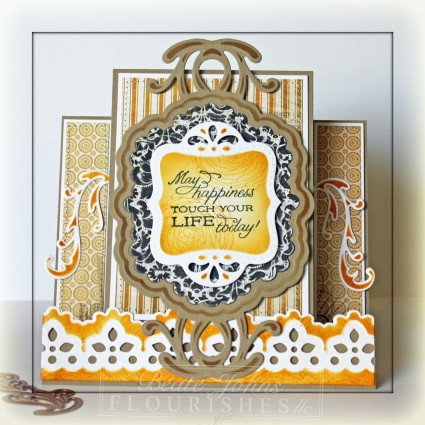
I picked the stairs and the gorgeous yellow/orange colors along with color of the steps. I had never created a Center Step card before and tought this would be a great time to try it out.

I created the card base out of a 5 1/2″ x 11″ piece of Kraft Cardstock. I cut and scored it just as  Frances showed us in this tutorial. I cut Neenah White cardstock to make slightly smaller layers for the center and side panels and topped those with My Mind’s Eye Lost & Found Two Sunshine patterned paper.

A 6 1/2″ wide strip of white cardstock was cut and embossed with Edgeabilities dies (Triple Scallop and Classic Petal). The strip was then sponged with Wild Honey Distress ink. The big flower head from Sweet Nature was stamped over in the same color. The strip was adhered to the lower part of the card.

For the center piece I cut a Kraft cardstock, more Sunshine paper as well as a piece of white cardstock with  Ornate Artisan Tags & Accents dies. The largest frame was sponged with Vintage Photo Distress ink. The Sunshine paper was sanded before it was adhered to the Kraftstock panel.

The white panel was sponged with Wild Honey Distress ink. A sentiment from Sweet Nature was stamped in the tags center with Tuxedo Black Memento Ink. The big flower head stamp was used again to add some texture to the sponged part of the tag. The tag was adhered to the card other layers with dimensionals.

To finish the card off two flourishes from the same die pack out of white cardstock. Again Wild Honey was used to sponge the cardstock. The flourishes were adhered to the thin side panel.

This card also works for today’s HYCCT challenge on SCS. That’s why there is no ribbon, rhinestones or pearls on it.

Please check out my fellow Timeless Tuesday Challenge Team members:

Cindy Haffner
Heather Jensen
Silke Ledlow
Tammy Hershberger

Bring Back Beautiful Members:

Mona Pendleton
Iwona Palamountain

October Guest Designer Rosemary Dennis

I hope you have time to participate in the challenges. Have a wonderful day!
Hugs and smiles
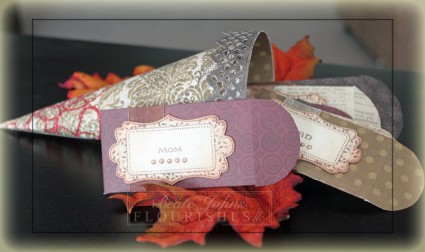
Today’s challenge hostess is Tammy. Her challenge is called Set the Table. Create anything you would use for a dinner table. Center piece, place cards, napkin rings…..

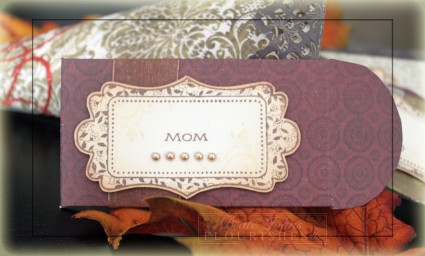
I created a paper cone with little coin envelopes inside. Each envelope has the name of a family member. I figure we give out little pieces of paper and everyone writes something nice, or something they love about each family member. Then we get to read it after dinner.


All the patterned paper used for the cone and envelopes are from the Lost & Found Merry Christmas paper pack.

The paper cone has a trim that had been cut and embossed with one of my new dies from the Lace Doily Accent pack.  The coin envelopes started out as 5″ x 5 1/2″ pieces of paper. The 5″ side was scored at 1 1/2″ and 3 1/2″. The 5 1/2″ side at 1 1/8″ and 4 3/4″. The corner pieces were cut off. The bigger flap was rounded completely, the smaller flap only had the edges rounded.

A Label from the Country Charm Label set was stamped in Rich Cocoa Memento Ink on Classic Cream Neenah cardstock. It was cut out by hand (I like it better then cutting it with the matching die so I can have a little trim of the cardstock showing), sponged first with Antique Linen, then just a touch of Tea Dye Distress ink. A small swirl from the same set was stamped in the lower right and upper left corner in Antique Linen.

For the inside I chose titles from What A Catch and Spring Bouquet. Before the panel was adhered to the envelope with dimensionals, gold organdy ribbon was taped around that envelope. Baby Bling Pearls under the title finish off the envelopes.

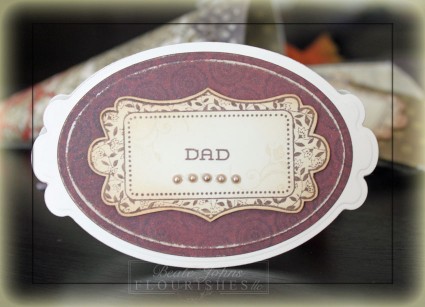
I created very simple place cards to match the envelopes. The base was cut and embossed out of Classic Cream cardstock and Label 10 Nestabilities. A second single layer was cut out of the same cardstock and adhered over the base. Patterned paper was cut with one of the Petite Oval Nestabilities, sanded and lightly sponged with Antique Linen. Then a duplicate of the label for the envelope was adhered to the place card to finish it off.

This was a tough challenge for me. I am so NOT good with “Setting the table challenges” and actually had a couple restless nights over it. I hope you have an easier time with this. Check out what the other challenge designers created.

Cindy Haffner
Heather Jensen
Makiko Jones
Silke Ledlow
Tammy Hershberger
Theresa Winslow – September guest Designer

I hope you have time to participate in the challenge! Have a wonderful day!
Hugs and smiles
Today’s challenge hostess is Betty. She challenged us to create a girly card decorated with Pearls, Ribbon and Glitz. Unfortunately it is also our last challenge with Betty. She is stepping down to spend more time with her family.

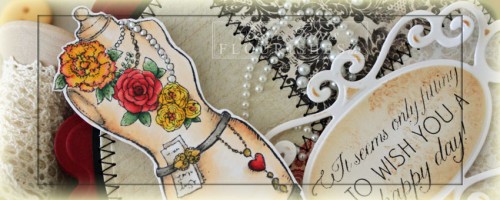
For my card I started out with the new gorgeous Feminine Charm set. I stamped the dress form in Tuxedo Black Memento ink on Neenah Solar White cardstock and colored it with Copic Markers (Dress form body: E50, E51, E53, W3   Stand: W1, W3, W5, W7, W9   Letter: E40, E41, E43   Flower and Heart: R22, R27, R29   Flower: Y13, Y18, R20, R22   Leaves: G21, G24, G28  Gold accessories: Y21, Y28).

The image was cut out and White Opal Liquid Pearls were added over the pearl necklace and gold Spica pen was added over the gold accessories.

Four different patterned paper square from the MME Lost & Found Urban paper pack were adhered to a piece of cardstock, then cut and embossed with one of the Grand Circle Nestabilities dies. The layers were stitched to a piece of black cardstock that was hand cut to a slightly larger layer.

A piece of white cardstock was cut and embossed with one of the Fancy Tag 2 dies. The center was sponged with Tea Dye Distress ink. One of the images from Fancyful Flourishes was partly stamped over the tag with Tea Dye ink (stamped off twice). A sentiment from Feminine Charm was stamped in the center with Tuxedo Black ink.  Three small flower were twisted together and adhered to the lower left of the sentiment panel.

Part of Finesse Pearl swirl was adhered to the upper right of the patterned paper layers before the sentiment panel was adhered with dimensionals. The dress form was adhered over the sentiment.

The card base was cut and embossed with a Grand Scallop Circle Nestabilities die out of Cherry Cobbler Cardstock. A single layer was cut and embossed out of the same cardstock with the same die and the pieces were used to create an Easel Card. The card front layers were adhered to the single piece before that was adhered to the card base.

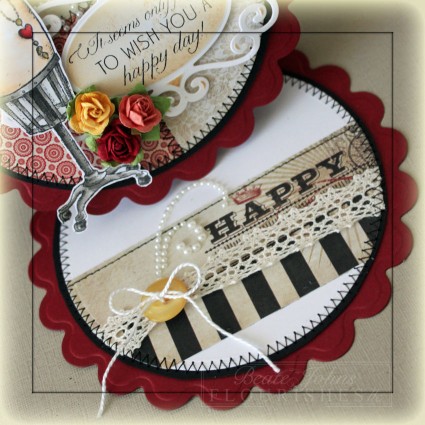
For the inside of the card a piece of white cardstock was cut and embossed with the same circle die used for the card front layers. A small strip from the Urban paper pack was cut with that die as well. The strip was adhered to the white layer and ivory Crochet Lace was adhered to the strip.

The layers were stitched to a slightly bigger, hand cut black cardstock circle. The crochet lace was topped with a yellow lace. The rest of the Finesse Pearl swirl was adhered over the button.

Please check out my fellow Timeless Tuesday Challenge Team members:

Betty Wright
Cindy Haffner
Heather Jensen
Makiko Jones
Silke Ledlow
Tammy Hershberger

I hope you have time to participate in the challenge! Have a wonderful day!
Hugs and smiles
© 2012 fresh & fun Suffusion theme by Sayontan Sinha