
Jul 012007
I love working with circles and ovals and I love paper piercing. Here is a quick and easy tutorial on how to paper pierce curves.
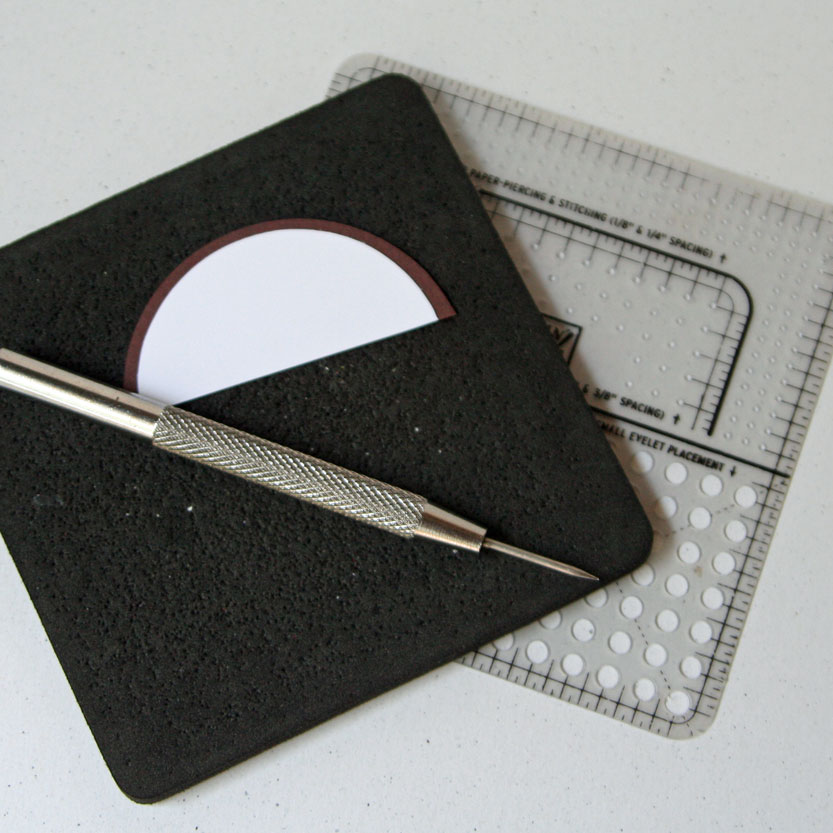
Supplies:
- Paper piercing tools
- curved cardstock
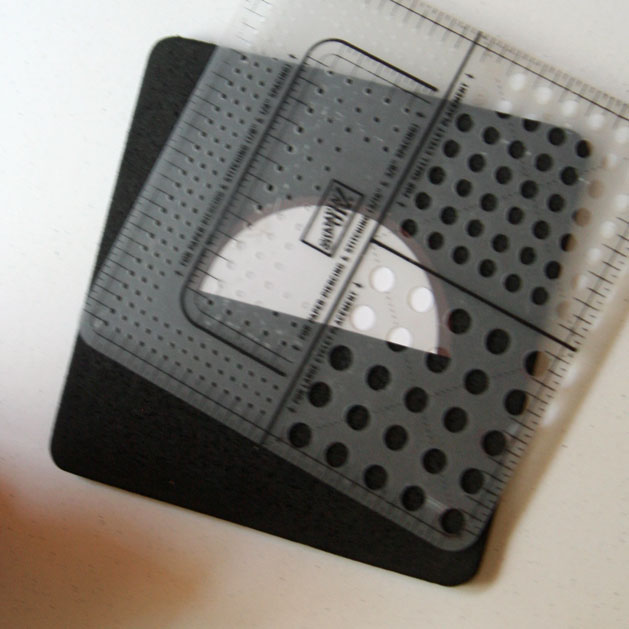
Step one:
Begin by lining up your guide line with the end of your cardstock. I lined the second, thinner line up with the end of the white cardstock.

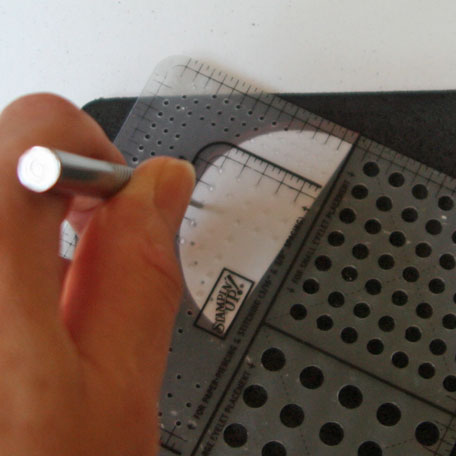
Step two:
Paper pierce until the guide line doesn’t connect with the end of the white cardstock anymore. Keep the paper piercing tool in the last pierced hole and move the paper piercing template over until the guide line lines up with the cardstock again.
Step three:
Continue to pierce and turn.
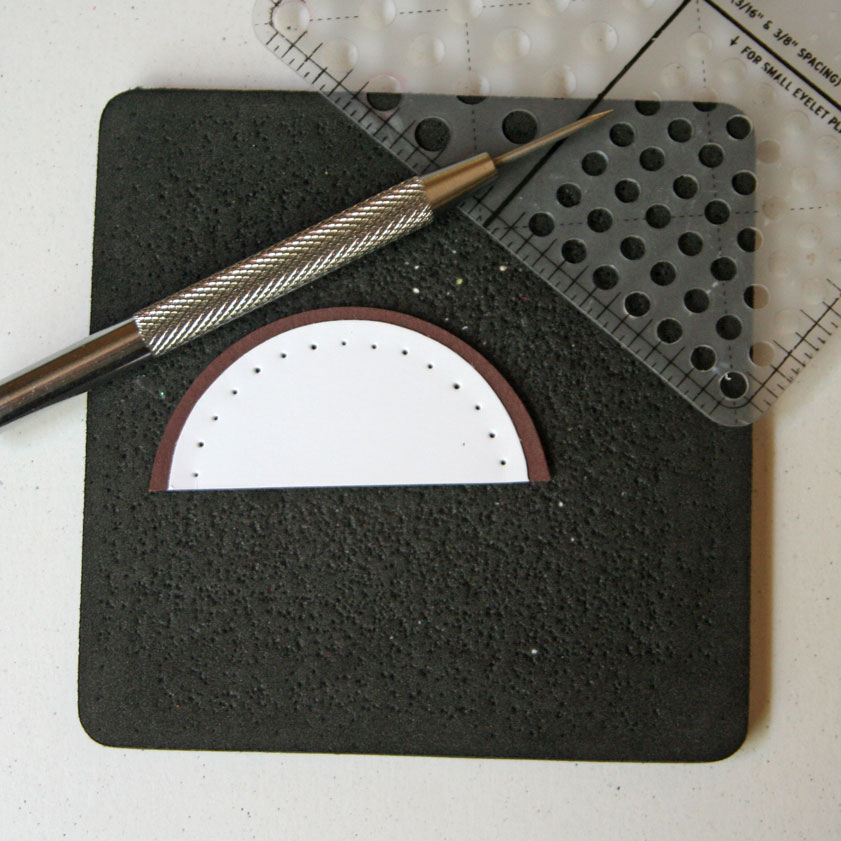
Step four:
Continue until you paper pierced your entire curve, circle or oval this way.
Beate
29 Responses to “Paper piercing curves”
Sorry, the comment form is closed at this time.


I was playing with this myself yesterday. Thanks for helping me out!
Another stellar tutorial! Thank you, Beate!!!! 😉
Very cool! I will have to give this a try!
Thank you for the demo. You make it look so easy!
I have another idea on my blog for you. I have since realized that it’s called plastic canvas, but this tool is inexpensive and super easy!
http://paperjewels.blogspot.com/2007/06/piercing-dotting-and-stitching-with.html
Great tutorial Beate! I took me a second or two to realize what line you were talking about in your first step, but I finally got it. Thanks for the great pics and the great tutorial!
Linda
That’s exactly how I do it, B — great tutorial!
Thankyou Beate! And thanks Jewel, will have to look out for some of that.
This is awesome! Thank you, thank you for sharing this!
frannyb
Great tutorial. I’ll definately have to try this one. Thanks for sharing.
Thank you so much Beate for the tutorial. I can always rely on your tutorials to work out really well.
Thank you so much for sharing this tutorial. I can’t wait to try it. You so inspire me!!
Roberta says:
The circle is good perfect. The measure is helping any pattern. Thank you for your tutorial. Pierce is the right needle.
Thanks for sharing this Beate. It’s so simple, yet I never thought of it!
Beate,
I love your work. What a beautiful kind spitit you have, so many people benifet from your talents
Thank you
& Blessings
Judy
Brilliant! I free handed it and my customers wanted a trick or technique to do it easier and straighter and I didn’t have this tutorial…Now I know! thanks bunches!
Too cool ~TFS~!!!
What a great tip! Thanks so much!
Hi Beate,
Thank you for answering my e-mail and directing me to your tutorial. Circle piercing makes sense to me now.
Thank you for sharing your wonderful work.
Pam
[…] circle was done with the use of the piercing template, as I had seen done by Beate Johns in her Paper Piercing Curves tutorial. It worked like a […]
Hi Beate,
Great tutorial – might want to add an r to the title so we know its piercing when we check the links not to mention so google will find your most excellent tutorial. 😀
Hugs and blessings – Jean
[…] Sparkle used a lot of glitter on her card (how appropriate!), but I used the shiny white pin stripe paper from the Taste of Textiles package instead. The patterned paper is from the Bella Birds DSP package, and the baby buggy image from the Puns from the Past set. To get the piercing along the edge of the circle panel looking even, I again used Beate’s wonderful tip on paper piercing curves. […]
[…] on a 3″ Baja Breeze circle that was matted with a die-cut scalloped circle. Again, I used Beate’s handy trick to do the piercing on the […]
Oh I am so glad I found this tutorial! Thank you so much for sharing how to paper pierce small circles! I have a Bazzill template but it is not for circles this small! 🙂
Great tutorial!
Cheryl S.
[…] and sentiment with Basic Gray ink on an oval die cut and colored the image with watercolor crayons. Beate’s paper piercing trick came in handy again for adding the piercing to the oval mat. After adhering all of the layers to […]
Now that is so very helpful….will have to go give it a try!! Thanks for taking the time to show us your trick!!
http://www.cardspaperandscrapbooks.com/
Where can I purchase the template you are using for this turtioral?
Thanks, Millie
Cool post it is surely. We have been looking for this information.