
Remember a few month back, SCS Technique Lover challenge was to create a tent card. That was such a cute idea, I thought it would be nice to have a tutorial for it in our resource section. So that’s the tutorial I wrote for Splitcoast today.
For my image I picked The Cat’s Pajama’s new set called A Whale of a Time. I stamped the cute big guy in Tuxedo Black Memento Ink on the new Xpress it paper from Copic. I received a few sheets at CHA and can’t wait to order more. It blends as well as the Neenah cardstock, but the ink doesn’t feather as much. Good stuff!
The whale was colored with Copic Markers (N0, N1, N3, N5, BG11, BG13, E01) and cut out. I saw Leigh O’Brien add little spots of texture on the bottom of the whale and I thought that was a cute idea. I totally cased that from her. To add those little dots, just hold your Blender Pen down a bit. The clear solution of the pen will “push” the colored ink away….leaving small white dots. For more texture tips with Copic Markers check this tutorial on SCS.
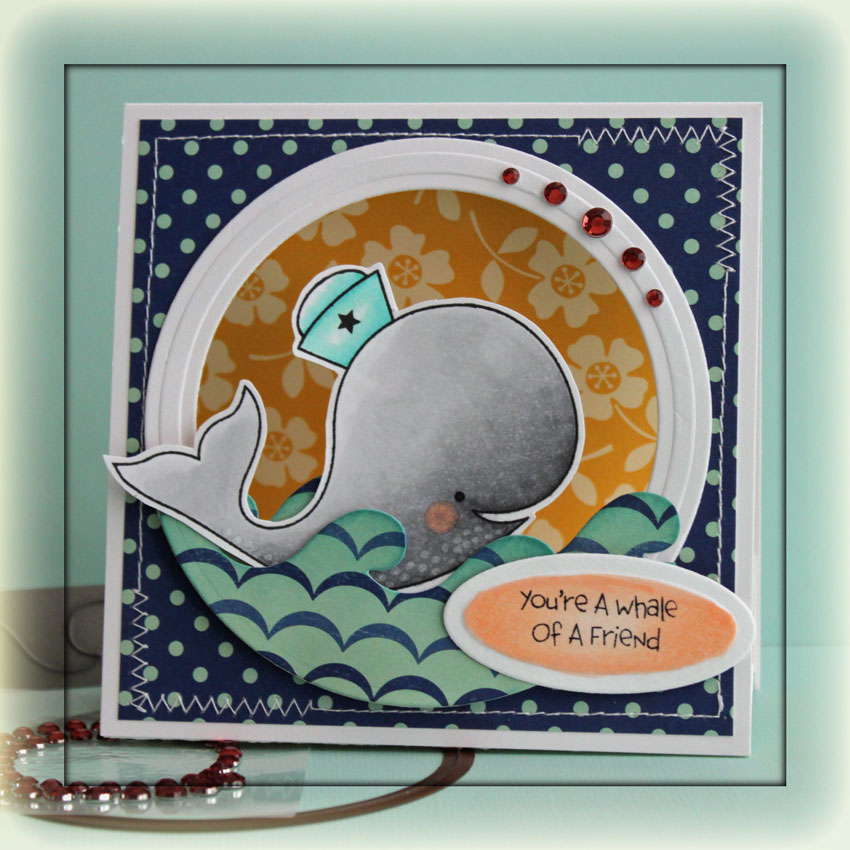
My card base is a 4 1/4″ x 8 1/2″ piece of Neenah Solar White cardstock folded in half. A 4″ square of Seaside October Afternoon paper (my 1/2 stack is almost gone….I need it to be available in stores so I can get more!!!) was stitched to the card front and a window was cut with Classic Circle Nestabilities. Next I cut and embossed a frame with Circle Nestabilities and adhered it over my window. Waves were cut with the new Wave CutUps die out of Seaside October Afternoon paper, then cut to match my window and adhered to the lower part of the frame. My sweet Whale was taped in between my waves.
The sentiment is from the same set. It was stamped on Neenah Solar White cardstock with Tuxedo Black Memento Ink and cut out with Petite Oval Nestabilities. The inner part of the die cut was colored with E01 and E00 Copic Markers. Lippy Red Kaisercraft Rhinestones finish off the card.
Here is a video for the visual learner:
[youtube]https://www.youtube.com/watch?v=XmYe-ktM5YE[/youtube]
Thanks so much for stopping by! Have a wonderful day
Hugs and smiles
Beate
23 Responses to “Tutorial on SCS – Tent Card”
Sorry, the comment form is closed at this time.


Hi Beate – hope you are doing well! I have a silly question: While the tent cards are REALLY cute, I was wondering where one would write a message? Since the bottom is glued shut and all… Any ideas?
Claudia, that’s a good question. When I sent those, I add my message on a sticky note on the back of the card.
Hugs and smiles
The whale image is SO cute!
This is just the cutest, Beate!! I love the images, papers…and that card style is so perfect for a most adorable display-type card!! Thank you for your wonderful tutorial!!
What a cute card, Beate! I love the tent style.
I’ll have to try this!! Love your card, so very sweet!
How cute is that? Beate you inspire me!
ACK! I feel like I say this everytime, but OMG! this is the cutest thing ever! gonna try this technique-too, fun!
Na das ist ja eine witzige Karte, gefällt mir auch sehr, sehr gut.
Eine geniale Technik, vielen lieben Dank für Dein Video, Du erklärst alles immer s wunderbar.
Einen schönen Abend
wünscht Dir
Anke
This is precious Beate! Going to have to give this a try!
Hugs
Vicki
You so rock Beate!! Love your tent card!! The whale and design are gorgeous!! All your tutorials are awesome!!
hugs,
Chris
Beate, this is so stinkin’ adorable! I LOVE it!
Thanks Beate for another great tutorial. You are amazing when it comes to confidence with your videos…by the way, I am enjoying my ‘smooch’ gift. Hopefully to show soon 🙂
Totally adorable, Beate! Thanks for the tutorial too! You always rock them!
Now isn’t this just the cutest design…love that sweet little whale and the little sea scne you created!!! Great tutorial, Beate!!!
This is just WAY TOO CUTE!!
so cute, love the waves and how he fits right in, pretty bright paper for the background!
this is so fun and cute! thanks for the tutorial, too!
Love that wave die, thanks for the heads up on that! The whale looks so happy swimming through them, love the way you colored him! Charming card and, as always, a great tutorial!
perfect!!! Thanks for sharing…sorry…I am limited with my time right now…still love ya though 🙂
Could NOT be any CUTER! Love this!
Absolutely wonderful tutorial Beatie! What a fun card! Love the images and papers. I must give this card a try. Thank you. 🙂
That card is awesome!!! Love the peek-a-boo window showing the inside of the card and the cute way you colored the whale and added it amonst the waves.
Love seeing your Cat’s Pajamas creations! 😀
Cindy