Kim Hughes/Paper Smooches
It’s my turn to share on the Spellbinders blog today. The topic this week is sparkles. Now that was an easy one for me. Rhinestones, Brilliance ink and Glimmer Paper.
I hope you have time to check it out and tell me what you think. Have a wonderful day!
Hugs and smiles
Today’s tutorial on Splitcoaststampers is written by the amazing Eva Doblias. She shows us how easy it is to use Twinkling H2O’s. She couldn’t create a video, so I shot one showing how to use the paints to create a watercolor wash background.
I started by stamping snowflakes from Verve’s Glad Tidings in VersaMark ink on a 3″ x 5″ piece of white cardstock. They were embossed with white embossing powder before I used blue and purple Twinkling H2O’s for the waterwash. Once the paper dried, I stitched the edges of that layer.
A piece of white cardstock was cut with the Vintage Oval Frame die and the stamp with the same name was stamped over it with Starlite Black Brilliance Ink. A sentiment from Glad Tidings was stamped in the center.
Silver glimmer paper was cut and embossed with the two smallest dies from Spellbinders Create-A-Flake Four, layered on top of each other and connected with a Recollections brad (Michaels). The snowflake was adhered to the right hand side of the sentiment layer. Rhinestones from a Sleek Strips Silver Rhinestone package were added underneath the sentiment. The sentiment layer was adhered to the lower left of the background layer before the background was adhered to the card base. Part of a Finesse Rhinestone Swirl finishes off the card.
Here is a video for the visual learner:
[youtube]https://www.youtube.com/watch?v=oSWBfnl_wSo[/youtube]
Thanks so much for stopping by! Have a wonderful day!
Hugs and smiles
My card today is super easy. I started with a 4″ x 11″ piece of Neenah Solar White cardstock. It was folded in half and the bottom left corner was rounded. One corner of a 2 1/2″ x 5 1/4″ piece of Echo Park’s Holly Jolly Christmas paper was rounded before the edges were sanded. The layer was adhered to the left hand side of the card front.
I have had the Taylored die Merry for a while and had to use it before Christmas is over. I like it a lot. I cut two Merry’s out of Red Devil Fourz Bazzill cardstock and one of silver glimmer paper. They were adhered to the lower part of the card base. Three tiny rhinestones were added on the Y of the bottom Merry.
Next I cut and embossed silver glimmer paper and Red Devil cardstock with the two small dies from the 2012 Snowflake Pendant Shapeabilities® die set. The snowflakes were adhered to the upper right hand side of the card front and topped with rhinestones. A paper piercing edge along the paper strip above the sentiments finish off the card.
I want to wish you a Merry Christmas. I hope you have a wonderful time with friends and family! Have a wonderful day!
Hugs and smiles
While I have nothing new to share, I have some exciting news. Simon Says Stamp is featuring two of my cards on their blog today. I hope you have time to check it out and say hi.
Thanks so much for stopping by! Have a wonderful day!
Hugs and smiles
I have another post on the Spellbinders blog today. I hope you have time to check out the entire card. It works great for the current Simon Says Stamp challenge, which is to create a Christmas project.
Thanks so much for stopping by! I don’t know how much I will be posting over the weekend and next week! I wish you all a wonderful Christmas. Hopefully you get to spend it with loved ones!!!
Hugs and smiles
I am back with another cute Tiddly Inks image called Cocoa Wishes. It was printed out on Neenah Solar White cardstock. It was cut 3 1/2″ wide and the image was colored with Copic Markers (Skin: E50, E21, E33, R20 Hair: E13, E15, E19, E18 Jeans: B91, B93, B95, B97 Ear Muffs/shirt/bird: YR09, R24, R29, R39 Cup: E40, E41, E42, E43 ).
Two pieces of 3 1/2″ wide strips of Carta Bella’s Winter Fun patterned paper were adhered above the image and the edges were stitched. The layers were adhered to the card base a 3 1/2″ x 11″ piece of Kraft cardstock, folded in half. The bottom corners were rounded and a piece of red washi tape was adhered on the the paper strips on top.
A sentiment from Snowflake Letters Mini seals was stamped in Tuxedo Black Memento Ink on a piece of white cardstock, cut and embossed with a Standard Circle Nestabilities die. A red button was tied on with a silver cord before the sentiment circle was adhered with foam adhesive squares. A few snowflakes were cut and embossed out of silver glimmer paper with Snowflake Borderabilities dies and adhered to the card to finish it off.
Thanks so much for looking! Have a wonderful day!
Hugs and smiles
Welcome to the Whimsy Stamps December 2012 rubber stamp and die release!
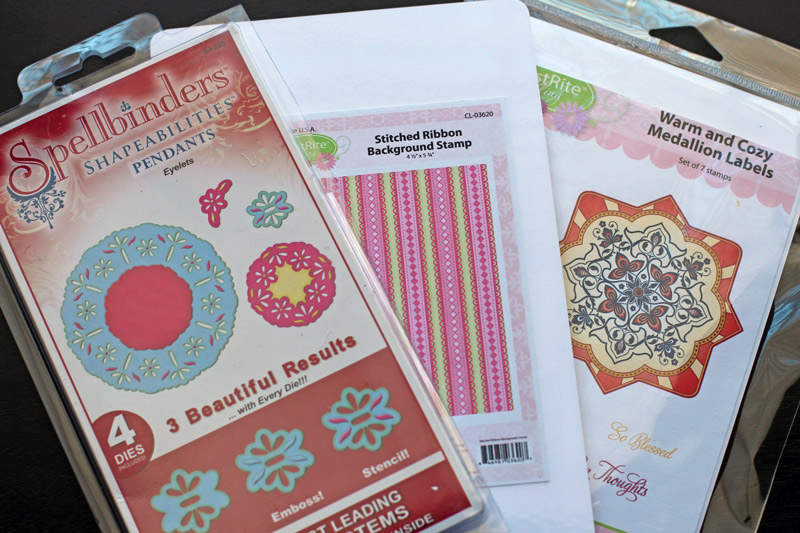
Today, Whimsy Stamps is releasing 20 fantastic new Rubber Stamps & Stamp Sets, 5 wonderful new Whimsy Shapeology Dies, a fabulous new Shape EZ by TLC template and 2 beautiful Whimsy Designer Paper 6×6 packs. These new goodies are available to buy right now from the Whimsy Stamps store along with all your Whimsy favourites.
We are also welcoming two new DT members to the Whimsy family today! We hope you will join us in giving a warm Whimsy welcome to Melissa Andrew and Janette Garcia. We are very excited that these extremely talented gals have joined us here at Whimsy as members of our magazine staff! Welcome Melissa and Janette!
From today until 23 December, the Whimsy DT and Special Guests will be showcasing these new products with a daily mini blog hop. Each mini blog hop has a new release prize hidden somewhere along the way and you have 24hrs to enter each prize draw by leaving a comment on every blog listed for that day.
At the end of release week (Monday 24 December) a ‘Release Round-Up’ will be posted on the Whimsy blog with a complete list of winners from the daily mini blog hops.
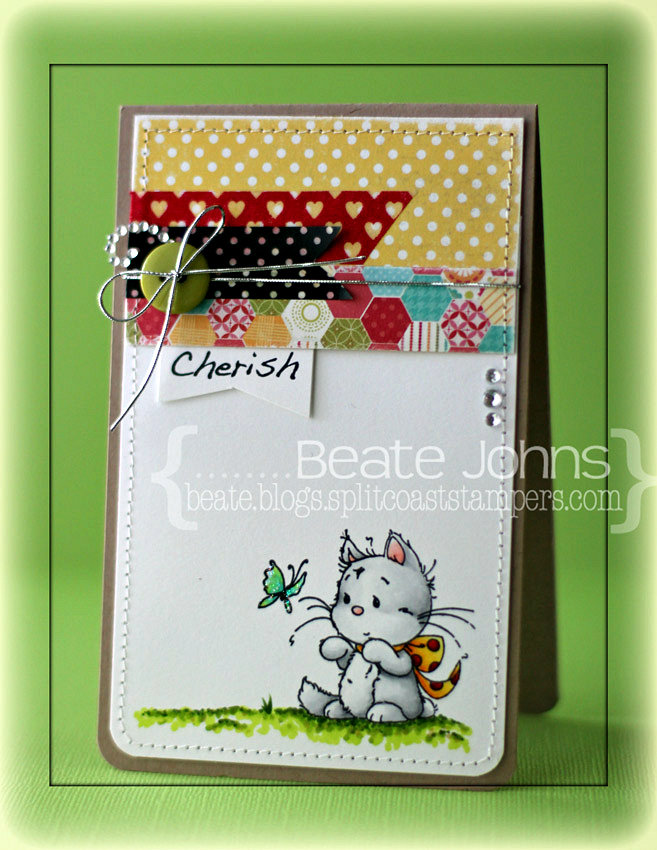
For my card today I used an image from the darling new Playful Kittens stamp set. Again this card works wonderful for the current Simon Says Stamp challenge. Some of my favorites on this card include Washi Tape, Patterned paper, Wee images, Rhinestones and Copic Markers.
The image was stamped with Tuxedo Black Memento Ink on a 3 1/4″ x 5″ piece of Neenah Solar White cardstock. The bottom corner were rounded and the image was colored with Copic Markers (Kitten: C00, N0, N1, N2, R000, R20 Scarf: Y11, Y13, Y15, Y17, YR09, R24, R29, R39 Ground: YG01, YG03, YG17 Butterfly: YG01, BG10, BG11, BG13).
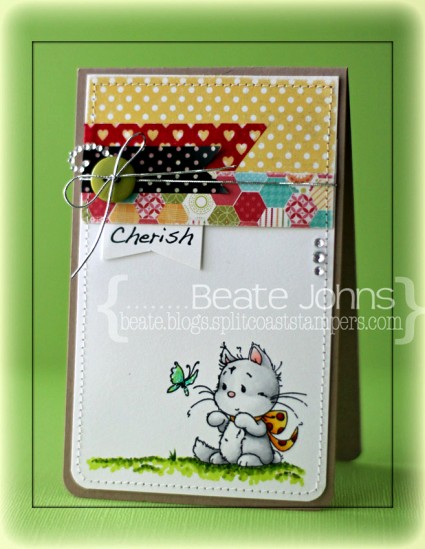
Two 3 1/4″ wide strips of Echo Park So Happy Together paper were sanded and adhered to the top of the image layer. The edges were stitched and two pieces of Washi Tape were adhered to the left hand side of the patterned paper strips. A green button was tied on with silver cord.
A sentiment from the Playful Kittens set was stamped on a scrap piece of paper. It was cut into banner shape and adhered under the paper strips. Stardust Glitter was added over the butterfly wings and rhinestones above the button and to the right hand side of the card.
To be entered into today’s mini blog hop prize draw, be sure to leave a comment on ALL of the DT posts listed below by 12.00pm EST tomorrow:
For a full reveal of this month’s fabulous release, please visit the Whimsy blog. Thanks so much for stopping by. Have a wonderful day!
Hugs and smiles
It’s time for a new Crafty Friends Challenge. Charmaine is the hostess and her challenge to us is to create a mostly white card, with just a splash of color. I will also enter the card into the current Simon Says Stamp Challenge, which is to use your favorites. Here I used paper piercing, rhinestones, dies, patterned paper and paper piercing. The layout of the card is from the current CASE Study card by Windy Robinson.
I started by cutting snowflakes out of silver glimmer paper with one of the Snowflake Borderabilities dies. A 1 3/4″ x 3″ strip of Carta Bella’s Winter Fun patterned paper was adhered to the bottom of a 3″ x 5″ piece of Neenah Solar White cardstock after the edges of the paper were sanded. The bottom edges were rounded and the edges of the layers were paper pierced. Seam Binding was tied around the top of the patterned paper and three bells were tied on with silver cord.
The layers were adhered to the card base, a 3 1/4″ x 10 1/2″ piece of Solar White cardstock folded in half with the bottom corners rounded. A sentiment from Simon Says Stamps Small Folded Banners Holiday was stamped in Platinum Stazon on white cardstock. It was cut into banner form. Want2Scrap Rhinestones finish off the card.
Check out my fellow Crafty Friends for more inspiration:
Thanks so much for looking! I hope you have time to join us in the challenge. It’s easy and fun! Have a wonderful week!
Hugs and smiles