
Sorry I am late with posting! I made a card for the challenge last night. But…I can’t show you until Wednesday. I am such a goober. So this morning I started again. BUT….Lucas woke up with a teary swollen eye (started last night…didn’t get better) and I have to take him to the doctor in five. I am pretty sure it’s allergies. But it was very scary last night. Ask Jenn, I called her at 9:30 p.m. His eye just swelled up. Only one of his eyes. It was red rimmed and the white of the eye was red as well. The redness is gone, but the oozing started. Yuck!
Lucas Update:
We are back from the doctor visit. They think it was allergies as well. He got eye drops he should take to preventing his eyes from swelling and ear drops because he has a bad swimmers ear. Thank goodness no pink eye!
Thank you all for your well wishes.
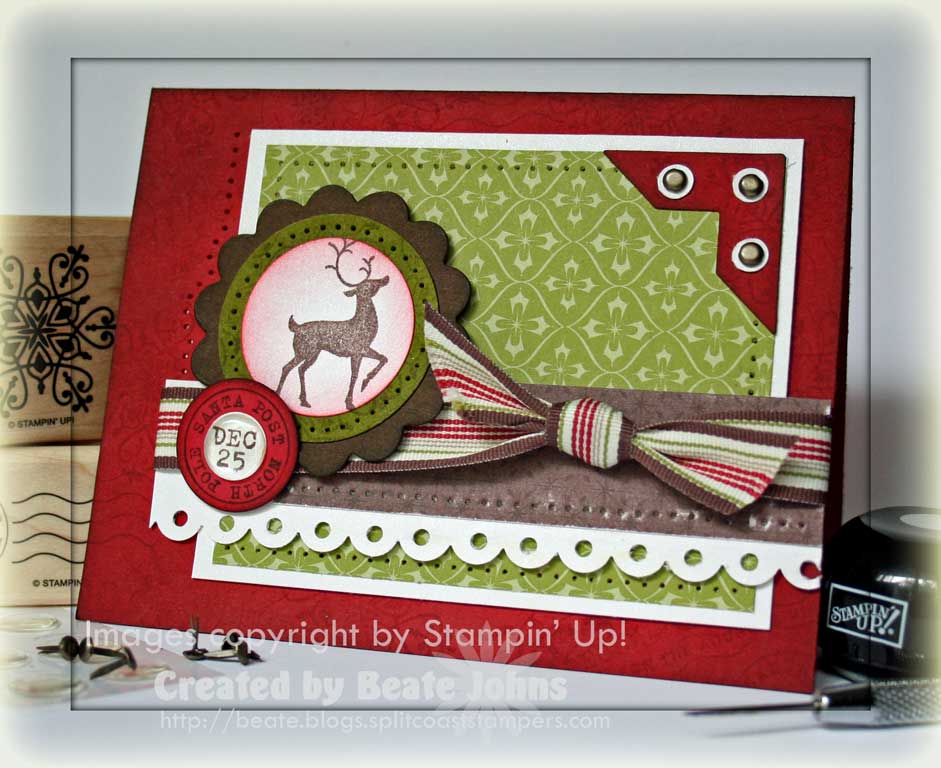
The card base is a 5 1/2″ x 8 1/2″ piece of Riding Hood Red cardstock. It was stamped with images from the Winter Post stamp set in Riding Hood Red. The edges were first sponged in Riding Hood Red, then in Chocolate Chip ink.
The white rectangle layer is a 3 1/2″ x 4 1/4″ piece of Shimmery White cardstock. Since most of the cardstock is hidden, I cut the inside out, only leaving 1/2″ frame. It was covered with a 3 1/2″ x 4″ piece of Ski Slope Designer Paper. That was paper pierced. A Riding Hood Red photo corner was punched with the Photo Corner punch, stamped with the snowflake from Winter Post and sponged again with Riding Hood Red and Chocolate Chip classic inks. Three 1/4″ Shimmery White circles were attached to the photo corner with Antique Brass brads in the center.
The brown strip is also from the Ski Slope Designer Paper Pack. It measures 1″ x 4 1/4″. It was taped to a 1 1/2″ x 5″ strip of Shimmer White paper. The bottom of the Shimmery strip was punched with the Scallop Edge Punch. I added a hole with my Crop-a-Dile in each scallop. The bottom of the Designer Paper was paper pierced and then sanded with my sanding block. The strips were adhered to my rectangle layers and Alpine Ribbon was tied around the brown paper strip. Then I adhered all layers to the the card base, lining up the horizontal strips with the edge of the card base.
The reindeer stamp is also from the Winter Post stamp set. It was stamped in Chocolate Chip ink on Shimmery White cardstock and punched out with the 1 3/8″ circle punch. The edges were sponged with Riding Hood Red ink. It was layered on a 1 3/4″ circle out of Old Olive. The olive circle was stamped with the snowflake, sponged and paper pierced before layered on a sponged scallop circle. That circle was cut with my Big Shot and the Pennant Bigz XL Die. The reindeer layers were attached to the card with dimensionals.
I stamped the postage stamp twice in chocolate chip ink, once on Shimmery White and once on Riding Hood Red cardstock. I punched the white center out with a 1/2″ circle punch and punched the entire circle out of the Riding Hood Red with the 1″ circle punch. The edges of the Riding Hood Red circle were first sponged with Riding Hood Red, then with Chocolate Chip. I topped it off with a page pebble from the Build-a-Brad and attached my layered postage stamp to the card base with dimensionals.


