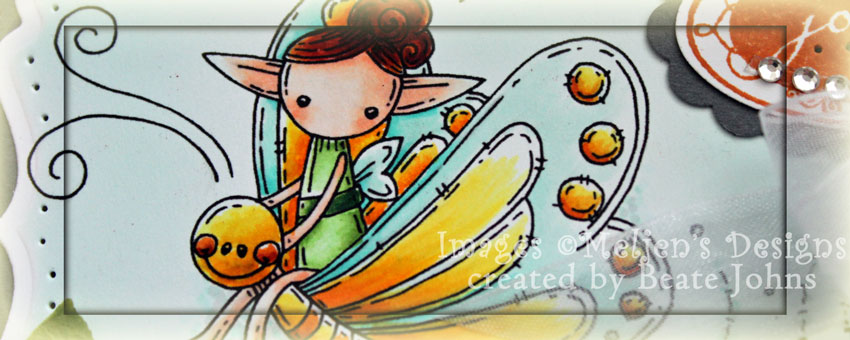
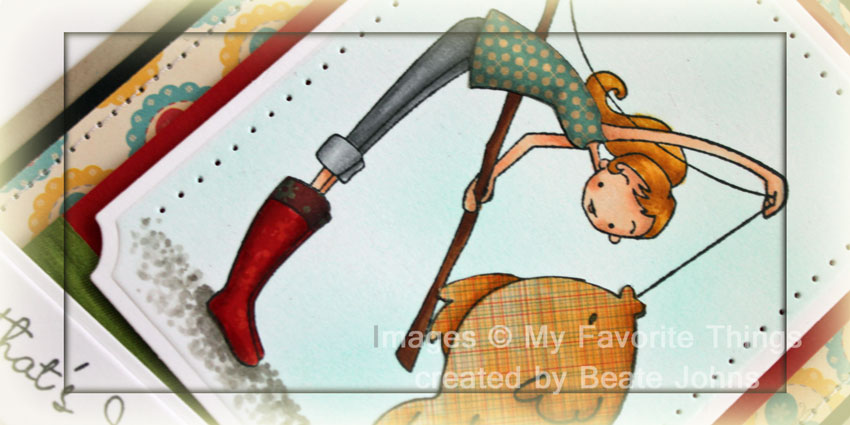
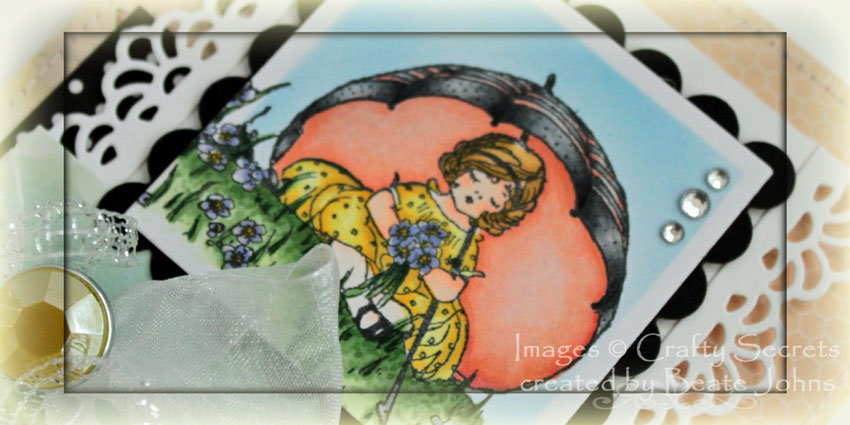
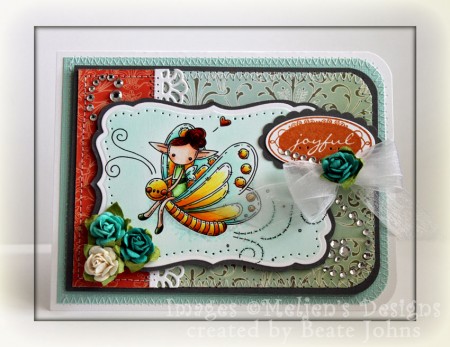
Splitcoast’s sketch challenge this week was a great sketch based on one of Jenna Barber’s cards. I had downloaded a few of Melissa’s (Meljen’s Designs) images and was itching to try out this darling fairy. After coloring the image, I ordered me two more of these sweet fairies in the Whimsy Stamp store. I bet you will see those here soon.

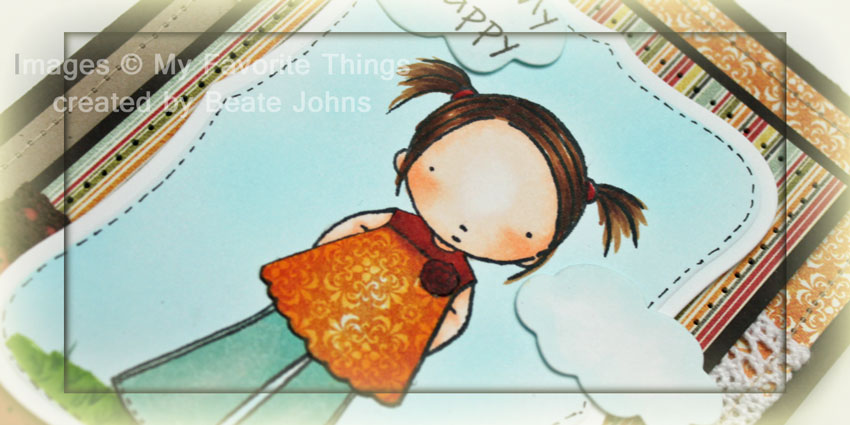
I printed her out on Neenah Solar White cardstock, cut the image with Label 17 Nestabilities die and colored her with Copic Markers (skin: E0000, E00, E01, E02, Hair: YR15, YR18, E18, Shirt: YG11, YG13, YG17, YG67, G28, G29, Butterfly: Y13, Y15, Y17, YR12, YR16, YR18, BG10, BG11, BG13). The image was layered on Basic Grey cardstock (Stampin’ Up!)  and cut freehand for an extra layer. The edges of the label were paper pierced.


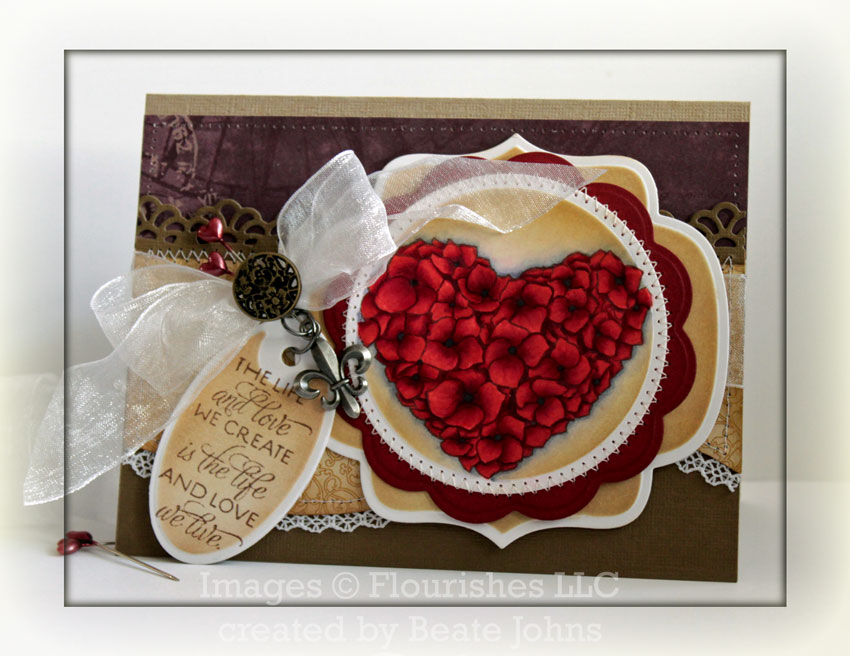
The card base is a 5 1/2″ x 8 1/2″ piece of Neenah Solar White cardstock. The right hand corners were rounded with W R Memory Keepers Cropadile Corner Chomper. A 4″ x 5 1/4″ piece of Core’dinations cardstock was stitched to the card base after the right hand corners were rounded as well.

A 3 1/2″ long strip of White cardstock was cut with the Faux Crochet Die-namics die and stitched to a 1 1/4″ x 3 3/4″ piece of Cosmo Cricket Everafter Patterned Paper. The layers were adhered to a 3 1/2″  x 4 3/4″ piece of Everafter Paper.  That was stitched to a 1/4″ bigger piece of Basic Gray cardstock.

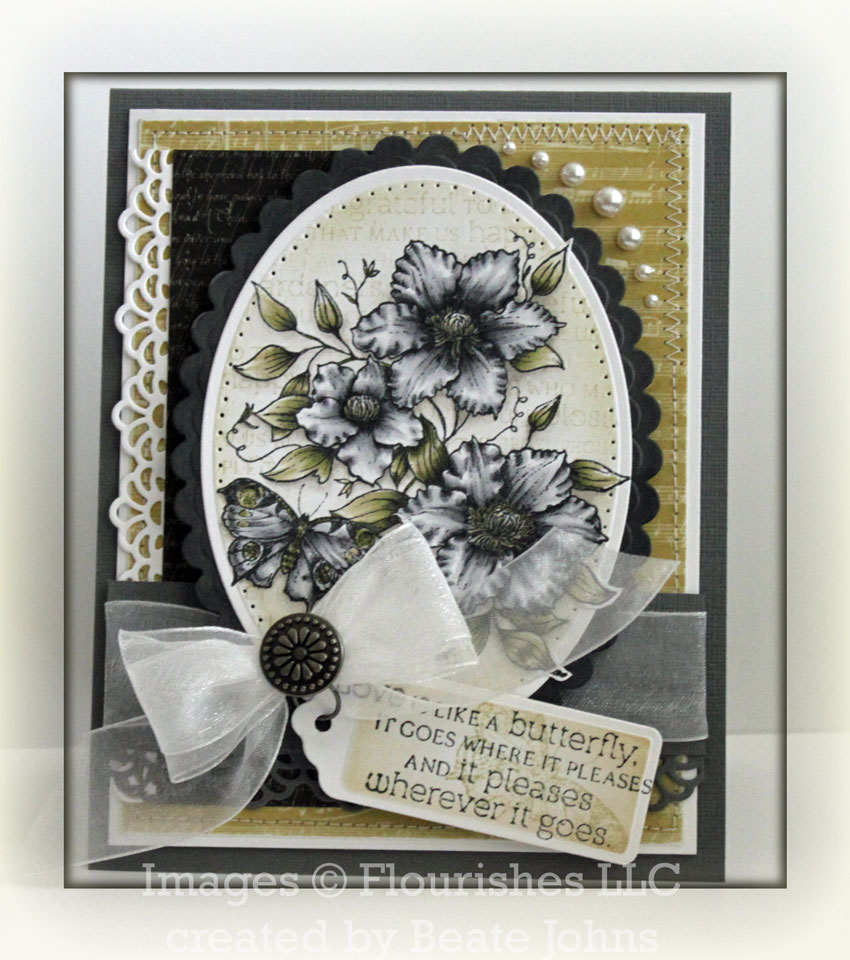
The sentiment is from Whimsy Stamps Oval Snippets. It was stamped in Rusty Hinges Distress ink and punched out with Stampin’ Up!’s oval punch. The oval was layered on a piece of Basic Gray cardstock, punched with the scallop oval punch.

Recollections Rhinestone swirls were adhered underneath the sentiment as well as on the top left and bottom right of the top layers. The image was adhered to the card base with dimensionals. Three Recollections flowers were twisted together and adhered to the lower left hand side. Organdy ribbon was tied with the Bow-Easy and topped with another Recollection flower before it was adhered to the bottom of the sentiment.

Thanks so much for stopping by! Have a wonderful day! Hugs and smiles

Tuesday was an amazing color challenge on Splitcoaststampers: River Rock, Basic Gray and Whisper White. Everyone created some wonderful cards for that challenge. For my sample I used Flourishes Butterflies & Blossoms set.

I stamped the image in Tuxedo Black Memento Ink on Neenah Solar White cardstock and cut it out with a Petite Oval Nestabilities die with the Out of the Box Technique. The image was colored with Copic Markers (Bloom: N1, N3, N5, Leaves: YG91, YG93,N5, Bloom Center: YG91, YG93, N1, N3 Shading underneath to make it pop: W00, W1, W2).

The image was masked and stamped over with the big sentiment from Butterflies & Blossoms in Old Paper Distress Ink and the edges of the oval were sponged with the same ink.  The image was layered on a piece of Basic Grey paper that had been cut and embossed with Petite Scallop Oval Nestabilities and colored with Copic Marker N5.

The layout for this card is from this week’s Midnight Madness Sketch Challenge.  A 5″ strip of white cardstock was cut with the Faux Crochet Die-namics border and adhered to a 2″ x 5″ piece of Webster’s Pages Petite Paper. The edge of the patterned paper was paper pierced.  The strip as was adhered to a 4 1/4″ x 5 1/2″ piece of Webster’s Pages paper, that had been stitched to a 3/16″ bigger piece of White cardstock

A 4 3/16″ long strip of textured Basic Grey cardstock was also cut with the Faux Crochet Border die and adhered to a 1 1/4″ x 4 3/16″ strip of the same cardstock. White Organdy Ribbon was tied around the strip before it was adhered horizontally over the bigger layers. Those layers were adhered to the card base, created out of a 4 3/4″ x 12″ strip of Textured Basic Grey cardstock.

The image layers were adhered to the card front with dimensionals. More White Organdy Ribbon was tied into a bow and topped with a Making Memories brad.

The sentiment is also from Butterflies & Blossoms. It was stamped in Tuxedo Black Memento Ink on a piece of Neenah Solar white cardstock cut and embossed with the retired 5 Tag die from Spellbinders. The center was sponged with Old Paper and a butterfly also from the same set was stamped over it. The tag was attached to the bow with a Jump Ring before the bow was adhered to the image with Scor-Tape.

Snow Kaisercraft Pearls on the top right finish off the card.

Thanks so much for stopping by! Have a wonderful day! Hugs and smiles

Today’s tutorial on Splitcoast is written by Anne Harada. It is called Faux Pressed Flowers.

For my sample I started out by stamping a stem stamp from Crafty Secrets new Art Blooms stamp set in Tuxedo Black Memento Ink on Neenah Solar White cardstock. I was cut with the Out of the Box Technique and Classic Oval Nestabilities die. Next I masked the stem and stamped over the image with the note border from Artsy Banner in Antique Linen Distress Ink.

The image was colored with Copic Markers (G40, G82, G85, RV32, RV35) and the oval was sponged first with Antique Linen, then with Vintage Photo Distress Ink. Prima Flowers were adhered over the stem, then the entire oval was embossed with ProvoCraft’s Textile Texture Embossing Folder. Next I sponged some more Vintage Photo Ink over the embossed part of the oval. Citrus Crush  Flower Soft was added in the center of my Prima Flowers.

The oval was adhered over another piece of Neenah Solar White cardstock, that had been was cut and embossed with Beaded Oval Nestabilities die and sponged with Vintage Photo ink.

I created the card following the Midnight Madness Sketch challenge from last week. For the card base  a 4″ x 5″ piece of Circa 1934 Cosmo Cricket patterned paper was stitched to a 3/16″ piece of Neenah Solar White cardstock. Two 2″ x 2 7/8″ piece of Circa 1934 paper were stitched to 3/16″ bigger piece of white cardstock.  Two 2 7/8″ long strips of white cardstock were cut with the Faux Crochet Border Dienamics, adhered to the rectangle pieces before those were taped to the bigger layers.

The layers were adhered to the card base, a 4 1/4″ x 11″ piece of Pink Pirouette cardstock folded in half.  Recollections Rhinestone swirl was adhered to the upper right corner. Another piece of Solar White was cut and embossed with Spellbinders Fancy Tag dies. One of the sentiments from Art Blooms was stamped on it with Tuxedo Black Memento Ink.

A pink silk bow was tied with the Bow Easy and topped with a Recollection Rhinestone brad. It was adhered to the upper right side of the sentiment panel to finish off the card front.

Here is a video for the visual learner:

[youtube]https://www.youtube.com/watch?v=ecfSfwNJSKo[/youtube]

Thanks so much for stopping by! Have a wonderful day! Hugs and smiles

For today’s post I created a One Sheet Box, so I could shoot a video for this technique.  It’s another great way to give away little treats for Valentine’s Day and the box is made really easy and fast.

To decorate the box I stamped the new Tilda with a small gift in Tuxedo Black Memento Ink on Neenah Solar White cardstock. It was cut and embossed with a Petite Oval Nestabilities die and colored with Copic Markers (Skin: E00, E01, E11, Hair: E99, E39, E18, Skirt and Socks: R81, R83, R85, R89, Shirt: N0, N1, N3, Shoes: N3, N5, N7, Tag: E30, E31, E33, Ground: E31, E33, E35, Background: B0000, B91).

The image was adhered to a piece of Black cardstock that had been cut and embossed with a Petite Scallop Oval Nestabilities die. The edges of the image oval were paper pierced.

The box base was created out of a sheet of October Afternoon Ducks in a Row patterned paper, that had been cut down to 8 1/2″ x 11″.

Two 3 3/4″ strips of white cardstock were cut with MFT Faux Crochet Dienamics Border die and adhere to the edge of the middle panels of the box. Two holes were punched in the upper edge of the back middle panel with my Crop-a-dile. May Arts white Organdy Ribbon was tied through it.

The image was attached to the box front with dimensionals. Curling Sparkling Silver Ribbon was tied around the bow and twirled around the back of a paint brush to wind it up a bit.

A tag was cut and embossed out of Neenah Solar White cardstock and the sentiment was stamped on it with Tuxedo Black Memento ink. A bit of color was added with Copic Marker B0000. It was tied to the bow with the Curling Silver ribbon. The slot on the left of the tag was covered with a Recollections flower that had been colored to match with Copic Marker R81.

Here is a video for the visual learner:

[youtube]https://www.youtube.com/watch?v=M24jWiq47Jc[/youtube]

Thanks so much for stopping by! Have a wonderful day!
Hugs and smiles

I had last week’s MFT Sketch laying on my desk since it was posted. I knew I wanted to make a card for it today! So when I saw the Technique Challenge on SCS I combined them along with MFT’s Guest Designer Challenge for February.

I started out stamping Jolinne (My Heart Sings) in Tuxedo Black Memento Ink on Neenah Solar White cardstock. I cut it out with  Circle Nestabilities and the Out of the Box technique and colored it with Copic Markers (Hair: E99, E39, E18, Skin: E0000, E00, E01, Pants: B91, B93, B95, Shirt: R81, R83, R85, Shoes: N0, N1, Ipod: N1, N3, N5, Board: E31, E33, E37, Coat: R27, R29, R39). The background was airbrushed with Copic Marker B91.

I piece of Cherry Cobbler cardstock was cut and embossed with Scallop Circle Nestabilities. The edges were colored with Copic Marker R39 to make it darker and match the image. The image was adhered to the scallop circle and the edges were paper pierced.  The layers were then adhered to a piece of Early Espresso cardstock that had been cut with the Dainty Lace Doily Dienamics die.

Today’s technique challenge is all about embossing. We are supposed to emboss a piece of paper first with an embossing folder, then heat emboss the raised image. I chose a 3 3/4″ x 5″ piece of October Afternoon Homemaker paper and embossed it with ProvoCraft’s Allegro Embossing Folder. Next I brayered over the raised images with Vintage Photo Distress ink and embossed those with Irisdescent Ice Embossing powder (Stampin’ Up!).

The bottom two corners were rounded with the W R Memory Keepers Cropadile Corner Chomper before it was stitched to a 3/16″ bigger piece of Early Espresso cardstock. Burgundy May Arts Organdy Ribbon was tied vertically around the layers. A Making Memory Brad was colored with Copic Marker E49 and attached over the ribbon.

Neenah Solar White cardstock was cut and embossed with a Tag die by Spellbinders. The sentiment from My Heart Sing was stamped in Tuxedo Black Memento ink over the tag. It was airbrushed with Copic Marker R83 and attached to the bow with Silver Curling Ribbon.

To finish off the card I added Silver Kaisercraft Rhinestones on the bottom corners and the sentiment tag.

Thanks so much for stopping by! Have a wonderful day!
Hugs and smiles

Today’s Featured Stamper on Splitcoast is Sue Walsh, aka Tillymint. Her gallery was so much fun to check out. Her coloring is gorgeous!!! I picked her Gifts Galore card as the card I wanted to case.

I started out with stamping the image from My Favorite Things Something Fishy in Tuxedo Black Memento Ink on a piece of Neenah Solar White cardstock, cut and embossed with the largest Large Label Die from Spellbinders.

The fish, shirt and boots were paper pieced with paper from Cosmo Cricket Togetherness Paper pack. The rest of the image as well as the paper pieced pieces were colored with Copic Markers (Skin: E00, E01, E11, Hair: YR21, YR24, Boots: R24, R27, R39, Pants: N3, N5, N7, Shirt: N1, N3, Pole: E33, E35, E39, Ground: W1, W3, W4, W5). The background was airbrushed with Copic Marker BG32.

Three sides (all but the ground) were paper pierced before it was adhered to a 3 1/8″ x 4 1/4″ piece of red cardstock. A 3 1/8″ long strip of the same red cardstock was cut with MFT’s Dainty Lace Die-namics Border die and adhered right under the red rectangle.

The sentiment is from the same set. It was stamped in Tuxedo Black Memento Ink on a piece of Solar White cardstock, cut and embossed with a Spellbinders tag die. 1/2″ wide olive Silk Ribbon was taped around the bottom of the edge of the red layer. A little loop was tied off the right hand side with embroidery thread and topped with a Cosmo Cricket Button. The tag was tied around the ribbon along with the button.

The card base is a 4 1/4″ x 11″ piece of Kraft cardstock folded in half. A 3 3/4″ x 5″ piece of Togetherness paper was stitched to a 3/16″ piece of Basic Black cardstock before those layers were adhered to the card base. The image layers were adhered on top of that with dimensionals.

Now to the Fresh and Fun Freebies. I haven’t given away blog candy in quite a while. Last time I ordered from My Favorite Things, I goofed and ordered an extra Something Fishy as well as an extra Dainty Lace Die by mistake. I am adding a few older MFT sets (5 big sets, 3 small ones)  to the blog candy.

All you have to do to qualify to win is add your name to the Mr. Linky underneath. I will pick a winner on Tuesday around 6 p.m. EST.

Hint for visitors that don’t have a blog:

You can still sign up, just use the direct address for your splitcoaststampers member gallery (https://splitcoaststampers.com/go/username). Substitute the username in the url with your own username.

If you are not a member of Splitcoaststampers yet, it’s easy and free and you can find so much inspiration there. Click here to get started.

Thank you so much for stopping by! Have a wonderful day! Hugs and smiles

I created this card for yesterday’s sketch challenge on Splitcoast. I started out with stamping this darling image from Crafty Secrets Sweet Kids in Tuxedo Black Memento Ink on X-Press It! Blending card and coloring it with Copic Markers (Umbrella: R00, R01, R02, N3, N5, N7 Grass: G20, G21, G24 Flower stems: G24, G28 Dress: Y11, Y13, Y15, W1 Flowers: BV11, BV13 Hair: Y21, Y26, Y28, Skin: E00, E02, Stockings: E0000, E00).

The image was cut and embossed with Classic Square Nestabilities and airbrushed with Copic Marker B21. The image was then layered on a piece of black cardstock, cut and embossed with Scallop Square Nestabilities.

All patterned papers used were from Webster’s Pages Petite Papers. First a 4 1/4″ x 5 1/2″ piece was stitched to a Neenah Solar White card base. The black with white polka dot paper measures 2 3/4″ x 3 3/4″ and was adhered to the card base.

Next is a 2 7/8″ x 4 1/2″ piece of Neenah Solar White cardstock strip. On each side a white strip was added that had been cut with (what is becoming my favorite border die) the Faux Crochet Border die.  A sentiment from Sweet Kids was stamped on the bottom of the vertical strip with Tuxed Black Memento Ink.

The small blue paper strip measures 1 1/4″ x 3 5/8″. The bottom border was paper pierced, then a strip of May Arts White Organdy Ribbon was tied around the strip. It was topped with a Pink Paislee brad. Sparkly Silver ribbon was tied around it and curled around the brad.

Recollection Rhinestones swirls in the top left and bottom right corner as well as some Silver Kaisercraft Rhinestones finish off the card.

Have a wonderful day! Hugs and smiles

I created this card for yesterday’s Color Challenge on Splitcoast (Eggplant Envy, Ridinghood Red and Soft Suede), the Sketch Challenge from Waltzingmouse stamps and Flourishes Timeless Tuesday (using hardware).

I stamped one of the images from Flourishes Hearts & Flowers set in Rich Cocoa Ink on Neenah Classic White cardstock. It was cut and embossed with Classic Circle Nestabilities,colored with Copic Markers (R24, R29, R39, BV0000, BV20, BV23, BV25, BV29).

The image was sponged with Old Paper and Vintage Photo Distress Ink and stitched to a piece of sponged Red Ridinghood cardstock cut and embossed with large scallop circle Nestabilities. It was then layered on a piece of White cardstock, cut and embossed with Label 9 Nestabilities and sponged with Old Paper and Vintage Photo Distress ink.

A 5 1/2″ long strip of Soft Suede cardstock was cut with MFT’s Faux Crochet Dienamics die. It was stitched to a strip of Webster’s Pages Petite Paper. The bottom of that strip had been cut in a wave and thin lace (Walmart) was stitched to it. Above the Faux Crochet Border a 1″ strip of purple paper from Webster’s Pages Petite Paper was adhered underneath. White Organdy Ribbon was tied around the layers before the layers were adhered to the 5 1/2″ x 4 1/2″ piece of textured Kraft cardstock.

A sentiment from Hearts & Flowers was stamped in Rich Cocoa on a piece of Classic White cardstock, cut and embossed with a retired Spellbinders tag die. It was sponged with Old Paper and Vintage Photo distress ink.

The bow was topped with a Antique Brad from Stampin’ Up!. The sentiment tag as well as an Adornment Charm were attached to the bow with Jump Rings. The bow was topped with two Heart Trinket Pins by Maja Road to finish off the card.

Thanks so much for stopping by! Have a wonderful day!
Hugs and smiles

I created this card for last weeks My Favorite Things sketch challenge as well as one of the VSN mini challenges. The challenge was to paper piece an image and have at least two parts of the image paper pieced.

I chose the Pure Innocence stamp Being Cute is What I do.  I stamped the image with Tuxedo Black Memento Ink on Express It! Blending Card and cut and embossed with Label 8 Nestabilities. The image was stamped three times on Pink Paislee 365 degree paper. Once for the shirt, once for the pants and once for the rose on the shirt.

The main image as well as the paper pieces were colored with Copic Markers (Shirt: Y35, Y38, R27, Rose: R27, R39, pants: BG10, BG11, Hair: E35, E25, E29, Grass: YG25, YG17, Skin: E0000, E00, E01),  a border was doodled on the edge of the cardstock, the paper pieces adhered to the main image and the background airbrushed with Copic Marker BG01.

A 1″ x 3 1/8″ piece of 365 Degree paper was adhered over a 3 1/8″ x 4 1/4″ piece from the same paper pack.  The paper was adhered to a 3/16″ bigger piece of Canyon Brown cardstock. the edges were paper pierced and  Webster’s Pages trim was adhered over the horizontal strip. The image was adhered over it with dimensionals.

Clouds were cut with the Cloud Die-namics die. The edges were colored with Copic Marker BG. The medium sized cloud was used to hold the sentiment from the same stamp set. The medium and small cloud were attached to the image layers with dimensionals.

A 1 3/4″ x 3 15/16″ piece of 365 Degree paper was adhered to a 3 15/16″ x 5 3/16″ piece of Kraft cardstock. Lace was adhered over the horizontal layer and a border was sewn to the edges of the layer. The layers were adhered to the Canyon Brown cardbase, which was a created out of a 4 1/4″ x 11″ piece. The image layer was adhered to the card base with dimensionals.

For the inside of the card a 1″ x 3 15/16″ piece of the patterned paper was stitched to a 3 15/16″ x 5 3/16″ piece of Kraft cardstock. A border was stitched around the edges. Another sentiment from the stamp set was stamped to the largest of the clouds and adhered to the inside of the card with dimensionals.

Thanks so much for stopping by! Have a wonderful day! Hugs and smiles

I had a quite a bit of computer problem. It completely crashed and Rick had to reboot it. Now it’s working again, but all my files were lost. I am so getting an automated backup system. I just spend the last hour creating watermarks and editing photos I had already edited. Arggh….computers!

I created this card for Bev’s Hope You can Cling to Challenge.  She asked us to use felt on our project.  First I stamped Miles and Maisie Claus in Tuxedo Black Memento Ink on X-Press It Blending Card. The image was cut and embossed with Classic Circle Nestabilities and colored with Copic Markers (Cheese: Y11, Y15, Y17 Maisies hat: G03, G05, G07 Maisies coat: R35, R37, R39 coat trim: E40, E41 Maisies fur: N1, N3, R20 Maisies nose: R81, R83 Apron trim: Y38, E97 Miles fur: E42, E43 Beard: W00, W1 Coat: R24, R27, R29, R39 Trim: B91, B0000 Gloves: C5, C7, C9 Nose: E04, E07) The image was airbrushed with Copic Marker B91 and Chunky Crystal Crafty Sparkles were adhered to the bottom with Glossy Accents.

I cut green Prisma cardstock with the largest Eyelet Circle and a Classic circle Nestabilities die to create the frame. With the Classic Circle die still on the paper, it was airbrushed with Copic Marker G07.  Next I cut and embossed a frame with the largest Eyelet square and a Classic square Nestabilities die and airbrushed that with Copic Marker B91. For the Eyelet Square, I adhered the circles that were cut out back in to decorate the frame. For the Eyelet Circle frame, I used Snow and Red Kaisercraft Pearls. Small green Kaisercraft pearls were added to the top right and left bottom edge of the square frame.

Red Silk May Arts ribbon was tied into a bow with Bow-Easy, topped with a Recollection Brad and adhered to the top left corner. The sentiment is from Holiday Sentiments. It was stamped in Tuxedo Black Memento Ink on Neenah Solar White cardstock, cut with Petite Oval Nestabilities and airbrushed with B91.

The card base is a 5″ x 12″ piece of blue Core’dinations cardstock folded in half. A 2 1/2″ x 4 1/2″ piece of patterned paper I received last year in one of Taylored Expressions project pantries kit was stitched to a white strip of felt that had been cut with the Scalloped Scallop Die-namics die. That was adhered to a 4 1/2″ x 5 1/2″ piece of the same paper pack. The layers were stitched to a 1/4″ bigger piece of white cardstock.

The inside of the card is kept very simple. Just something to tie it in with the front.

Thanks so much for stopping by! Have a wonderful week (and cross your fingers my computer will not crash again!).

Hugs and smiles

© 2012 fresh & fun Suffusion theme by Sayontan Sinha