ello and welcome to Day 4 of our June Rubber & Die Release Showcase!

On Wednesday (20 June) Whimsy Stamps released this month’s new rubber designs, new Shapeology dies and new Shape EZ by TLC. From then until 26 June the Whimsy Stamps DT and Special Guests are showcasing these fabulous new goodies with a daily mini blog hop and I am part of today’s hop!

Each mini blog hop has a new release prize hidden somewhere along the way and you have 24hrs to enter each prize draw.

To be entered into today’s mini blog hop prize draw, be sure to leave a comment on ALL of the DT’s posts listed below by 12.00PM EST tomorrow. All winners will be announced on the Whimsy blog on 27 June.

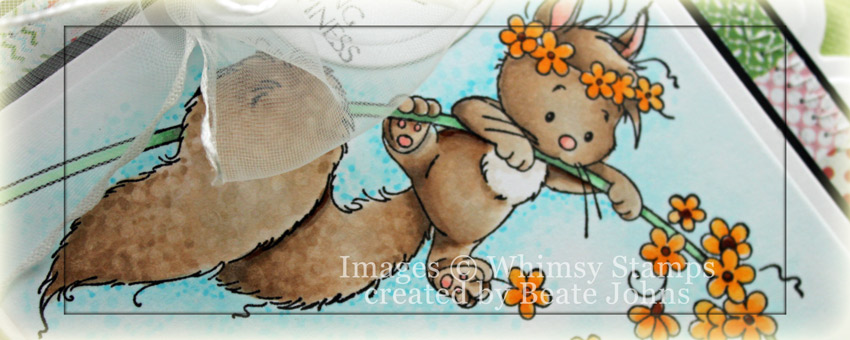
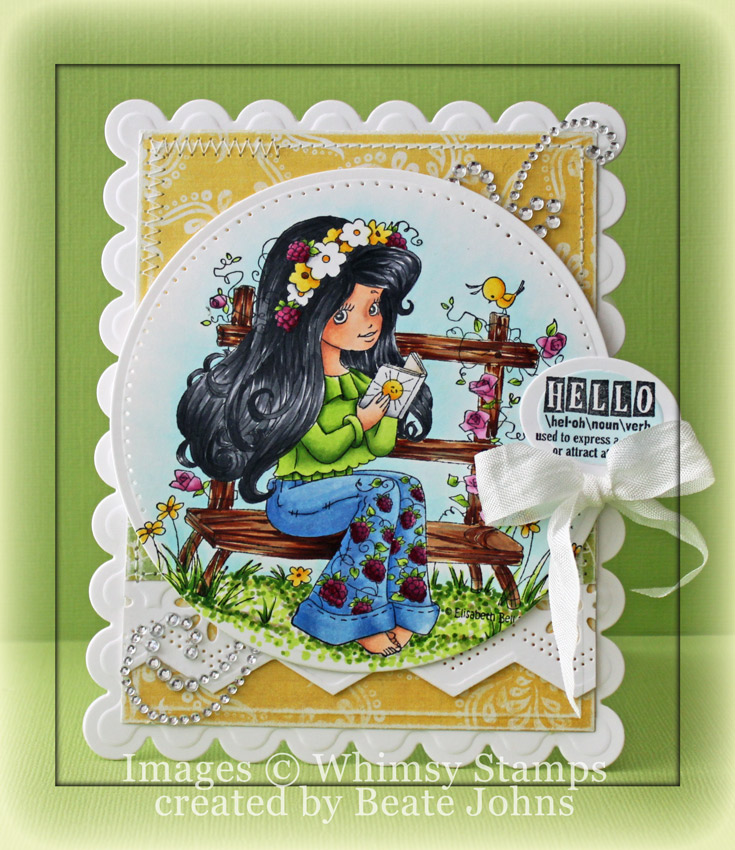
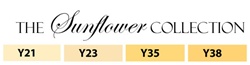
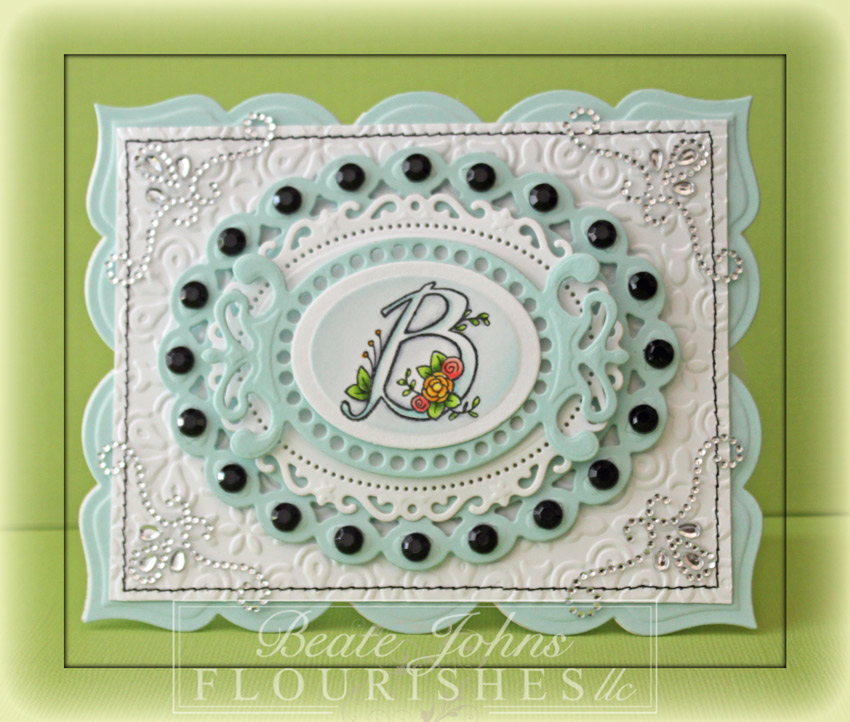
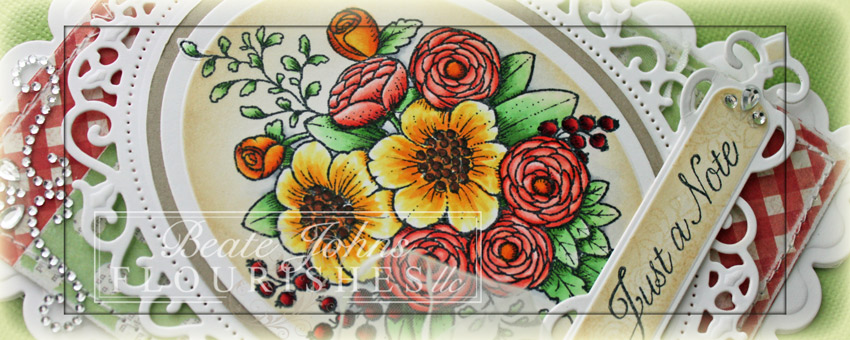
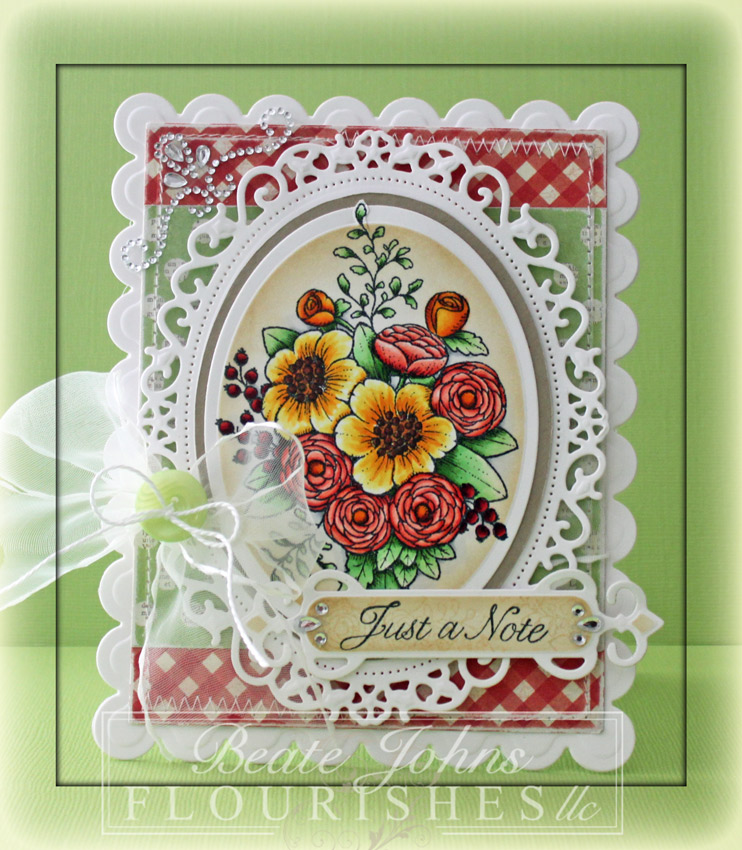
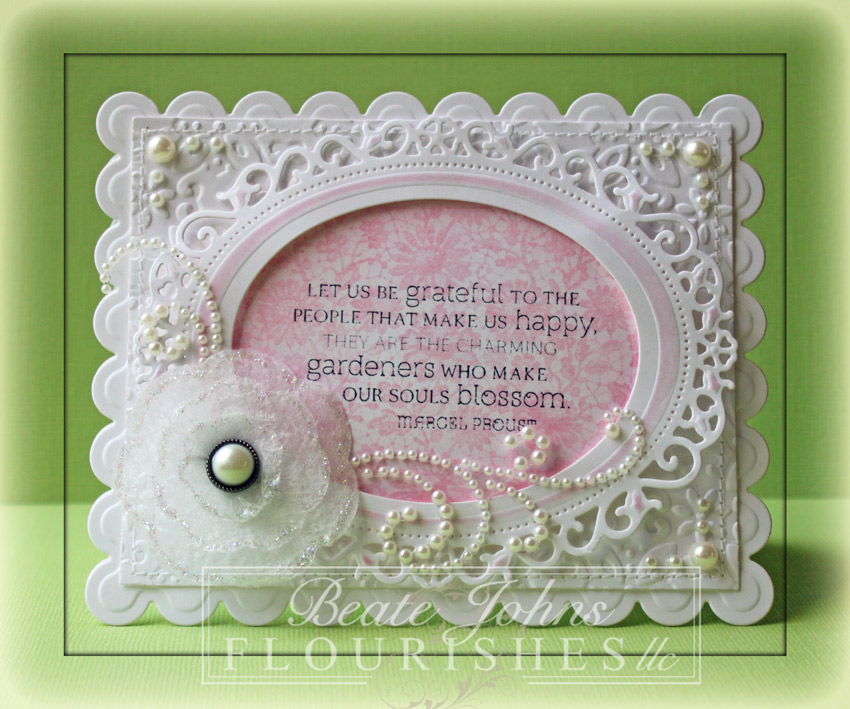
I stamped the new Fluffy Hanging in There in Tuxedo Black Memento Ink on Neenah Solar White cardstock,. It was cut and embossed with the largest  Classic Square Nestabilities die. The image was colored with Copic Markers (Fluffy: E40, E41, E42, E43, R00, R21, W3   Flowers: Y35, Y38, E97  Stem: YG41, YG45    Basket: W00, W3). The image was adhered to a slightly bigger black cardstock layer.

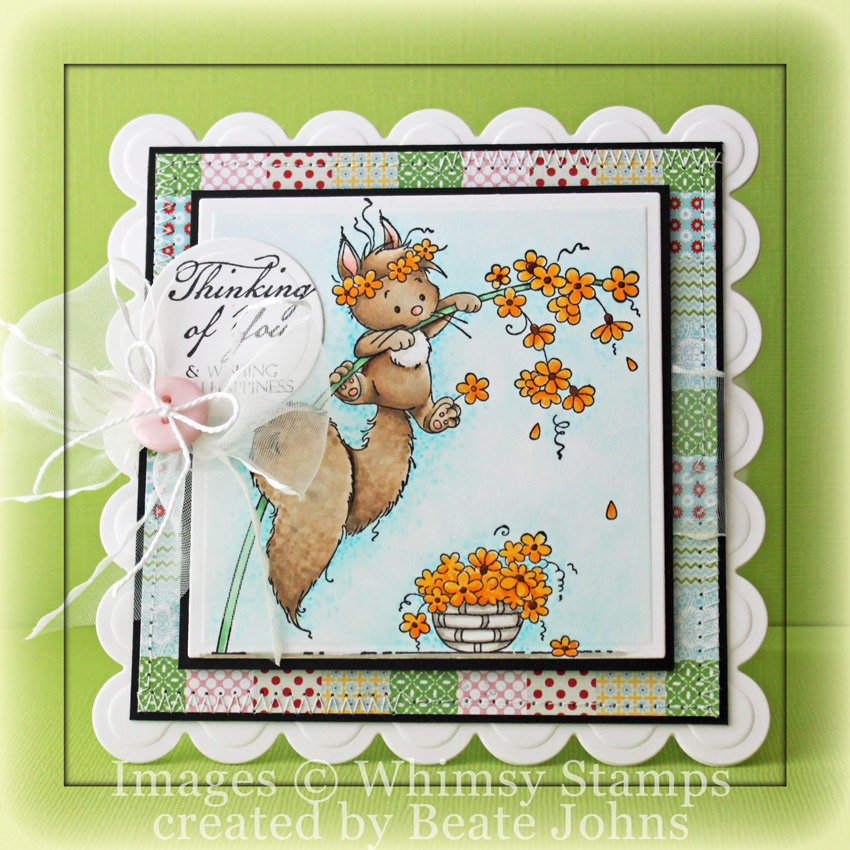
A piece of Lily Bee Designs Handmade Patterned paper was stitched to a slightly bigger piece of black cardstock. Sheer white ribbon was tied around the layers and topped with a pink button. The layers were adhered to the card base, white cardstock cut and embossed with a Grand Scallop Square Nestabilities die.

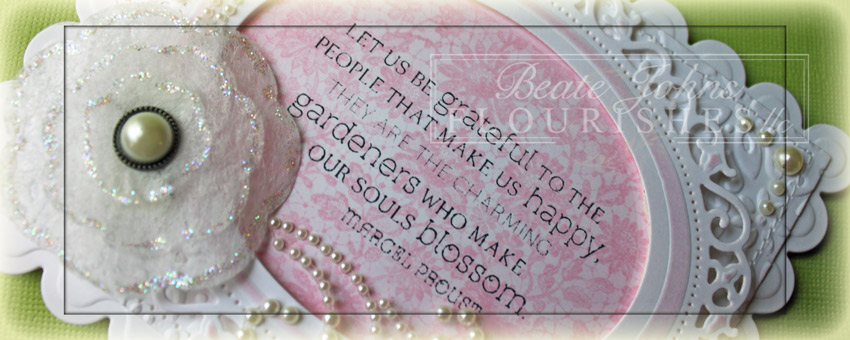
A sentiment from Everyday Sayings Notables 4 was stamped in Tuxedo Black Memento Ink on a piece of white cardstock, cut and embossed with a Standard Circle Nestabilities die.

To take a peek at today’s fabulous new release creations, please click on the links below…

Zoe McGrath (Special Guest)

Remember that the entire new release is available to buy right now from the Whimsy Stamps store along with all your Whimsy favourites.

Thanks for stopping by and don’t forget to pop back to the Whimsy blog tomorrow for more new release creations!
Hugs and smiles

Hello and welcome to Day 2 of our June Rubber & Die Release Showcase!

On Wednesday (20 June) Whimsy Stamps released this month’s new rubber designs, new Shapeology dies and new Shape EZ by TLC. From then until 26 June the Whimsy Stamps DT and Special Guests are showcasing these fabulous new goodies with a daily mini blog hop and I am part of today’s hop!

Each mini blog hop has a new release prize hidden somewhere along the way and you have 24hrs to enter each prize draw.

To be entered into today’s mini blog hop prize draw, be sure to leave a comment on ALL of the DT’s posts listed below by 12.00PM EST tomorrow. All winners will be announced on the Whimsy blog on 27 June.

For my card I stamped Elisabeth Bell’s new Blossom Berry Sitting Pretty image in Tuxedo Black Memento Ink on Neenah Solar White cardstock, cut and embossed her with the smallest of the Grand Circle Nestabilities and colored with Copic Markers( Skin: E000, E00, E01, E11   Hair: C3, C5, C7, C9   Pants: B21, B23, B24, YG01, YG03, YG17, RV55, RV66, RV69   Shirt: YG01, YG03, YG17   Bench: E31, E34, E37, E29, W3    Flowers/Bird: Y13, Y15, Y17, RV52, RV55, RV66   Ground: YG01, YG03, YG17, E31, W3    Background: B0000, B000). The edges of the circle were paper pierced.

Two pieces of Echo Park Paradise Beach patterned paper were cut with a  Grand Rectangle Nestabilities die.  The edges were sanded and stitched before seam binding was tied around it.  The layers were adhered to a card base, cut and embossed with a Grand Scallop Rectangle die out of  Solar White cardstock.

One of the new Definition Notables 4 sentiments was stamped in Tuxedo Black on Neenah White cardstock, cut and embossed with a Classic Oval Nestabilities die and colored with Copic Marker B0000.  The oval was adhered right over the seam binding bow. Parts of a Silver Finesse Rhinestone Swirl finish off the card.

To take a peek at today’s fabulous new release creations, please click on the links below…

Remember that the entire new release is available to buy right now from the Whimsy Stamps store along with all your Whimsy favourites.

Thanks for stopping by and don’t forget to pop back to the Whimsy blog tomorrow for more new release creations!
Hugs and smiles

Hi all and welcome to the final day of Flourishes’ Release Week!

Introducing…..

The new Happily Ever After set is the perfect companion set for our new set Summer Blossoms. Here, you have a pint-sized sentiment set that packs some punch when it comes to wishing “The Happy Couple” well! Use it for Anniversary wishes, weddings, bridal showers or even to congratulate a newly engaged couple! It’s a must have set to add to your collection! This set measures 4 by 3″ so it’s a bargain at $8.50!
For my Happily Ever After Sample I stamped a sentiment in Tuxedo Black Memento Ink on a piece of white cardstock, cut and embossed with a Fancy Tag Two die. With the die still on the cardstock, the edges were sponged with Antique Linen and Vintage Photo Distress Ink. A corner flourish from Summer Blossoms was stamped over the edges with third generation Vintage Photo ink.

A piece of white cardstock was cut and embossed with a Classic Heart die and embossed with the Elegance M-Bossabilities folder.  It was adhered to another piece of white cardstock, cut and embossed with a Classic Scalloped Heart die.  The tag was adhered to the lower right of the heart.

The same corner image from Summer Blossoms that was used to stamp over the tag for texture, was stamped in Tuxedo Black ink on white cardstock and colored with Copic Markers (Yellow Flower: Y21, Y23, Y35   Center flower: BG0000, BG000  Leaves: G40, G43, G46). The image was cut out and adhered to the lower right of the tag.

A piece of My Mind’s Eye Lost & Found 2 Breeze paper was adhered over a bigger piece from the same paper pack and cut and embossed with the smallest of the Grand Square Nestabilities dies. The edges were sanded and stitched. Crochet lace was taped to the edge of the vertical strip and Sheer ribbon was tied around the edge. The bow was topped with a button, tied on with embroidery thread.

The layers were adhered to the card base, cut and embossed with the smallest Grand Scallop Square Nestabilities die out of white cardstock. Rhinestones finish off card.

To make sure all your events are truly memorable, Flourishes has added a do-it-yourself invitation to deck out however you wish! Baby showers, potlucks, bridal showers and more! This blank download allows you to personalize any get-together with that elegant, handmade touch! Created as a part of Flourishes’ Blossom Collection with fonts that match this series of stamps — this invitation blank offers endless opportunities for entertaining in style! Click HERE to see this in the store and CLICK HERE for instructions on how to download this image after your purchase! The tutorial was from a post we featured a while back for our calendar download.

For my sample I printed the invitation on white cardstock and cut and embossed it with the largest Romantic Rectangle die. The booties from Hello Baby were stamped in Tuxedo Black Memento Ink on a piece of My Mind’s Eye Two Lost & Found 2 Breeze. The booties were shaded with Copic Markers (BG000, BG01) and cut out. They were adhered to a piece of white cardstock cut and embossed with a Fancy Tag One die, which was then adhered to the center of the top of the invite.

Would you like to win our new Happily Ever After Set? All you need to do is leave some love in the form of a comment on the blogs below! Why? You need to try to figure out…..

One of the ladies on our link list below will be picking a name from the comments on her blog post today. We don’t know which one it is… so the more blogs you leave comments on, the more chances you have to win! What are you waiting for? Time to hop along and see what these fabulous designers created!

Thanks so much for stopping by! Have a wonderful day!
Hugs and smiles

Today’s new stamp set is a gorgeous Monogram Alphabet set called Letters in Blossom. For my sample I thought I let a Monogram letter stand by itself.

I stamped my initial in Tuxedo Black Memento Ink on white cardstock. It was cut and embossed with a Classic Oval die and colored with Copic Markers ( Leaves: YG11, YG13, YG17    Yellow Flower: Y13, Y15, Y17   Red Flower: R20, R22, R24   Letter Shading: BG10, BG11  Shading: C00, C3). The center of the oval was sponged with Tumbled Glass Distress Ink before it was layered on light blue cardstock, cut and embossed with a Fancy Tag 3 die.

It was then adhered to a piece of white cardstock, cut and embossed with the second largest Floral Oval Nestabilities die. Next is another light blue layer, cut and embossed with the largest Beaded Oval Nestabilities die. A black rhinestone was adhered in the center of each “bead” around the oval.

A white piece of cardstock was cut with the second smallest Grand Rectangle die. The rectangle was then embossed with the Elegance M-Bossabilities folder and the edges were stitched. The card base was created out of light blue cardstock with a Grand Label 23 Nestabilities die. Rhinestones Borders in each corner finish off the card.

Want to win this set? All you need to do is leave some love in the form of a comment on the blogs below! Why? You need to try to figure out….

One of the ladies on our link list below will be picking a name from the comments on her blog post today. We don’t know which one it is… so the more blogs you leave comments on, the more chances you have to win!

Senior Design Team

You can play in our Noon Time Challenges, which start today! It’s a fast-paced and fun challenge that will give you yet a chance to win our full June release!   All challenges will close this Friday at 5 PM EST and winners will be announced Saturday in our Winner’s Circle blog post! So get those fingers inky and good luck!

And, don’t forget our New Release Bundle! If you buy all three sets in a bundle, you save 10% off the price. But, this offer only lasts through next Friday, June 16. So… you have to act fast! Just click HERE to see!

Thanks so much for stopping by! Have a wonderful day!
Hugs and smiles

Hi all and welcome to the very first day of Flourishes Sneak Peeks for JUNE! It’s exciting because the sets being revealed this week aren’t just unique for June — they are part of an entire collection of stamp sets that will be released over the next year! It’s called the Blossom Collection and each set released under this name will be designed to coordinate with the other pieces for all types of occassions! Use one set on it’s own or slowly add to the collection — that’s the beauty of it!

Today’s set is the first part of this collection and features beautiful blooms perfect for summer!

Part of The Blossoms Collection, this beautiful array of summer blossoms illustrated by Marcella Hawley features a bouquet, corner stamps, and pieces to create your own borders or frames. Add in a trio of all occasion sentiments and you have the perfect set to create cards for every day correspondence. Set measures 4 by 6″ and is the perfect companion to sister sets Happily Ever After SS199 and Letters in Blossom SS198. If you like what you see, this set is available for pre-order now, just click HERE!

The design team has been busy creating beautiful things with this stunning set!

I stamped the big floral image in Tuxedo Black Memento Ink, colored it in Copic Markers (Yellow flowers: Y13, Y15, Y17, YR16, YR18, E97, w3, E29   Red Flowers: R20, R21, R22, YR16, E97   Berries: R24, R29, R29   Leaves: YG11, YG13, YG17   Shading: C00, C3). The image was cut and embossed with the largest of the Classic Oval Nestabilities die and the edges were sponged with Antique Linen Distress Ink.

It was adhered to a piece of Kraft cardstock, which was cut free hand into a slightly larger oval layer. The layers were adhered to a piece of white cardstock, cut and embossed with the largest of the Floral Oval Nestabilities dies.

Two pieces of My Mind’s Eye Lost and Found 2 Rosy patterned paper were cut and embossed with the second smallest Grand Rectangle Nestabilities die. The edges were sanded and stitched before May Arts ribbon was tied around the horizontal strip and topped with a button. The layer was then adhered to the card base, white cardstock, cut and embossed with a second smallest Grand Scallop Rectangle die.

A sentiment from Summer Blossoms was stamped in Tuxedo Black ink on a piece of white cardstock, cut and embossed with a Fancy Tag One die. The embossed parts of the tag were sponged and the sentiment was adhered to the lower right of the image. Rhinestones finish off the card.

Want to win this set? All you need to do is leave some love in the form of a comment on the blogs below! Why? You need to try to figure out…..


One of the ladies on our link list below will be picking a name from the comments on her blog post today. We don’t know which one it is… so the more blogs you leave comments on, the more chances you have to win!

With that bit of eye candy, you’ll surely want to see the design team’s cards and creations in full color when you take a trip over to their blogs!

One quick note!! As you make your rounds today, you might notice some of the gals using some fun paper in shades of sage, blue and yellow! It’s all a part of Flourishes new 123 Create Kit that is being released TODAY… right HERE! Want a peek? Take a look. All this for just $20!

DID YOU KNOW YOU COULD WIN OUR ENTIRE JUNE RELEASE? Have you checked out our 10 Minute Creations Challenge? Just click HERE to find out how to play! You can also play in our Noon Time Challenges, which kick off today and continue noon tomorrow! Our noon time challenges are fast-paced chances to win our full June release! All challenges will close this Friday at 5 PM EST and winners will be announced Saturday in our Winner’s Circle blog post! So get those fingers inky and good luck!

Don’t forget our New Release Bundle! If you buy all three sets in a bundle, you save 10% off the price. But, this offer only lasts through next Friday, June 22! So… you have to act fast! Just click HERE to see!

See you back here at noon for more Flourishes FUN!

Thanks so much for stopping by! Have a wonderful day!
Hugs and smiles

Today’s Timeless Tuesday hostess is Heather. She challenged us to create a Father’s Day project.  For me it was the perfect opportunity to use the new Father’s Day stamp set from last month release.

I stamped one of the images in black ink on white cardstock and cut it out. It was layered over a piece of cardstock cut and embossed with an Ornate Artisan Tags and Accents die that had been sponged with Antique Linen and Vintage Photo Distress Inks.  Another piece of white cardstock was cut and embossed with a Label 18 Nestabilities die. The embossed part was sponged again and one of the sentiments of the Father’s Day set was stamped over the sponged area with Vintage Photo ink. The layers were adhered over a piece of black cardstock, cut and embossed over a Lacey Square Nestabilities die.

A strip of My Mind’s Eye Lost and Found 2 Sunshine paper strip was adhered to a bigger square of the same paper pack. The layers were cut and embossed with a Label 1 Nestabilities die.  The edges were sanded  before the layers were adhered to the card base, black cardstock cut and embossed with a Grand Label 1 Nestabilities die.

A sentiment from the Father’s Day stamp set was stamped on a piece of white cardstock, cut and embossed with a Lacey Pennant die. The embossed part of the pendant was sponged as well.

Take a peek at what the other Timeless Tuesday designer have created for today…

I hope you have time to play. Thanks so much for stopping by! Have a wonderful day!
Hugs and smiles

Emily Keaton wrote today’s tutorial for Splitcoaststampers. She shows us how to create flower embellishments out of used dryer sheets.  I cut my flower pieces with the Blossoms Nestabilities die. The pieces were sprayed with Tattered Angel Marigold Glimmer Mist and held together with a Glitter Brad. The edges of each petal was lined with Lime Green Stickles.

The sentiment from Unity’s Itty Bitty Wonderful set was stamped in Rich Cocoa Memento Ink on a piece of Neenah Solar White cardstock, cut and embossed with a Standard Circle Nestabilities die. The edges of the circle were  sponged with New Sprout Memento Ink..

Pieces of Echo Park Hello Summer patterned paper were cut and embossed with two Foliage dies. The embossed part of the leaves were sponged with Bamboo Leaves Memento Ink and adhered to the flower. The flower was adhered to the lower part of the circle with dimensional foam.

The circle was adhered to a piece of white cardstock, cut and embossed with a Lace Doily Motif die. A piece of Echo Park Sweet Day paper was cut and embossed with a Grand Square Nestabilities die. The edges were sanded and stitched before the paper was adhered to the card base, white cardstock cut and embossed with a Grand Scallop Square Nestabilities die. Part of a Finesse Rhinestone Swirl finish off the card.

Here is a video for the visual learner:

[youtube]https://www.youtube.com/watch?v=RjKef3d3ghY[/youtube]

Thanks so much for stopping by! Have a wonderful day!
Hugs and smiles

Today’s Timeless Tuesday Challenge hostess is Amanda! She challenges us to create a white card and add Pearls and/or Lace. I tried, but had to add a bit of pink shading.

I started by cutting a frame with the Floral Oval Nestabilities and a Classic Oval Nestabilities die (sorry….I LOVE that Floral die and have a hard time NOT using it).  The frame was sponged with Angel Pink Memento Ink.  Another slightly larger then the frame window oval was cut. Antique Lace was inked with Angel Pink ink and stamped over the oval. A sentiment from Butterflies & Blossoms was stamped in Tuxedo Black Memento Ink in the center of the oval before the frame was adhered over it with dimensional foam.

A piece of white cardstock was cut with a Grand Rectangle Nestabilities die before the rectangle was embossed with the Mystic M-Bossabilities die. The edges were stitched before it was adhered to the card base, which was cut and embossed with a Grand Scallop Rectangle Nestabilities die.

Used dryer sheet was cut with Blossoms dies, layered and held together with a Pearl Brad. Stardust Stickles was added to the edge of each flower petal.  The flower was adhered with dimensional foam to the lower left of the floral oval frame. Pearls and part of a Pearl Finesse Swirl Finish off my card.

Take a peek at what the other Timeless Tuesday designer have created for today…

I hope you have time to play. Thanks so much for stopping by! Have a wonderful day!
Hugs and smiles

My post on the Spellbinders blog today is all about summer time. I hope you have time to check it out. I always appreciate comments there.  The cherries were colored with Copic Markers (Cherries: YR15, R08, R24, R29, R39   Leaves: YG01, YG03, YG17   Branch: E23, E25, E27, E29   Background: B0000, B000).

Talking about summer time. With the kids being home from school now, I don’t think I can post a daily blog post. I hope you understand. I will post as often as I can.

Thanks so much for stopping by! Have a wonderful day!
Hugs and smiles

Today’s challenge hostess is Mona! She asks us to create a thank you card or tag.  I knew right away I wanted to use the new Hydrangea stamp set again. This time I chose to use the larger of the two flower clusters instead of the big bouquet. The image was stamped three times in Tuxedo Black Memento Ink on white cardstock, colored with Copic Markers (YR30, YR31, R000, R00, R01, Ro2).  I know those are not colors that Hydrangeas come in, but they worked best for the patterned paper I chose.

A frame was cut out of white cardstock, a  Standard Circle Nestabilities die as well the largest  Tear Drop Circle die. The same Standard circle was used to cut a piece of patterned paper from the  Pink Paislee Butterfly Garden collection. The circle was sanded and stitched and a sentiment from the Hydrangea set was stamped in it’s center. The flowers were adhered to the lower  left of the of the frame.

Another piece of Butterfly Garden paper was cut and embossed with the smallest of the Grand Square Nestabilities die. The edges were sanded and stitched. May Arts Ribbon was threaded through a hole in the Tear Drop circle frame and the layers were adhered to the patterned paper square. The ribbon was tied into a bow and topped with a button. The layers were adhered to the card base, white cardstock cut and embossed with a Grand Scallop Square Nestabilities die. Rhinestones on the top left finish off the card.

Take a peek at what the other Timeless Tuesday designer have created for today…

I hope you have time to play. Thanks so much for stopping by! Have a wonderful day!
Hugs and smiles

© 2012 fresh & fun Suffusion theme by Sayontan Sinha