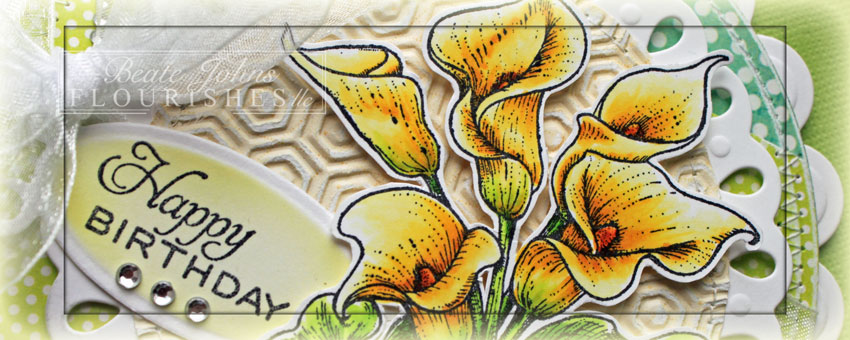
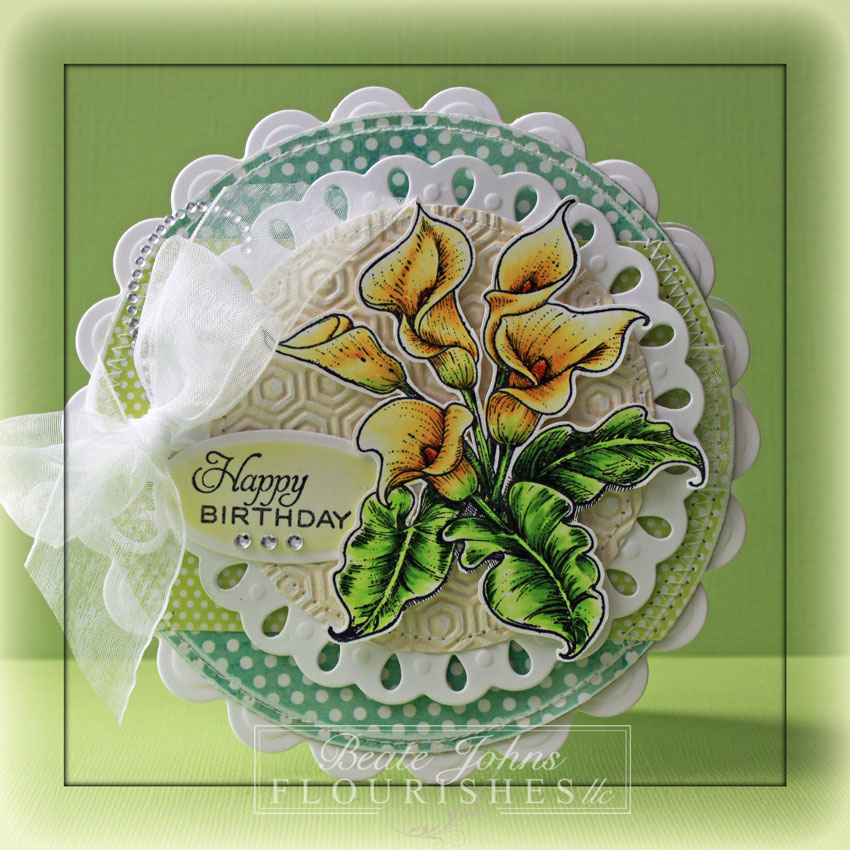
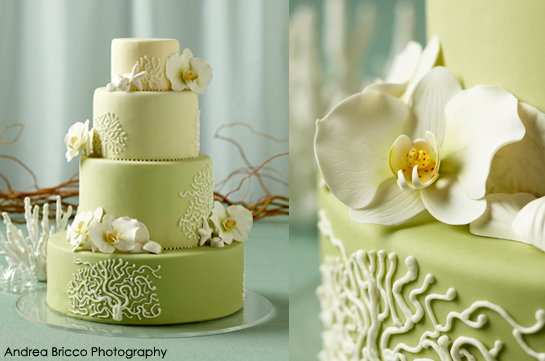
I created this card for a recent  Inspiration Challenge on Splitcoast. Stef picked a great site to draw inspiration from. As soon as I saw this cake, I knew I wanted to use Flourishes gorgeous Orchid stamp set.

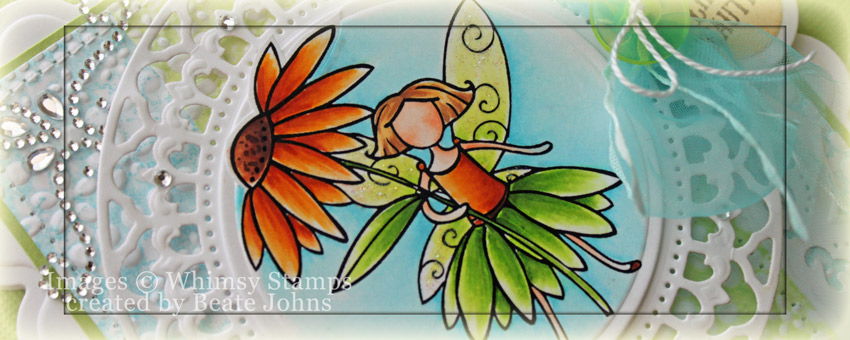
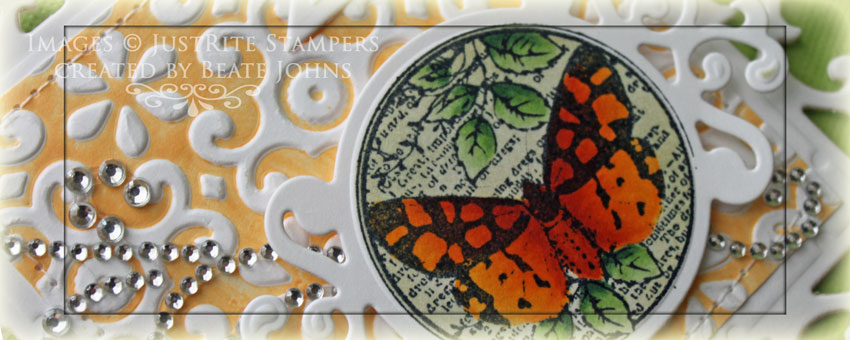
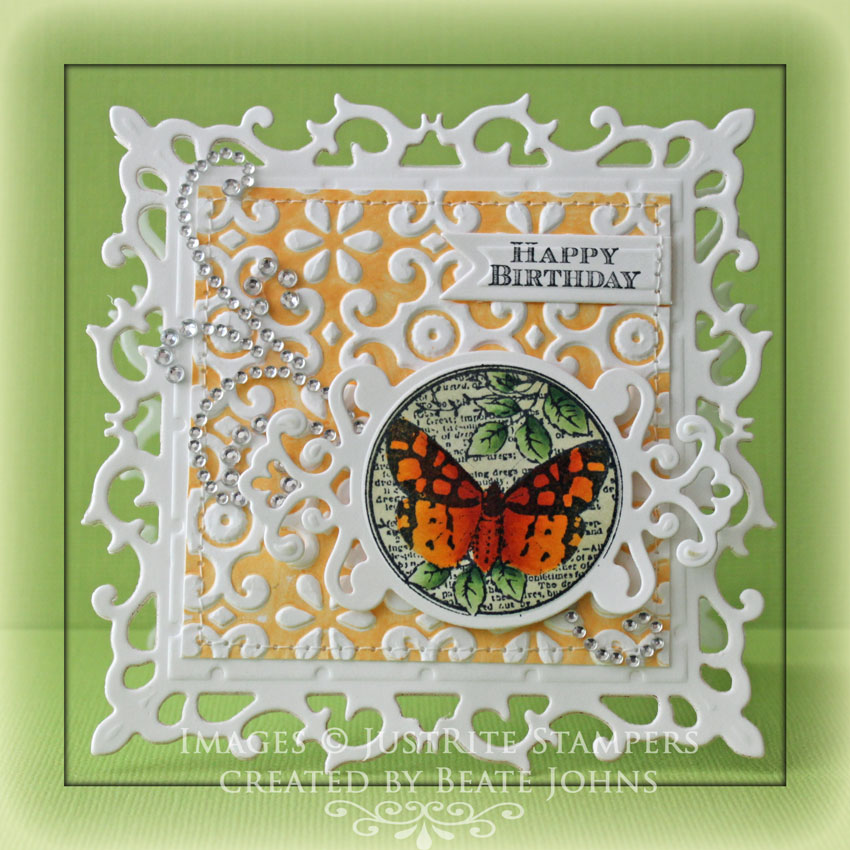
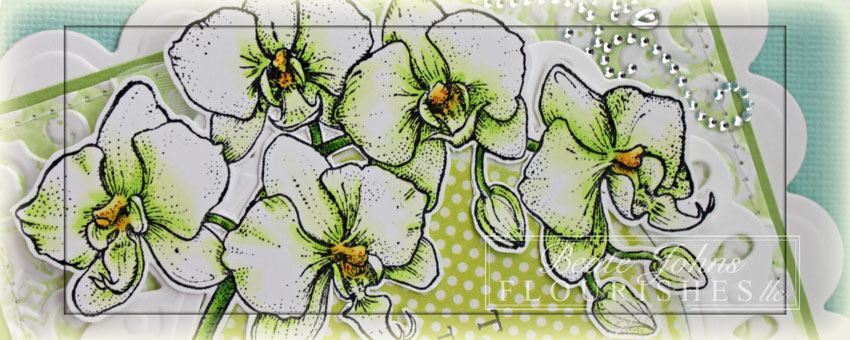
I stamped the Orchid image in  Tuxedo Black Memento Ink on Neenah Solar White cardstock and colored it with  Copic Markers (YG0000, YG01, YG03, YG17, Y13, Y17 and red spica pen). The image was cut out and adhered to a frame cut and embossed with the largest  Tear Drop Circle and a Standard Circle Nestabilities die.

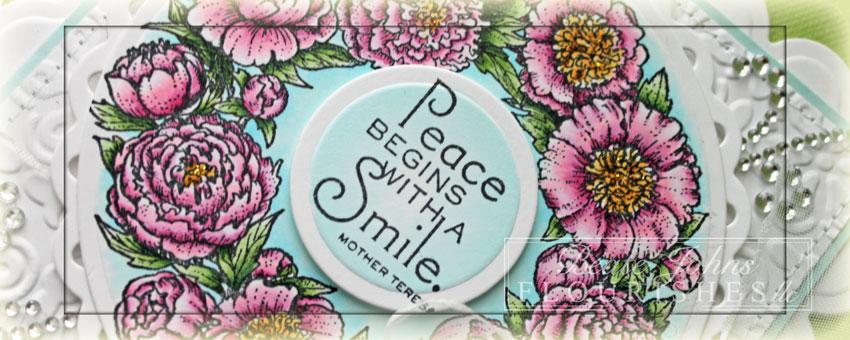
With the same Standard Circle die used for the frame, a piece of MME Lime Twist Life is a Party was cut and embossed. The edges were sanded and the circle was layed inside the frame. The orchid was adhered over the frame and paper with dimensionals. A sentiment from the orchid set was stamped on the right hand side of the paper with Tuxedo Black Ink.

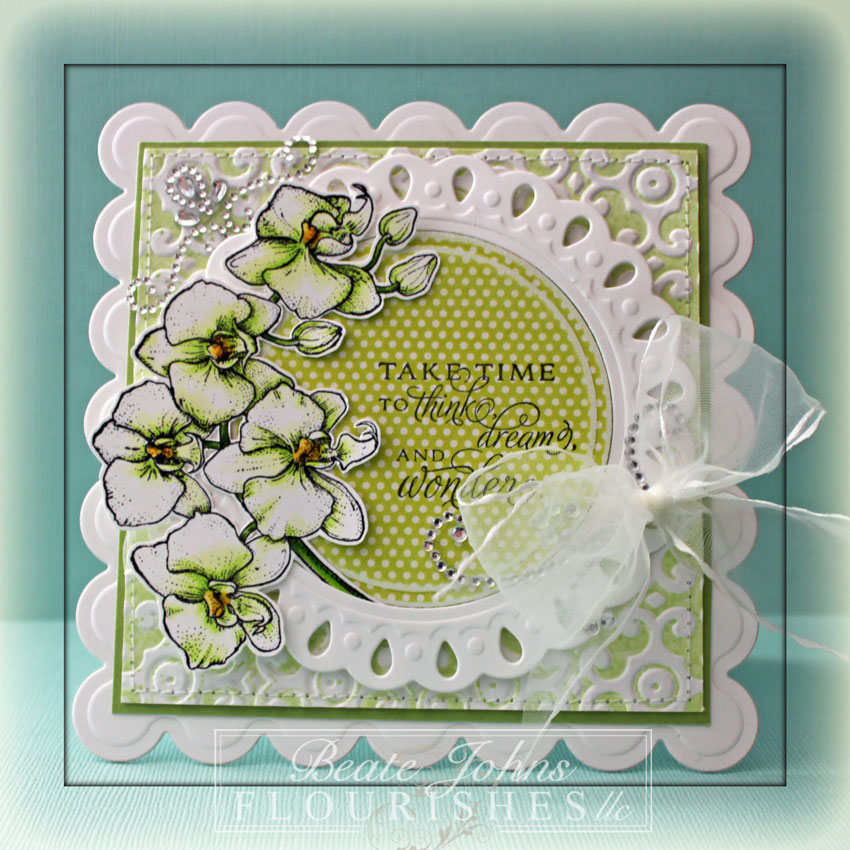
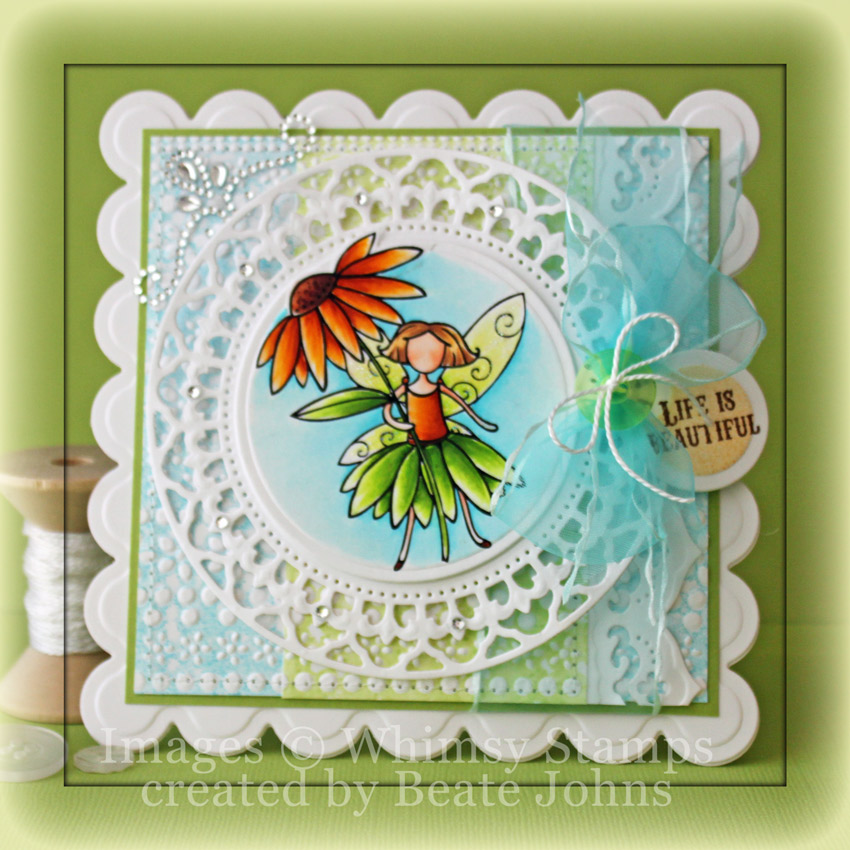
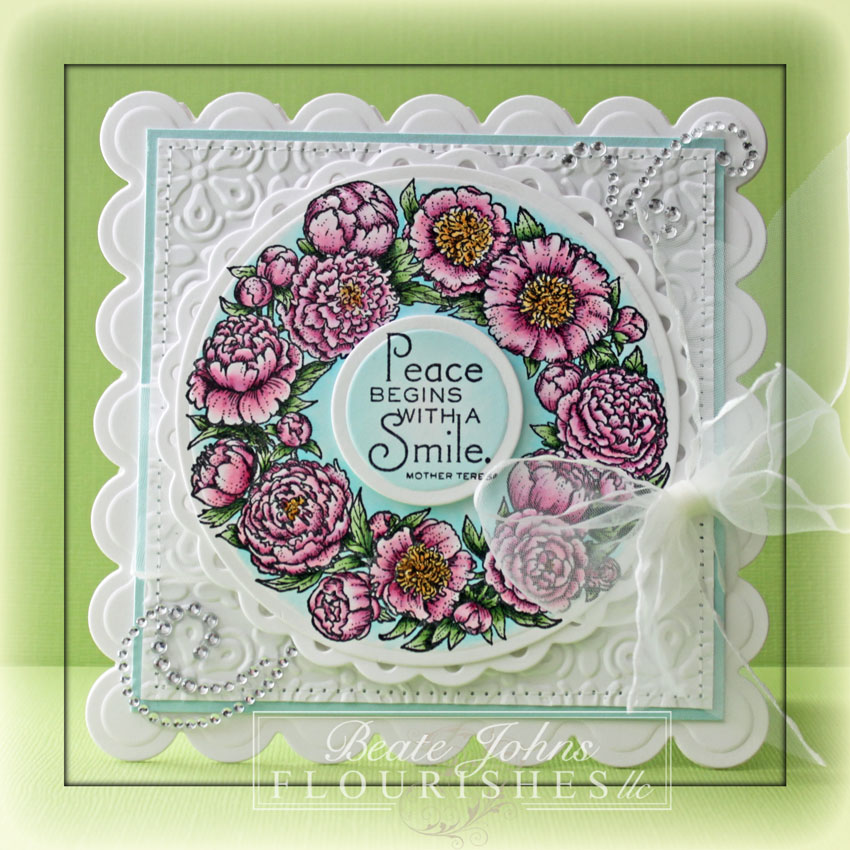
A 4 3/16″ square of Solar White cardstock was embossed with the Elegance M-Bossibilities folder (I do love that folder!) that had been inked with New Sprout Memento Ink. It was stitched to a 4 1/4″ square of Sour Apple Cardstock.  A piece of my new favorite May Arts ribbon was threaded through one of the Tear Drop circle holes  and tied around the layers. The frame was adhered over the squares with dimensionals.

The card base was cut and embossed with the second smallest Grand Scallop Square Nestabilities dies. Nina Brackets gorgeous new Fancy That! Border Bling and parts of a Finesse Rhinestone Swirl finish off the card.

Thanks so much for stopping by!
Hugs and smiles

Today’s new Whimsy Challenge is to use no patterned paper. That’s a tough one for me. But I did it for my card on Monday and liked it so much,  I used the same dies and embossing folder again.

I picked Brooke the Zinnia Fairy as my image. She was printed out on Neenah Solar White cardstock, cut out with the Out of the Box technique and a  Standard Circle Nestabilities die and colored with Copic Markers ( Flower and Shirt: Y32, Y17, YR15, YR18, E97, E99, E29   Leaves and Skirt: YG01, YG03, YG17   Skin: E0000, E00, E02   Hair: Y23, E31, E33   Wings: YG0000, YG00, YG01   Background: BG0000, BG000, BG01). The circle was adhered to a piece of Solar White cardstock that had been cut and embossed with the largest Spendid Circle die.

One 2 1/4″ x 4 1/4″ piece of white cardstock was embossed with the new Flower Fun M-Bossabilities folder that had been inked up with New Sprout Memento Ink. A 4 1/4″ wide strip of white cardstock was then cut and embossed with a Classic Edge 2 and a Classic Decorative Inserts 5 die. The strip was adhered under the embossed strip, which was then adhered to a 4 1/4″ white cardstock square that had been embossed with the same embossing folder, this time inked up with Tumbled Glass Distress Ink. The edges were stitched before the layers were adhered to a 1/8″ bigger piece of green cardstock.

Aqua Sheer Ribbon was threaded through one of the openings of the Splendid circle die cut before the image layers were adhered to the embossed layers with dimensionals. The ribbon was tied into a bow. A tag was cut out of white cardstock with a die from the Home Sweet Home pack. A sentiment from The Good Life Tickets was stamped over it in Rich Cocoa Memento Ink and the inner part was airbrushed with Copic Marker Y17. The tag was tied to the bow with embroidery thread and a button.

The layers were adhered to the card base which was created out of Solar White cardstock, cut and embossed with a Grand Scallop Square Nestabilities die. Rhinestones from the Sleek Strips Silver Rhinestones and part of a Fancy That! Border Bling finish off the card.

I hope you have time to participate in the challenge. While not easy (I love using patterned paper), it’s fun and you could win free digital images. Thanks so much for stopping by!

Have a wonderful day!
Hugs and smiles


Hello and welcome to Day Six of our March Rubber & Die Release Showcase!

On Wednesday (21 March) Whimsy Stamps released this month’s rubber designs, new Shapeology dies and new Shape EZ templates. From then until 27 March the Whimsy Stamps DT and Special Guests are showcasing these fabulous new goodies with a daily mini blog hop and I am part of today’s hop!

Each mini blog hop has a new release prize hidden somewhere along the way and you have 24hrs to enter each prize draw.
To be entered into today’s mini blog hop prize draw, be sure to leave a comment on ALL of the DT’s posts listed below by 12.00PM EST tomorrow. All winners will be announced on the Whimsy blog on 28 March.

For my sample today I chose the darling Pixie Dust Fairy. It was stamped iin Tuxedo Black Memento Ink on Neenah Solar White cardstock, cut out with the Out of the Box technique and a  Standard Circle Nestabilities die and colored with  Copic Markers (Skin: E000, E01, E02, BV000   Hair/Pixie Dust: YG01, YG03, YG17   Ribbon/Pot: Y11, Y13, Y15, W2   Dress/Shoes: C00, C1, C3    Wings: YG0000, YG00, YG01   Background: B0000).  The circle was adhered to a piece of Solar White cardstock that had been cut and embossed with the largest gorgeous new Spendid Circle die.

A 4 3/16″ square of white cardstock was cut and embossed with the new Flower Fun M-Bossabilities folder that had been inked up with New Sprout Memento Ink. The layer was stitched to a 1/4″ bigger piece of Sour Apple cardstock.  May Arts ribbon was threaded through on of the holes in the Splendid circle before the circle layers were adhered to the embossed squares with dimensionals. The ribbon was tied to a bow and a button was tied on that with embroidery floss.

The layers were adhered to the card base which was cut with a Grand Scallop Square Nestabilities die out of Solar White cardstock. Another piece of white cardstock was cut and embossed with the second smallest Splendid circle die. A sentiment from the Friendship Ticket Sentiments was stamped in the center and the circle was airbrushed with Copic Marker B000. The circle was adhered to the lower right of the image layer. Lime Twist Smooch Glitz was added over the hair and pixie dust, Frost Smooch Glitz over the wings.   Fancy That! Border Bling was adhered to the upper left corner and part of a Finesse Rhinestone Swirl was adhered to the lower left.

o take a peek at today’s fabulous new release creations, please click on the links below…

Alberto Gava {Special Guest}
Ann Vento
Beate Johns {Special Guest} – you are here
Ellie Stover
Erin Bailey
Heidy Blom
Tammy Louise Cunliffe

Remember that the entire new release is available to buy right now from the Whimsy Stamps store along with all your Whimsy favourites.

Thanks for stopping by and don’t forget to pop back to the Whimsy blog tomorrow for more new release creations!

Have a wonderful day!
Hugs and smiles

Just like spring, Flourishes’ March release is blooming with goodness! If you are ready for some fresh picks, then you have definitely come to the right place! Flourishes’ tagline of having classic and timeless images couldn’t hold more true when you look at our March offerings!

This first set is Marcella Hawley at her finest. And, she’s paired beautiful peonies with one of the world’s most beloved women to bring you a touching and beautiful set to honor those special to you — including your mom!

Introducing:

Mother’s Words of Wisdom takes some of the best quotes from Mother Theresa, and brings them to life. All five sentiments in the set were designed to fit perfectly in this gorgeous frame of peonies illustrated by Marcella Hawley. It’s an image that anyone you care about, including your mother, will be sure to cherish. Set measures 4″ by 6″.

This new wreath image was so much fun to color. It was stamped in Tuxedo Black Memento Ink on Solar White cardstock and cut and embossed with the largest Standard Circle Nestabilities die. The image was colored with Copic Markers ( Peonies: RV10, RV52, RV55, Y21, YR21, YR23   Leaves: G40, G43, G46    Background: BGoooo, BGooo0) and adhered to a piece of white cardstock, cut and embossed with the largest Tear Drop Circle die.

A sentiment from the same set was stamped on a piece of white cardstock, cut and embossed with a smaller circle die. The edges were colored with Copic Marker BG0000. It was adhered into the center of the image with dimensionals.

A 4 3/16″  square of white cardstock was embossed with the new M-Bossabilities folder Elegance. It was stitched to a 4 3/8″ square of light blue cardstock. Ribbon was threaded through one of the Tear drops in the circle before the image was adhered to the center of the layers. The ribbon was then tied into a bow and everything was adhered to a card base, cut and embossed with the second smallest Grand Scallop Square Nestabilities die.

Gold Smooch Glitz was added to the center of the flowers. Parts of a Finesse Rhinestone Swirl finish off the card.

Would you like to win the Words of Wisdom set ? All you need to do is leave a comment on each of the blogs below. Why? You need to try to figure out….

.
One of the ladies on our link list below will be picking a name from the comments on her blog post today. We don’t know which one it is… so the more blogs you leave comments on, the more chances you have to win!
Happy hopping, friends!

DID YOU KNOW YOU COULD WIN OUR ENTIRE MARCH RELEASE? Have you checked out our Pinter-inspiration color challenge?  Just click HERE to find out how to play! You can also play in our Noon Time Challenges! Be sure to tune in today and tomorrow at noon for two more fast paced ways to win! All challenges will close this Friday at 5 PM EST and winners will be announced Saturday in our Winner’s Circle blog post! So get those fingers inky and good luck! See you back here soon!

Thanks so much for stopping by! Have a wonderful day.
Beate

Here is another card I created for the latest Product Review. We were lucky enough not only to receive two of the new M-Bossabilities folder, but also one of the new Cut, Fold and Tuck dies for the review. I know….my job is tough. LOL

Remember years ago when the Lattice border was the big hit on cards? These dies remind me of that, except for they are floral, star or scalloped shaped. To showcase the Round About Cut, Fold and Tuck I received, I started adding Tumbled Glass Distress Ink over a piece of Neenah Solar White cardstock. I cut the piece with the smallest of the die, then stamped one of the stamps from Large Doily stamp set in Broken China Distress ink.

After folding and tucking the cut pieces over it was adhered over a piece of white cardstock, cut and embossed with a Tear Drop Circle Nestabilities die.  A piece of October Afternoon Modern Homemaker paper was cut and embossed with a Blossom Tag & Accent die and layered on another white cardstock, cut and embossed with another die from the Blossom Tag & Accent die pack.

A piece of white cardstock was cut with a  Grand Circle Nestabilities die and embossed with the gorgeous  Elegance M-Bossibilities folder. A strip of October Afternoon Weathervane paper was cut with the same circle die and stitched to the white circle.   A sentient from the Large Doily set was stamped to the lower right of the strip. Yellow Organdy Ribbon was tied above the sentiment. The bow was topped with a button, tied on with Linen Thread.

The card base was cut and embossed with a Grand Scalloped Circle Nestabilities die out of MFT’s Berrylicious cardstock. Rhinestones and part of a Finesse Rhinestone Swirl finish off the card.

Thanks so much for stopping by! Have a great weekend!
Hugs and smiles

Today a new product review was posted on Splitcoaststampers. It is for Spellbinders new M-Bossabilities embossing folders. Needless to say I love them (what Spellbinders product do I not love?). To show off the folders, I created a quick and easy tutorial on how to create a Faux Letterpress look.

The background was created with the new Elegance M-Bossibilities folder. It was inked with Cantaloupe Memento Ink andNeenah Solar White cardstock was embossed with the folder. It was cut down to a 2 15/16″ square, which was then stitched to a piece of Solar White cardstock, cut and embossed with the largest of the Fleur De Lis Square Nestabilities dies. The card base was cut out of the same cardstock with the same die and the card front was adhered on top.

An image from JustRite Stampers Botanical Butterflies was stamped in Tuxedo Black Memento Ink on a piece of white cardstock, cut and embossed with a Parisian Accent die. The image was colored with Copic Markers (Butterfly: Y17, YR15, YR18    Leaves: G40, G43, G46) and sponged with Old Paper Distress ink. The image layer was adhered to the lower right of the card base with dimensionals.

A sentiment from Fleur De Lis Label 20 stamp set was stamped in black on white cardstock that had been cut and embossed with a Nested Lacey Pennants die. Parts of a Finesse Rhinestone Swirl finish off the card. I made this card into a birthday card I can enter it into JustRite Stampers current Birthday Bash Challenge.  You still have an entire week to enter the challenge for a chance to win JustRite stampers stamp sets.

Here is a video for the visual learner:

[youtube]https://www.youtube.com/watch?v=45XWgbAOKqw[/youtube]

Let’s light the candles and strike up the music!! The owner of Flourishes – Jan Marie Caruso – is celebrating a birthday and we’re helping her by getting the party started with just about the entire Flourishes Crew!  Why not leave some love on her blog HERE and while you are hopping around, pay a visit to the Flourishes team members who are honoring her special day!

I hadn’t used the gorgeous new Calla Lilies set from the latest release and was itching to color those flowers. They are so pretty. I stamped the main image in Tuxedo Black Memento Ink on Neenah Classic White cardstock. It was colored with Copic Markers (Y11, Y13, Y15, YR18, YG01, YG03, YG17) and cut out.

A piece of My Mind’s Eye Miss Caroline Howdy Dowdy paper was cut with a  Standard Circle Nestabilities die. It was embossed with the new So Trendy M-Bossabilities Folder. The embossed paper was sanded, then stitched to a piece of Solar White cardstock, cut and embossed with the largest Tear Drop Circle Nestabilities die.The lilies were adhered to circle layers with dimensionals.

A 2 1/2″ wide strip of MME Lime Twist Life is a Party paper strip was adhered to a bigger piece. Both layers were cut and embossed with a Grand Circle Nestabilities die. The edges were sanded and stitched before a White Organdy ribbon was threaded through one of the Tear drops and tied around the round paper layers. The image was adhered over the circle with dimensionals.

The layers were adhered to a piece of white cardstock, that had been cut and embossed with a Grand Scalloped Circle die.  The card base was cut and embossed with the same die out of white cardstock and the card front was adhered to the base.

A sentiment from Tag Lines was stamped in Tuxedo Black ink on Solar White cardstock that had been cut and embossed with a Fancy Tag Die. The embossed center was airbrushed with Copic Marker Y11. The sentiment layer was adhered to the lower left of the Lilies. Three Baby Bling Rhinestones were added under the sentiment. Part of a Finesse Rhinestone swirl finish off the card.

In honor of Jan’s special day, the worker bees behind the scenes decided to have a COLORFUL sale to help celebrate! TODAY and TOMORROW only – all Copic Markers will be on sale 15% off. Just use the code COPIC15 in the coupon code box at the time of check out to get this fun discount! So, join us in singing her a special little birthday song! Be sure to check out all the fun and festive wishes and grab some great ideas for birthday cards along the way!

Happy Birthday Jan! We hope your day is the absolute BEST and cheers to an even better year ahead!

Have a wonderful weekend! Hugs and smiles

Today’s hostess is Mona. She challenged us to create a corner bookmark. I hadn’t made one of those since I wrote the tutorial. With me buying all my books on Kindle now, I don’t usually have books laying around. But…. I do have magazines I can use them for. And since it’s for a magazine, I don’t have to worry about making it not bulky so it doesn’t hurt the book pages. 🙂

I couldn’t help myself. I had to use the Rose from A Year in Flowers 2 again. I LOVE that image. I stamped it several timed in Rich Cocoa Memento Ink on Neenah Solar White cardstock. They were colored with Copic Markers (Roses: R00, R01, R02, R05   Leaves: G40, G43, G46), cut out and layered.  A piece of white cardstock was cut with a Standard Circle Nestabilities die and embossed with the new Elegance M-Bossibilities folder. The circle was stitched to a piece of Kraft cardstock, cut and embossed with a Beaded Circle Nestabilities die. The rose layers were adhered slightly to the lower right of the circles.

My bookmark base was created out of a 4″ square of Neenah Solar White cardstock. It was scored and the bottom edge was cut and embossed with the Eyelet Borderabilities die. The edges of a 1 1/4″ x 4″ piece of My Mind’s Eye Follow Your Heart Be Happy paper patterned paper were sanded, stitched and adhered over the lower part. Seam binding was tied around it. The bow was topped with an  October Afternoon button tied on with Linen Thread.

With the same Linen thread I tied on a small tag, cut and embossed with one of the new Tailor-Made Classic Tag Template die.  The center was lightly sponged with Antique Linen Distress ink before a sentiment from Tiny Flowers and Tags. I didn’t want the seam binding in the back of the bookmark to get in the way of the magazine pages, so I taped another 1 1/4″ x 4″ strip of the same patterned paper over it on the back.

The image layers were adhered to the right of the bookmark. Baby Bling Rhinestones on the embossed part and parts of a Finesse Rhinestone Swirl finish off the bookmark.

Check out my fellow Timeless Tuesday Challenge Members for more inspiration:

Cindy Haffner
Heather Jensen
Maki Jones
Mona Pendleton
Tammy Hershberger
and February Guest Designer Tera Fujan

Thanks so much for stopping by! Have a wonderful day!
Hugs and smiles

There is a new product review on SCS today. We got to play with Design Memory Crafts Mixed Media Sampler (Faber-Castell products). After checking their blog and finding this cool card, I wrote a tutorial for the technique for SCS. My sample is a lot more subdued then Jill Foster‘s, but I still like it. Those Pastel Pencils are a lot of fun.

I started by cutting a piece of black cardstock with a Classic Square Nestabilities die. Flowers from Verve’s Great Friend were stamped in Embossing Ink and embossed with silver embossing powder. The flowers were colored with PITT Pastel Pencils and the edges were smudged with a white gelato stick.

The card base was embossed with the Elegance M-Bossibilities folder and the image panel was adhered over it with dimensionals. A piece of Solar White cardstock was cut and embossed with a Tailor-Made Classic Keyhole die. A sentiment was stamped over it in Tuxedo Black Memento Ink and the right edge was cut straight. It was adhered to the lower right hand side of the image. It was topped with a black button, tied with Lemondrop twine.

Here is a video for the visual learner:

[youtube]https://www.youtube.com/watch?v=4hBX8RSC9EQ[/youtube]

Thanks so much for stopping by! Have a wonderful day!
Hugs and smiles

© 2012 fresh & fun Suffusion theme by Sayontan Sinha