I have a quick video tutorial on the Spellbinders blog, showing how to create this little treat box. I hope you have time to check it out.  The sentiment is from a JustRite Stampers set that will be released in the middle of September. It’s called Grand Sentiments and it’s gorgeous!

Have a great weekend!
Hugs and smiles

It’s my turn to share a tutorial on Splitcoaststampers today.  After creating this little note holder last month, I thought it would be a fun project for a tutorial.

This little box was created out of Berrylicious cardstock. The edges were stamped with the flower cluster from Your Next Stamp Happiness in  Tumbled Glass Distress Ink before the box was assembled. Fancy Waves! Border Bling was added to each side.

Copy paper was cut in 3 1/2″ square and the corners were rounded.. Each page was stamped with the Flower cluster in Tumbled Glass Distress ink and a sentiment from Happiness in Tuxedo Black Memento Ink.

Here is a video for the visual learner:

[youtube]https://www.youtube.com/watch?v=J2rrNjdD1fc[/youtube]

Thanks so much for stopping by! I hope you are having a great summer. As you can tell by my sporadic posting, I am enjoying mine. 🙂
Hugs and smiles

Today’s tutorial on Splitcoaststampers is for a Slider Box. When you open the drawer a slider message will appear.

A piece of Neenah Solar White cardstock was cut and embossed with a a Fancy Tag Three. The embossed part was sponged with Aqua VersaMagic ink and a sentiment from Verve’s Blessings stamp set was stamped in the center. Part of a Fancy That! Border Bling was adhered underneath.

The tag was adhered to a piece of October Afternoon Sidewalks Paper paper cut and embossed with the second largest Floral Oval Nestabilities die.  That was then adhered to another piece of white cardstock, cut and embossed with a Label 10 Nestabilities die. The layers directly over the box were cut with  the largest Label 17 Nestabilities die. The Label for the box top was covered with more October Afternoon Sidewalks paper. More Fancy That Border Bling! as well as Rhinestones from the 72 count Rhinestone bling finish off the card.

Here is a video for the visual learner:

[youtube]https://www.youtube.com/watch?v=fTyvpZLaxCQ[/youtube]

Thanks so much for stopping by! Have a wonderful day!
Hugs and smiles

Today’s Timeless Tuesday Challenge is Cindy. She is challenges us to create anything that could be found on your desk. I thought I would create a little note pad box with the new Summer Blossoms and Letters in Blossom sets from this month release.

First I cut around 70 3 1/2″ squares out of printer paper. The edges of each square were rounded. Some squares were stamped with New Sprout Memento Ink and a corner blossom from Summer Blossoms, some where stamped with the B from Letters in Blossom.

For the box I started with a 7 5/8″ square of green cardstock. Each side was scored at 1″ and 2″. Before the box was adhered together,  images from the Summer Blossoms set were used to stamp the outer walls with Bamboo Leaves Memento Ink. One one side I used a 3/4″ circle punch to create a slot to make it easier to get the single papers out of the box. Before the papers were added, I taped a piece of white wrinkled ribbon on the bottom of the box as another help to lift the papers out of the box.

The outer ribbon end was topped with a button, sewn one with embroidery thread. A 3/4″ x 4 1/2″ piece of copy paper was stamped densely, rolled and slipped into an RSVP pen. To finish off my box I created a box top out of clear cardstock. A 5 3/4″ square was scored at 1″ on each side to create the top.

Take a peek at what the other Timeless Tuesday designer have created for today…

I hope you have time to play. Thanks so much for stopping by! Have a wonderful day!
Hugs and smiles

Yesterday’s tutorial on Splitcoaststampers was written by the wonderful Beverly Gerard. She showed us how to create bookmarks out of chipboard.

I started by cutting 2 thin coasters with the second largest Floral Oval Nestabilities die. I also cut four pieces of Kraft cardstock with the same die.

A piece of Neenah Solar White cardstock was cut and embossed with a Classic Oval Nestabilities die. An image from Flourishes From The Desk Of was stamped in Tuxedo Black Memento Ink and colored with Copic Markers (Flowers: Y15, Y17, YR15, Y27, E39,   Leaves: G40, G43, G46, YG21   Water: BG0000, BG000   Books: E71, E74, E77, YR14, YR27, E37, E0000, E30, E31). The image was masked, then a sentiment was stamped over the image with Antique Linen Distress ink. The oval was sponged with the same ink.


I ran the Kraft Oval die cuts through my Xyron. A Kraft Oval was adhered to each of Coaster oval die cuts. Before Kraft ovals were added to the other side, May Arts ribbon was adhered to the coaster oval.


The image oval was adhered to the bookmark front and magnetic discs on the back.

To finish off the bookmark I tied a button to the top of the oval with embroidery thread.

Thank you so much for stopping by! Have a wonderful day.

Hugs and smiles

I had another post on the Spellbinders blog on Tuesday. This week is all about box dies. I used the Hexagon Petal Envelope die to create this box. Please check out the step by step tutorial HERE.

Thanks for stopping by! Have a wonderful day!
Hugs and smiles


It’s my turn to share on the Spellbinders blog today. And since it’s Saturday, it’s a short video explaining how I created this wall hanging. For an image of the entire project and the video, please check this blog post.

Thanks so much for stopping by! Have a wonderful weekend!
Hugs and smiles

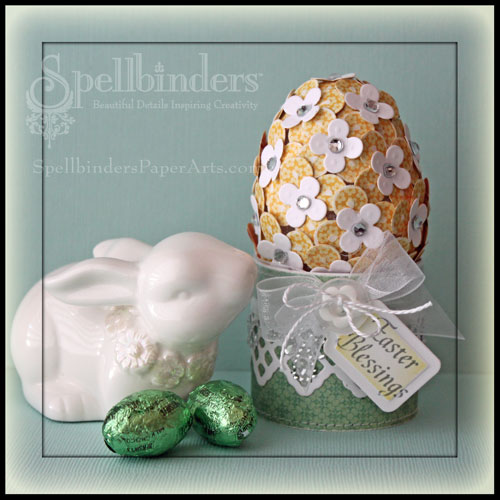
Maki is today’s Timeless Tuesday challenge hostess and asked us to create an Easter project or card. As soon as I read the challenge, I knew I wanted to use those adorable bunnies from Spring is Sprung.

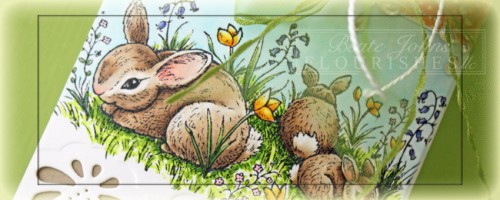
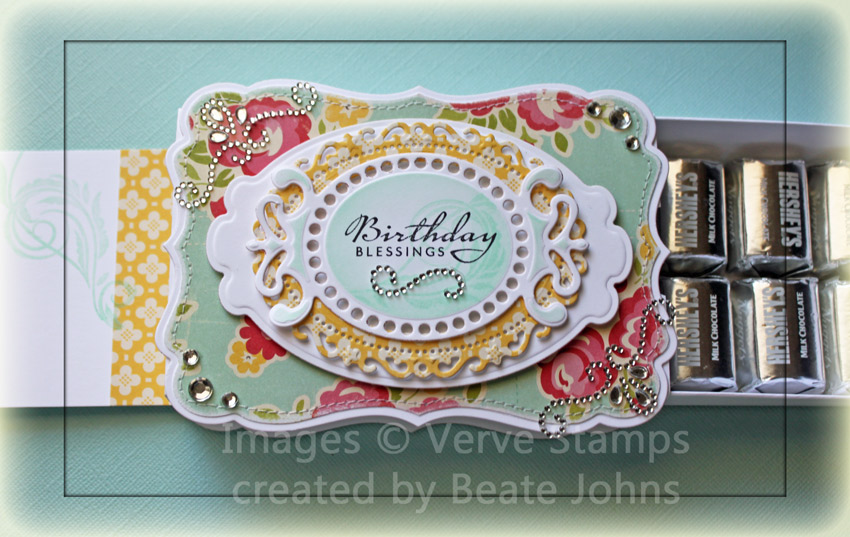
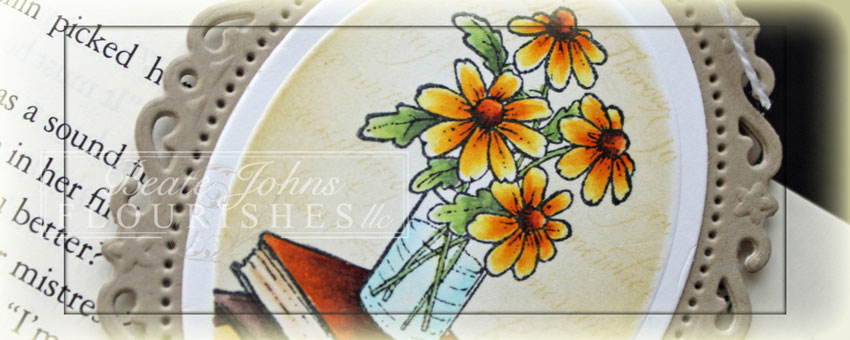
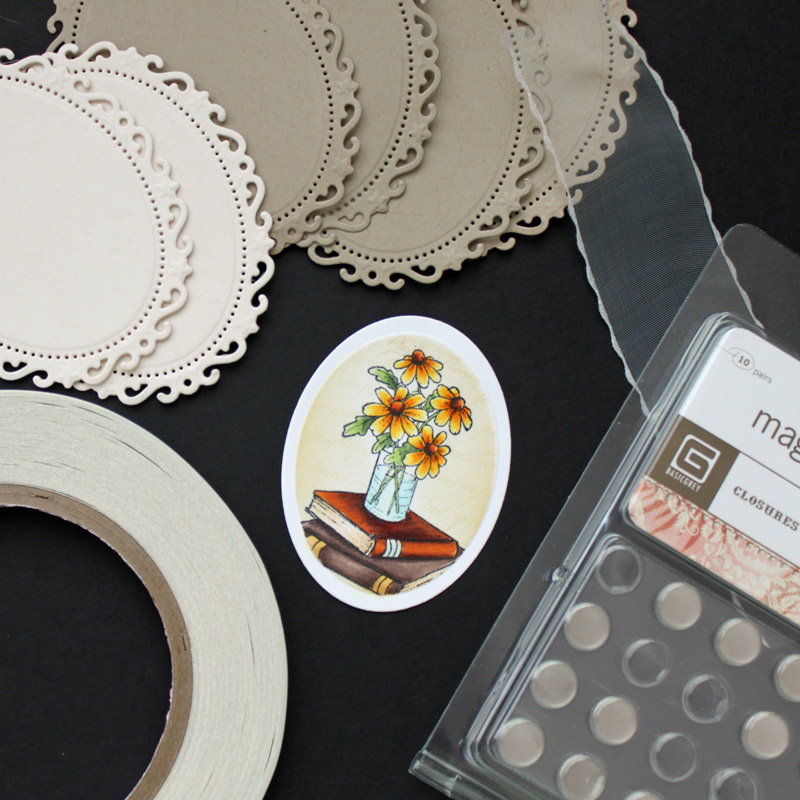
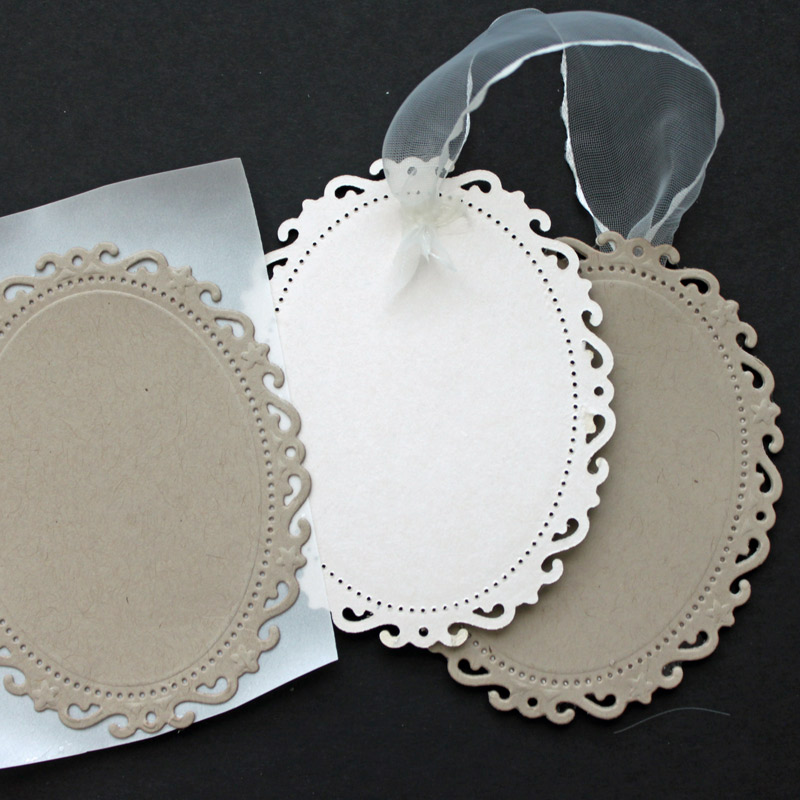
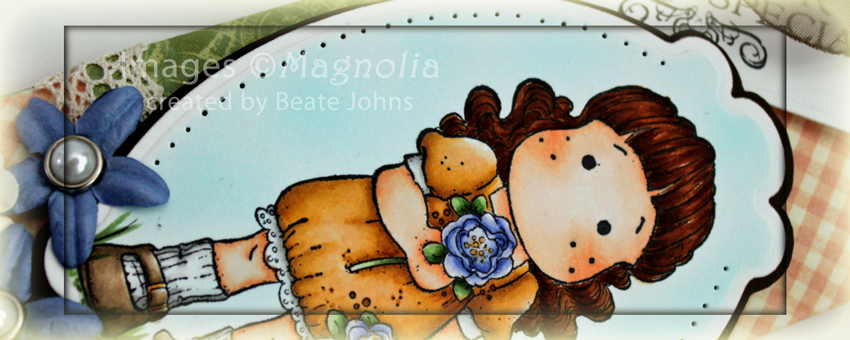
I started by cutting the edges of a 6 1/4″ wide piece of white cardstock with a Classic Edge 2 die as well as a die from Classic Decorative Inserts die.  I scored the strip at 3″ and 6″ before stamping the bunny image in Tuxedo Black Memento Ink on one of the 3″ panels, above the embossed edge. The image was colored with Copic Markers (Bunnies: E40, E41, E42, E43, R00, R20   Flowers: Y13, Y15, Y17, RV10, B63, B66, G43, G46   Grass: YG01, YG03, YG17   Sky: B0000, B000).

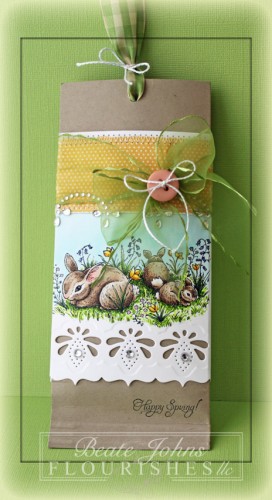
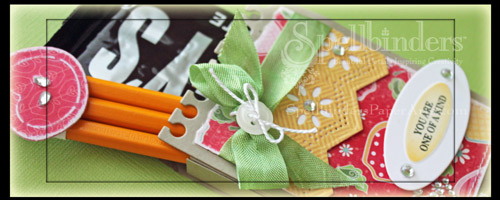
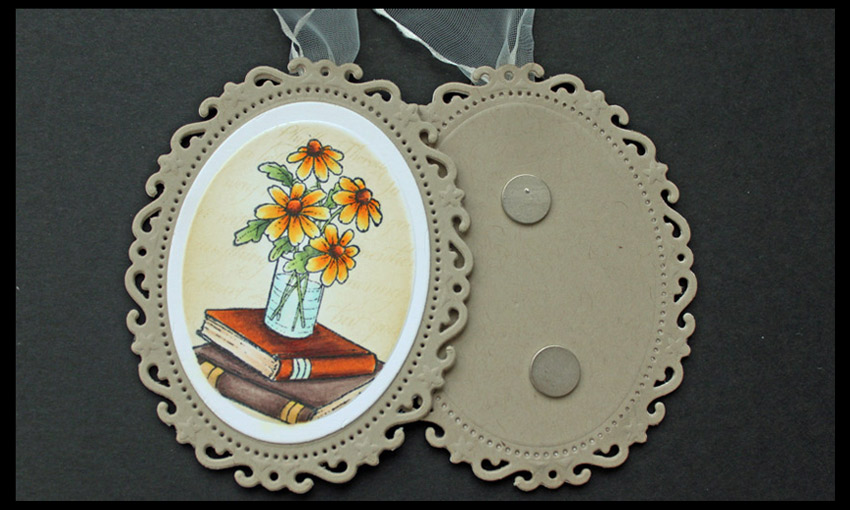
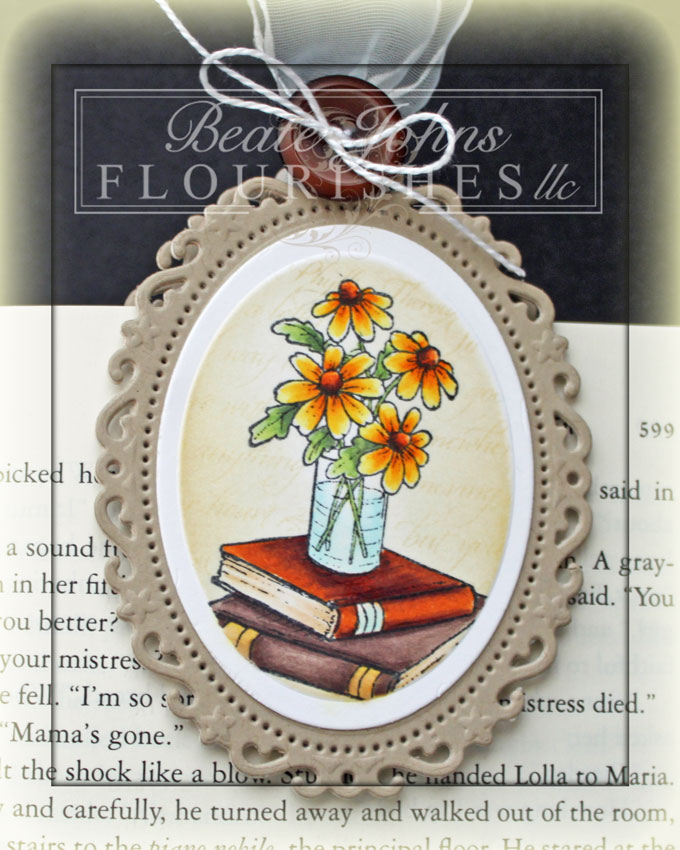
A 6 1/2″ x 7″ piece of Kraft cardstock was scored at 3″ and 6″ on the 6 1/2″ side and adhered into a tube.The bunny strip was adhered around that tube. A 1 1/2″ x 6″ piece of MME Lost & Found 2 Rosy Patterned paper was stitched to a white cardstock strip. It was adhered above the bunny image strip. A rhinestone border bling was adhered to the bottom edge of the patterned paper layer and ribbon was tied around it. It was topped with a button, tied on with embroidery thread.

A hole was punched on top and ribbon threaded through it. Next a Hershey bar was pushed down into the tube and the ribbon on top was tied with a piece of embroidery thread. A sentiment from the same set was stamped on the lower right corner of the tube. Three small rhinestones on the embossed strip finish off the pull treat holder.

Check out my fellow Timeless Tuesday Challenge Members for more inspiration:

Cindy Haffner
Heather Jensen
Maki Jones
Mona Pendleton
Silke Ledlow
Tammy Hershberger
and March Guest Designer Meredith MacRitchie

Thanks so much for stopping by! Have a wonderful day!
Hugs and smiles


Today is my first Saturday post on the Spellbinders Blog. I shot a video on how to turn a Styrofoam egg into a darling Easter decoration. Please hop on over to say hi, check out the supply list and the video.

Have a wonderful weekend! Hugs and smiles


I created this little Pull-Treat over a year ago for a submission. It wasn’t accepted and I completely forgot to share it with you until now. For my sample I stamped Tilda in the Garden in Tuxedo Black Ink on Neenah Solar White cardstock. The image was cut and embossed with Label 10 die and colored with Copic Markers (Skin: E000, E00, Eo2, Hair: E99, E39, E18, dress: YR20, YR21, YR23, E33, Leaves and grass: G40, G82, G85, Dress Trim and socks: T0, T3, Shoes: E42, E43, E44, Flowers: B60, B63, B66).

The image was airbrushed with Copic Marker B00, layered on Neenah Canyon Brown cardstock and a slightly bigger layer was free hand cut. The edges of the image layer were paper pierced.

The treat holder was created out of Graphic 45 Once Upon a Springtime patterned paper. The sleeve was created out of a 2 1/2″ wide strip from the same paper pack. May Arts Crochet lace was adhered to the bottom of that paper strip before the image was adhered with dimensionals.

The hole for the ribbon was punched with Stampin’ Up!’s ribbon slot punch. The ribbon is Brown Organdy ribbon by May Arts. The ribbon was topped with a Recollection Pearl Brad. The sentiment was stamped on a piece of white cardstock cut and embossed with Spellbinders retired 5 Tag die and attached to the bow with a jump ring.

Three Prima flowers were topped with more Recollection pearl brads and adhered to the lower left hand side of the image.

Thanks so much for stopping by! Have a wonderful day! Hugs and smiles


© 2012 fresh & fun Suffusion theme by Sayontan Sinha