Search Results : round tab punch

sparklysweetwcmd09cwide.jpg

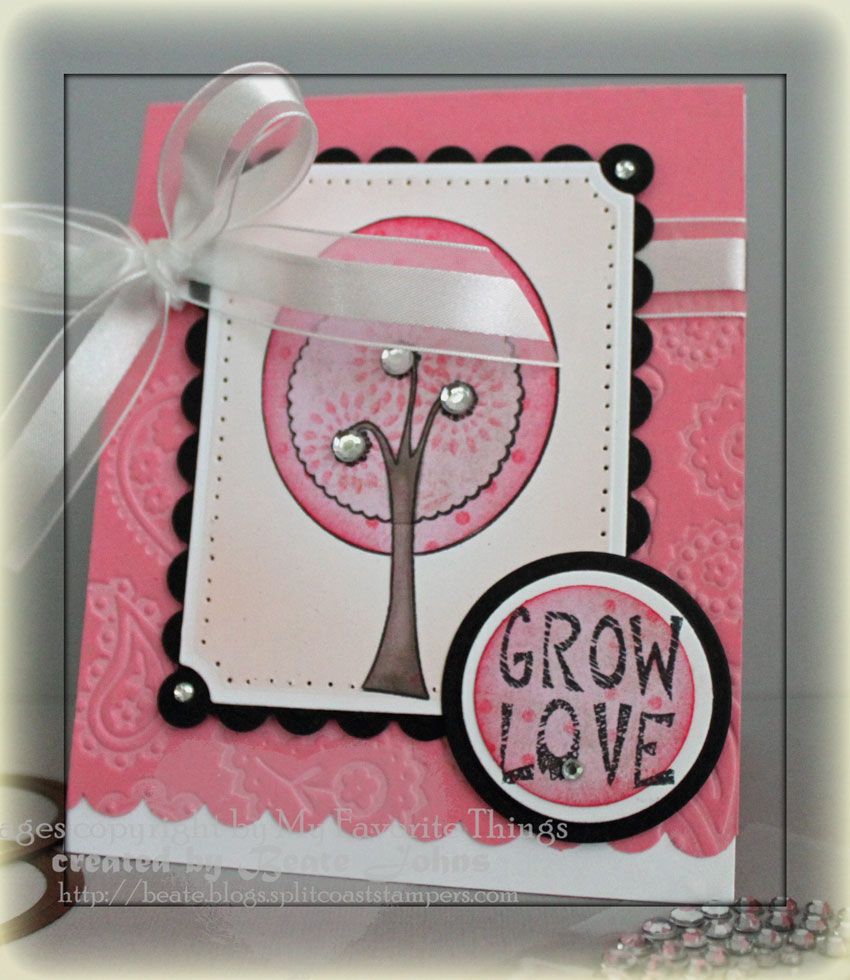
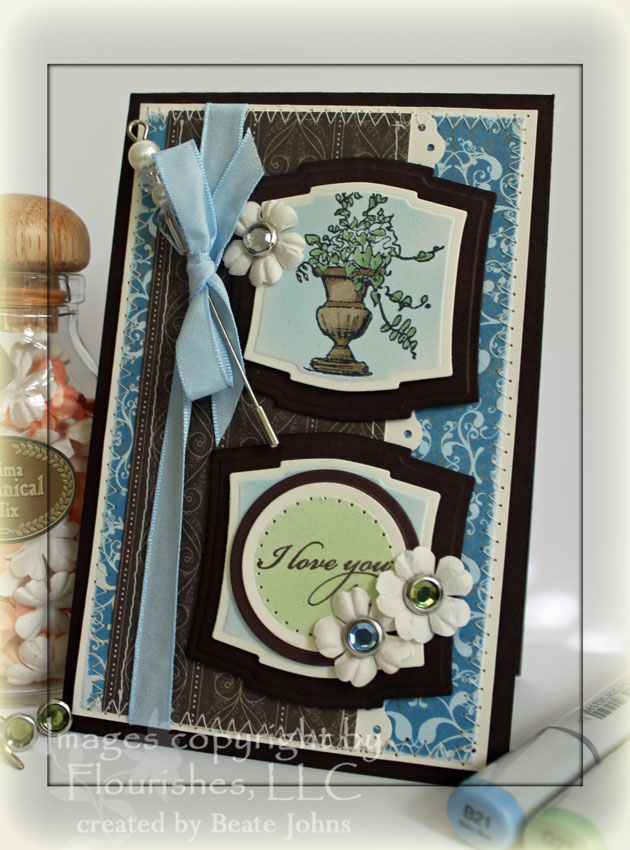
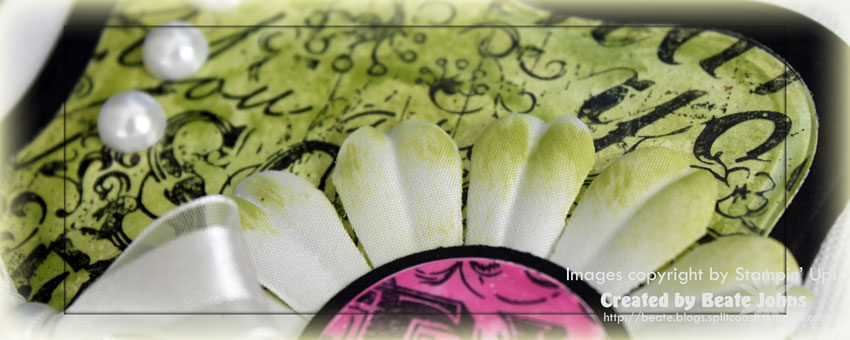
Bella’s WCMD Challenge was to create a  card that shows what your girlfriends like to do in 80s colors. I don’t own any Bella stamps yet (they are ordered, though…can’t wait for them to get here). I figured eating baked goodies is always something I enjoy doing with friends.

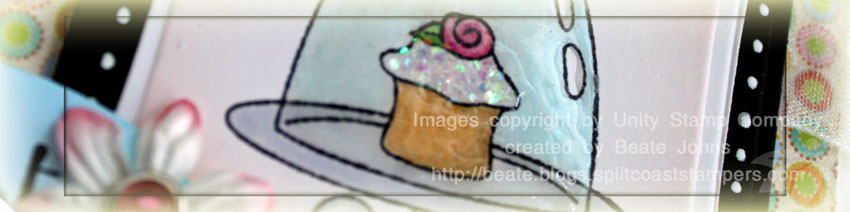
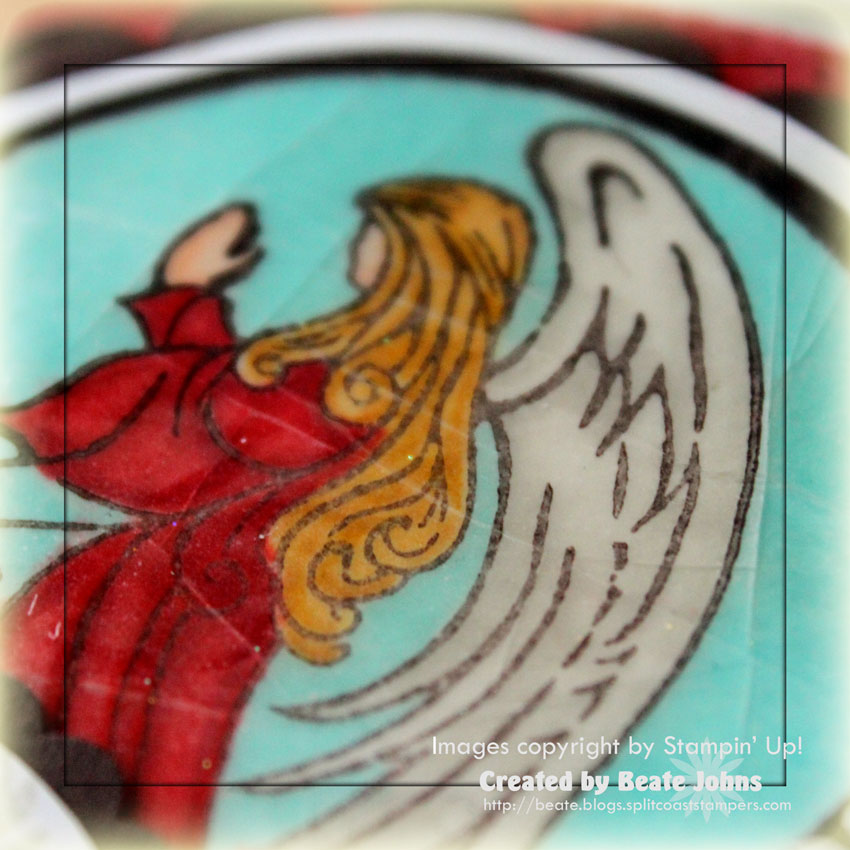
The stamp is from Unity’s August 09 KOM stamp set. It was stamped in Tuxedo Black ink on Gina K.’s Pure Luxury White CardstockIt was cut out with Label 3 Nestabilitiesairbrushed  and colored with Copic Markers (YG06, G07, BG000, BG00, BG02, RV10, RV14, E53, E55) and Spica glitter pens Melon and Pink.

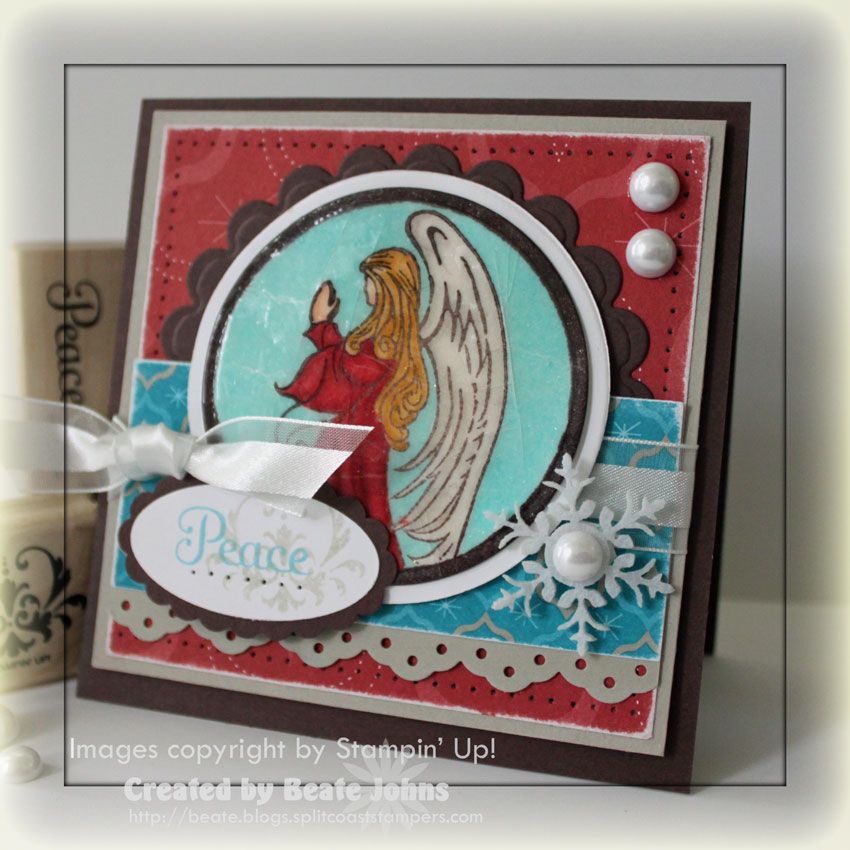
Chunky Crystal sparkles were added to the cupcake frosting before the entire glass bowl was covered with Crystal Effects. The image was layered on a bigger black Label 3 die cut. a White Gel Pen dotted border was added.

sparklysweetwcmd09c.jpg

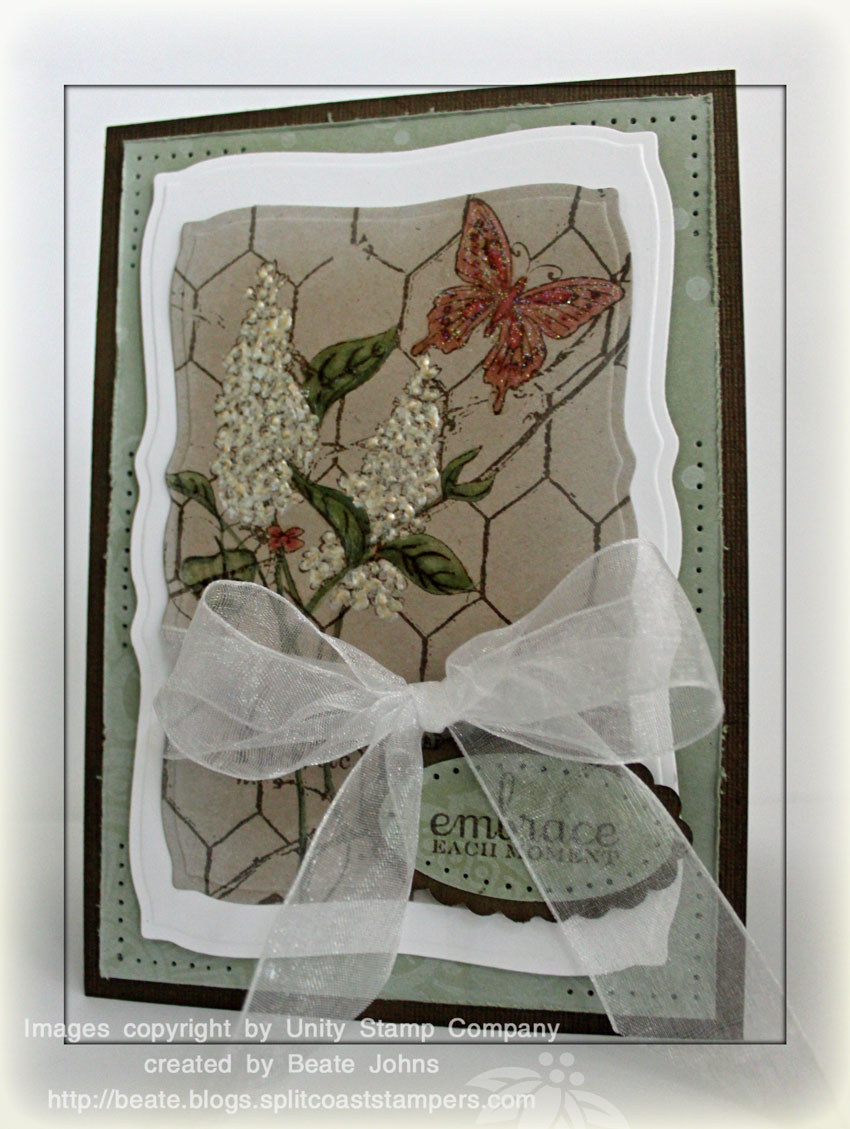
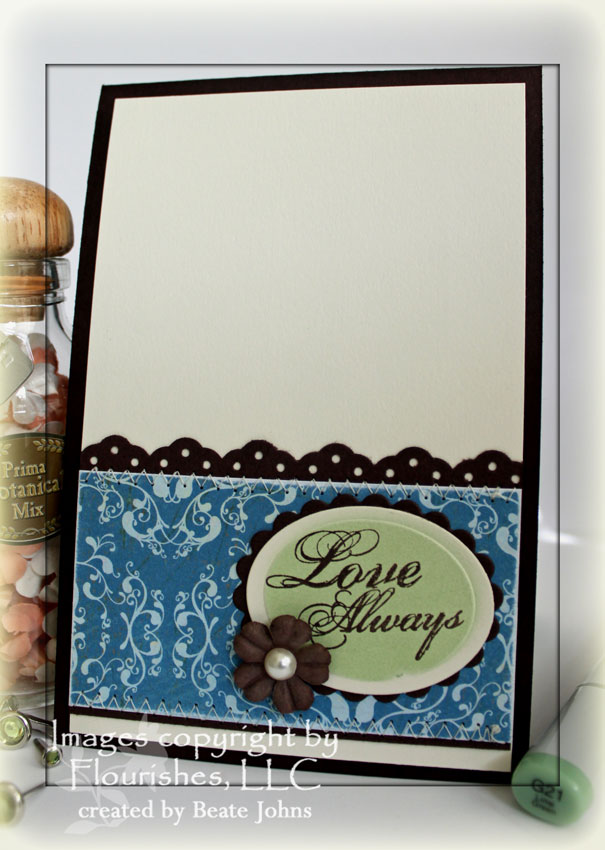
The card base is a 5 1/2″ x 8 1/2″ piece of Basic Black cardstock folded in half. It was layered by a 4″ x 5 1/4″ piece of Whisper White folled by a 1/4″ smaller piece of Gyspy Basic Grey patterned paper. The horizontal strip measures 1 7/8″ x 5″ and is from the same paper pack. A thin strip of Basic Black cardstock was taped underneath. It had been punched with the scallop Edge Punch. 1″ wide White Organdy Ribbon from May Arts was tied around the strip.

The sentiment is from the same Unity Kit. It was stamped in Tuxedo Black ink on Gina K.’s white cardstock. It was cut out with the large oval punch, airbrushed and taped to the left of the image. A Prima Flower was attached with a Rhinestone brad and small Rhinestones taped under the sentiment to finish off the card.

lovelylilacscc239wide.jpg

I love the new backgrounds from Unity! They are so pretty. I used the Lovely Lilac one for a color challenge a while back. I thought the soft colors would go lovely with this stamp.

The image was stamped in Soft Suede ink on Kraft Cardstock and colored with Copic Markers (R02, R22, G82, G85). White Liquid Pearls were added over the Lilacs, Crystal Effect over the leaves and Butterfly. Dazzling Diamond glitter was sprinkled over the butterfly. Every butterfly deserves a little sparkle.

lovelylilacscc239beate.jpg

The image was cut out with Curved Rectangle Nestabilities, sponged with White Craft ink . 1″ wide White Organdy Ribbon from May Arts was tied around it and it was layered on a bigger white Curved Rectangle. The card base is a 4 1/4″ x 12″ piece of sponged Textured Soft Suede cardstock folded in half. A 3 7/8″ x 5 5/8″ piece of Mellow Moss was stamped with the gorgeous Everlasting Romance stamp in White Craft ink, distressed and paper pierced.

The sentiment is from the stamp set Bevy of Butterflies. A piece of Mellow Moss was cut out with the large oval punch (SU), stamped with Everlasting Romance in Whisper White and once it was dry, stamped in Soft Suede with the sentiment. It was layered on a Scallop Oval that had been punched out of Textured Soft Suede Cardstock.

pinktreewcmd09gwide.jpg 

The WCMD challenge for MFT was to create a card with Pink, White, Black and Bling. I bought Grow Love Plant A Tree and hadn’t used it yet. This was the perfect occasion. Okay…maybe not perfect, but trees could be pink, right? LOL

I stamped the tree threee times in Tuxedo Black Memento Ink. Once on Gina K.’s Pure Luxury White cardstock, twice on Basic Grey Blush patterned paper. I cut out the top of the patterned paper tree, sponged and stamped them and taped them on top of my white layer. Then I colored in the trunk with Copic Markers (W1, W2). The image was cut out with Spellbinders Small Label Nestabilities , air brushed with Copic R00 and layered on a black scallop layer cut out with Rectangle Nestabilities. The edges of the white layer were paper pierced.

pinktreewcmd09g.jpg

The card base is a 3 1/2″ x 10″ piece of Regal Rose cardstock folded in half. The front was partially embossed with the Paisley I added White Craft ink directly on the Paisley Cuttlebug Folder before embossing the card front partially with it. White Organza Ribbon was tied around the card, right where the dry embossing ends. The lower edge of the card was punched with the scallop edge punch. A slightly smaller then 3 1/2″ x 5″ piece of Whisper White cardstock was taped behind the card front.

The sentiment is from the same set. It was stamped on the same paper as the trees, cut out with Circle Nestabilities, sponged and stamped just like the biggest tree top layer. Then it was layered first on a White, then a black dircle. Kaiser Rhinestones finish off the card.

christmasdeervvacetatewide.jpg

Gina’s latest released stamps are amazing. They came to my house the same day I tried to come up with a nice sample for the Acetate and Tissue tutorial. That was the very first tutorial I ever wrote and it needed overhauling BAD! I knew right away that I wanted to use the gorgeous Reindeer from Gina’s Holiday Cheer TV kit.

christmasdeeracetatevvanill.jpg

The card base was cut with the Clear Scallop Square Die from Stampin’ Up! out of Gina K’s Pure Luxury Black cardstock. Now that is thick cardstock for a base! The Very Vanilla square measures 3 7/8″. The 7Gypsies and My Mind’s Eye papers are 3 5/8″ wide. They were stitched to the Vanilla layer. White May Arts Silk Ribbon was tied around the middle where the two papers meet.

For the main panel I stamped the Reindeer in Stazon on Acetate, added Crystal Effect to the backside and used Bashful Blue reinker to add color. Dazzling Diamond Glitter was sprinkled over it before adding the tissue. I stamped the tree line from the same set in Old Olive on Very Vanilla and placed my Acetate/Tissue layer over it. Once it was dried, I cut the layers with Label Three Nestabilities. It was layered on the next size label cut out of black cardstock.

The sentiment is from the second set of Gina K’s Holiday Cheer TV kit. It was stamped in Vintage Photo Distress Ink, cut out with the large oval punch, sponged around the edges and layered on a scallop oval black punch-out. I finished the card up with some blue Kaiser Rhinestones.

Video for visual learner:

[youtube]https://www.youtube.com/watch?v=YhxeylZncu8[/youtube]

Make sure to check out today’s tutorial. Anna-Marie Still is sharing a cute peeps holder.

16thanniversarywide.jpg

Saturday was our 16th anniversary. Time flies. When we first started dating I just turned nineteen. I hit forty this year and the gray hairs are starting to sprout. It boggles my mind that I know Rick for more then half of my life. (for all your Bejeweled player…, can you hear Incredible…in that Bejeweled voice? LOL)

sc248.jpg 

Thursday I had some time to play. It’s been too long since I could participate in a challenge. I checked out the sketch and had fun with it.

16thanniversaryflourishessc248.jpg

My card base is bigger then usual, only for the fact that I already had that cardbase cut and in my scrap pile. It turned out it worked great that way. The card base is  4″ x 12″ piece of Chocolate Chip and is folded in half.

A 3 1/2″ x 5 1/2″ piece of Patterned Paper from BasicGrey Cupcake collection was adhered to a slightly bigger piece of Very Vanilla Cardstock. The edges were first sanded with a sanding block, then zigzag stitched. The horizontal strip measures 2 1/4″ x 5 1/2″ and is from a different BasicGrey collection (sorry, my 6×6 paper packs are falling apart and I have no idea where it is from). A Vanilla strip as added to the left hand side. That strip had been punched with the Eyelet Border Punch. The long sides of these layers were straight stitched. Then blue Taffeta ribbon was tied around the right hand side and a hat pin from the Pretties Kit was added.

The main panel pieces were cut with Spellbinders Nestabilities Label Two. The bigger layer was cut out of Chocolate Chip cardstock and sponged. The smaller layer was cut out of Very Vanilla Cardstock. After embossing that layer, I left the Nestabilities die on the cardstock and airbrushed it with Copic Marker B21.

For the top panel I stamped the flower pot from Flourishes Chairs For You stamp set in Memento Black ink. It was colored with Copic Markers E43, E44, G21 and G24.

For the sentiment I cut two extra layers with Circle Nestabilities. The Vanilla Circle was airbrushed with G21, then paper pierced. The sentiment is from Flourishes I love Roses and was stamped in Chocolate Chip. The flowers are from the Prima flowers from the Botanical Mix. I added Ice and Clear Rhinestone brads in each center.

16thanniversaryflourishesin.jpg

For the inside I taped a 2″ x 3 5/8″ wide strip of BasicGrey paper on to a slightly bigger piece of Chocolate Chip cardstock. The top had been cut with the Eyelet Border punch. The long sides were zigzag stitched. The sentiment layers were cut with Oval Nestabilities. The Vanilla layer was airbrushed with G21. The sentiment from Flourishes I Love Roses was stamped in Chocolate Chip.

Have a wonderful Sunday! Hugs and smiles

 kindredspiritacrylicheader.jpg

Tomorrow is the 4th annual World Card Making Day. It is a holiday especially for us paper crafters to get together and create and start your holiday card making season. Card makers from all over the world will be celebrating the joy of creating and giving handmade cards.

Head on over to the WCMD site and check out event ideas and the WCMD gallery. Upload a card to the gallery there to share it with other cardmakers worldwide and be eligible to win a great prize on both the PaperCraft Connection and the Moxie Fab World. Enter the WCMD contest  and you have a chance to get published in the March/April 2010 Papercrafts magazine. Categories for this contest include: Birthday, Christmas/Season’s Greetings, Hello/Thinking of you, love and Thank you.

Check out the WCMD Blog tour to see 25 more cards made especially for today and receive a 25% off coupon for the online store

If you are planning on posting a blog entry specifically for the WCMD, you can add a link your post on the WCMD website with Mr. Linky here.

Make sure you comment on this post and go to the Moxie Fab World blog and leave a comment there as well. It will increase your chance to win a great prize. Comments will close at midnight October 4th and prize winner will be announced on Tuesday, October 6th.

__________________________________________________________________________________________

For my card today I used this week’s tutorial on SCS called Acetate smash.

kindredspiritsbookmarkcard1.jpg

My card  base is created out of Core’dinations cardstock from the Roy G. Biv Super Assortment. It uses a 4 1/2″ x 9″ piece of cardstock folded in half. I paper pierced and sanded the edges.The main panel was cut with Label One Nestabilities. The large layer was cut out of Basic Black cardstock, the smaller one out of Acetate and once out of Whisper White cardstock.

I stamped the Acetate with the dotted background from Bountiful Backgrounds in Black Stazon, turned the Acetate around and added Citrus and Pool Acrylic Paint with Dabbers from Adirondack. The White cut out was pressed against the Acetate. The cool thing is, once the Acrylic Paint dries, the layers stick together! The layers were adhered to the black die cut.  I punched out an oval with the large oval punch, trimmed it to match the Label cut and adhered it to the top left. A Filigree brad topped with an Ice Rhinestone brad were centered over that. On the lower half I tied White Satin Ribbon from May Arts.

The frame image is from the stamp set Kindred Spirits, the sentiment from Bountiful Backgrounds. It was stamped in Black Stazon on Whisper White cardstock and cut with Oval Nestabilities. The created a reverse mask, leaving only the center of the image exposed and airbrushed it with Copic Marker YG23. It was layered on a slightly bigger black scallop oval.

Here is a video for the visual learner:

[youtube]https://www.youtube.com/watch?v=RxoWL5IC7s0[/youtube]

Make sure to stop by Splitcoast tomorrow to check out the hourly challenge that will be posted there in honor of WCMD! Just click on the blinkie on the site bar to get you there.

Have a great weekend! Hugs and smiles

New guest tutorial writer Lynn Put came up with a darling Halloween Bucket made out of Pillow Box Dies. I thought that bucket would look wonderful as a Christmas basket too.

christmaspunchpillowboxbuck.jpg

I cut my pillow boxes out of Real Red Cardstock. The patterned paper is from the Merry Moments Designer paper pack. The handle slot was punched with the Horizontal Slot Punch and the handle itself was attached with Silver Jumbo Brads.

The sentiment is from the Level 2 Hostess set Christmas Punch. It was stamped in Chocolate chip ink on Very Vanilla. The damask image from Friends 24-7 was stamped over it in second generation Old Olive. I cut out the image right around the oval border, layered it on a Wide Oval Punch-out in Chocolate Chip and a Real Red Scallop Oval that had been cut with Oval Nestabilities. To finish it off I added a bow with Old Olive Grosgrain ribbon.

 Here is a video for the visual learner:

[youtube]https://www.youtube.com/watch?v=hpap24HCJSs[/youtube]

I finally got around to create a card for the sketch from Friday. Of course I had to change the sketch up a bit. I turned it into a square.

happypumpkinwsc98ppbeate.jpg

The card base is a 4 1/4″ x 8 1/2″ piece of Chocolate Chip cardstock folded in half.  Next is a 3 15/16″ square of Pumpkin Pie cardstock, followed by a 3 3/4″ square of Soft Suede cardstock. The 2 1/4″ x 3 9/16″ strip of Designer paper is from the Merry Moments Designer Paper pack.. The edges were sponged with Old Olive and paper pierced. On the top right I added three 1/4″ Chocolate Chip circles topped with Earth Element Brads

The ribbon is from the retired Valet Ribbon Originals. A 3/4″ circle was punched out of Thoroughly Modern Designer Paper, the edges were sponged and the circle was ran through my Xyron 150. I adhered the paper underneath a clear button and tied it to my Ribbon bow with Linen Thread.

happypumpkincloseup.jpg

For my main image I stamped the little Bear from the Verve Stamp set Hello Pumpkin three times in Memento Tuxedo Black ink. Once on Very Vanilla Cardstock, once on Kraft cardstick, one on Cast-a-Spell Designer paper and one on Throughly Modern Designer Paper. The image on Very Vanilla Cardstock was cut and embossed with Rectangle Nestabilities. It was layered on a slightly bigger Soft Suede Rectangle and a Scallop Chocolate Chip rectangle.  The background of the Very Vanilla layer was airbrushed with Copics. Parts of my other images were cut out, sponged and then adhered to the main layer.

happypumpkininsidewsc98.jpg

The card inside is layered with a 3 15/16″ Pumpkin Pie cardstock square. The Merry Moments Designer Paper measures 7/8″ x 3 1/2″. The edges were sponged and the top edge paper pierced. I created a “Faux” Button by punching out a 3/4″ circle of Thoroughly Modern Designer paper and layering it on three 3/4″ cardstock circles. The edges were punched, two holes were pierced and Linen thread was threaded through it. I didn’t even know that that was today’s Technique Lover Challenge on SCS. How cool is that? Maybe I am psychic! LOL

Here is a video tutorial on paper piecing for the visual learner:

[youtube]https://www.youtube.com/watch?v=aDQObTxqQjI[/youtube]

Update!
The stamp set is on sale at Verve right now!!!

Today’s tutorial was written and filmed by Lydia Fiedler. I created the paper with drink napkins I found at Target.

Week before last the Limited Supply Challenge was to create a card with the 2 1/2″ x 8 1/2″ strip of cardstock that you have leftover when you cut two 4 1/4″ x 8 1/2″ strips (for square cards) out of a sheet of cardstock. You can imagine how many I have of those. LOL

I combined both the technique for today as well as the challenge to create this little card.

feltedscraplinglsx236.jpg

There is actually no stamping done on this card. The napkin/background paper measures 1 1/2″ x 2 1/2″. I added a Whisper White cardstock strip underneath that had been punched with the Eyelet Border punch. Blue Taffeta Ribbon had been tied on the top of the background paper.

The sentiment is from the Rubon pack Chit Chat. The flower center was punched out of another napkin/background piece with the 1″ circle punch. The 1 1/4″ circle always seems too big to layer the 1″ circle on, so I cut a Chocolate Chip circle with my Circle Nestabilities. Both circles were adhered to a flower from the Pretties kit. That was taped to the card base with dimensionals.

Have a wonderful day! I hope you come back tomorrow and start blog hopping with me.

font-hop-icon.JPG

holytriptychcrackcloseup.jpg

I started my sample for today’s sketch by stamping the angel image from Holy Triptych in Chocolate Chip Craft ink and embossing it with Clear Embossing powder. It was cut and embossed with Circle Nestabilities. I was going for a stained glass look, so I used my Copic Markers to color it in and get a vibrant look. I used B00 for the outside, W00 and W02 for the wings, E00 and E02 for the skin, YR24 and YR31, R27 and R29 for the dress and E79 for the border. I added Versamark over the entire circle and clear embossed it several times. Then I gently bent the cardstock to create cracks in my embossed layer.

holytriptychwsc97beate.jpg

My card base is a 4 1/4″ x 8 1/2″ piece of Chocolate Chip folded in half. The next layer is a 3 15/16″ square of Sahara sand, topped with a 3 3/4″ sanded and paper pierced piece of Holiday Lounge Designer Paper. The Chocolate Chip scallop as well as the Whisper White Circle were both cut with Circle Nestabilities. The Scallop Circle was taped over the Designer paper and a 1 1/2″ x 3 3/4″ strip of Holiday Lounge DP  was taped over it. The strip had been sanded, then layered on a 3 3/4″ strip of Sahara Sand cardstock that had been punched with the Eyelet Border Punch. White Organza Ribbon was tied around it. The angel circle was adhered over the Whisper White circle and taped to the card front with dimensionals.

For the sentiment I stamped the ornamental stamp from Framed with Love in second generation Sahara Sand on Whisper White and cut it out with my Large Oval Punch. Next I inked up only the word Peace from one of the greetings from the set Four the Holidays (Mini catalog) with Taken with Teal and stamped it in the center of my oval. The white oval was taped to a Chocolate Chip scallop oval that had been punched out with the Scallop Oval Punch. I added a paper pierced row under the sentiment.  To finish off the card front I added two medium size half pearls from the Pretties Kit on the top right. One of the Felt Snowflakes from last year’s mini catalog was adhered with a dimensional next to my angel and topped with another half pearl.  If I would recreate this card, I would probably emboss the sentiment to make it pop more. Some things you see only when the card is almost done….and since I stamped it this morning (flaked last night and watched Diaries of a Vampire instead! I will have to get me those books!)

holytriptychsigncloseup.jpg

Before adding the oval greeting, I had played around with a frame from Framed with Love. I had stamped it with Chocolate Chip Craft ink and embossed with Clear embossing powder twice. Once I cut it out all the way, once, only the center. In the center I stamped the sentiment and ornamental stamp just like on the greeting in the front.  Except for here, I added colored in the inside of the oval with a Versamarker and clear embossed that oval as well. Unfortunately this frame was too big for the front. I thought though…that it might work for the inside of my card.

holytriptychwsc97inside.jpg

The inside layer for my card is a 3 15/16″ square of Sahara Sand Cardstock. I added another 1 1/2″ x 3 3/4″ strip of Holiday Lounge Designer paper over it with a Eyelet Border Punched piece of Taken with Teal.

I hope you all have a wonderful weekend! Austin is off today, so I think I might go and play some tennis with him. I haven’t worked out as much as I should the last two weeks.

Hugs and smiles

© 2012 fresh & fun Suffusion theme by Sayontan Sinha