Search Results : round tab punch

unitystore1109cardpursewide.jpg

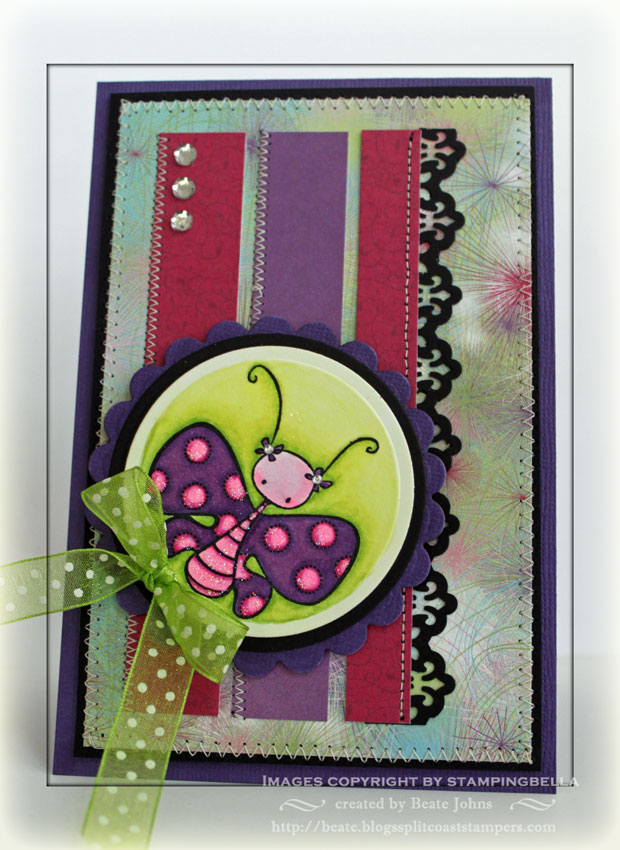
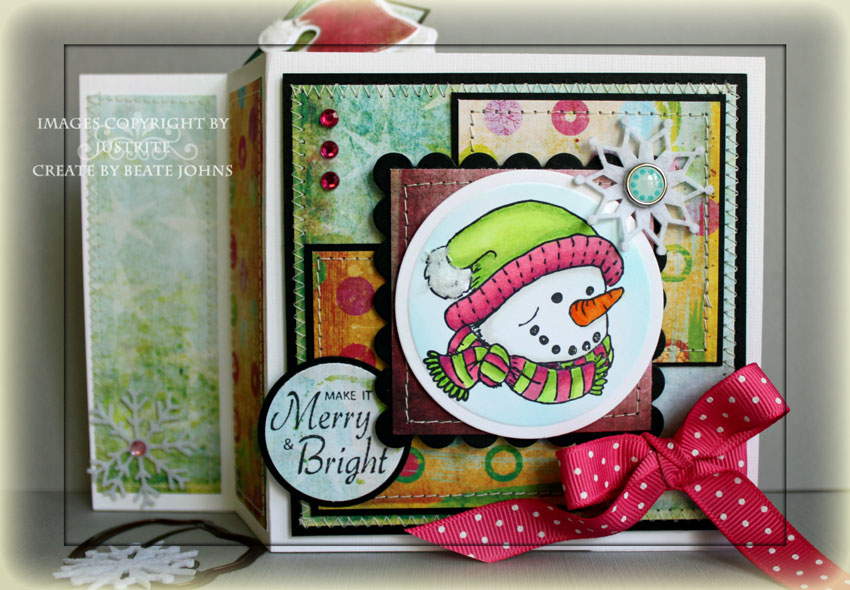
Jodi Collins is today’s guest tutorial writer and she is showing us how to create a Card Purse for regular size cards. For my version I used the November Store kit from Unity. I LOVE this kit. Just look at this gorgeous stamp!

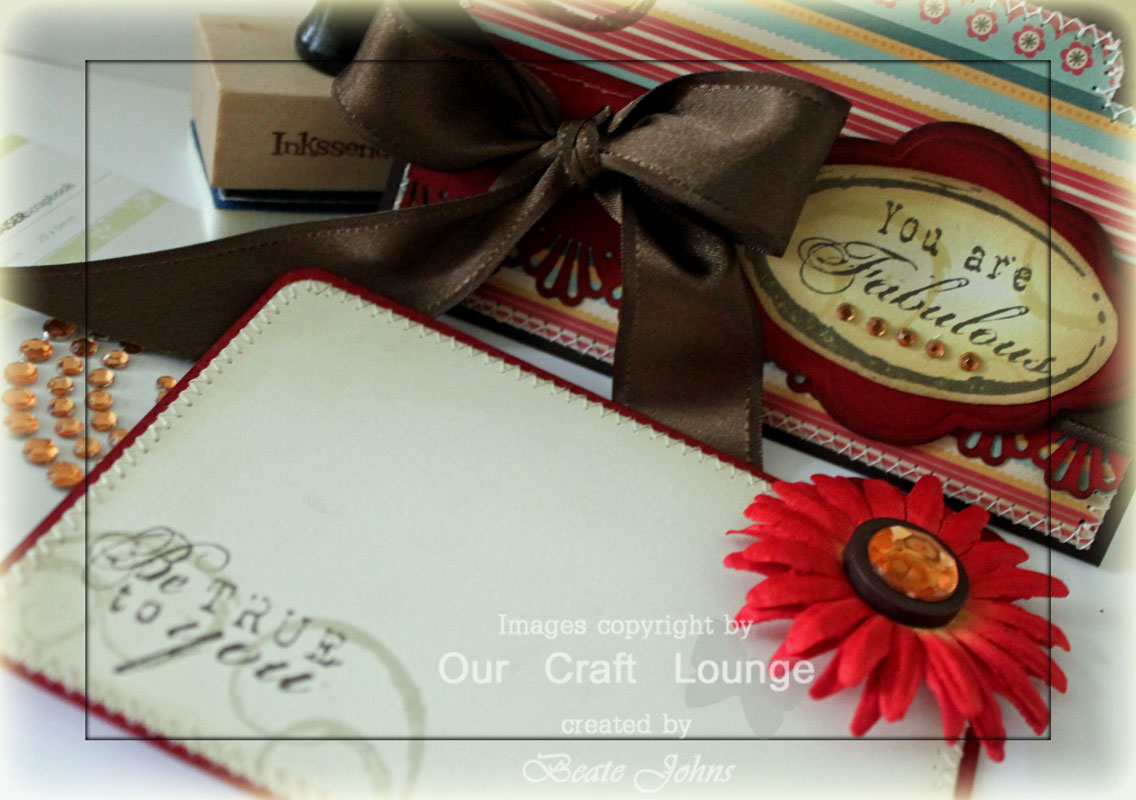
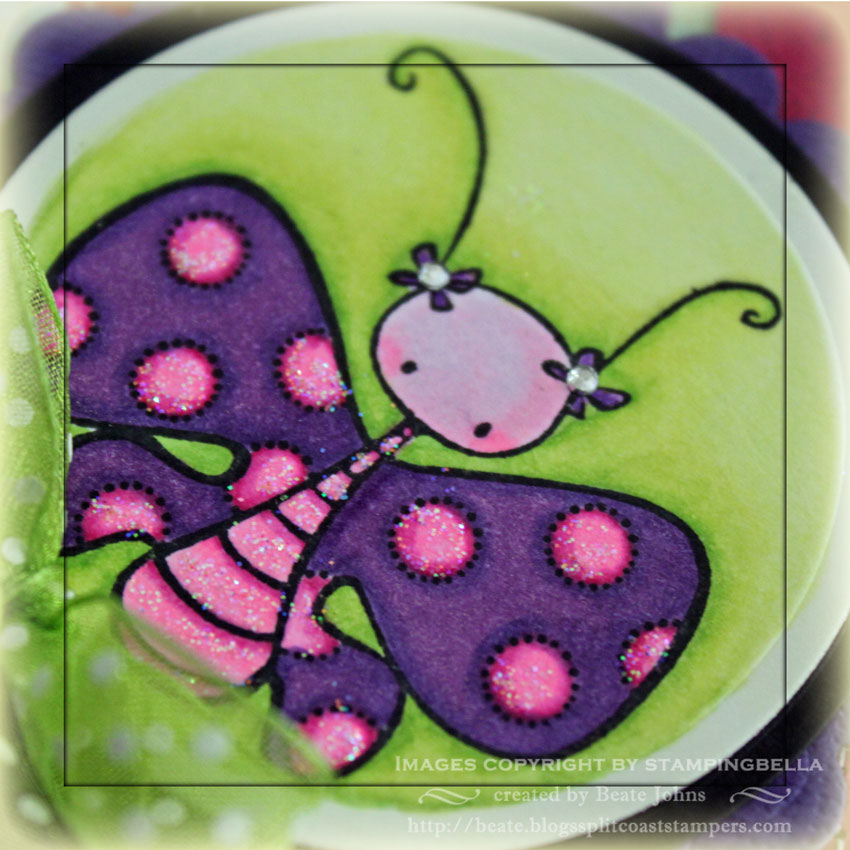
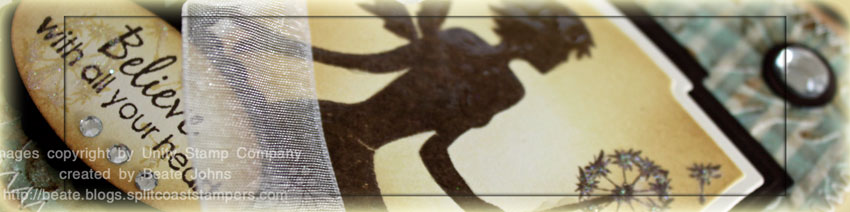
I stamped the fairy girl in Espresso Adirondack ink on Vanilla cardstock, cut it out with Label 2 Nestabilities, left the die on and sponged it first with Scattered Straw Distressed ink, then just a bit with Vintage Photo Distress ink. It was layered on a Chocolate chip cardstock piece that had been cut with the next size up label and sponged with Espresso ink. That had May Arts Organdy Ribbon tied around it.

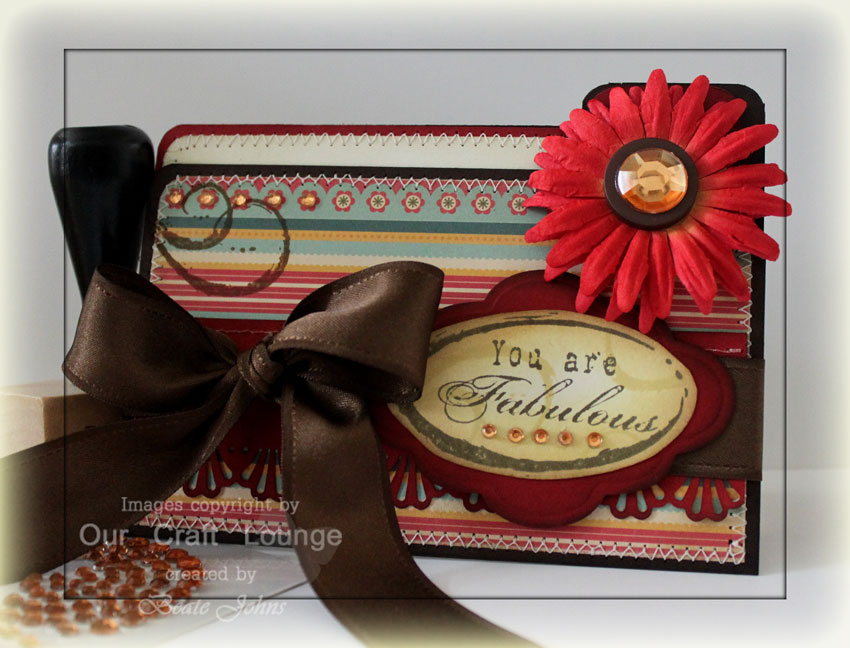
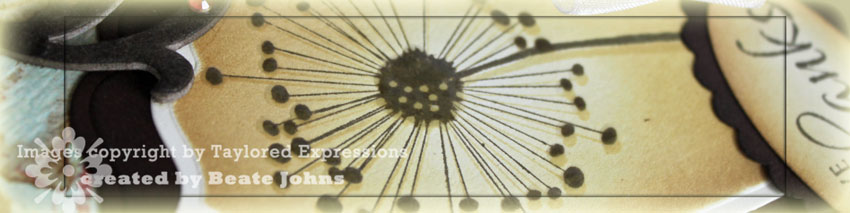
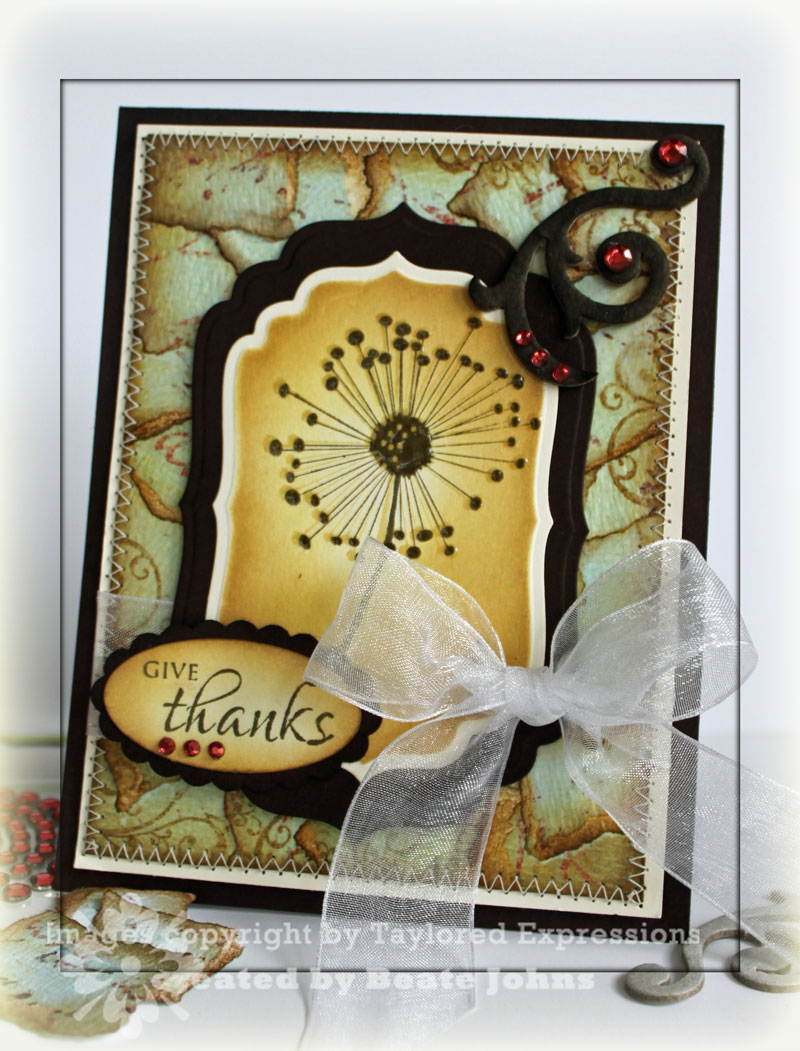
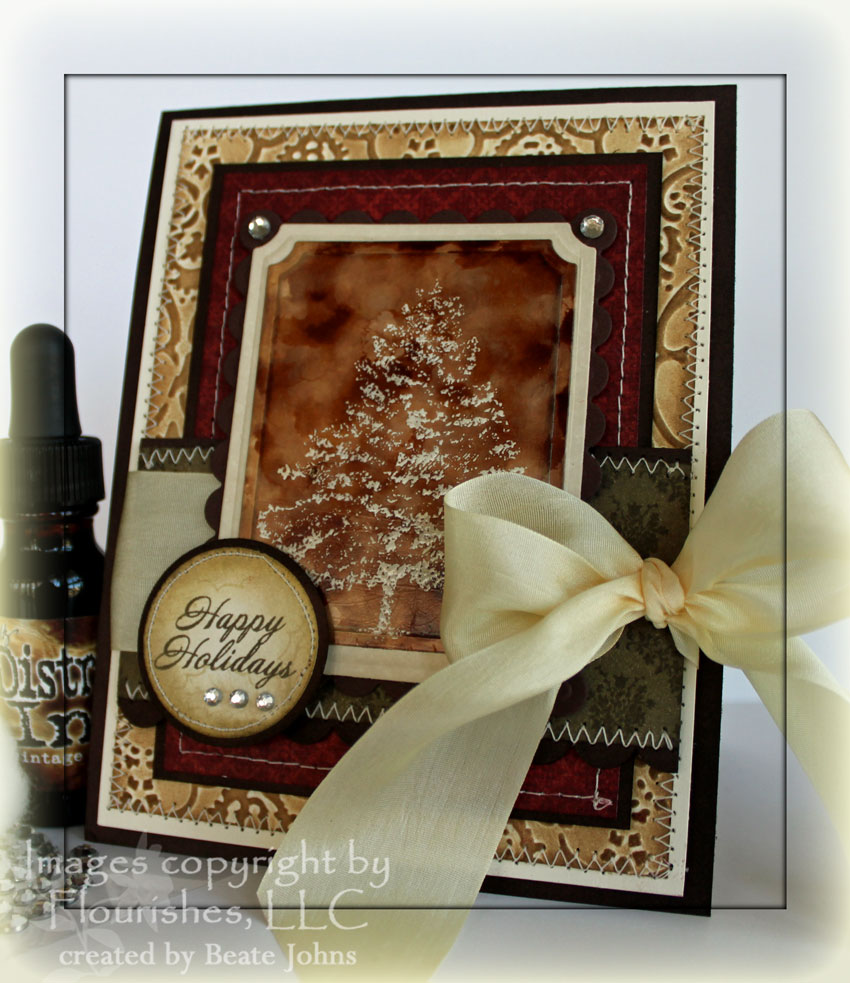
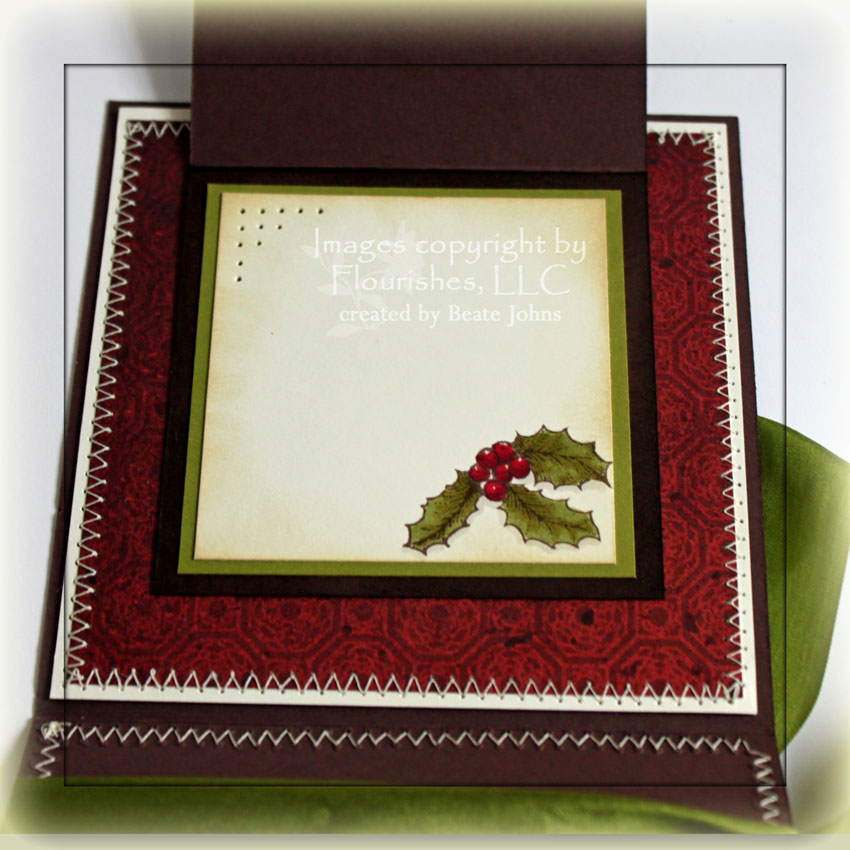
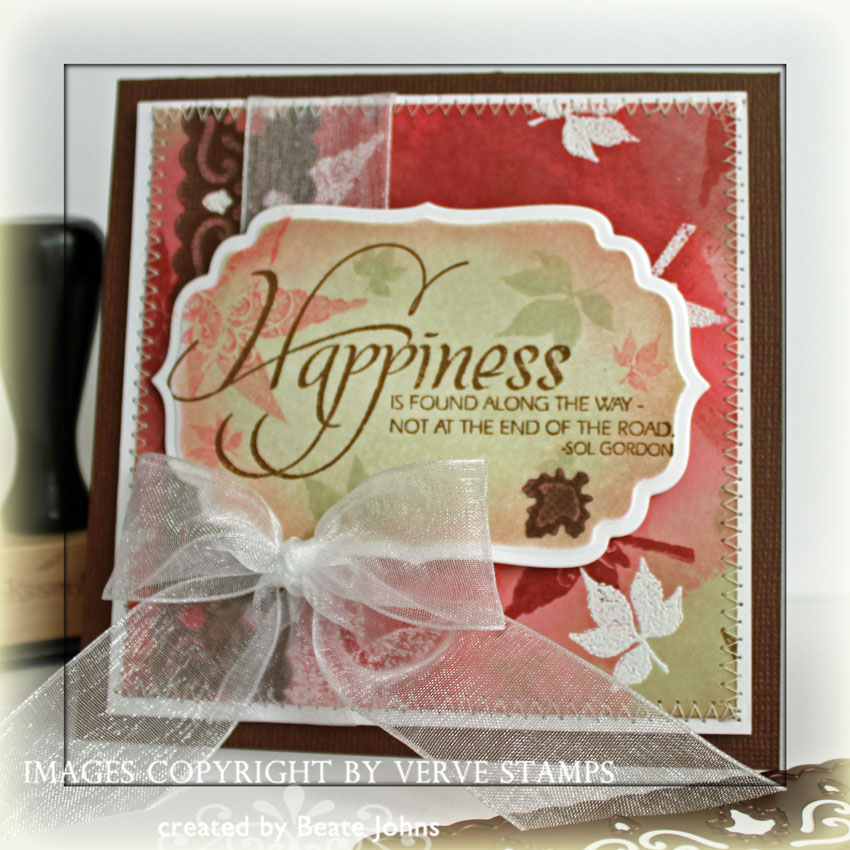
The entire fairy was covered in Crystal Effect, the dandelion in Stardust stickles. The sentiment is also from Believe in Fairytales. it was stamped in Espresso ink on Vanilla cardstock, cut with large oval punch, sponged with Scattered Straw and Vintage Photo and layered on a Chocolate Scallop Oval punchout. I stamped the dandelion part of the image in Scattered Straw over the sentiment and added Stardust stickles to the dandelion. Three Tiny Twinkles finish off the sentiment layer.

unitystore1109cardpurse.jpg

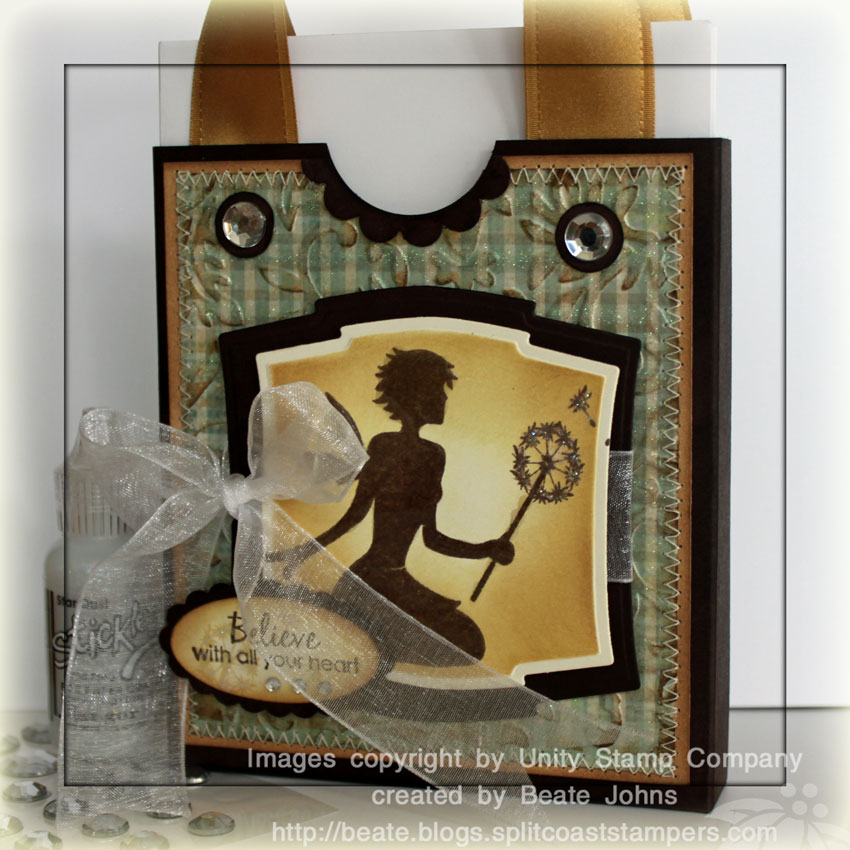
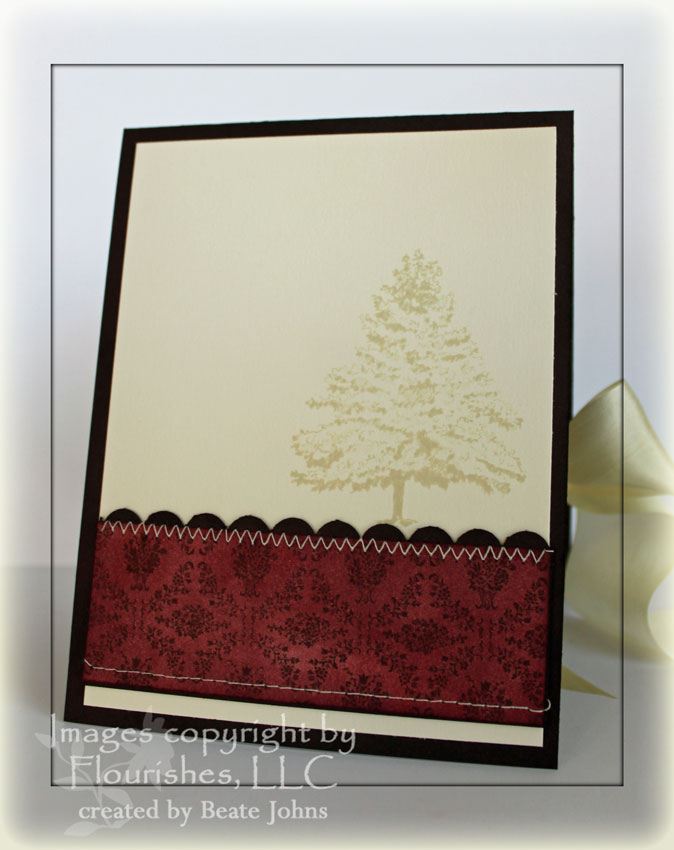
A 4″ x 4 1/2″ piece of Laundry Line My Mind’s Eye paper was embossed with the Victoria Cuttlebug folder and sponged with Vintage Photo ink. It was stitched to a 3/16″ bigger piece of Very Vanilla cardstock that had been sponged with Vintage Photo ink. The main image was attached to the card box with dimensionals.

To finish it off I added Large Kaiser Rhinestones on top of 1/2″ Chocolate Chip circles that were sponged with Espresso ink. The ribbon handles were made of out Gold Satin Ribbon from May Arts. They were attached to the box with Scor-Tape.

Here is a video for the visual learner:

[youtube]https://www.youtube.com/watch?v=wZLR1mGA99g[/youtube]

 ocllifeisfilefolderwide.jpg

I got to play with three gorgeous new sets from Our Craft Lounge a little bit ahead of time. The release is tomorrow. Make sure you come back for a chance to win a set.

Check them out. I LOVE these new sets. Lots of elements and scrapbook stamps. Since I didn’t have time to get new photos of the kids to create a mini book, I decided to make a file folder card. I haven’t made one of those in  a while.

ocllifeisfilefolderbeate.jpg

I started out with a 5 1/4″ x 7 1/2″ piece of Chocolate chip cardstock. It was scored at 4″. The patterned paper is from the Early Bird paper pack from Cosmo Cricket. The swirl on the top left was stamped in Vintage Photo and is from the new set Love Notes .

Over the patterned paper is a 1 1/2″ x 5″ strip of sponged (with Fired Brick ink) Riding Hood Red cardstock that had been punched with one of the new Martha Stewarts Punch Around the page. May Arts Chocolate satin Ribbon was tied around it.

The sentiment is actually pieced together from the two elements/scrapbooking sets Life is and The Journey. First I stamped the oval frame in Walnut Stain ink, then added the sentiment pieces in the same color. Last I added the swirl from Love Notes in Scattered Straw ink. I hand cut the oval and sponged it first in Scattered Straw, then Vintage photo. It was layered on a Riding hood cardstock piece. It had been cut with Label 6 Nestabilities and sponged first with Fired Brick, then Walnut Stain ink.

ocllifeisinsidebeate.jpg

The card inside is created with sponged Riding Hood Red and Very Vanilla cardstock. The neutral cardstock had been sponged with Old Paper Dsitress ink. The swirls were stamped in the same color. The sentiment was stamped in Walnut stain ink.

The Flower was created by adding two Red Prima Daisy Doodles on top of each other, then a Basic Grey Button, which was topped off with a large Kaiser Rhinestone.  To tie in the rhinestone I added smaller ones of the same color on the card front and the sentiment.

Here is a video for the visual learner:

[youtube]https://www.youtube.com/watch?v=HZMvLHDjW5E[/youtube]

Make sure to check out more sneak peek samples on these blogs:

Bird and Groom –Beth
Hang it Up Cupid – Lila
Hearts & Hugs – Holly, Kendra
The Journey – Charmaine
Life is – Charmaine
Love notes – Kisa, Joy
Out for a spin – Carol
Fairy Dust is a must – Kendra, Vicki
Grandma’s Truffles – Broni
Jungle Love – Heather
Shamrock Blessings – Pam
Sweet on you – Cami
Wanted – Kisa

tecelebratelifetornmosaicwi.jpg

Today’s tutorial on SCS is written by Carole Burrage and is called Faux Torn Mosaic. Create a different looking background by tearing patterned paper in pieces, sponging them and taping them over a piece of cardstock.

For my sample I used a new set from Taylored Expressions. I had ordered it on Saturday and BAM I already received it in the mail on Wednesay. Taylor is FAST! I thought the flower from Celebrate Life would be perfect for this technique. I needed something bold that wouldn’t be overpowered by the background.

The flower was stamped in Stained Walnut on Very Vanilla Cardstock, then overstamped with Scattered Straw Distress ink. The image was cut out with Label 4 Nestabilities. I left the die on and sponged the image first with Scattered Straw, then a bit with Vintage Photo distress ink. It was layered on the next size up Label 4 die cut out of Chocolate Chip cardstock that had been sponged with Walnut Stain ink. The flower was finished off with a layer of Crystal Effect.

tecelebratelifetornmosaicbe.jpg

The card base is a 4 1/4″ x 11″ piece of Chocolate chip cardstock folded in half. The edges of the card front were sponged with Walnut Stain ink. For my background I tore up Penny Lane My Mind’s Eye paper. The torn edges were sponged with Vintage Photo ink. The torn layer was stitched to a 3 15/16″ x 5 3/16″ piece of Very Vanilla.

The sentiment is also from Celebrate Life. It was stamped in Walnut Stain on Very Vanilla cardstock, punched out with the large oval punch and sponged with Scattered Scraw and Vintage photo. It was layered on a sponged Chocolate Chip Scalloped Oval punch-out. Three small Lippy Red Kaiser Rhinestones were added underneath the sentiment.

I sponged a Maya Road Swirl with Walnut Stain ink, added more Lippy Red Rhinestones and placed it on the top right of the image. I punched a slit on the lower right of the image and tied May Arts Organdy white ribbon around the left hand side of the layers.

Here is a video for the visual learner:

[youtube]https://www.youtube.com/watch?v=tk7mnHIIfSk[/youtube]

fllcmagicforestwide.jpg

When it was time to shoot a video for the Magic Snowflake tutorial, I had to think for a while to come up with a sample. After I created the focal point, I had to put it aside for a while before I finished it.  I just couldn’t think of a layout. Mojo works on it’s own schedule I guess.

fllcmagicforestoftreesbeate.jpg

The card base is a 4 1/4″ x 11″ piece of Chocolate Chip cardstock sponged with Walnut Stain Distress ink. A 3 3/4″ x 5″ piece of Very Vanilla cardstock was embossed with a cuttlebug folder, then sponged with Vintage Photo distress ink, layered and stitched on a 1/4″ bigger piece of Vanilla cardstock.

A 3″ x 4 1/4″ piece of Merry Days of Christmas was stitched to a 1/4″ bigger piece of sponged Chocolate chip cardstock. The horizontal strip started out as a 1 3/4″ x 3 3/4″ piece of Vanilla cardstock. Vintage Wallpaper was stamped on it with Walnut Stain ink. It was sponged with Vintage Photo and Walnut stain ink and layered on a slightly wider strip of Chocolate chip cardstock. The bottom of the Chocolate strip had been punched with the scallop edge punch from Stampin’ Up! Cream May Arts Silk ribbon was tied around it.

The main image is from Flourishes Forest of Trees stamp set. It was stamped in Snowcap Adirondack pigment ink on Glossy White cardstock and embossed with clear embossing powder. Old Paper and Vintage photo distress ink reinkers were used with rubbing alcohol to create the background. The image was cut with Label Nestabilities, layered on a sponged vanilla layer and a scallop chocolate chip rectangle.

The sentiment is from the Dove and Holly set. It was stamped in Walnut Stain ink on Vanilla cardstock. The Holly was stamped in Antique Linen distress ink. The sentiment was punched out with a 1 1/4″ circle punch, sponged with Antique linen and layered on a 1 3/8″ sponged Chocolate chip circle. The circles were stitched together and Kaiser Rhinestones were added to finish it off.

fllcmagicforestoftreesinsid.jpg

I created the inside to reflect the outside of the card and to show off that gorgeous Vintage Wallpaper background stamp. It was stamped again in Walnut Stain on Vanilla cardstock and sponged with Aged Mahogany ink. The tree was stamped in Antique Linen. I love those Distress inks. They are my kind of colors!

Here is a video on the Magic Snowflake Technique:

[youtube]https://www.youtube.com/watch?v=9a9-MpiPHfk[/youtube]

ffljoyfuldoveswide.jpg

Ever since I saw the sneaks for Flourishes Dove and Holly set, I knew I NEEDED that set. Marcella creates the most amazing stamp sets.

So when the set came right before I had to come up with a video for the Joy Fold card, I knew I was going to use it. And to mix it up a bit, I created a square Joy fold card….because, I LOVE square cards.

fllcjoyfuldovesbgbeate.jpg

My card base is a 4 1/4″ x 6 1/4″ piece of Chocolate chip cardstock scored at 4 1/4″. The edges were sponged with Walnut Stain Distress ink. For the backing I layered a 3 3/4″ square piece of Basic Grey Boxer paper on a 4″ square of Very Vanilla cardstock. The layers were stitched together and adhered to the card base.

A 1 7/8″ x 4″ piece of Basic Grey Fruitcake paper strip was adhered to the front flap. Behind the front flap I taped a strip of Vanilla cardstock that had been punched with an EK punch. It was sewn to the card front. May Arts Olive Silk Ribbon was tied around the flap.

The flap base is a 3″ x 6″ piece of Chocolate Chip cardstock, sponged with Walnut Stain ink and folded in half.  A 2 1/2″ square of Old Olive Cardstock was stamped with Vintage Wallpaper and Peeled Paint ink, the edges were sponged and it was sewn to a 2 3/4″ square of Vanilla cardstock.

The doves were stamped in Rich Cocoa Memento Ink on Gina K’s Pure Luxury Ivory cardstock and colored with Copic Markers (E51, E55, E57, YR23, YR24, YG93, YG95, R46, R59, W1). It was cut with Circle Nestabilities, sponged with Antique Linen and layered on a Burgundy cardstock scallop that was sponged with Aged Mahogany. It was attached to the flap with dimensionals. Crystal Effect was added over the Holly berries.

fllcjoyfuldovesinside.jpg

The inside of the flap was layered with a 2 3/4″ square of Old Olive cardstock and a 1/4″ smaller piece of Pure Luxury Ivory cardstock. The holly stamp was stamped in Rich Cocoa Memento ink in the right bottom corner and colored with the same markers that were used for the Dove image. Again Crystal Effect was used to enhance the Holly berries.

Here is the video for the visual learner:

[youtube]https://www.youtube.com/watch?v=8u_RnvolcZc[/youtube]

I thought I could use yesterday’s Way to Use it Challenge to create a card for today’s sketch. Boy…that was a tough one! Julia challenged us to use purple on our card! Purple? Really? I don’t like purple…I wasn’t even sure I had any purple Designer paper. I checked my stash and found a few sheets with purple in my Basic Grey Euphoria pack.

stampingbellapapillonpurple.jpg

I recently received my first order of Bella stamps, but hadn’t played with them yet. I picked the darling butterfly to try out first. It’s just so adorable. I stamped it with Tuxedo Black Ink on Neenah cardstockcut it out with Circle Nestabilities and colored it with Copic Markers (YG000, YGoo, YG21, YG23, YG25,RV02, RV04, Rv10, RV17, V15, V17). The image was then first layered on black cardstock, then on Purple Core’dinations cardstock. Stardust stickles was added to the pink dots and Tiny Twinkles on the bows on her antena.

wsc104firsttry.jpg

I really like how my butterfly looks, but I am not so sure about the rest of the card. Oh well….I can’t love all of my cards, right?

The Core’dinations card base measures 4″ x 12″ and was folded it half. A 3 1/2″ x 5 1/2″ piece of Euphoria Paper was adhered to a 3 11/16″ x 5 11/16″ piece of Black cardstock and sewn together. The two wider strips measure 3/4″ x 4 3/4″, the smaller one 1/2″ x 4 3/4″. The thinner strip has a layer of punched black cardstock underneath (EK Success border punch).  I had these layer originally like the sketch, but the black border looked better on the right, so I switched it around.

To finish off the card I added three Kaiser Rhinestones on the top left  and a bow out of May Arts Polka dotted organdy ribbon underneath the butterfly.

I will have to try again to come up with a better card for the sketch. Have a wonderful day! Hugs and smiles

pumpkinshakerwide.jpg 

For yesterday’s Product Focus, I thought it would be perfect to create an updated tutorial for the Shaker card. It was one of my first tutorials and needed a new look. Why didn’t anyone tell me that flash photography and tutorials don’t mix well, especially when using Acetate. LOL

We had a lot of questions about the Spellbinder image in the SCS gallery with the Pumpkin frame. I thought it would be great to use that in the tutorial to show how it’s done.

I cut my Pumpkin Frame with Pumpkin Nestabilities out of Dusty Durango textured cardstock. I also cut a Pumpkin out of Acetate and Grandma’s kitchen patterned paper. My shaker was filled with Crafty Sparkles – Chunky Crystal.

pumpkinshakerverveunitybeat.jpg

My card base is Chocolate Chip cardstock cut with the Clear Scallop Square Big Shot die from Stampin’ Up! I love to use that die to create card bases. What’s not to love about a square scallop card, right? LOL

A 3 3/4″ square of Whisper White cardstock was layered with a 3 9/16″ square of All Fall Fancy Pants Patterned Paper. The Patterned Paper was stamped with a the leaf swirl stamp from Simple Blessings in Vintage Photo Distress ink and sewn to the White layer. The horizontal strip measures 1 5/8″ x 3 1/2″ and from the Grandma’s Kitchen paper collection. It was stamped with Unity’s Giving it all meaning in Vintage Photo. The edges were distressed and sponged. I used a triple stitch to sew the strip to the square layeres and tied 5/8″ wide Organdy ribbon around it. The bow as topped off with a Recollections Brad (Michaels).

The Pumpkin Frame was sponged with Really Rust and Chocolate chip ink. I small bow was made out of SU Mistletoe ribbon with the help of my BowEasy. The sentiment is from Verve’s Hello Pumpkin set. It was stamped in Vintage Photo on White Cardstock, cut out with the small oval punch and sponged with Old Paper Distress ink. One of the leaves from Simple Blessings was stamped over it in second generation Old Paper ink for added texture.

Here is a video for the visual learner:

[youtube]https://www.youtube.com/watch?v=KD6vmmQKGug[/youtube]

 happinessfoundcc241wide.jpg

When I saw last week’s color challenge I thought I could use the color combo for recreating another old tutorial of mine: Serigraph. It’s fun to revisit these old tutorials and try to come up with a new sample.

The card base is a 4 1/2″ x 9″ piece of cardstock from Core’dinations Chocolate Box Collection folded in half. The background was created with Distress ink Colors: Old Paper, Worn Lipstick and Fired Brick. The stamps used were Verve’s Happiness Found and Harvest Blessings.

happinessfoundcc241beate.jpg

The background base is a 3 13/16″ square of Whisper White cardstock. It was layered on a 4″ Whisper White square and was stitched to it. The strip on the side was cut and embossed with Spellbinders Harvest Border out of the same Core’dination cardstock as the base. It was sanded and taped to the side. 1″ Wide Organdy Ribbon was taped around it. The bow was made with Bow-Easy.

For the sentiment I cut Whisper White cardstock with Spellbinders Label 4. It was sponged first with Old Paper, then with a hint of Worn Lipstick. Leaves were stamped over it in Old Paper and second generation Worn Lipstick before the sentiment was stamped in Vintage Photo. The leave is a punchout from the Harvest Border Borderabilities.

happinessfoundcc241inside.jpg

The inside of the card is rather simple. I love that the Core’dination cardstock from the Chocolate Box collection has a different core then it’s front. Here it’s a soft red that went perfectly with my leave colors. The leave on top is stamped in Worn Lipstick and is from the stamp set Harvest Blessings. The two leaves on the bottom are punchouts from the Harvest Border.

Thanks for stopping by. Have a wonderful day!

Here is a video for the visual learner:

[youtube]https://www.youtube.com/watch?v=NGtdhne0U78[/youtube]

christmaswiperwide.jpg

I worked ahead this week and already made this card on Monday as my entry for the Technique Challenge, which was to create a Wiper card.

I haven’t made a square one before, so it was perfect to use the sketch with the challenge. As my main image I chose this cute stamp from JustRite’s Old Fashioned Christmas set. Frosty was stamped in Tuxedo Black Memento Ink on Gina K’s Pure Luxury White cardstock, cut out with Circle Nestabilities and colored with Copic Markers (RV13, RV14, RV17, YG01, YG03, YG05, W1, YR04, YR07) and airbrushed with Copic Marker B000. White Flower Soft was added the to the pompom on the hat.

christmaswipertlc243beate.jpg

My card base consists of two 4 1/2″ x 7 1/2″ pieces of Textured Whisper White cardstock scored at 1 1/2″ and 3″. A 3 3/4″ square of Fancy Pants Happy Holidays Patterned paper was sewn to a 4″ Black square. The three smaller patterned paper squares measure 2 5/16″ and are from the same paper pack. They two outer ones were layered on a 2 7/16″ black cardstock square, the one in the middle on a scalloped black square that had been cut with Square Nestabilities.

Melon Mambo dotted ribbon was tied around the big square layers before the smaller square were adhered. A retired felt snowflake from Stampin’ Up! with a My Mind’s Eye Brad in it’s center was added to the top right corner of the main image. Three little pink rhinestones filled the left top corner.

For the sentiment I chose another JustRite stamp from the Merry Little Christmas set. It was stamped in Tuxedo Black Memento ink directly on Fancy Pants patterned paper, punched out with a 1 1/4″ circle punch. It was layered on a 1 3/8″ black circle and adhered to the bottom left of the main image.

christmaswiperpopup.jpg

My wiper pop up image was a little Santa hat cut out with Spellbinders Holiday Cheer die. It was cut out twice, once out if White cardstock, once out of red/pinkish patterned paper from the Happy Holidays Paper pack. I cut the red center out, sanded it a bit and taped it to the white layer. White Flower Soft was added to the rim and pompom of that hat.

You can find the step by step tutorial for wiper cards on Splitcoast. Here is the video for the visual learner:

[youtube]https://www.youtube.com/watch?v=SDrn0UG2Bto[/youtube]

autumnblessingswsc102wide.jpg

This weekend was bad. Lucas, Rebecca, Rick and I all had the flu. Austin already had it last weekend. Fever, achiness and nasty dry cough is not good. The kids are better, but Rick and I are still trying to recover. I couldn’t help myself though….I needed to make a sample for my challenge.

My image is from JustRite’s Autumn Blessings. It was stamped in Tuxedo Black on Gina K.’ Pure Luxury White cardstock and colored with Copic Markers (leaves: YG23, YG25, G94, Pumpkin: YR02, YR04, YR14, E15, Sky: YR31, bottom: E31). It was cut with Circle Nestabilities and ground and sky were airbrushed.

autumnblessingspumpkinwsc10.jpg

The Chocolate Chip card base measures 6 1/2″ x 8″ and was folded in half. A 3 1/2″ x 5 7/8″ piece of Basic Grey paper was stitched to a slightly bigger piece of Whisper White cardstock. A 5 7/8″ wide Chocolate Chip cardstock strip was cut, embossed and stenciled with Spellbinders Harvest Border and stitched to the middle of my Basic Grey paper. Champaigne Satin Ribbon was tied over the layers.

The smaller patterned paper rectangle measures 2″ x 4 3/8″ and is from the Basic Grey Pad Offbeat. It was stitched to a  1/4″ bigger piece of Whisper White. The focal point was first layered on a slightly smaller Creamy Caramel, then on a Chocolate Chip Scallop circle before adhered with dimensionals to the smaller rectangle. The sentiment is also from JustRite’s Autumn Blessings. It was stamped in Tuxedo Black on Whisper White cardstock punched out with the large oval punch and then layered on a sponged Chocolate Chip Scallop oval. The edges were paper pierced and the entire layer was airbrushed with YR31. The little pumpkin was cut with the Harvest Border out of a scrap of Basic Grey Offbeat paper.

To finish it off I added clear Dew drops with Crystal Effect to the top left and bottom right of the card. Since I already had the Crystal Effect out, I added some over my colored and cut out pumpkins.

Have a wonderful day! Hugs and smiles

© 2012 fresh & fun Suffusion theme by Sayontan Sinha