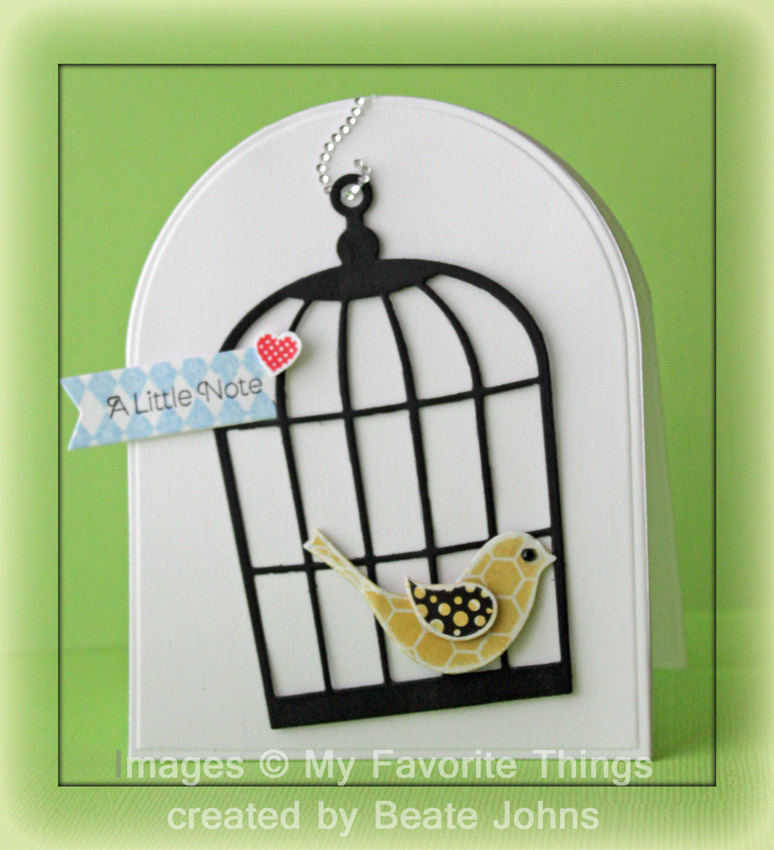
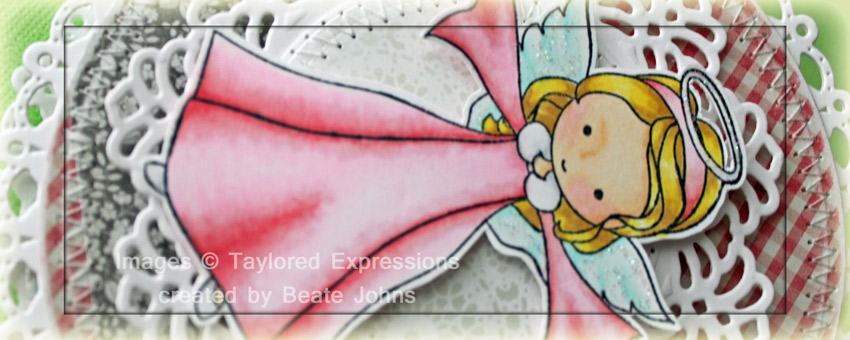
Yesterday’s new tutorial on Splitcoaststampers was for the Concertina or Cascading Card. Cherie Franklin is the author, I shot the video.  For my sample my main image is from MFT’s darling Snow Angel stamp set. The image was stamped in  Tuxedo Black Memento Ink on  Neenah Solar White cardstock. It was colored with Copic Markers (Green: YG01, YG03, YG17    Red: R20, R22, R24, R29   Fur: E41, E42, E43    Snow: B0000, B000   Ear/Nose: R20, E40)  and cut out.

It was also stamped in My Mind’s Eye Winter Wonderland paper (red paper) and Carta Bella Merry & Bright patterned paper. The paper pieces were shaded with Copics, cut out, run through my Xyron and adhered to the cardstock image.

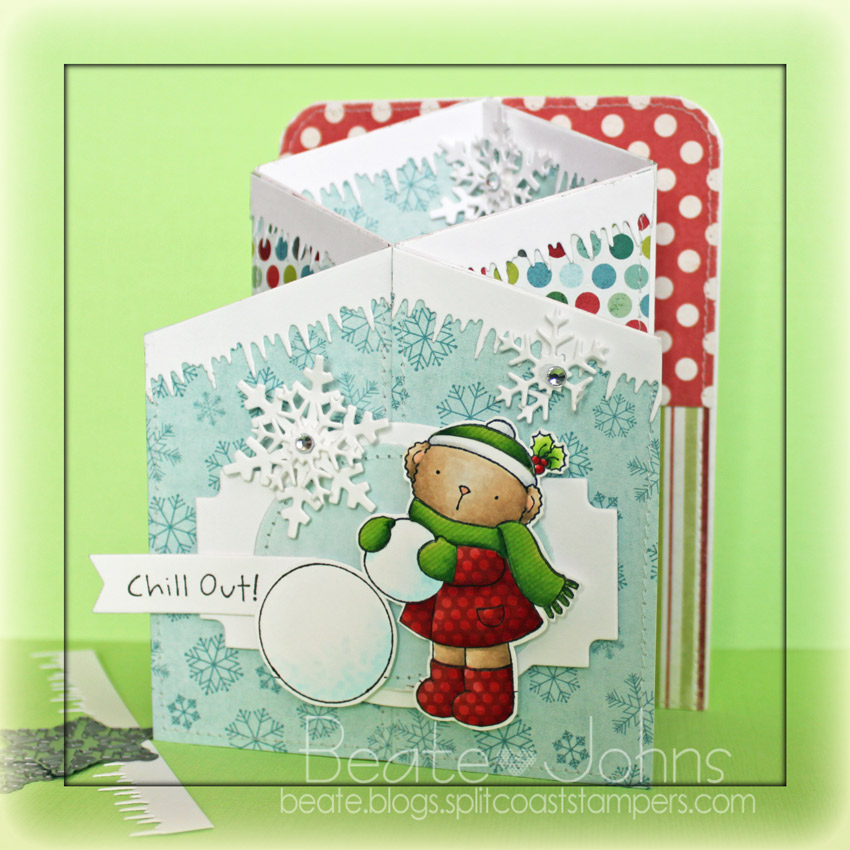
Winter Wonderland patterned paper was used to decorate the card sides.  The top corners were rounded and the top of the slanted pieces were topped with Solar White cardstock that was cut with Icicle Border Die-namics die.  The two larger Layered Label dies were used to create layers to place my image on.

More white cardstock was cut with the two smaller dies from Let it Snowflake die-namic dies, stacked and topped with a rhinestone from a Sleek Strips Silver Rhinestones.  Last I stamped a sentiment from Snow Angel on a piece of cardstock with a sentiment strip die.

Here is a video for the visual learner:

[youtube]https://www.youtube.com/watch?v=Whpy-eDRcac[/youtube]

Thanks so much for stopping by! Have a wonderful day!
Hugs and smiles

Edna’s Hope You Can Cling to challenge is to create a card with five words on it. I pulled out quite a few sets before I settled on the words and dies for my entry. I wanted to use different fonts for my adjective, so I used three different sets.

I started by cutting you and are out of Neenah Solar White cardstock with MFT’s High Rise Alpha Lowercase dies. I stamped a word from each First Class Friend, Complimentary Greetings and Well Worn My Favorite Things stamp sets in Jet Black Archival ink and cut them out.

The card base is a 3 1/2″ x 11″ piece of Kraft cardstock, folded in half. The bottom corners were rounded. A 2 1/4″ x 5 1/2″ wide strip of My Mind’s Eye The Sweetest Thing Tangerine paper was to the center of the card front. A strip of white paper was cut with the Squiggle Border and adhered to the right hand side of the paper strip. The words were adhered in it’s center.

Two small hearts were cut out of black and white cardstock with a die from the Notched Tag stamp and die set. Another heart was cut out of Tangerine paper with the smallest of the Hearts A Plenty Die-namic die. An arrow was cut out of black cardstock with one of the Lead the Way dies. They were used to dress up the card. Tiny black rhinestones from a Baby Bling rhinestone pack finish off the card.

Thanks so much for stopping by! Have a wonderful day!
Hugs and smiles

Here is another super quick CAS card I created for an inspiration challenge on Splitcoaststampers. For this card I used the Empirical Style Pennants as inspiration piece.  The card base was cut and embossed with the largest Rounded Banner Stax out of Neenah Solar White cardstock.

A cage was cut out of black cardstock with a die from the Contemporary Cage stamp and die set. it was adhered with foam adhesive squares a bit off kilter. Part of a Fancy That! BorderBling was used as hanger to center the bird cage to the card. Bird pieces were cut out of My Mind’s Eye Honey patterned paper. The edges of the paper were sanded and the wing was stamped with a matching image from the set.  A black rhinestone was used as an eye and the bird was adhered to the cage with square adhesive foam.

A piece of white cardstock was cut with an MFT Sentiment Strip Die-namic die. A sentiment from Contemporary cage was stamped in to the right and the left end was cut off. Small diamonds from the Distressed Diamonds stamp set was stamped in Summer Sky Memento Ink over the sentiment panel before it was adhered to the upper left hand side of the cage. A little heart stamped in Ladybug Memento Ink was cut out and adhered to the top right of the sentiment panel to finish off the card.

Thanks so much for stopping by! Have a great day!
Hugs and smiles

It’s time to post on the Spellbinders blog today. This week’s theme is to show you “Things you can do with the Grand Calibur”. For me it’s mostly cutting paper and cardstock, but today I pulled out bottle caps that had been in my stash for quite a while and used them as part of a Christmas Ornament.

I hope you  have time to check out the entire ornament and the step by step instructions on the Spellbinders Blog. Thanks so much for stopping by! Have a wonderful day.
Hugs and smiles

The new Crafty Friends Challenge is super easy. Charmaine is the hostess and she is asking you to incorporate dry embossing into your project. I combined the challenge with yesterday’s Hope You Can Cling to Challenge.

I started out by embossing a 3″ x 5″ piece of Neenah Solar White cardstock with the Simplicity M-Bossabilities folder. The bottom right and top left corners were rounded. The layer was stitched to a 3/16″ bigger piece of black cardstock, before it was adhered with foam adhesive squares to the card base, a 3 1/2″ x 11″ piece of textured Kraft cardstock, folded in half.

Three butterflies were cut out of My Mind’s Eye Honey patterned paper, topped with rhinestones from a Sleek Strips Silver Rhinestones. Another piece of Honey paper was cut and embossed with a Spellbinders Nested Pennants die. The edges were sanded and stamped with a sentiment of MFT’s Thanks a Bunch Stamp set in Jet Black Archival ink.

A flourish was cut out of black cardstock , adhered to the left hand side of the Pennant sentiment strip and topped with a yellow button.

Check out my fellow Crafty Friends for more Halloween inspiration:


Thanks so much for looking! I hope you have time to join us in the challenge. It’s easy and fun! Have a wonderful week!
Hugs and smiles

I had fun with Saturday’s Inspiration challenge. For this sample I chose the target sheet on the Empiral style website as my inspiration piece. I thought the layout would make a great card sketch. I thought the finished card would work great for the current Tuesday Trigger on Moxie Fab World, so I will be entering it there as well.

The card base is a 3 3/4″ x 11″ piece of Sno Cone cardstock, folded in half. The bottom corners were rounded. Six circles were cut with a Standard Circle Nestabilities die out of an old My Mind’s Eye Lime Twist Life of the Party patterned paper pack.  The edges of the paper were sanded. The four top circles were adhered to the card front with foam adhesive squares, the bottom two circles with regular adhesive.

A piece of Neenah Solar White cardstock was cut with Simon Says Stamps exclusive Memory Box Banner die. A stamp from the Saying it with Banners set was stamped in the center of the banner with Jet Black Archival ink. The banner was folded and adhered over the bottom two circles with foam adhesive squares.

Two star images from Shoot for the Stars were stamped in Jet Black Archival ink on Neenah Solar White cardstock, cut out and adhered to two of the circles. Part of a Finesse Rhinestone Swirl was adhered next to one of the stars to finish off the card.

Thanks so much for stopping by! Have a wonderful day!
Hugs and smiles

It’s Friday that means it’s Friends with Flair time at the Unity Blog.  I thought I share a card I made during the last VSN. This one was for Lori’s Glitter Window Challenge. I stamped the cute snow man family image from the Stamp of the week club Just Chillin’ stamp set  in  Tuxedo Black Memento Ink on Neenah Solar White cardstock. It was colored with Copic Markers (YG01, YG03, YG17, R05, R27, R39, BG70, Bg72, BG75, C00, C1, C3, BG0000, BG10) and cut and embossed with one of the Resplendent Rectangles Nestabilities die.

After cutting a frame out of Kraft cardstock with the same and the next size up Resplendent Rectangle dies, I realized that the regular glitter window technique wouldn’t work so well for these shapes. So instead I ran the image layer face down through my Xyron machine and rubbed loose glitter all over.  The frame and the image layer were adhered on another piece of Solar White cardstock and cut down to the size of the Kraft cardstock layer.

The card base was created out of a 9 1/2″ x 6″ piece of white cardstock, folded in half with the edges rounded.  the card front was covered with My Mind’s Eye Winter Wonderland paper patterned paper. White organdy Ribbon was tied around the layers and the bow was topped with a button tied on with embroidery thread.

The image was adhered over the card front with foam adhesive squares. The sentiment was stamped in Tuxedo Black ink on white cardstock, cut out and adhered to the lower right of the image. The lower part of the sentiment panel was colored with Copic Marker BG10 and topped with Stardust Stickles.

White cardstock was cut and embossed with two small Create a Flake 4 Spellbinders dies. They were adhered together with more foam adhesive square. A rhinestone was added to the center of the flake. It was then covered with Glossy Accents and Vintage Glass Glitter Shards were sprinkled over it. The snowflake was adhered to the top left of the image to finish off the card.

Thanks so much for stopping by! Have a wonderful weekend!
Hugs and smiles

Today on the Spellbinders blog I show step by step instructions on how to make this little ensemble. I hope you have time to check it out and tell me what you think.

Thanks so much for stopping by! Have a wonderful day!
Hugs and smiles


My card today is a multi-tasking card. It is a sample in this week’s tutorial for the Twisted Circular Easel card, a fun variation of the Easel card tutorial that was already in our resource section. It is also a sample for the new Spectrum Noir Marker review on SCS and a sample for Lydia’s HYCCT challenge, which was to create a card that showcases your style.

I started by stamping Taylored Expressions Moka Angel image Tuxedo Black Memento Ink on Neenah Solar White cardstock. It was colored with Spectrum Markers (Dress: PP1, PP3, PP5 Skin: FS2, FS3, FS 6 (cheeks), TN2 Wings: BT1, BG2) and cut out.  A piece of white cardstock was cut and embossed with a Vintage Lace Motif die. A piece of My Mind’s Eye Be Happy paper was cut and embossed with a Standard Circle Nestabilities die. The edges were sanded before the circle was stitched to the Vintage Lace circle.  The angel was adhered over the circles with foam adhesive squares. Stardust Stickles was added over the wings and the halo.

My Mind’s Eye Honey patterned paper was cut and embossed with the smallest Grand Circle Nestabilities die. The edges were sanded and stitched. Seam binding was tied around the layer. The bow was topped with a button, tied on with embroidery thread and the layers were adhered to a piece of white cardstock, cut and embossed with the smallest of the Grand Decorative Circle dies.  The image circles were adhered to the card front center with foam adhesive squares.

The inside of the card was also decorated with Honey patterned paper that had been cut and embossed with a Grand Circle Nestabilities die. White Crochet Ribbon was adhered around the horizontal strip before the layers were stitched.  White cardstock was cut and embossed with a tag die from the new Back to the Basic tag dies. A sentiment from Moka Angel was stitched on it with Jet Black Archival ink. Flowers and part of a Finesse Rhinestone Swirl finish off the card.

Here is a video for the visual learner:

[youtube]https://www.youtube.com/watch?v=1RoUVh0l8yM[/youtube]

Thanks so much for stopping by! Have a great day!
Hugs and smiles

I created this tag for last week’s Way to use it challenge on Splitcoast.  I cut a piece of Kraft cardstock, cut with the Four Point Die-namics die. A background from Own your Story was stamped in Brilliance Moonlight White ink over the tag and the edges were sponged with the same ink.

Once the ink dried  the flourish from the same set was stamped in Spanish Olive VersaMagic ink on the bottom of  tag and a sentiment of the set with with Midnight Black VersaMagic Ink.  A piece of My Mind’s Eye Six by Six A Mother’s Love was cut with a Mini Rolled Roses Die-namics die, rolled into a flower and adhered above the green flourish. A tiny part of a Finesse Rhinestone Swirl was adhered on the upper right of the flower. White Crinkled Ribbon was tied on to the tag with a button and Linen Thread.

Thanks so much for stopping by! Have a wonderful day!
Hugs and smiles

© 2012 fresh & fun Suffusion theme by Sayontan Sinha