There isn’t any stamping on this page, but all the supplies are from Stampin’ Up!, except for the Heidi Swapp Ghost Hearts.

rebecca-in-tree-pink-6×6-ws.jpg

I cut the photo with the biggest Nestabilities circle die cut. Next I cut a scalloped circle out of Bravo Burgundy and mounted the photo on that.

The photo with matting was layered on a 4 1/4″ ticket corner punched square from Petals & Paisleys Designer Paper. That was adhered to a 4 3/4″ Whisper White square.

The scrapbook page is a 6″ x 6″ Rose Romance cardstock square.  The center panel was adhered to the page and small pink Circle Rhinestone brads (Ice Collection) were added in the white squares corners.

I punched a large oval out of Burgundy cardstock and added faux stitching with paper piercing tools and my white gel pen.

I journaled on a metal rimmed circle tag and layered it on a Burgundy scallop circle. On both the oval tab and the journal circle I added a Heidi Swapp Ghost heart and secured it with a large pink Circle Rhinestone brad.

Last I added Faux Stitching with Gel Pen and Paper Piercing tools all around the edges of the page.

Sorry this is so late and my post so short! I have to get back to work. But I couldn’t miss my scrapbook Sunday! It’s tradition and I look forward to making a page…no matter how simple it might turn out.

I am taking a break from SCS work today and hang out with friends. Here is what we will be making today.

stamp-camp-november.jpg

You can check out the cards up close in these blog entries:

Blue Thanks

Flower Birthday

Christmas Criss Cross

Angel card

Giraffe

rak-mercy-kevin.jpg

Mercy Kerin sent me this BEAUTIFUL Z-fold card.

You can see more of her great work on her blog Lord Have Mercy!

Thank you Mercy!

I didn’t think I would have time to make a sample for this weekend’s sketch, but I got up earlier this morning and squeezed some stamping time in.

so-much-circular-thanks-wsc.jpg

The card base is a 4 1/4″ x 8 1/2″ piece of Chocolate Chip cardstock folded in half.

Next comes a 4″ square out of Mellow Moss cardstock, followed by a 3 3/4″ Tempting Turquoise Prints Designer Paper square.

The corners were punched with the ticket corner punch and the edges stamped with All in a Row to create the faux stitched look.

I added 4 Antique Brass brads in the corner of the Mellow Moss Square.

For the circle I stamped the dotted circle from So Much in Brown StazOn on Shimmery White. It was cut out with a circular Nestabilities die cut and watercolor washed with Aqua Painter and Mellow Moss reinker. I stamped Thanks on the lower part of the circle.

Next I stamped the flower from So Much on a piece of Shimmery White with Brown StazOn and colored it in with Aqua Painter and Real Red reinker. Once it was dry, I cut it out and added first an Antique Brass Jumbo Eyelet, then a turquoise Circle Rhinestone brad in the flower center.

The flower was adhered to the circle with dimensionals. It still looked a little blahhhh, so I paper pierced a stem for the flower and added the line with Mellow Moss Marker.

I tied 5/8″ Real Red grosgrain Ribbon  around the Mellow Moss/Turquoise layers and mounted my circles over it.

Here is the sketch for this weekend’s sketch challenge.

All of you who know have seen the Cosco paper batch, know I have a few more paper packs to give out as prizes.

wsc27.jpg

To participate in the challenge and be entered in the stamp set raffle, make a card with this layout and upload it either to your blog, or to an online gallery.

 If you upload your card on SCS, put WSC27  (NO SPACE INBETWEEN WSC AND 27) in the keyword section. That way we can look at all of them at once!

Post a link to your card to this blog entry as a comment. Please add your entry# to it.

I will determine the winner of the clear stamps with Random.org on Wednesday at 9:00 a.m.

To see samples made with this sketch now, check out the blogs of

Charmaine Ikach

Jenn Balcer 

Laurie Schmidlin 

Lori Craig

MaryJo Albright

Sharon Harnist

Have fun creating! I can’t wait to see what you come up with.

SCS submissions

Hi everyone! I am still plucking away, spending my almost every waking moment on the computer. Sorry, I still have no stamping to share with you. But I can tell you who random.org picked as the winner for my last challenge.

janine-wsc26.jpg

Janine made this beautiful Christmas card and was poster #8. That was this weeks lucky number.

You can see more of her work on her blog 2bkrafty.

Like always, it was my pleasure to check out all the amazing entries! Thank you for participating!!!

I hope I will be back to my normal posting routines next week. But then….you will be too busy checking out the cool stuff on SCS. LOL

Have a wonderful day! Besides working, I have to bake a cake for my oldest. It’s his 13th birthday today! I can’t believe I have a teenager in the house! Seems like yesterday when he was a chubby toddler talking German/English toddler talk.

fun-fast-notes-sc131.jpg

I have another card on the showcase today!

Crazy? Yes! Unbelievable? Yes

And very freaking exciting!!!!

I think Stampin’ Up! just found a flat rate envelope that I sent in back in August and they are embarrassed and are trying to make up for it! LOL Not that I am complaining! I am loving it!

Thanks for everyone emailing me about it. I have been babysitting my neighbors darling toddler boy since yesterday afternoon at 5:00 p.m. Cheryl, the Mom, just had her baby girl this morning.

Since then I dropped James back off and took Rebecca to the dentist (NO CAVITIES!!! Yeah!!!). Now it’s cleaning time and then back to work!

Even my Monday morning cleaning routine won’t be able to wipe that silly grin from my face! Another card on the showcase, another card on the showcase. Hugs, grins and happy dance!

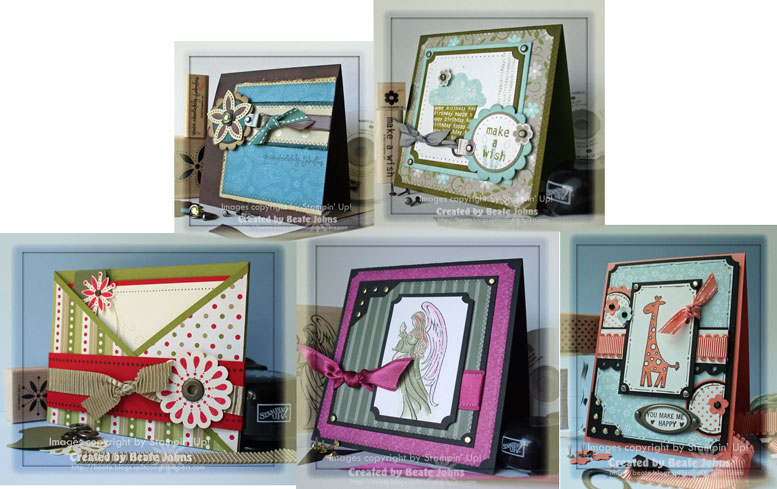
I will be really quiet all next week. I am working full time on something BIG for SCS that will start November 12th, plus I have to find the time and plan my next stamp camp on Saturday. I don’t know how much stamping I will get done during that time.

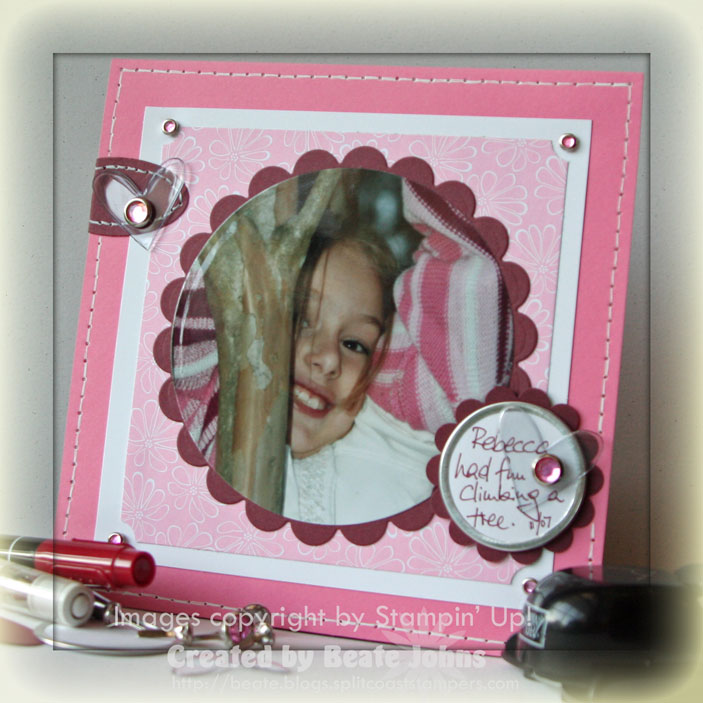
But I had to make another page for my Days to Remember calendar. Rick will be leaving right after Christmas, and this is only the 4th page for his calendar. I made this one to match the colors of another page for the calendar. That way they can be next to each other once they are torn out of the calendar and in an album.

simple-serif-rebecca-and-le.jpg

My page base is a 6″ x 6″ piece of textured Groovy Guava cardstock.

As I for earlier Sunday pages, I used the layout for this weekend’s sketch challenge to create the page.

The black layer is a 5″ square, the following Purely Pomegranate paper from the Cutie Pie Designer Paper pack a 4 3/4″ square.

The two right side corners were punched with the ticket corner punch and the edges were stamped with my All in a Row Argyle stamp.

For the scalloped layer I cut a piece of Whisper White cardstock with the biggest Square Nestabilities Die. I lined the cardstock up so one side would be straight.
I then layered a 3 1/4″ x 3 1/2″ piece of Darling Doodles Designer paper over that.

I cut my photo down to 3″ x 4 1/4″ and layered it first on a 1/4″ bigger Basic Black piece of cardstock, then on a 1/4″ bigger piece of Wild Wasabi.

I added a double photo corner to the top left hand side. The bigger piece is punched out of Basic Black cardstock, the smaller one out of Blue Bayou Prints Designer paper. Three Pewter brads finish the corner off.

Before taping all the layers and photo down to the page, I tied Blue Bayou Double Stitched Ribbon around the lower part of the layers. Then I taped everything down and added three Pewter Jumbo Eyelets on the left hand side. I fastened three Square Ice Rhinestone brads in the center of the eyelets. (I had seen that just this weekend on someone’s entry for this WSC and thought it looked awesome! Thanks for the inspiration!)

I stamped Spring 2007 on a Whisper White large oval punchout. I layered a black scallop circle with a Pomegranate Designer label punch, a 1 1/4″ Wild Wasabi Circle and topped it off with the stamped large oval. I added a Pewter brad on each tip of the oval and mounted the whole thing with dimensionals to the page.


Side note: 

I received several questions about Nestabilities. You can find great information here:

Ellen Hutson lists what die cut machines work and how to sandwich the dies with those machines

Sharon Harnists review

My personal opinion? I love them! I have a hard time not using them. I love scallops and these dies are a great way to make them, without having to store a mountain of punches. Just in case you are wondering which ones I bought, check here. It made a great early Christmas present to myself. Because doggone it….I am good enough, I am smart enough…and people like me (I LOVED that sketch on SNL).

I just love Asela’s little Snow family and had to use it again. When I made the first card, I had stamped several images and ran them with different Nestabilities die cuts through my Cuttlebug. They were staring at me wanting to be used!

I love these dies. They are easy and I can get  scalloped rectangles, squares, ovals and circles in so many sizes! What a great idea to invent dies for that instead of different size punches. I think I will sell my Marvy punches, if anyone wants them.

I can’t wait for Stampin’ Up!’s new catalog. I  need new images. I have been playing with the same images since July for the main catalog and August from the mini! That’s simply too long! How sad am I to get bored so quickly?

snow-family-wintergreen-wsc.jpg

The card base is a 5 1/4″ x 10 1/2″ piece of Always Artichoke cardstock.

It was folded in half and the corners on the right side were punched with the corner rounder.

The next layer was a 4 1/2″ x 4 5/8″ piece of sponged Blue Bayou with the right corners rounded, followed by a 1/4″ smaller Wintergreen Designer paper  piece, that was corner rounded and paper pierced.

The last two background layers were cut with rectangle Nestabilities die. The sponged Blue Bayou layer measures 3 1/8″ x 3 1/2″, the Always Artichoke Prints Designer paper layer is cut with the next smaller die. I adhered them together and tied black polka dotted May Arts ribbon to the left hand side of it.

The Snow family image was cut with an oval Nestabilities die and layered on the next bigger scallop oval in basic black.

I colored the image with Blue Bayou, Soft Sky, Close to Cocoa, Going Gray, Purely Pomegranate, Always Artichoke and Pumpkin Pie Classic inks and my Aqua Painter. Amuse Creative Candy stickers were added over the snowflakes.

The saying was stamped in Black Palette ink on a metal edged circle tag and layered on a black punchout made with the scallop circle punch.

I slept in a little bit today. When I got up and checked my email, I had a few notes from friends, telling me that one of my cards made the showcase again!!! Wohoo!!! What a great way to start the weekend!

stem-silhouettes-wsc14.jpg

I really liked this card when I made it back in August as a sample for WSC14.

You can find the blog entry with all the cards infor here.

© 2012 fresh & fun Suffusion theme by Sayontan Sinha