

Today’s tutorial was written by Birgit Edblom, aka. Biggan. She created a gorgeous card for one of the challenges and I asked her to write a tutorial for SCS. She was sweet enough to do so.
For my sample I stamped the leaves from Unity’s Gratitude = Joy first in Peeled Paint, then in Shabby Shutter distress ink over a 3 1/2″ square of Penny Lane My Mind’s Eye Paper. The paper was cut apart first in 1/2″ strip, then in offset 1″ pieces, to create the wall look. To add more depth, I sponged around each “brick” with Antique Linen Distress ink.
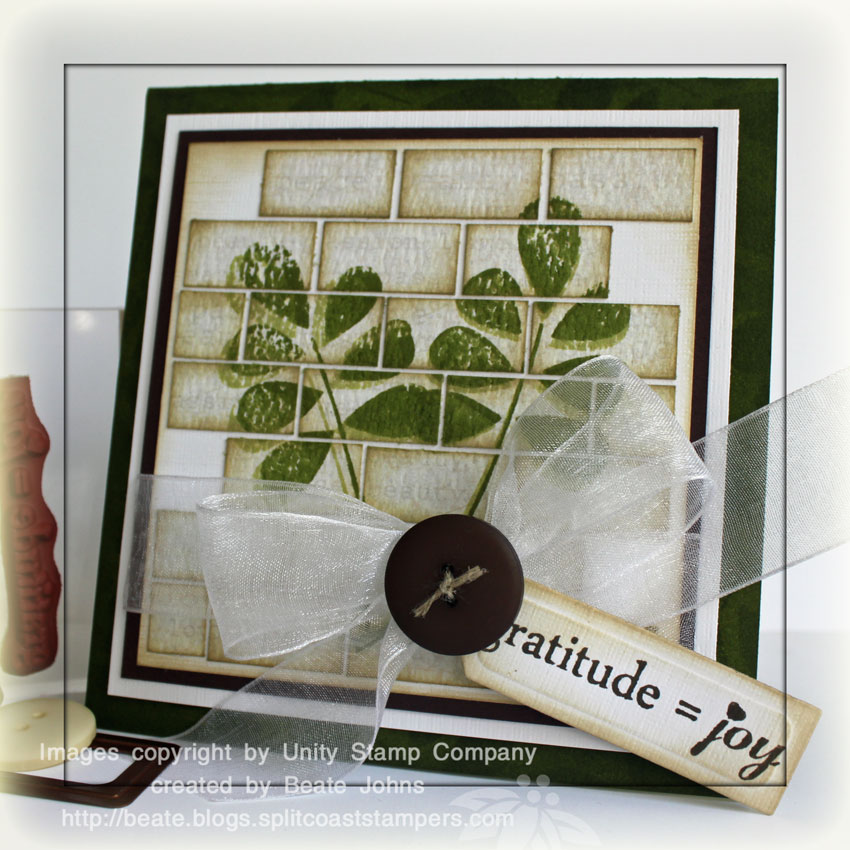
I taped the bricks to a slightly bigger piece of textured white cardstock. The edges had been sponged with Antique Linen. That was layered on a 1/4″ bigger piece of Chocolate chip cardstock. White Organza ribbon from May Arts was tied around the layers. A Basic Grey Button was tied over the bow with Linen thread. The sentiment was stamped with Walnut Stain Distress ink on Textured White cardstock, cut with Nestabilities tag dies, sponged with Antique Linen and attached with the same Linen thread. The layers were adhered to a 4 3/4″ piece of white textured cardstock with Scor-Tape.
The card base is a 5″ x 10″ piece of Old Olive cardstock folded in half. The leaves were stamped in Peeled Paint all over the edges of the card front. Then the edges were sponged. The card front layers were attached with dimensionals to the card base.
Have a wonderful day! Here is a video for the visual learner:
[youtube]https://www.youtube.com/watch?v=_4-CKG9iSiw[/youtube]
Beate
14 Responses to “Tutorial on SCS – Wall of Bricks”
Sorry, the comment form is closed at this time.


Your tutorial is so wonderful, Beate!! You made the cutting look so easy with your paper cutter!! Love how you inked all the edges too…just the perfect touch!!
This will look great as a home décor, maybe on canvas…thanks for sharing!
WOWSA! This is just GORGEOUS! I can’t wait to try this technique!!
WOW WOW WOW was für eine wunderbare Karte Beate.
Liebe Grüße
von Anke
Beate, beautiful card. Another of those gorgeous bows you make.
very cool technique! tfs 🙂
This looks sooo 3-D. I can’t wait to try it! Thank so much for your tutorials!
This is STUNNING!! I can’t wait to try it 🙂
Maria
Got {ippity}?
http://salesbym.blogspot.com
Hi Beate! Just wanted to tell you that your card is just beautiful! This is a fantastic technique – another one to add to my ‘to do’ list! lol
Karen
x
You’re right — inking the edges may take a little time, but the effect is so worth it!
I love watching all your videos, Beate. I find them relaxing and inspiring at the same time!
I had an idea when I was watching this technique – I would think that you could save some time if you inked all the edges after you cut the focal piece into the 1/2 inch strips. Then you would only have to ink the newly cut edges when you make the strips into bricks.
Thanks for all the great ideas, videos, and inspiration! ~Tara D.
so cool and all that sponging really gives it the brick look, tfs!
I love this technique…and your BEAUTIFUL card!! Thanks for the tute!!
this is so elaborate & a WOW card; I’ve really enjoyed this tutorial; looking foreword to trying this & waiting patiently for the next one. TFS!