I created this card about a year ago for a submission. I am kind of glad that it didn’t get picked so I have something to share with you today. Sorry I have been so quiet lately. With the long labor day weekend followed by another bout of migraines (we had a rain front moving through), I didn’t get much stamping done lately!

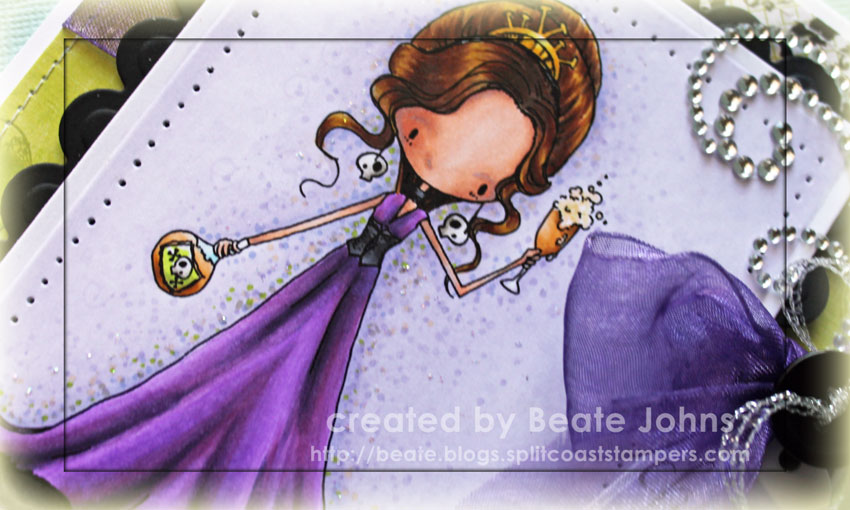
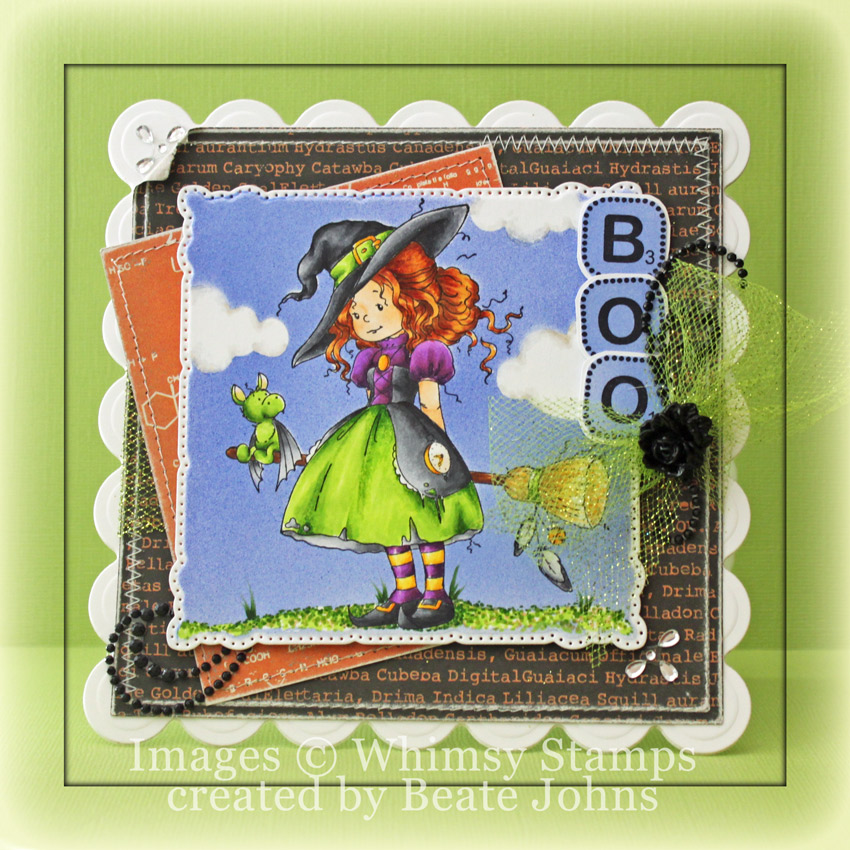
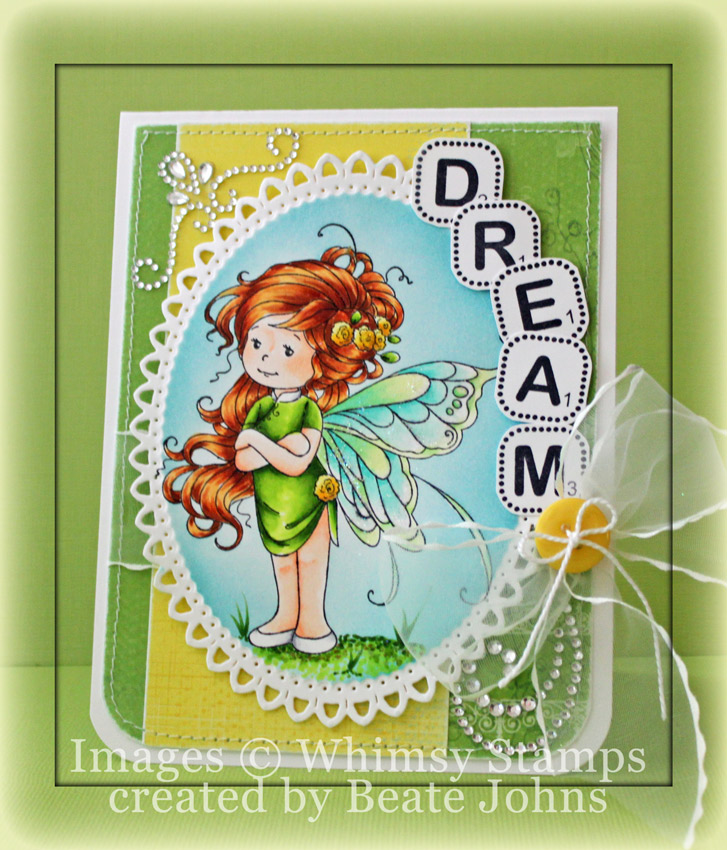
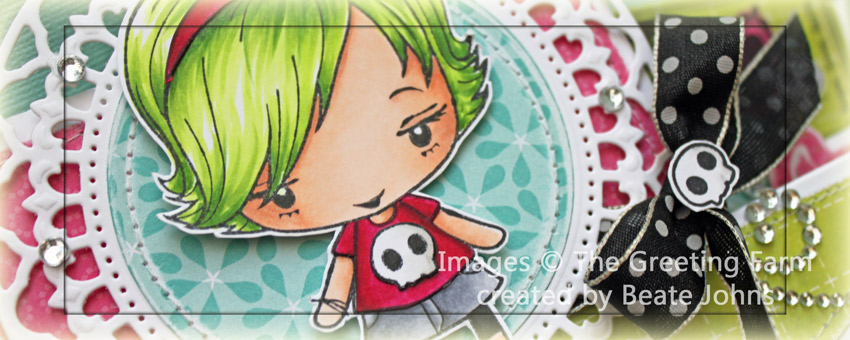
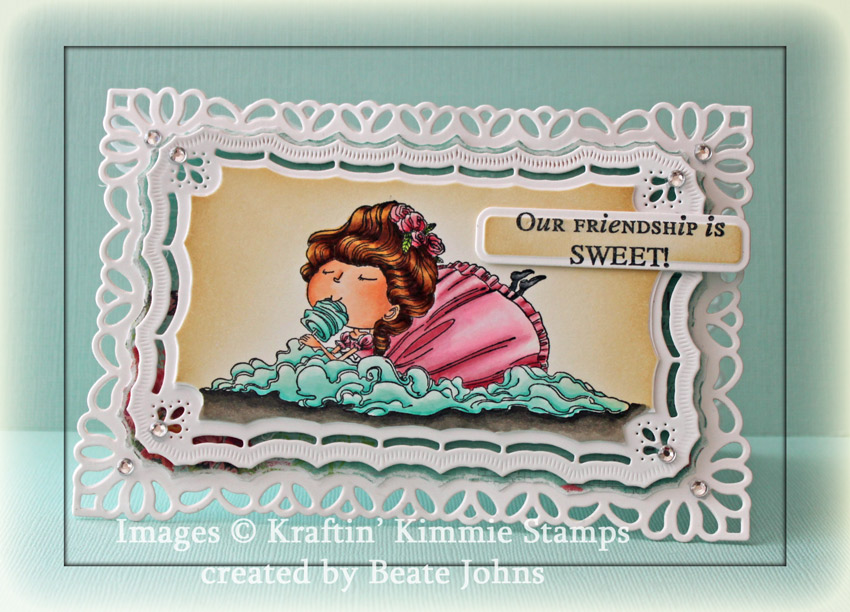
For this card I printed out Tiddly Inks Toasting Properly on Neenah Classic White cardstock. The image was cut and embossed with a Grand Rectangle die and colored with  Copic Markers (Skin: E000, E00, E01, E11, BV00   Hair: Y26, E35, E37, E47   Dress: V04, V05, V06, V17, V09   Crown: Y13, Y15, Y17, W3   Bottle: YR21, YR23, YR23, W3, YG01, YG03, W3    Ground: W3, W5, W7, W10    Background: BV0000, BV000, BV00, BV01    Background spots: BV000, BV00, BV01, YR21, YG03)  . The image was adhered to a piece of black cardstock, cut and embossed with a Grand Scallop Rectangle Nestabilities die and the edges were paper pierced. Some dots were added with Stardust Stickles around the girl to make the background sparkle.

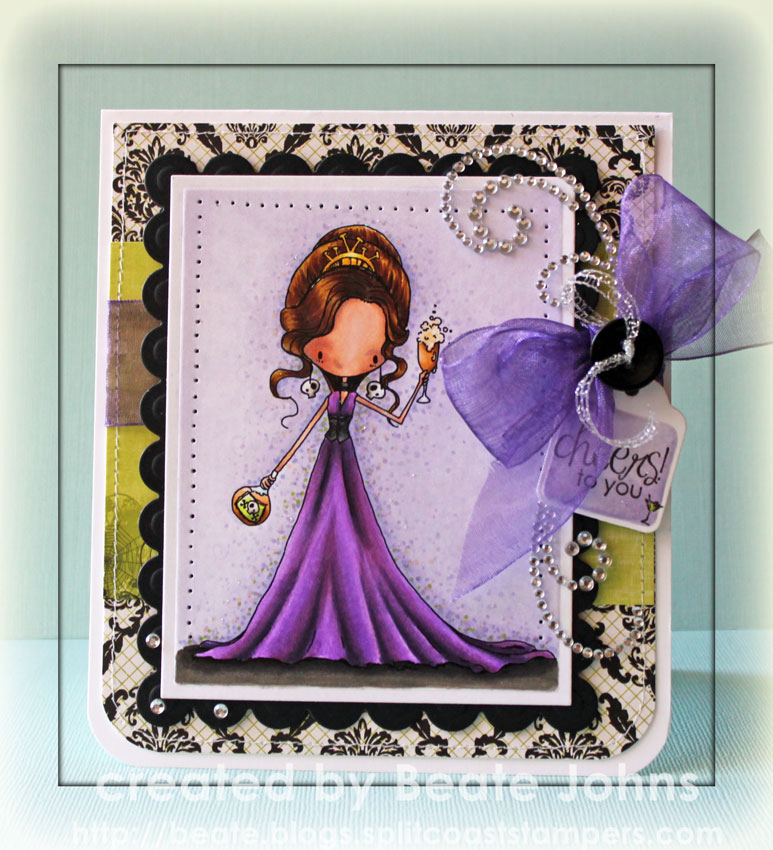
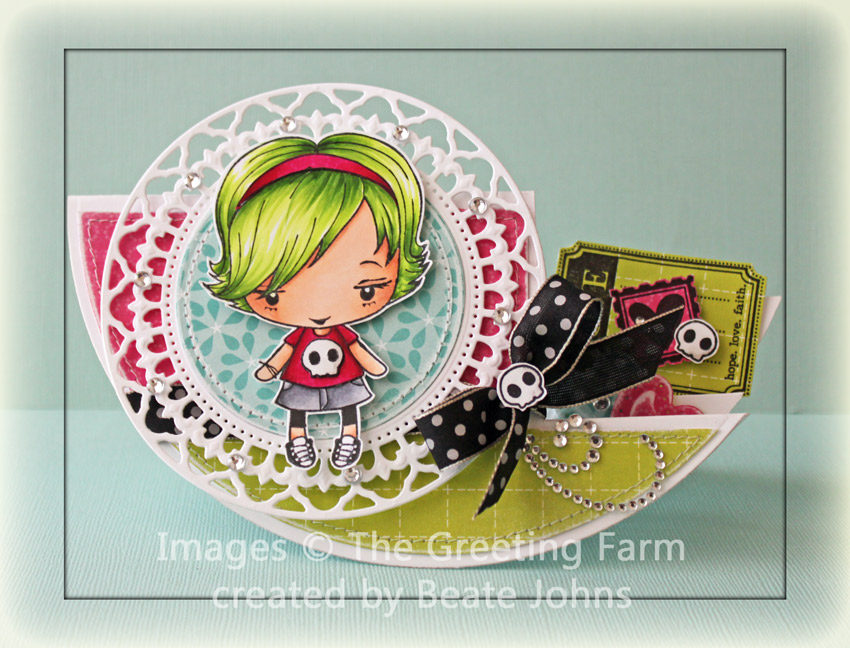
A 3″ x 4 1/2″ piece of Phantom Pink Paislee patterned paper was adhered to a 4 1/2″ x 5 1/4″ piece of the same paper pack. The bottom corners were rounded and a border was stitched around the edge. White organdy Ribbon was colored with Copic Marker V06, tied around the horizontal strip  and topped with a black button, tied on with Silver Curling Ribbon.

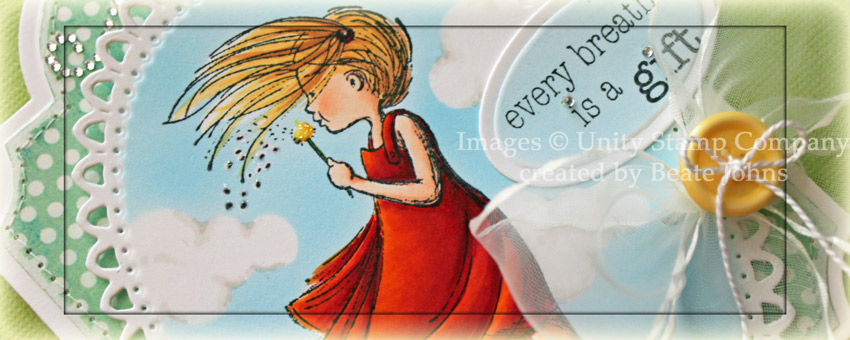
A sentiment from Whimsy’s Friendship ticket sentiments was stamped in Tuxedo Black Memento Ink on a piece of white cardstock, cut and embossed with Spellbinders retired Five in one Tag die. The embossed part was colored with the markers I used for the image background. The sentiment was tied to the bow with the same curling ribbon that was used for tying on the button.

The layers were adhered to the card base, a 4 3/4″ x 11″ piece of white cardstock folded in half. Parts of a Finesse Rhinestone Swirl were adhered above and underneath the the bow and three Baby Bling Rhinestones on the lower left corner finish off the card.

Thanks so much for stopping by! Have a wonderful day!
Hugs and smiles

This week the Flourishes team focuses sets that are about to retire. Once they are sold out, you won’t be able to order them anymore.

I love this image from Country Home set and decided to combine it with the Card Creator dies. Two pieces of white cardstock were cut and embossed with a Matte A and Matting B Basics die, another with the second largest Fancy Weave Card Creator die. The image from Country Home was stamped in Tuxedo Black Memento Ink on the smallest rectangle and colored with Copic Markers (Grass: YG11, YG13, YG17    Trees: YG61, YG63, YG67, E33, E37   Road: E40, E42, E43, E44    Flowers: V17 Sky: B0000, B000, B00). It was first adhered to the slightly bigger layer, then to the weave layer.

The flowers on the side of the road are purple and my sky is blue….so it fits for this week’s Timeless Tuesday challenge.

Next I cut a piece of patterned paper with another Matte basic die and another piece of white cardstock, with the next size up Matte die. More white cardstock was cut and embossed with the biggest Fancy Weave die. The layers were adhered on top of each other and then added to a 4″ x 5 1/4″ card base, created out of cardstock from the Color Made Easy Emerald Coast collection.

Part of a sentiment from Cottage Home was stamped on white cardstock, cut and embossed with one of the Tailor-Made Classic Tag set dies.  Sky Blue Color Made Easy ribbon was tied into a bow. The sentiment was tied on it with embroidery floss and a button.

Check out what my fellow design team member have created today:

Thanks so much for stopping by! Have a wonderful weekend!
Hugs and smiles

My post today on Spellbinders Paper Arts Blog is all about how I create the clouds behind my images.  I hope you have time to check it out.

For my image I used the darling new Unity Image (created by Phyllis Harris) called Every Breath. It was stamped in Tuxedo Black Memento Ink on Neenah Solar White cardstock. The image was colored with  Copic Markers (Dress; YR04, R24, R29, R39 – same colors I used for last weeks poppies   Skin: E000, E00, E01, E11    Hair: Y21, Y23, E33    Sand: E31, E33).

I hope you have time to check it out. Thanks so much for stopping by! Have a wonderful day!
Hugs and smiles

Hello and welcome to Day 6 of our August Rubber & Die Release Showcase!

On Wednesday (22 August) Whimsy Stamps released this month’s new rubber designs, new Shapeology dies, new digital papers and new Shape EZ by TLC. From then until 28 August the Whimsy Stamps DT and Special Guests are showcasing these fabulous new goodies with a daily mini blog hop and I am part of today’s hop!

Each mini blog hop has a new release prize hidden somewhere along the way and you have 24hrs to enter each prize draw.

To be entered into today’s mini blog hop prize draw, be sure to leave a comment on ALL of the DT’s posts listed below by 12.00PM EST tomorrow. All winners will be announced on the Whimsy blog on 29 August.

For my card today I used another darling new Wee image called Hazel. She was stamped in Tuxedo Black Memento Ink once on Neenah Solar White cardstock and was colored with  Copic Markers (Skin: E50, E51, E53    Hair: Y23, E97, E99   Hat/dress: C3, C5, C7, C9   Buckles: Y15, Y17, YR15   Skirt/(Dragon): YG01, YG03, YG17, (R00)   Broom: E35, E37, E27, Y23, Y26, Y28). The image was cut and embossed with the largest of the Marvelous Square Nestabilities die. The image was masked, cloud masks were adhered over the square and the background was airbrushed with Copic Marker with B66, B69.  The clouds were then shaded with Copic Marker W00, W0 and W1.

A piece of Echo Park The Apothecary Emporium paper was cut and embossed with the third smallest of the Grand Square Nestabilities die. The edges and sanded and were stitched. Another piece of Apothecary Emporium paper was cut, sanded and stitched before it was adhered crooked on the bigger layer. Glitter green tulle was cut into about 1 1/2″ wide strip and tied around the the layer before they square was adhered to the card base, white cardstock cut and embossed with the third smallest Grand Scallop Square Nestabilities die.

Letters from the new sentiments new Spell It Out set were stamped on white cardstock, airbrushed with Copic Marker B66, cut out, layered on white cardstock and cut out again. They were adhered to the right hand side of the image, above the tulle bow. Parts of a black Finesse Rhinestone swirl and aFancy Waves! Border Bling finish off the card.

To take a peek at today’s fabulous new release creations, please click on the links below…

Remember that the entire new release is available to buy right now from the Whimsy Stamps store along with all your Whimsy favourites.

Thanks for stopping by and don’t forget to pop back to the Whimsy blog tomorrow for more new release creations! Have a wonderful Sunday!
Hugs and smiles

Hello and welcome to Day 5 of our August Rubber & Die Release Showcase!

On Wednesday (22 August) Whimsy Stamps released this month’s new rubber designs, new Shapeology dies, new digital papers and new Shape EZ by TLC. From then until 28 August the Whimsy Stamps DT and Special Guests are showcasing these fabulous new goodies with a daily mini blog hop and I am part of today’s hop!

Each mini blog hop has a new release prize hidden somewhere along the way and you have 24hrs to enter each prize draw.

To be entered into today’s mini blog hop prize draw, be sure to leave a comment on ALL of the DT’s posts listed below by 12.00PM EST tomorrow. All winners will be announced on the Whimsy blog on 29 August.

For my sample I stamped the darling new Wee Image Summer Fairy in Tuxedo Black Memento Ink once on Neenah Solar White cardstock. It was colored with  Copic Markers (Hair: Y23, E97, E99 Skin: E0000, E00, E01 Wings: YG0000, YG11, BG10, BG11, BG13 Dress: YG01, YG03, YG17 Shoes: C00, C1, C3 Ground: YG01, YG03, YG17, E33, W3) and cut and embossed with the smallest Grand Decorative Oval Nestabilities die. The image was masked, the die placed back over the cardstock and the open space was  sponged first with Tumbled Glass, then with  Broken China Distress Ink.

I kept the rest of the card pretty simple. It’s such a cute image, it didn’t need much. Two pieces of Pink Paislee Spring Jubilee Patterned Paper were cut to a 4″ x 5 1/4″ layer. The two bottom corners were rounded, the edges sanded and stitched. May Arts ribbon was tied around the layers before the image layer was adhered over it with dimensional adhesive. The layers were adhered to a card base, a 4 1/4″ x 11″ piece of Solar White cardstock, folded in half with the bottom corners rounded.

Letters from the new Spell It Out set were stamped on white cardstock, cut out and adhered to the left side of the image oval for a sentiment. Part of a silver Finesse Rhinestone Swirl and a piece of Fancy That! Border Bling on the top right finish off the card.

To take a peek at today’s fabulous new release creations, please click on the links below…

Remember that the entire new release is available to buy right now from the Whimsy Stamps store along with all your Whimsy favourites.

Thanks for stopping by and don’t forget to pop back to the Whimsy blog tomorrow for more new release creations! Have a wonderful Sunday!
Hugs and smiles

I can’t believe my guest designer stint with Kraftin’ Kimmie Stamps is already over. Time seems to fly now that school has started again. Today’s challenge is to create a scene. I made it easy on myself and used a stamp that already looks like a scene when you stamp it. It’s an image from Emilie Goulet’s new Too Cute to Spook 1 set.

The image was stamped in Tuxedo Black Memento Ink once on Neenah Solar White cardstock and once onEcho Park Hello Summer patterned paper. Both images were colored with Copic Markers (Pumpkins: YR00, YR12, YR15, YR18, R08   Leaves: G20, G21, G24, G28   Skin: E000, E00, E01   Shirt: E41, E42, E43, B91, B93, B95  Pumpkin Eyes: E50, E51, E53).  The image on the patterned paper was cut out with scissors and adhered to the image on the white cardstock, which was cut and embossed with a Card Creator Matte B die.

The images were masked and a circle mask was adhered to the upper left corner. With the die still on the cardstock, the image was sponged with Broken China and Chipped Sapphire Distress Inks . Next the circle mask was taken off and that area was sponged with Mustard Seed Distress Ink. The layer was then adhered to black cardstock, cut and embossed with a Card Creator Matte A die.

A piece of Hello Summer paper was cut and embossed with another Matte B die, sanded and stitched to a piece of black cardstock, cut and embossed with the next larger Matte A die. Ribbon was tied around the layers before the image layers were adhered with dimensional adhesive. The layers were adhered to the card base,  5 1/2″ x 8 1/2″ cardstock from the Emerald Coast Color Made Easy collection.

A sentiment from the set was stamped on a piece of Solar White cardstock, cut and embossed with the smallest of the Nested Lacey Pennants dies. Four rhinestones from a Sleek Strips Silver Rhinestones were adhered underneath the sentiment before the pennant was adhered to the upper left corner. Part of a Finesse Rhinestone Swirl above the bow finish off the card.

I hope you have time to check out the other designers samples and participate in the challenge. Have a wonderful weekend!
Hugs and smiles

Today the Flourishes Design Team focuses on the stamp set Poppy Patch. For my sample  stamped several images of that set in Tuxedo Black Memento Ink on white cardstock. It was cut and embossed with the third largest Card Creator Matting B Basics die and the Out of the Box technique. The image was colored with Copic Markers (YR04, R24, R29, R39, G20, G21, G24, G28) and sponged first with Tumbled Glass, then with Broken China Distress Ink.

The image was adhered to black cardstock, cut and embossed with the third largest of the Matte A Basic dies.  Ribbon was tied around the lower part of the layers. Another piece of white cardstock was cut and embossed with a Tailor-Made Classic Tag Template die. The center of the tag was sponged with Broken China ink and a sentiment from Passion Flower was stamped in it’s center. The tag was tied to the bow along with a button. The card base was cut and embossed out of white cardstock with the largest of the Card Creator Faux Postage dies.

Check out what my fellow design team member have created today:

Thanks so much for stopping by! Have a wonderful weekend
Hugs and smiles

I have a quick tutorial on the Spellbinders blog today showing off how to use M-Bossabilities (or any other embossing folder) to create a Pergamano look.

I hope you have time to hop on over an check it out. Have a wonderful day!
Hugs and smiles

Today’s tutorial on Splitcoaststampers is for a Side Step card variation, the Circular Side Step card. For my sample I stamped the darling Ebony from The Greeting Farm in Tuxedo Black Memento Ink once on Neenah Solar White cardstock, once on pink paper from Echo Parks Summer Days collection. The shirt and head band were colored on the patterned paper, the rest on the white cardstock with Copic Markers (Hair: YG01, YG03, YG17   Skin: E000, E00, E01, E11   Shirt/Headband: RV25, RV29, RV69   Skirt: C3, C5, C7   Skull: W00, W1). The headband and shirt were cut out and adhered to the image stamped on cardstock, which was then cut out as well.

White cardstock was cut and embossed with the largest Splendid Circle die and blue patterned paper from Summer Days with the third largest  Standard Circle Nestabilities die. The patterned paper was sanded, then stitched to the Splendid Circle center. Ebony was adhered over the circles with dimensional adhesive.

The card base was cut and embossed out of white cardstock with the second largest Grand Circle Nestabilities die. Patterned paper strips from the Summer Days paper pack were adhered together, cut and embossed with that same circle die. The edges were sanded and then the paper was cut on the embossed edge. For the cuts on the right hand side I placed the paper over the card base and used a stylus to trace the cut lines. Next I cut 1/8″ along that traced line. The edges were stitched before the paper was adhered to the card front. Ribbon was tied around the edge of the first step and tied into a bow. A skull from the shirt was stamped again on white cardstock, cut out and adhered over the bow. The image was adhered over the big part of the card base with dimesional adhesive and part of a Finesse Rhinestone Swirl was adhered under the bow.

The tag and postage image from Tea-rrific clear stamp image were stamped in black ink on Summer Days paper and cut out. They were adhered on top of each other with another skull image and taped the the back step of the card.

In the center two pieces of Summer Days paper were cut and embossed with the bigger heard from the new Folk Art die set. The edges were sanded. The hearts were adhered to the center step and topped with two of the bigger rhinestones from a Sleek Strips Silver Rhinestones pack.

Here is a video for the visual learner:

[youtube]https://www.youtube.com/watch?v=HlALbWF4MRc[/youtube]

Thanks so much for stopping by! Have a wonderful day!
Hugs and smiles

It’s time for Kraftin’ Kimmie August Release Blog hop. For my card I used another Candy Girl. This image is called Fabby Flossy. She was stamped on Tuxedo Black Memento Ink on Neenah Solar White cardstock. It was cut and embossed with the second largest of the Resplendent Rectangles die. It was colored with Copic Markers (Cotton Candy: BG10, BG11, BG13   Skin: E000, E00, E01 ,E11   Hair: Y32, E33, E37, E39   Dress/Roses: RV10, R81, R83, R85   Ground: W0, W1, W3, W5, W7, W9) and  sponged with Antique Linen Distress Ink.

A piece of Pink Paislee Spring Jubilee patterned paper was cut and embossed with the largest Resplendent Rectangle die. The embossed edges were sanded and then cut along the embossed line. It was adhered to the card front, white cardstock with the same die.

A sentiment from the set was stamped in Tuxedo Black on white cardstock that had been cut and embossed with an insert die from the Fancy Framed Tag One. It was sponged with Antique Linen before it was adhered to the upper right hand side of the image. Rhinestones from a Sleek Strip Silver Rhinestones pack finish off the card.

Check out the creations from the other design team members. Just click on the froggy image to find the links.


Thanks so much for stopping by! Have a wonderful day!
Hugs and smiles

© 2012 fresh & fun Suffusion theme by Sayontan Sinha