flowersoftufproudofyouwide.jpg

Flower Soft has a great new product out…well actually two. But the latest product review on SCS was all about the new Flower Soft Ultra Fine. I really like the much finer new product. It makes it easier to use on more detailed stamps. The other new product is their beautiful new line of stamps called Moments in Time

flowersoftufproudofyou.jpg

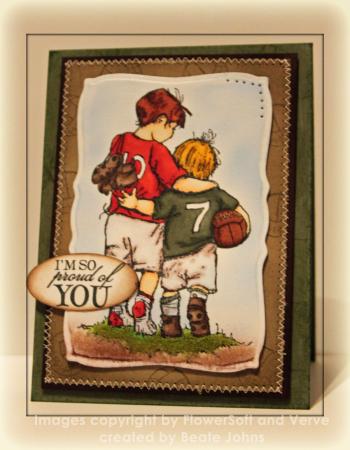
My image is from the Moments in Time stamp set called Man of the Hour. This image reminds me so much of my two boys when they were little. Kids grow up way to fast, don’t they? The image was stamped in Tuxedo Black Memento ink on Neenah White cardstock and colored with Copic Markers (Shirt and socks: R24, R27, R29, BG93, BG96  Ball E33, E34, E35  Shorts: E70, E71, C00 Grass: YG01, YG03, YG05  Skin: E50, E51, E53  Shoes: E44, E47  Hair: Y18, Y26, YR28, E15, E8). The image was cut out and embossed with Curved Rectangle Nestabilities. While leaving the die on, I airbrushed the sky with Copic Marker B24.

On the ground I added Flower Soft Ultra Fine Sand, for the grass I used the Flower Soft Ultra Fine Sage. The sand color was to light, so after the glue dried, I airbrushed that area with E47. The top right of the image was paper pierced.

The card base is a 4 1/4″ x 11″ piece of Always Artichoke cardstock folded in half. A 3 1/2″ x 4 7/8″ piece of Kraft cardstock was stamped with the ball from the same set in Frayed Burlap Distress ink. The edges were sponged with the same ink. That layer was stitched to a 1/4″ bigger piece of Chocolate chip cardstock. The stitched layers were attached to the card front with dimensionals.

The sentiment is from Verve’s Dare To Be You stamp set. It was stamped in Tuxedo Black ink on Neenah White cardstock, punched with SU’s large oval punch and sponged with Frayed Burlap ink before it was adhered to the image.

The rubber stamps from Flower Soft come as unmounted rubber sheets along with Kling-on cushion. I created a quick tutorial on how to mounting unmounted rubber stamps. I used my Flower Soft image for the photo tutorial and a Stamp’n Whiskers image for the video tutorial that you can see here:

[youtube]https://www.youtube.com/watch?v=WW6U-vPnqpU[/youtube]

 unityowltreatbagcoverwide.jpg

I am sorry I have been so quiet. First winter hit us hard, then my oldest had exam and last week I was at the CHA. I hope to post again regular starting today! CHA was so much fun! It was great to meet up with so many fellow stampers. I had a wonderful time!

Yesterday’s tutorial on SCS was for a Treat Bag Cover.

unityowltreatbagcoverbeate.jpg

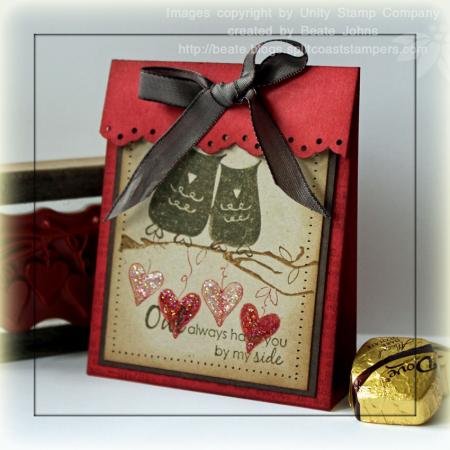
I started with a 3 3/8″ x 10 1/2″ piece of Riding Hood Red cardstock. It was stamped with Unity’s Giving it all Meaning background in Fired Brick Distress ink. The edge of the flap was punched with SU’s Eyelet Border Punch and the edges were sponged with Fired Brick.

I inked up the branch from the Believe in Fairytales Store kit with Vintage Photo Distress ink, the hearts with Fired brick and stamped the image on a 2 7/8″ x 3 1/2″ piece of Kraft cardstock. The owls are from the same stamp set and were stamped in Walnut Stain distress ink. The edges were spongedwith Vintage photo ink. The Kraft cardstock was adhered to a 1/4″ bigger piece of Chocolate Chip cardstock. The edges of that had been sponged with Walnut Stain.

To finish the image off I sewed around the edges with a sewing machine (without thread) and added Stardust Stickles over the hearts.

Here is a video for the visual learner:

[youtube]https://www.youtube.com/watch?v=a9DFs8svcGo[/youtube]

fllcwaterliliesfspuwide.jpg

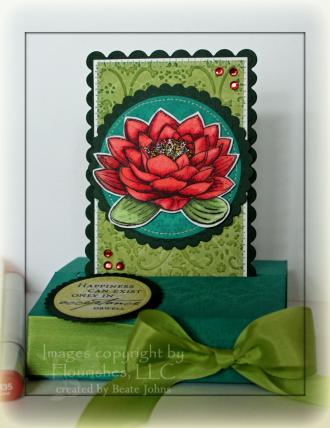
In yesterday’s newsletter the “Tutorial you might have missed” was the Free Standing Pop-Up card. I used the colors from this weeks color challenge to create this sample for the video tutorial. I had been waiting for a chance to use Flourishes Waterlily stamp set. I the color combo (Hunter, Celery, Bermuda Bay and optional pink) were perfect for the image.

fllcwaterliliesfspopupopen.jpg

The card base was created out of a 4 1/4″ x 11″ piece of textured Bermuda Bay cardstock. The strip had been stamped with the Vintage Wallpaper background stamp in Broken China distress ink. Each edge was sponged with the same ink.

The tag base was cut with long rectangle Nestabilities out of Hunter cardstock. It was sponged with Pine Needles Distress ink. A 2 11/16″ X 5″ piece of Certainly Celery Patterns Designer Paper was embossed with the Textile Texture Cuttlebug embossing folder and first sponged with Shabby Shutters, then with a hint of Pine Needles Distress ink. It was sewn to a slightly bigger piece of Whisper White cardstock. Lippy Red Kaiser Rhinestones on the top right and bottom left corner finish off that layer.

The main image was stamped in Tuxedo Black on Neenah White cardstock and colored with Copic Markers (R32, R35, R39, G40, G82, G85, Y15, Y18) and cut out. Star Dust Stickles were added to the flower center. The flower was adhered to a Bermuda Bay circle with dimensionals. The circle had been stamped with Vintage Wallpaper in Broken China, the edges were sponged and it was sewn to a slightly bigger scallop circle out of Handsome Hunter cardstock. Both circles were cut with Petite Circle Nestabilities.

The sentiment was stamped in Tuxedo Black Memento ink on Neenah White cardstock. It was cut with Circle Nestabilities and layered on a slightly bigger scallop circle that had been cut with Petite scallop circle Nestabilities. The edges of the white circle had been sponged with Shabby Shutter ink and a smaller waterlily had been stamped over the sentiment in the same color. Celery Silk ribbon was tied around the card base.

Here is a video for the visual learner:

[youtube]https://www.youtube.com/watch?v=wzeqvwyxyss[/youtube]

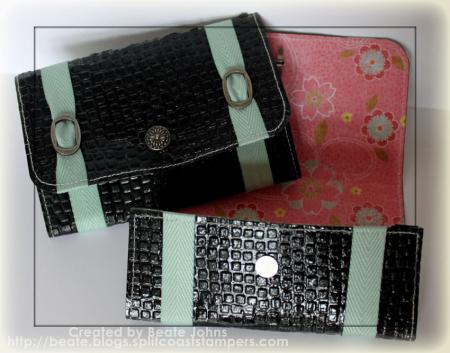
Today’s tutorial on splitcoaststampers is written by Yvonne Hagane. She is showing us how to create a Faux Leather Wallet.

fauxleatherblackmmseye.jpg

For my sample I used black cardstock and My Mind’s Eye Pretty Please paper. The twill is from Martha Stewart, the ribbon buckles from retired Stampin’ Up! hardware.

I really like this project, but I have a bit of trouble with the magnetic closure to stay on. Even when using Crystal Effect to adhere them.

Here is a video for the visual learner:

[youtube]https://www.youtube.com/watch?v=eq_R0ZfpO8w[/youtube]

For yesterday’s Weekly Inkling I shot a video for the Ghirardelli Box tutorial. I can’t believe I forgot to take a picture of the finished product. It’s super dark and gloomy here today, so I will post the video without the image.

[youtube]https://www.youtube.com/watch?v=h10USCySmC0[/youtube]

The stamp set used in this video is Verve’s Hearts on Fire. I love how you can stamp over  the outlined heart fits perfectly over the patterned heart image . The punch used for the border under the flap is Stampin’ Up!’s Eyelet Border punch. The patterned paper is from My Mind’s Eye Bella Bella Paper Pack.

Have a Happy and save New Year’s Eve! Hugs and smiles

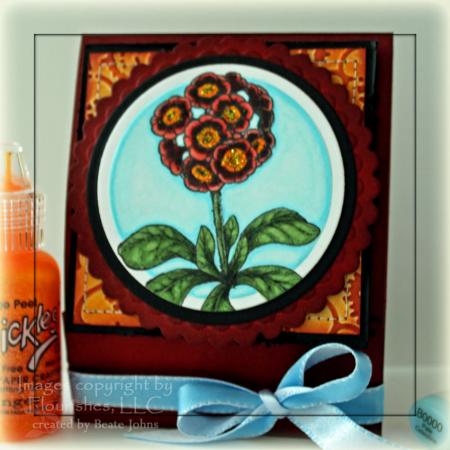
flourishesprimrosematchbook.jpg

Today’s tutorial on SCS  was written by Cindy Coutts. She is showing us how to create a matchbook holder for Post-It Note Pads. My video tutorial shows how to create a matchbook for regular sized pads, Cindy’s shows how to create a cover for 3″ x 4″ pads.

flourishesprimrosembbeate.jpg

My matchbook base is a 3 1/8″ x 9 1/4″ piece of Ridinghood Red cardstock. The edges were sponged with Aged Mahogany Distress ink and the strip was scored at 3 3/8″, 3 3/4″ and 7 3/4″. The edge of the short flap was punched with Stampin’ Up!’s Eyelet Border punch.

The image is from Flourishes new Calendar Set 1. It was stamped in Tuxedo Black Memento Ink on Neenah White cardstock and cut out with Circle Nestabilities. I left the Nestabilities die on and colored the image with Copic Markers (B00, B000, Y35, Y38, G40, G82, G85, G94, R32, R35, R39).  It was layered first on a slightly bigger circle out of black cardstock, then on a scalloped circle cut out of Ridinghood Red.

Orange Peel Stickles was added over the center of the flower, Crystal Effect over the rest of it to make it stand out more. May Arts double sided satin ribbon finishes off the holder.

Here is a video for the visual learner:

[youtube]https://www.youtube.com/watch?v=SbjlZvIRZhE[/youtube]

I am sorry I have been so quiet. I haven’t  stamped this week. The kids are home and it’s hard to work when they are there. Instead we hang out or I have my nose in a book (Sword of Truth series, Terry Goodkind).

In Germany we open present Christmas Eve. Since the kids stopped believing in Santa, our family follows that tradition. That way Rick and I get to sleep in Christmas morning. You got to love that. Anyway….since for me Christmas is today, I thought I wish you a Merry Christmas. I really appreciate all your kind words and support you give me! May your Christmas be merry and filled with family, friends and love!

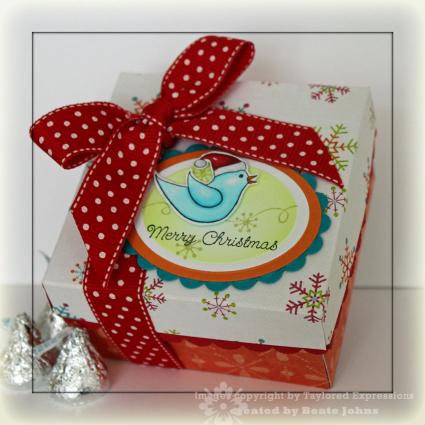
I have a 3″ x 3″ notecard box to share with you that I created for a video tutorial last week.

taylorwingsofjoy3x3box.jpg

The box base is created out of Real Red cardstock. The patterned paper is from the My Mind’s Eye Colorful Christmas Paper Kit.

The adorable bird and sentiment are from Taylored Expressions Set Wings of Joy. The bird was stamped in Tuxedo Black Memento Ink on White Neenah paper, colored with Copic Markers and cut out. The oval frames were cut with Oval Nestabilities out of White Neenah, Pumpkin Pie SU and Turquoise Core’dinations cardstock. The white oval was air brushed with a light YG Copic Marker. The swirl and snowflakes are also from the set Wings of Joy and were stamped in Shabby Shutter Distress ink. The sentiment was stamped in Tuxedo black ink. I attached the bird to the sentiment layer with dimensionals. The layers were attached to the box also with dimensionals. Stampin’ Up!’s red polka dotted ribbon finished off the box.

Here is a video for the visual learner:

[youtube]https://www.youtube.com/watch?v=s6fL_mjJvb0[/youtube]

I am sorry I am so quiet. The weather has been gray here for most of the last three weeks. It is getting to me. I bet you can tell in my videos how gloomy it is outside. Although…when I shot this video it was sunny.

After Thanksgiving I started with a stiff neck. That got REALLY bad last weekend. It felt like I got a nasty cramp in my neck everytime I moved. So not fun. Now the pain is back to just being a stiff neck. I am getting old! Although I just blame it all on cold weather. LOL

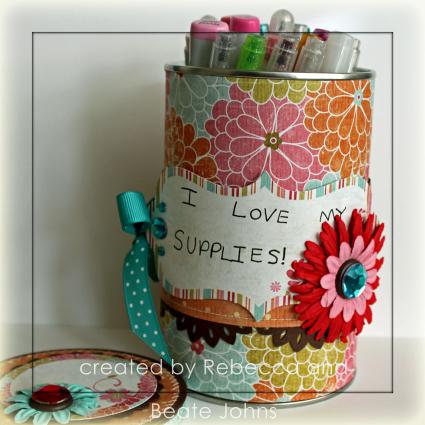
Yesterday’s tutorial on SCS was written by Sharon Johnson. She created a beautiful Altered Tin. The one I created for the video tutorial is a bit on the funky side. Rebecca helped me with the label and decoration. It will be on her desk holding her pens and other “supplies”.

rebeccapencilholder.jpg

What can I say? She likes pens, pencils and markers at least as much as her Mom does. 🙂 The paper used for the can is from My Mind’s Eye Pretty Please kit. We added some Prima Daisy Doodles and Kaiser Rhinestones to finish off the can.

Here is a video for the visual learner (please excuse the loud amulance at the end of the video. I live very close to the hospital on base and I didn’t have another can to alter):

[youtube]https://www.youtube.com/watch?v=EaCwAuanBwA[/youtube]

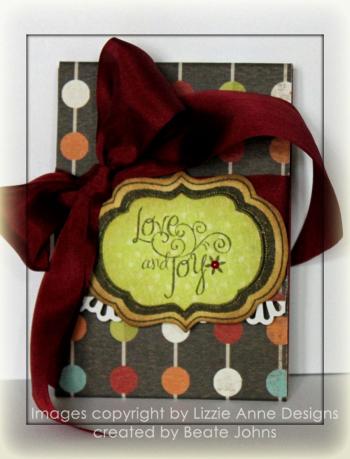
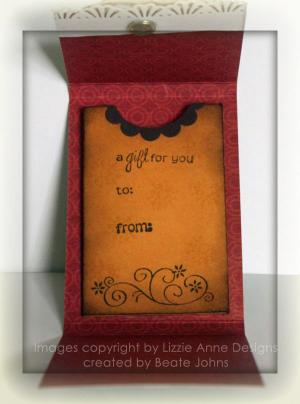
ladgiftcardholderclosed.jpg

We needed a video for the gift card holder tutorial for last weeks newsletter. For my sample I used Penny Lane My Mind’s Eye Paper and Lizzie Anne Designs Love & Joy Labels.

ladgiftcardholderinside.jpg

Here is a video for the visual learner:

[youtube]https://www.youtube.com/watch?v=4VzUHsnOLoo[/youtube]

Taylor is hosting a Blog hop today. We all decorated one of her Perfect Package Card Boxes.  I love how sturdy those boxes are and that they are collapsible.

In honor of Black Friday and Cyber Monday (the two biggest shopping days of the year!), Taylored Expressions is offering 15% off everything in the store! Just use the promotional code TEBlackFriday upon checkout to receive the discount. You don’t want to miss up to 50% off all JustRite products, Buy 2 Get 1 Free on Tiny Twinkles, and the new TE Shirts & Aprons!

techristmasbelssingsbox.jpg

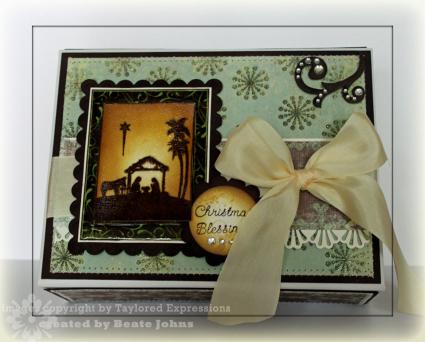
I am a bit stuck on the Laundry Line paper from My Mind’s Eye lately. It’s so pretty and it sparkles!!!  A 4 1/2″ x 6 1/8″  piece of Tenny Wishes paperwas stitched to a 1/4″ bigger piece of sponged Chocolate chip cardstock. The 1 3/4″ x 6 1/8″ piece of Proud print paper was stitched to a slightly wider piece of Very Vanilla cardstock that had been punched with a Martha Stewart Border punch. Ivory Satin ribbon from May Arts was tied around the strip before it was taped to the card box front.

The image is from Taylor’s Christmas Blessings. It was stamped in Espresso Adirondack ink on Vanilla cardstock twice. I cut the inner image out of one  of the images, sponged it with Scattered Straw and Vintage Photo Distress ink and brushed it with Clear Rock Candy Distress Paint.

I colored the frame of the other image with Copic Marker G82 and covered it with Crystal Effect. It was layered on a Chocolate Chip scalloped rectangle cut and embossed with Nestabilities.  The sentiment is also from Christmas blessings. It was stamped in Espresso ink, cut out with a 1 3/8″ circle punch, sponged with Scattered Straw and Vintage photo and layered on a sponged Chocolate Chip scallop circle. To finish up the front, I inked up a Maya Road scroll with Espresso ink and added Clear Kaiser Rhinestones as well as Tiny Twinkles.

techristmasblessingsinside.jpg

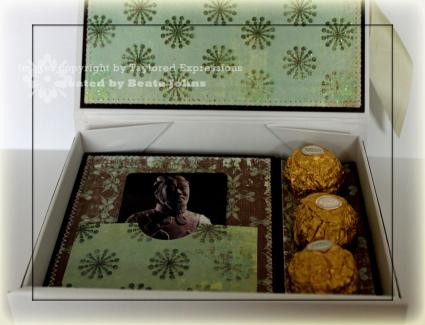
The back of the lid was layered matching the outside. On the inside of the box I created a spot for three Rocher chocolates, as well as a gift card holder. A matching card will be placed of the gift card.

techristmasblessingscrackle.jpg

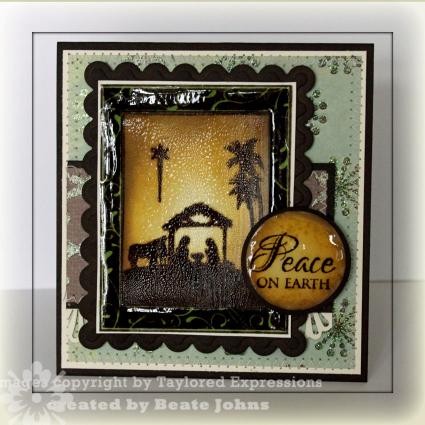
The Chocolate Chip card base measures 4″ x 8 1/2″ and was folded in half. The rest of the card is pretty much the same as the box front. It looks a lot better IRL, but it was hard to photograph with all the Crystal Effect and Crackle Paint.

Please check out these blogs to see what the other girls created with these awesome boxes:

Alex Maldonado
Amy Rohl
Bev Gerard
Charmaine Ikach

Cindy Haffner
Debbie Olson

Donna Baker
Jami Sibley
Jen del Muro
Jen Tapler
Jenn Balcer
Jennifer Buck
Jessica Diedrich

Joan Ervin
Joanne Basile
Linda Duke
Lori Craig
Rose Anne Reynolds
Sankari Wegman
Sharon Harnist
Sherry Cheever

Taylor VanBruggen

Have a happy and safeBlack Friday! Hugs and smiles

© 2012 fresh & fun Suffusion theme by Sayontan Sinha