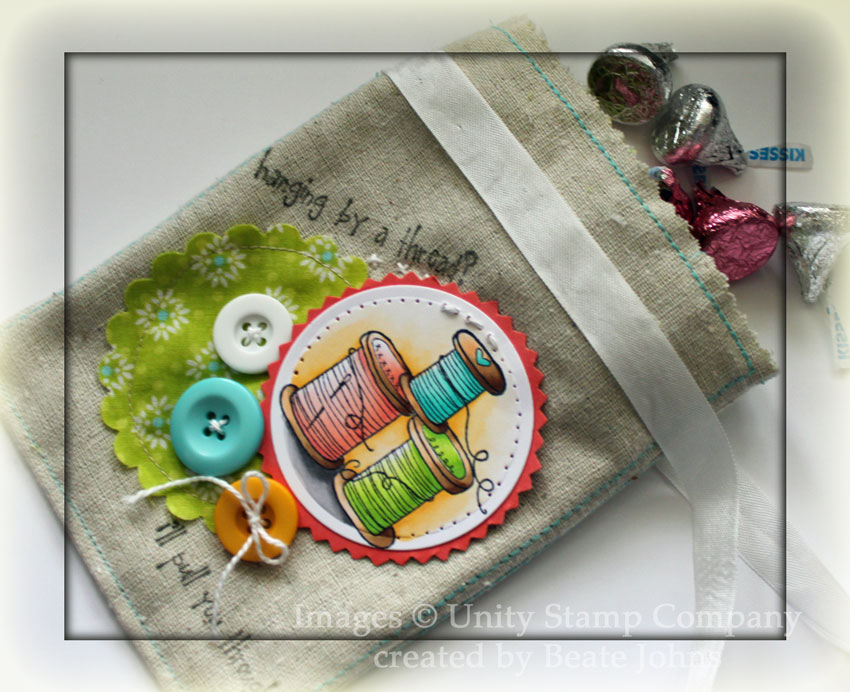
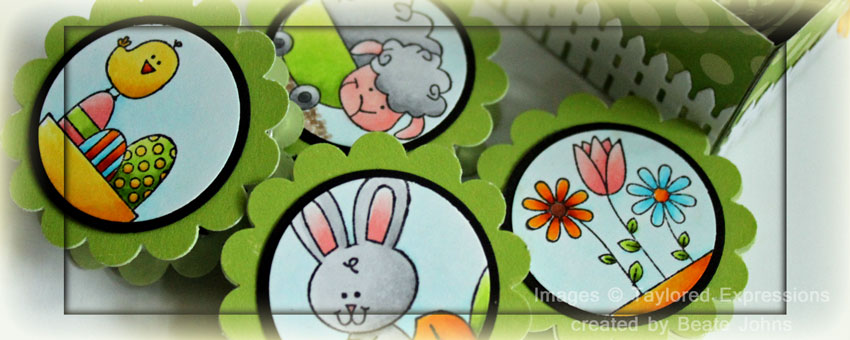
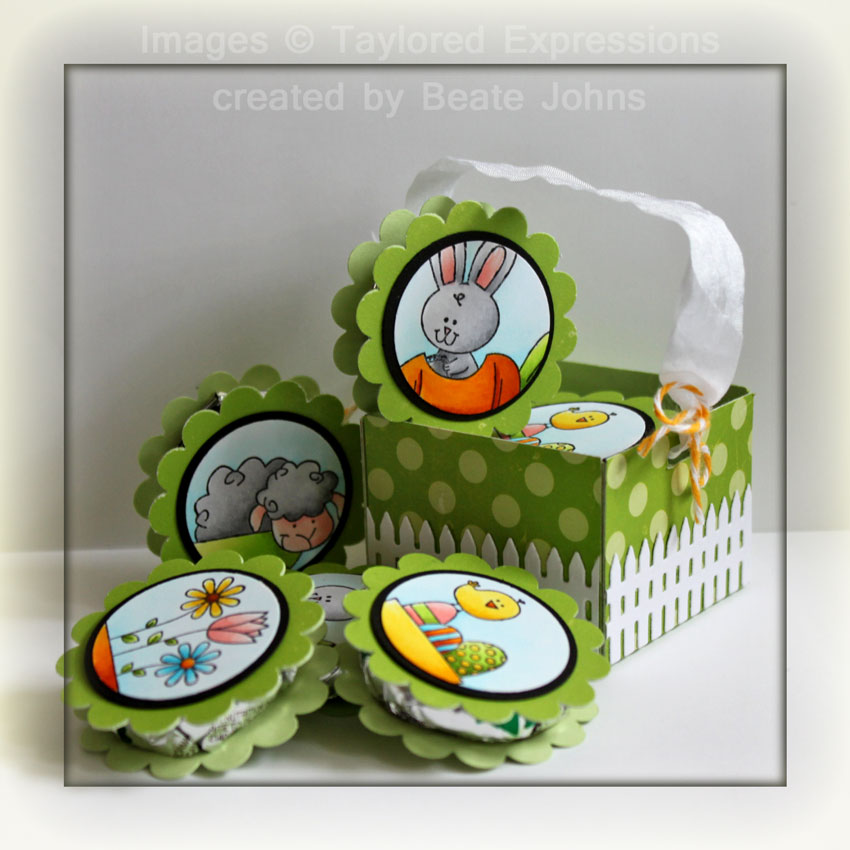
Yesterday’s tutorial on Splitcoast was the cutest little project. I had to make one right away. I made it matching to the card posted on Monday.

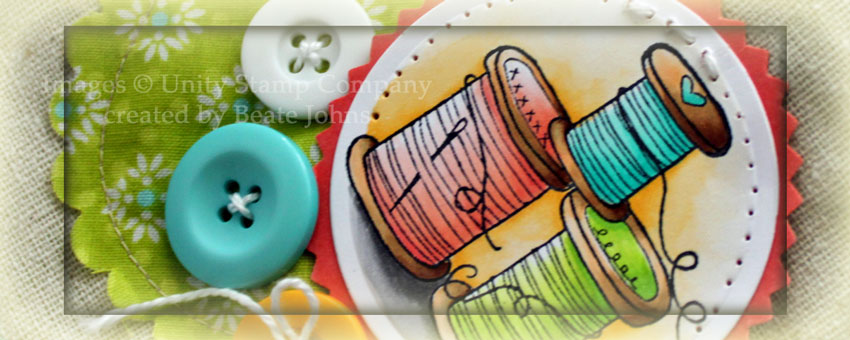
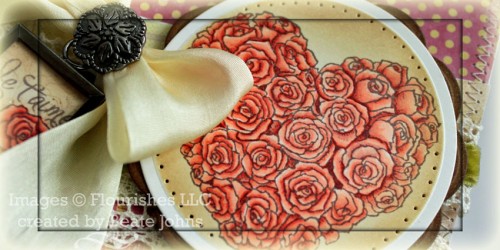
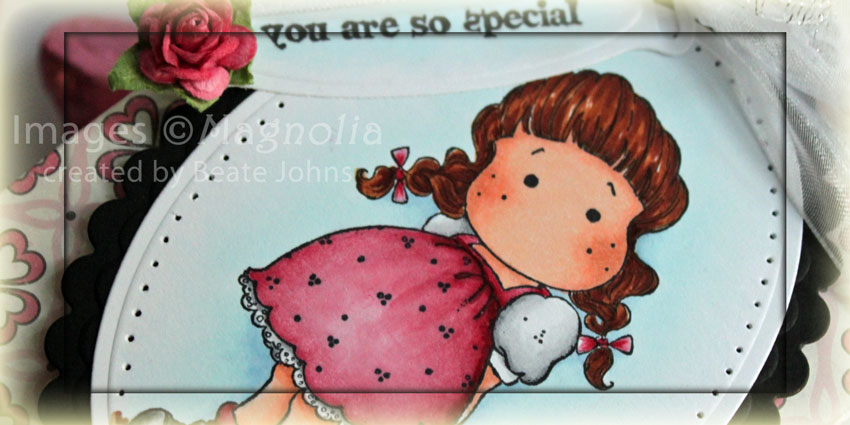
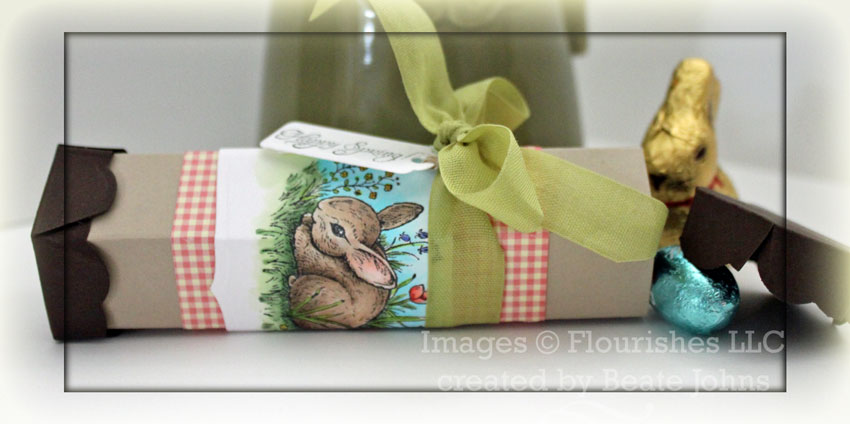
The bunny image from Spring is Sprung was stamped on a 5″ wide piece of Solar White cardstock with Tuxedo Black Memento ink. The bottom of the image panel was cut and embossed with a Grand Label 4 Nestabilities die. The image was colored with Copic Markers ( Bunnies: E40, E41, E42, E43, E44, R00, R20    Grass: G20, G21, G24   Tulips: R11, R12, R14, YG21, YG23, YG25   Bell Flowers: B63, B66    Tiny Flowers: Y13, Y17    Sky: B0000, B000, B00).

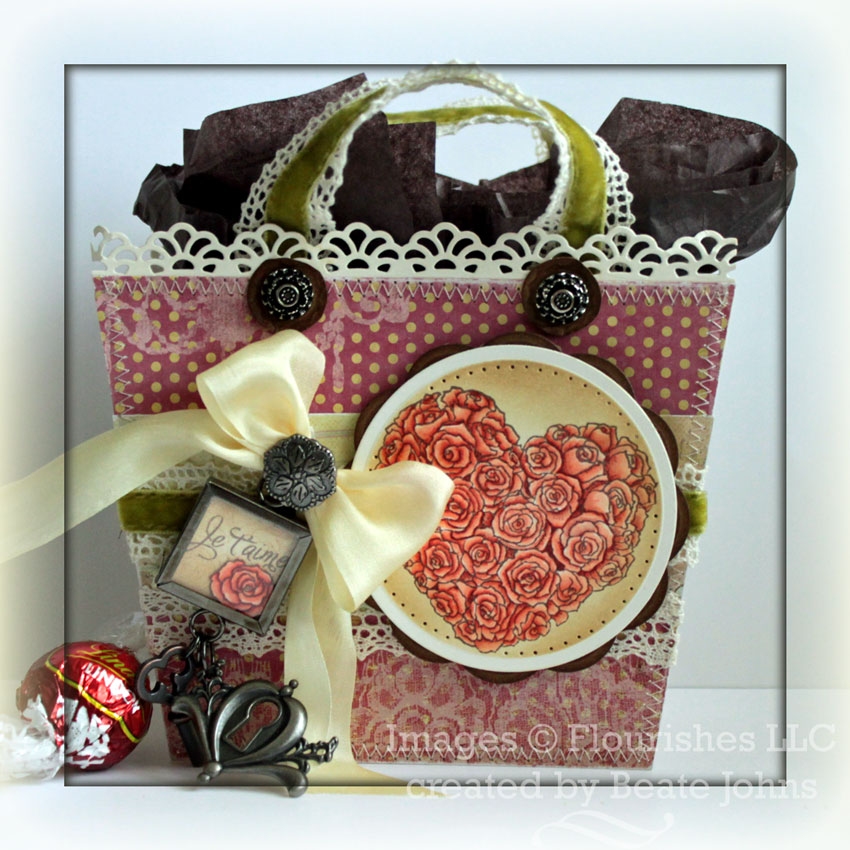
Then the image was scored just like the treat tube base. For the base I used a 5″ square of Kraft cardstock, topped with a 3″ x5″ piece of Pink Paislee’s Hometown summer paper.

The caps were created out of Canyon Brown cardstock, cut and embossed with a Blossom Nestabilities die.

Green Linen Ribbon was tied around the top of the image layer. A tag was cut out of Solar White cardstock with the smallest of the Tag  Trio dies, a sentiment from Spring has Sprung was stamped on it with Tuxedo Black ink. It was tied to the bow with Linen thread.

Thanks so much for stopping by! Have a wonderful day!
Hugs and smiles

Today’s Waltzingmouse sketch challenge is to create mini cards. How fun is that? As inspiration for my cards I used this Tuesday’s Trigger challenge.

I LOVED the color combo and composition of the piece and kept it all. My cards are tiny 3″ x 3″ cards. They were created out of 3″ x 6″ Solar White cardstock folded in half.

I started by stamping a label from Very Vintage Label No. 4 in Broken China Distress Ink.  I stamped a different sentiment into the frame of each card with the same ink. All sentiments are from the Fancy Phrases set.

The border stamp from Victorian Frippery was stamped in Spiced Marmelade on the right edge of the cards. The left side of the card was embossed with the Damask Embossing Folder.

After making the cards I decided to make a matching note card tote, following this tutorial on Splitcoaststampers.  It’s simple and almost like the cards. I did use a bigger frame from the Very Vintage Label set and added a little scroll on the top and bottom of the sentiment.

The top corners of the box were punched with the Crop-a-Dile Cloud Chomper. The handle is a 3 /4″ x 8″ piece of Pumpkin pie. It was adhered to the outside of the box with silver brads. This way you can move the handle back while adding the cards into the box (this cool hint was posted under the video tutorial).

Here is a video (with a different box that I will share later) for the visual learner:

[youtube]https://www.youtube.com/watch?v=VR-Ht2uOyv4[/youtube]

Did you know that Unity has their own challenge blog now? How cool is that. They are hosting a monthly challenge. This month is to called Fashion Forward. Since I didn’t have any dress stamps from Unity, I pulled out an the Kit of the Month from April last year and used the thread spools from that set.

I stamped the image in Tuxedo Black Memento Ink on Neenah Solar White cardstock and cut and embossed with Classic Circle Nestabilities. The image was colored with Copic Markers ( R00, R11, R12, R14, BG11, BG32, BG13, YG00, YG01, YG03, YG06, E50, E51, E55, E57, E59, T1, T3, T5, YR30, 1/5th YR31, YR31), adhered to a piece of Cameo Coral cardstock which was cut with pinking scissors.

I joined Pinterest yesterday and got addicted really fast. I saw this project (you have to be logged in to view it). I pulled the fabric that I have at home out and created a little bag.

I stitched on a few buttons, stamped a sentiment from the same Kit on the bag with black Palette Ink and stitched seam ribbon on the upper edge of the bag so it could be tied shut.

I hope you have fun to play the Unity challenge with me! If you need an invite to Pininterest let me know and I’ll invite you. But I warn you! It’s highly addictive and you can’t blame me when the day just gets away from you!

Hugs and smiles

For this weeks Tutorial from the Archives in the Weekly Inkling I chose Cambria‘s darling Tiny Treat Basket. I had seen Taylored Expressions Hello Spring set when it came out next week and thought that set would be perfect for the basket. The set and the beautiful new fence die. Boy did I have fun creating this sample.

To start out with the basket was created out of a 5″ square of Neenah Celery Cardstock.  I used Echo Park Little Boy Paper to decorate the sides of the basket. The fence was cut out of Neenah Solar White cardstock and adhered to the bottom of each of my patterned paper pieces. The handle was created with White Crinkled Ribbon (May Arts) and tied together with Lemon Drop Twine.

I searched everywhere to find round candy that is wrapped not in pouches, but still in a circular shape. What’s up with York for wrapping them differently now? Thank goodness Pearson is still wrapping them the good old fashioned way.

To decorate the patties I punched scallop circles (Stampin’ Up! Punch) out of Celery cardstock and another pattern from Echo Park’s Little Boy collection. I adhered the paper over the cardstock to give it more stability. A chocolate piece was adhered between two scalloped pieces. In the center of the top I adhered a 1 3/8″ black cardstock circle.

Next I inked up each image of the train stamp individually with my Tuxedo Black Memento Ink Dew Drop and punched them out with the 1 1/4″ circle punch (also Stampin’ Up!).  The images were colored with Copic Markers ( Bunny and Sheep: N0, N1, N3, R00, R20, R21,   Carrot: Y17, YR15, YR18, YG01, YG03, YG17,    Bird: Y13, Y15, Y17,    Eggs: Y17, YR15, YR18,   Boo, B01, B04,   R00, R20, R21,   YG01, YG03, Y15, Y17    Bird Wagon: Y13, Y15, Y17,    Flowers: Y17, YR15, YR18, E99, E37,  R00, R20, R21, Bo0, B01, B04, Y17, YR15,  Flower Wagon: Y15, Y15, YR15) and adhered over the black circles.

Here is a video for the visual learner:

[youtube]https://www.youtube.com/watch?v=EDahfzhs-5k[/youtube]

Thanks so much for stopping by! Have a wonderful day!
Hugs and smiles

I created this Pull Treat for as one of three projects for my next class at Simply Scrapbooks (03/12/11).  I adore this image from Stampavie and had a lot of fun coloring her.

The image was stamped in Tuxedo Black Memento Ink on Neenah Solar White cardstock. It was cut and embossed with Petite Oval Nestabilities die and colored with Copic Markers (Shirt: YR20, YR21, YR23, E33, Pants: B91, B93, B95, B97, Hair: E99, E19, E18, Skin: E000, E01, E02, Flowers: B60, B63, B66, Leaves: G40, G82, G85, Shoes: R05, R08, E09). It was layered on a piece of Canyon Brown cardstock cut and embossed Scallop Oval Nestabilities dies and the edges were paper pierced.

The pull treat base was created out of Graphic 45 Once Upon a Springtime paper. A 2 1/4″ wide strip of the same paper pack was adhered to the pouch. May Arts Crochet Lace was adhered to the end of the green paper layer. The image was adhered over the strips with dimensionals.

A slot was punched for the ribbon and May Arts Brown Organdy Ribbon was used for the pull treat. It was tied into a bow. That was topped with a Recollection Pearl brad.

The sentiment is from JustRite Stampers new set Fancy Tags. It was stamped on Solar White cardstock and was cut and embossed with Spellbinders tag dies specifically designed for JustRite Stampers. Two Silver Kaisercraft Rhinestones were added to the tag and a Prima Flower with a Recollection brad center finish off the pull treat.

Thanks so much for stopping by! Have a wonderful day.
Hugs and smiles

For today’s Tutorial from the Archives in the weekly inkling I picked Jenn‘s darling 2, 5, 7, 10 box. For my sample for the video, I chose JustRite Stampers new Birdhouse set. I love birdhouses and these are a lot of fun to color.

I stamped the image in Tuxedo Black Memento Ink on Neenah Solar White cardstock, cut and embossed it with Classic Circle Nestabilities and colored it with Copic Markers ( House: B32, B34, N4, Y43, Y35, Y38, YR14,    Leaves: YG01, YG03, YG17,    Flowers: R02, R05, R08,   Flower Center: YR14, E09, E29,    Dragonfly: Y11, YG03,   Background shading: W00, W1, self mixed marker 1/5th YR31, 4/5th Blending solution).

The image was adhered to a bigger piece of Basic Black cardstock, cut and embossed with scallop circle Nestabilities. The edges of the image layer were paper pierced.

For the box base I chose a 8 1/2″ x 11″ piece of Kraft cardstock. The flap was decorated with a 3″ long strip of white cardstock cut with the Faux Crochet Die-namics Border die. The box is held close with May Arts Gingham ribbon.

A 2″ x 3″ strip of Echo park “For the Record” paper was adhered to the box front before the image layers were taped down with dimensionals. Silver Recollection pearls finish off the box front.

The sentiment is from JustRite Stampers new Cling stamp set called Fancy Tags. It was stamped in Tuxedo Black Memento ink on Neenah Solar White cardstock that had been cut with JustRite’s new Spellbinders dies called Nested Sentiment dies.

Here is a video for the visual learner:

[youtube]https://www.youtube.com/watch?v=ja17pV1MQ0Y[/youtube]

Thanks so much for stopping by! Have a wonderful day.
Hugs and smiles

I created this box for the Inspiration Challenge on Splitcoaststampers last Saturday.  4″ coasters were covered with Pink Paislee Sweetness paper. Holes were punched with a Crop-a-dile and the pieces were laced together with White Organdy Ribbon. Three sides were just tied into a knot, the one on the front left was tied into a bow and topped with a Pink Paislee Brad.

The sentiment is from the new Technique Tuesday stamp set Talking in Circles. It was stamped in Brilliance Coffee Bean ink on the same paper that was used to cover the coasters. The image was cut and embossed with Classic Circle Nestabilities,before it was layered to a piece of Neenah Solar White cardstock that was cut and embossed with Beaded Circle Nestabilities. A Recollection Rhinestone swirl finishes off the box front.

Here is a video for the visual learner:

[youtube]https://www.youtube.com/watch?v=27qqSsdmwCw[/youtube]

Thanks so much for stopping by! Have a wonderful day!
Hugs and smiles

It’s the first Monday of the month, which means it is time for the next Bring Back Beautiful Challenge.


Love is a beautiful thing, so let’s honor it in our card making! Use the color red, have a feel of romance, or adorn your creation with hearts – the choice is yours! Link up your Bringing Back Beautiful Challenge card here to enter. If you upload to SCS, please use the keyword BBB07. You have until February 28th to enter! As we unveil our challenge for next month, we’ll share our True Beauties – those card makers who wowed us with this challenge! Winners will be featured on the Flourishes Blog and will receive a True Beauty blog button to display proudly on their blog!

For my sample I chose the new Heart & Flowers stamp set. I used the Rose Heart and stamped it in Rich Cocoa Memento Ink on Natural White cardstock. It was cut and embossed with Classic Circle Nestabilities and colored with Copic Markers (R01, R02, R05). The edges were sponged with Antique Linen and Vintage Photo Distress Ink. It was layered on a piece of Kraft cardstock that had been cut and embossed with a large scallop circle Nestabilities die and sponged with Vintage Photo distress ink.

I stamped the sentiment from Hearts & Flowers in Rich Cocoa Memento Ink on a 7/8′ square of Classic White cardstock. The heart was inked with Vintage Photo Ink and stamped in third generation over the sentiment. The edges of the square were sponged with the same ink and entered in the 1″ square Memory Frame. I noticed I didn’t have 1″ Memory Glass, so I added a few more 7/8″ paper squares and added a 7/8″ square of Acetate to the front and back of the frame.

My project is a Genie bag. The base is a 4″ wide lunch bag. I cut it down to a 4″ square and created covers for the bag. The paper is from 7 Gypsies Victoria pack. The sides started out with a 4 1/4″ x 5 1/2″, then cut the sides in angles 5/8″ in. A piece of Classic White cardstock was cut with Faux Crochet Dienamics die and adhered on the upper edge of the sides.  May Arts Velvet ribbon was adhered over a horizontal strip of the same paper pack. The heart was adhered over the ribbon with dimensionals. A bow was tied out Ivory Silk ribbon from May Arts. It was topped with an Antique Brad from Stampin’ Up!

The sentiment frame as well as a key and charm from Tim Holtz Idea-ology line were attached to the bow with jump rings.

Two strips of the velvet lace ribbon were used as handles. They were adhered to the inside of the side pieces. Next small circles were cut out of Kraft paper, sponged with Vintage Photo ink and topped with smaller Antique Brads.

Here is a video for the visual learner:

[youtube]https://www.youtube.com/watch?v=y6h1XJRszYk[/youtube]

Be sure to check out the rest of the team by clicking on over to see…..


Thanks so much for stopping by! Have a wonderful day!
Hugs and smiles

For today’s post I created a One Sheet Box, so I could shoot a video for this technique.  It’s another great way to give away little treats for Valentine’s Day and the box is made really easy and fast.

To decorate the box I stamped the new Tilda with a small gift in Tuxedo Black Memento Ink on Neenah Solar White cardstock. It was cut and embossed with a Petite Oval Nestabilities die and colored with Copic Markers (Skin: E00, E01, E11, Hair: E99, E39, E18, Skirt and Socks: R81, R83, R85, R89, Shirt: N0, N1, N3, Shoes: N3, N5, N7, Tag: E30, E31, E33, Ground: E31, E33, E35, Background: B0000, B91).

The image was adhered to a piece of Black cardstock that had been cut and embossed with a Petite Scallop Oval Nestabilities die. The edges of the image oval were paper pierced.

The box base was created out of a sheet of October Afternoon Ducks in a Row patterned paper, that had been cut down to 8 1/2″ x 11″.

Two 3 3/4″ strips of white cardstock were cut with MFT Faux Crochet Dienamics Border die and adhere to the edge of the middle panels of the box. Two holes were punched in the upper edge of the back middle panel with my Crop-a-dile. May Arts white Organdy Ribbon was tied through it.

The image was attached to the box front with dimensionals. Curling Sparkling Silver Ribbon was tied around the bow and twirled around the back of a paint brush to wind it up a bit.

A tag was cut and embossed out of Neenah Solar White cardstock and the sentiment was stamped on it with Tuxedo Black Memento ink. A bit of color was added with Copic Marker B0000. It was tied to the bow with the Curling Silver ribbon. The slot on the left of the tag was covered with a Recollections flower that had been colored to match with Copic Marker R81.

Here is a video for the visual learner:

[youtube]https://www.youtube.com/watch?v=M24jWiq47Jc[/youtube]

Thanks so much for stopping by! Have a wonderful day!
Hugs and smiles

For today’s “Tutorial from the Archive” in the Weekly Inkling I picked the Pull Treat Tutorial. It’s a great project to give away small treats on Valentine’s Day.

I stamped Pure Innocence‘s Bunch of Blossoms in Tuxedo Black Memento Ink on Neenah Natural White cardstock and cut and embossed it with Petite Oval Nestabilities. I stamped the girl again on October Afternoon Thrift Store paper, cut out the dress and shaded it with Copic Markers (E74, E77).

The rest of the girl was also colored with Copic Markers (Shoes: E74, E77, Ground: E70, E71, E73, E74, Flowers: R32, R35, Hair: YR31, Y26, E97, Butterfly: YR31, R32, R35) and the oval was airbrushed with Copic Marker B91. The dress was paper pieced over the colored image.  Stardust Stickles was added over the butterfly for some extra sparkle.

The Treat pouch base was created out of a 6″ x7″ piece of October Afternoon’s Daydream Paper, the Belly Band is the same paper (other side) measuring 2 1/2″ x 6″. May Arts Crochet Lace was wrapped around the bottom edge of the Belly Band.

The image was layered on a piece of Neenah Canyon Brown cardstock and adhered to the pouch with dimensionals. The hole for the ribbon was punched with Stampin’ Up!’s ribbon slot punch. The ribbon is Brown Organdy ribbon by May Arts. The bow was aged by heating it with my heat gun.

The sentiment is from the same stamp set. It was stamped on a tag cut with retired Spellbinder tag and airbrushed with Copic Marker YR31. A Recollection flower was colored with Copic Marker R32 and layered on top of a Prima Flower before both were attached over the tag. Recollection Rhinestone swirls finish off the Pull Treat.

Pull Treat Video Tutorial:

[youtube]https://www.youtube.com/watch?v=no-hDWEmcFE[/youtube]

Paper Piecing Video Tutorial:

[youtube]https://www.youtube.com/watch?v=aDQObTxqQjI[/youtube]

Thanks so much for stopping by! Have a wonderful day! Hugs and smiles

© 2012 fresh & fun Suffusion theme by Sayontan Sinha