I created this Pull Treat for as one of three projects for my next class at Simply Scrapbooks (03/12/11).  I adore this image from Stampavie and had a lot of fun coloring her.

The image was stamped in Tuxedo Black Memento Ink on Neenah Solar White cardstock. It was cut and embossed with Petite Oval Nestabilities die and colored with Copic Markers (Shirt: YR20, YR21, YR23, E33, Pants: B91, B93, B95, B97, Hair: E99, E19, E18, Skin: E000, E01, E02, Flowers: B60, B63, B66, Leaves: G40, G82, G85, Shoes: R05, R08, E09). It was layered on a piece of Canyon Brown cardstock cut and embossed Scallop Oval Nestabilities dies and the edges were paper pierced.

The pull treat base was created out of Graphic 45 Once Upon a Springtime paper. A 2 1/4″ wide strip of the same paper pack was adhered to the pouch. May Arts Crochet Lace was adhered to the end of the green paper layer. The image was adhered over the strips with dimensionals.

A slot was punched for the ribbon and May Arts Brown Organdy Ribbon was used for the pull treat. It was tied into a bow. That was topped with a Recollection Pearl brad.

The sentiment is from JustRite Stampers new set Fancy Tags. It was stamped on Solar White cardstock and was cut and embossed with Spellbinders tag dies specifically designed for JustRite Stampers. Two Silver Kaisercraft Rhinestones were added to the tag and a Prima Flower with a Recollection brad center finish off the pull treat.

Thanks so much for stopping by! Have a wonderful day.
Hugs and smiles

For today’s Tutorial from the Archives in the weekly inkling I picked Jenn‘s darling 2, 5, 7, 10 box. For my sample for the video, I chose JustRite Stampers new Birdhouse set. I love birdhouses and these are a lot of fun to color.

I stamped the image in Tuxedo Black Memento Ink on Neenah Solar White cardstock, cut and embossed it with Classic Circle Nestabilities and colored it with Copic Markers ( House: B32, B34, N4, Y43, Y35, Y38, YR14,    Leaves: YG01, YG03, YG17,    Flowers: R02, R05, R08,   Flower Center: YR14, E09, E29,    Dragonfly: Y11, YG03,   Background shading: W00, W1, self mixed marker 1/5th YR31, 4/5th Blending solution).

The image was adhered to a bigger piece of Basic Black cardstock, cut and embossed with scallop circle Nestabilities. The edges of the image layer were paper pierced.

For the box base I chose a 8 1/2″ x 11″ piece of Kraft cardstock. The flap was decorated with a 3″ long strip of white cardstock cut with the Faux Crochet Die-namics Border die. The box is held close with May Arts Gingham ribbon.

A 2″ x 3″ strip of Echo park “For the Record” paper was adhered to the box front before the image layers were taped down with dimensionals. Silver Recollection pearls finish off the box front.

The sentiment is from JustRite Stampers new Cling stamp set called Fancy Tags. It was stamped in Tuxedo Black Memento ink on Neenah Solar White cardstock that had been cut with JustRite’s new Spellbinders dies called Nested Sentiment dies.

Here is a video for the visual learner:

[youtube]https://www.youtube.com/watch?v=ja17pV1MQ0Y[/youtube]

Thanks so much for stopping by! Have a wonderful day.
Hugs and smiles

I created this card for the Sketch as well as the Color challenge on Splitcoaststampers this week.  The darling image is from JustRite Stampers new cling stamp set called In the Moonlight. I stamped the image in Tuxedo Black Memento Ink on Express It! Blending card and cut it out with the Out of the Box technique and the Curved Rectangle Spellbinders dies.

The image was colored with Copic Markers (dress: R27, R29, R39, R89, YR21, YR25, YR17, Wings and blossoms: BG10, BG11, Moon: own blend 1/5th YR31, 4/5th Blending Solution, YR31, Skin: E000, E01, E02, Wood: E71, E74, E79, Hair: E37, E39, E59), masked and airbrushed with Copic Marker BG75. I adhered the image to a bigger piece of Canyon Brown cardstock and cut around it by hand for a slightly bigger layer. Stardust Stickles were added over the wings.

Two pieces of Webster’s Pages patterned paper were stitched to a 3 3/4″ x 5″ piece of Neenah Solar White cardstock and adhered to a 3/16″ bigger piece of Canyon Brown cardstock. May Arts Organdy Ribbon was tied around the layers and topped with a Recollection Brad. Recollection Rhinestone swirls were added to the top right corner of the layers before the image was adhered on top with dimensionals.

A tag was cut out of Neenah Solar White cardstock with the Fancy Tag die from Spellbinders. The center was airbrushed with Copic Marker BG11 before an image from In the Moonlight was stamped on it with Tuxedo Black Memento Ink. Two Silver Kaisercraft Rhinestones were attached to the tag to finish it off.

The inside of the card is super simple. I stamped the image in Stormy Sky Distress ink on the lower right hand corner of a 3 3/4″ x 5″ piece of Neenah Solar White cardstock. It was stitched to a 3/16″ bigger piece of Canyon Brown cardstock before the layers were adhered to the inside of the card.

Thanks so much for all your sweet comments yesterday. They made my day!
Have a wonderful weekend!
Hugs and smiles

Again, sorry I have been so quiet. While I had a good start this week getting back to stamping, I was hit with another migraine in the middle of the week. I don’t know why I have those so often here in Ohio. Six more month and we will be moving….hopefully that will help.

For this treat box I started out with a 8 1/4″ square or Red Riding Hood cardstock, scored at 2 3/4″ and 5 1/2″.  The squares and triangles were layered first with Neenah Solar White cardstock, then with Fancy Pants Hot Chocolate Patterned Paper. The triangle parts of the box were decorated with White and Riding Hood Red cardstock cut and embossed with Fanciful Holiday Spellbinder dies.

May Arts Brown Organdy Ribbon was threaded through gold eyelets, tied into a bow and aged with a heat gun. A white piece of cardstock was cut and embossed with the smallest Nested Heart die and sponged with Aged Mahogany Distress ink and adhered to a bigger piece of Riding Hood Red cardstock, cut and embossed with the middle Nested Heart die. Small Snow Kaisercraft Pearls finish off the heart embellishment.

The sentiment is from JustRite Stampers Victorian Nested Frames. It was stamped in Walnut Stain Distress ink on White cardstock. The sentiment was cut and embossed with a tag die from Spellbinders. The tag was sponged with Aged Mahogany ink and tied to the bow with gold thread.

Here is a video for the visual learner:

[youtube]https://www.youtube.com/watch?v=vvMMIY3NHKc[/youtube]

Have a wonderful weekend! Hugs and smiles

Sorry I am so quiet lately. It seems I am only on the road lately driving kids to and from school and after school activity. But I have something to share with you today. Not only another video perfect for the colder season, but some personal news as well.  We heard that we are probably moving to Tinker AFB in Oklahoma. That’s in Oklahoma City. While it is not Florida or Texas as we were hoping, it is closer to the South then we are now. And it is in the States. There were a lot of overseas jobs open. With the boys both finishing High School next place we go, I am excited that we will stay in the States for that.

Yesterday I created a video tutorial for the Dryer Sheet Technique. I love this technique for winter cards. It adds such a soft look to your image. For my sample I used Gina K.’s Winter Wings stamp set. I stamped one of the birds in Tuxedo Black Memento Ink on Neenah Solar White cardstock and colored it with Copic Markers (Bird: E42, E43, E44, YR23, YR24, N7, N9, Branch: E44, E47, E49, snow: B000). I tried to color the bird like a Chickadee. The image was cut and embossed with Classic Circle Nestabilities and airbrushed with Copic Marker B000.

I then ran the image face down through my Xyron, added a used dryer sheet over it and cut it again with the same Circle Nestabilities die I had used earlier. Next I rubbed Cosmo Crystal Crafty Sparkles all over the image and tapped off the access.

A piece of 7Gypsies Nottinghill patterned paper was cut and embossed with Label 1 Nestabilities, sanded and then adhered to a black card stock piece cut and embossed with the next size Label 1 Nestabilities die. The image was adhered to both layers with dimensionals.

The card base is a 4 1/4″ x 8 1/2″ piece of Pure Luxury Kraft card stock folded in half. It was embossed with Kassie’s Brocade Cuttlebug embossing folder. The raised image was highlighted with Adirondack Snow cap pigment ink.

A 2 1/4″ x 4 1/4″ piece of 7Gypsies Nottinghill paper was adhered in the center of the card base and ribbon from Gina K.’s latest TV kit was tied around the paper strip. The ribbon was tied into a bow and topped with a black Basic Grey button tied on with black waxed Linen.

The sentiment is also from Winter Wings. It was stamped in Tuxedo black Memento Ink on a 3/4″ x 1 7/8″ piece of Neenah Solar White card stock. A background border from Vintage Borders was stamped in second generation (stamped off once) Stormy Sky Distress Ink, two of the corners were rounded and the edges were sponged with Stormy Sky. The sentiment was attached to the card with one of Tim Holtz Memo Pins. To finish the card off three Snow Kaisercraft Pearls were added to the upper right hand side.

Here is a video for the visual learner:

[youtube]https://www.youtube.com/watch?v=A1JUgGHL118[/youtube]

Thanks so much for stopping by! Have a wonderful day! Hugs and smiles

Welcome to the 11th week of JustRite Stampers’  Wednesday feature, 12 Weeks of Christmas Blog Hops!  Every Wednesday up until Thanksgiving some of your favorite designers will be joining some of the JustRite design team for a series of Christmas blog hops, showcasing JustRite’s entire Christmas Collection of stamps!  Don’t forget that JustRite has some Christmas stamps in their newly released CLING line of stamp sets, too — you can find them HERE.  This week, the designers joining the JustRite design team are the Stampers Dream design team and a few other special guests!

For the month of November, we thought we would switch gears a little and throw in some holiday gift ideas using your JustRite stamps, so be watching for those, too, on November’s hops!  And in celebration of JustRite’s Christmas Blog Hops, they have a huge surprise for you — take 25% off All JustRite Original Christmas Stamps now through November 29 — Don’t forget to tell Santa!

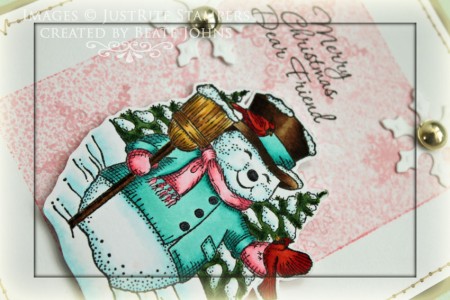
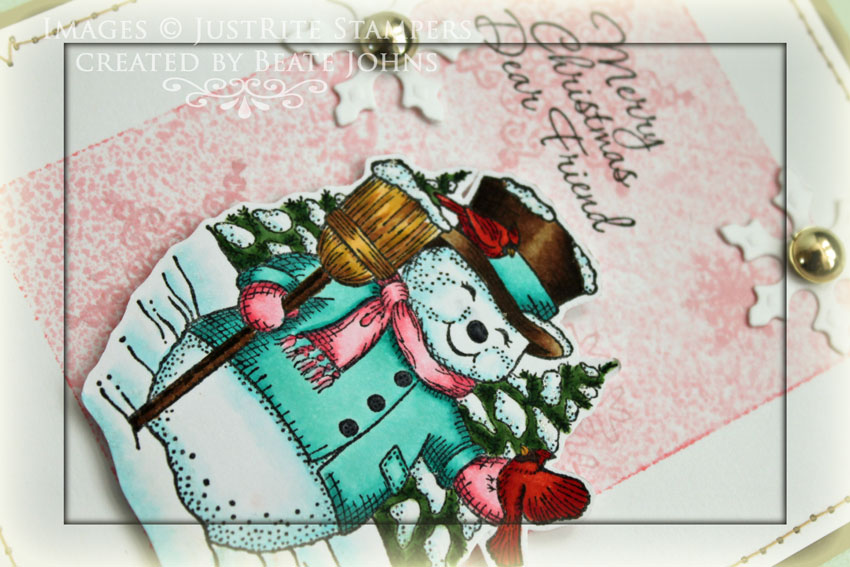
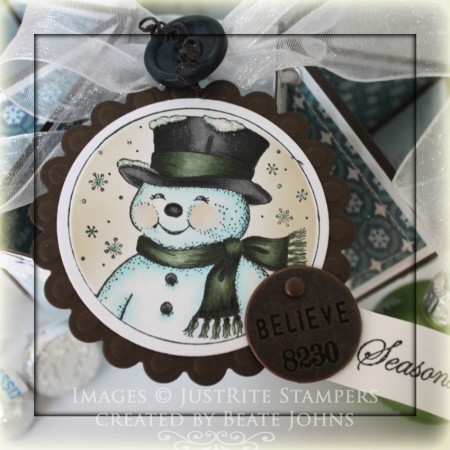
For my sample today I used the new Sparky the Snowman Cling stamp set. I love how the new cling stamps stamp. I stamped the snowman in Tuxedo Black Memento Ink on X-Press It! Blending card and colored it with Copic Markers (hat/broom stick: E57, E59, E49, broom top: Y23, Y26, Y28, E33, Cardinal: R08, R27, R29, R39, YR24, C7, Scarf, Mitten: Rv10, RV13, RV14, Jacket: BG11, BG13, BG15, BG18, Snow: B0000, B000, B00, Trees: YG63, YG67, G28). I colored over the snow with a clear Spica pen and cut out the snowman.

I used the largest of the three JustRite Stampers Acrylic blocks and inked it up with Spun Sugar, then the edges with Worn Lipstick Distress ink. Next I sprayed the block with water from my Mini Mister and then stamped it on a 3 3/4″ x 4 5/8″ piece of Neenah Solar White cardstock. Snowflakes from the Sparky set were stamped over the background with Spun Sugar ink.  The layer was stitched to a 3/16″ bigger piece of Neenah Canyon Brown cardstock.

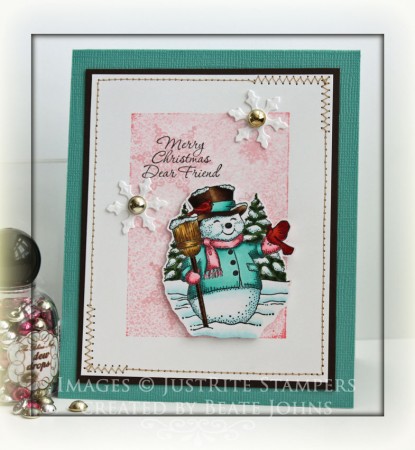
The card base is a 4 1/4″ x 11″ piece of Core’dination cardstock folded in half. The sentiment is also from the Sparky set. It was stamped in Tuxedo Black Memento Ink on the left hand side of the background. Sparky was adhered over the background in dimensionals. To finish the card I added two small snowflake cut and embossed with the Snowflake Borderabilities. They were topped with Dew Drops.

This background technique has been popping up all over the internet. Lydia told me about it first after she had made a card with it during a SCS shoe box swap from Lisa Spangler. I thought it would be fun to have a tutorial for it on Splitcoast. You can check it out here.

Here is a video for the visual learner:

[youtube]https://www.youtube.com/watch?v=yJaOxVOjQt8[/youtube]

Please visit these designers’ blogs to see what fabulous JustRite Christmas inspiration they have for you on the hop today!

JustRite Inspiration Blog
Beate Johns

Debbie Olson

Sankari Wegman
Tosha Leyendekker

Kazan Clark

Lori Craig

Amy Sheffer

Stephanie Kraft

Denise Marzec

Michele Kovack

Carolyn King

Barb Schram

Jenn Balcer

Cindy Lawrence

Angela Barkhouse

Christina Fischer

Heidi Blankenship

Mariana Grigsby

Terre Fry

Teresa Kline

Thanks so much for stopping by! Have fun checking out everyone’s wonderful creations! Hugs and smiles
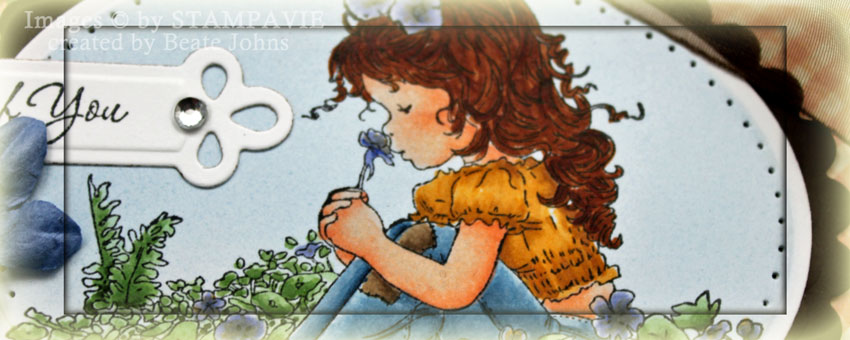
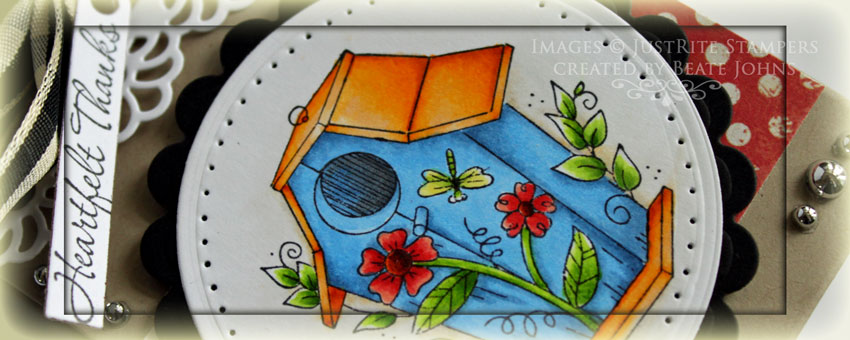
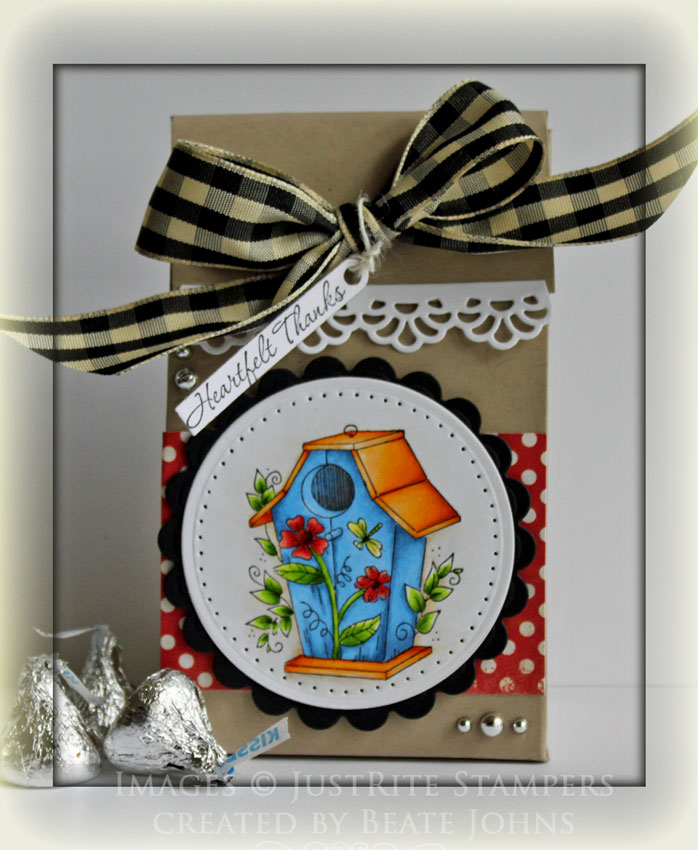
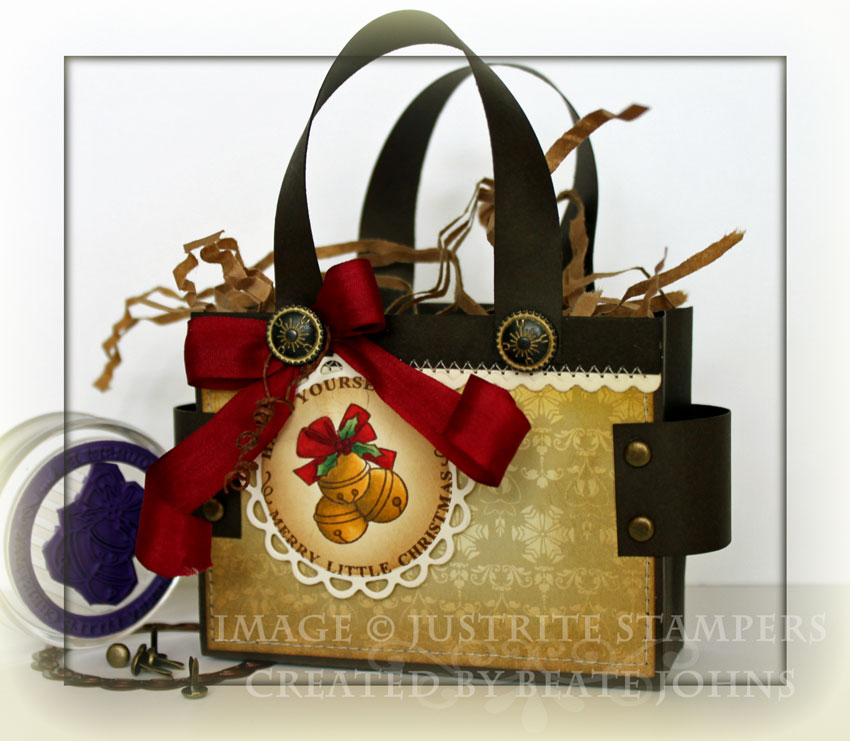
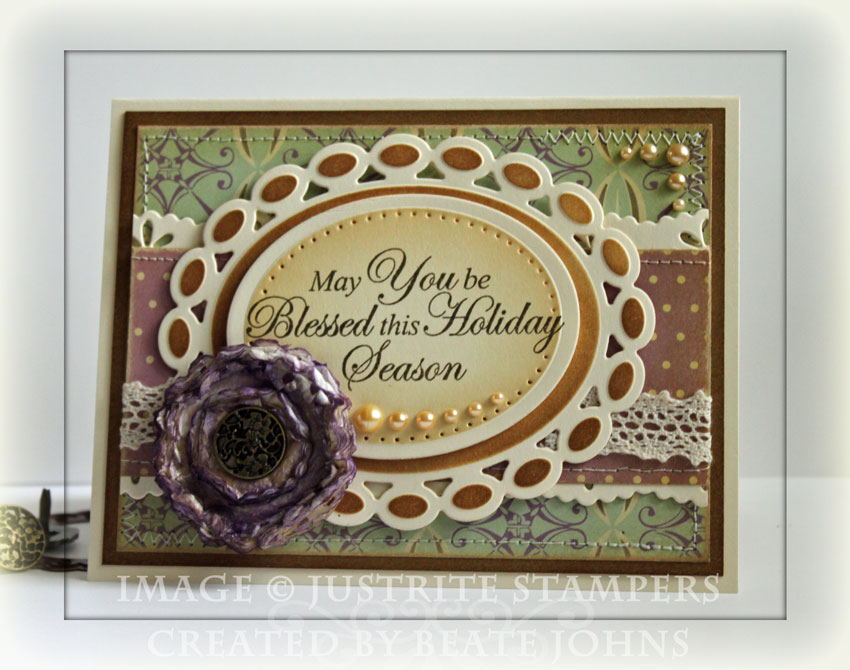
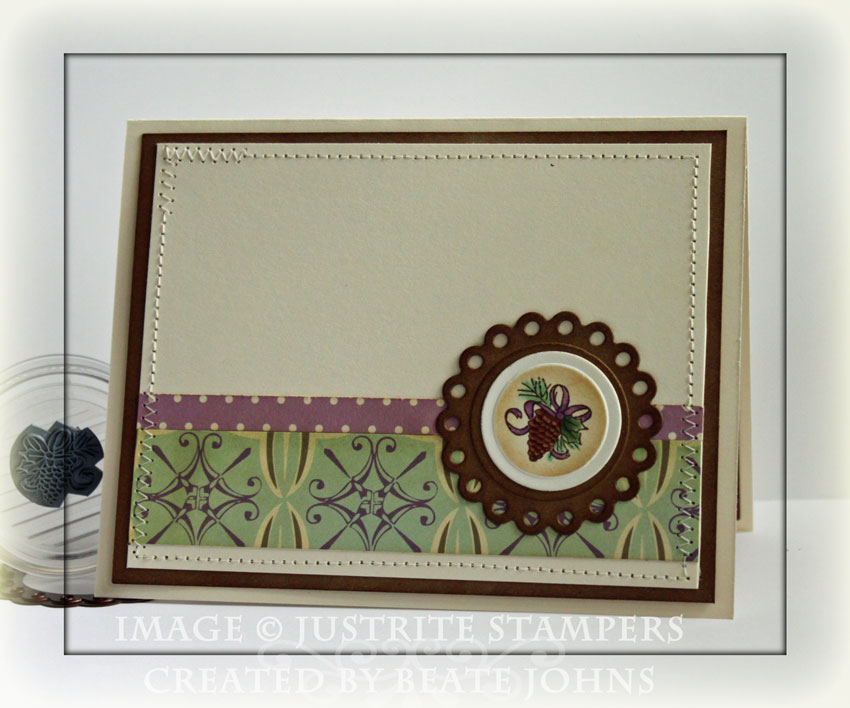
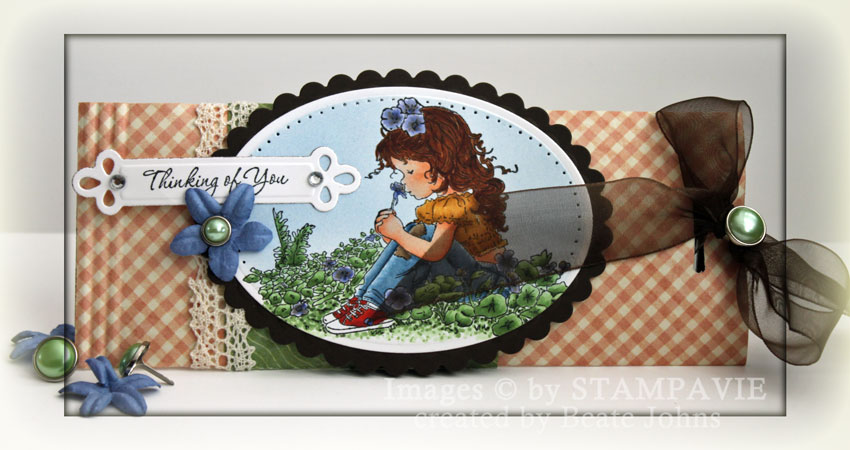
Welcome to the 10th week of JustRite Stampers’  Wednesday feature, 12 Weeks of Christmas Blog Hops!  Every Wednesday up until Thanksgiving we have been showcasing JustRite’s entire Christmas Collection of stamps!  Don’t forget that JustRite has some Christmas stamps in their newly released CLING line of stamp sets, too — you can find them HERE.

For the month of November we thought we would also throw in some holiday gift ideas for any of your JustRite stamps so be watching for those, too, on November’s hops!  And in celebration of JustRite’s 10th week of Christmas Blog Hops, they have a huge surprise for you — through November 29 take 25% off all JustRite Original Christmas stamp sets, with free shipping within the U.S. on orders over $50 — Don’t forget to tell Santa!

For today’s blog hop I created a circular tag with JustRiteStampers Vintage Christmas set. I stamped the darling snowman in Tuxedo Black Memento Ink on X-Press It Blending Card and colored it with Copic Markers (snowman:  B0000, B000 Hat, nose and buttons: N3, N5, N7, N9, Cheeks: E000, E00, Scarf: BG93, BG96, BG99). The image was cut and embossed with Classic Circle Nestabilities, airbrushed with Copic Marker E40 and layered on a piece of Early Espresso Cardstock cut and embossed with Eyelet Circle Nestabilities. Glossy Accents was added over the snow on the snowman’s hat and snowflake. Fine Glitter was sprinkled over it.

The sentiment is from JustRite Stampers Christmas Nested Sentiments. It was stamped on a strip of X-Press It blending card. The cardstock was bend in shape of a waving banner and attached to the main image by adhering it to a Tim Holtz Philosophy Tag with Glossy Accents.

The box base is a 8 ¼” square of Early Espresso cardstock. It was scored at 2 ¾” and 5 ½” on each side. The corner square were scored diagonally and folded in. The folded corners were layered with white cardstock triangles that were cut by cutting  a 2 3/8” square in half. That square had been topped with a triangle cut out of a 2 1/8” square of Echo Park Wintertime. The layers were stitched together before they were adhered to the box with Scor-Tape. For the full squares,  2 ¼” pieces of Echo Park Winterland patterned paper were stitched to a 2 ½” square of white cardstock.

Organdy Ribbon was threaded through silver eyelets, was tied into a bow and topped with a navy button.

Here is a video for the visual learner:

[youtube]https://www.youtube.com/watch?v=vvMMIY3NHKc[/youtube]

Please visit these designers’ blogs to see what fabulous JustRite Christmas inspiration they have for you on the hop today!

JustRite Inspiration Blog
Sharon Harnist
Debbie Olson
Beate Johns
Kazan Clark
Stephanie Kraft
Michele Kovack
Angela Barkhouse
Sankari Wegman
Heidi Blankenship
Kathy Jones
Eva Dobilas
Thanks so much for stopping by! Have a wonderful day! Hugs and smiles

Welcome to JustRite Stampers’ newest Wednesday feature, 12 Weeks of Christmas Blog Hops 7!   Every Wednesday up until Thanksgiving some of your favorite designers will be joining some of the JustRite design team for a series of Christmas blog hops, showcasing JustRite’s entire Christmas Collection of stamps!  You also might see some projects from the JustRite design team, using some of their newly released line of CLING stamps!  You can find our new collection of cling stamps HERE.  This week, the designers joining us are most of the Spellbinders and Caardvarks design teams!  So mark your calendars for Wednesdays at 9am Central for great Christmas gift, card & project ideas, starting at the JustRite Inspiration blog!

I had seen a cool layering of Spellbinder dies created by Aga on the Spellbinder blog the other day and had to try it out. Since  I didn’t want to case her completely I used pink as my color, added patterned paper and finished the card differently.

I stamped an image from JustRite Stampers  Whimsical Christmas  in Tuxedo Black Memento Ink on X-Press It Blending card and colored it with Copic Markers (Bird: BG11, BG32, BG13 Scarf: RV14, RV17, RV19 Ribbon: B000, B02, B04 Skates: N1, N3, N5). It was cut and embossed with Classic Circle Nestabilities and it was airbrushed with Copic Marker RV14.

Next I cut a frame with the same Circle Nestabilities die as well as a Blossom Nestabilities. Again it was airbrushed by Copic Marker RV14. Dew Drops from the Cotton Candy bottle I just picked up at my local Scrapbook store.

The layers were added to a piece of Neenah Solar White cardstock cut and embossed Fleur de Lis Pendant. Four small Fleur de Lis pieces were cut, airbrushed and adhered to the big Pendant.

The entire stack was adhered to a frame cut with Lacey Square and Classic Square Nestabilities. A dew drop was added to each corner.

The card base is a 4 7/8″ x 9 3/4″  piece of Pink Pirouette cardstock folded in half.  A 4 3/8″ Pretty Please My Mind’s Eye patterned paper was stitched to a 1/4″ bigger piece of white cardstock. The layers were adhered to the card base.

A bow out of silk ribbon, topped with a Recollection brad finished off the card.

Please visit these designers’ blogs to see what fabulous JustRite Christmas inspiration they have for you on the hop today!

JustRite Inspiration Blog
Spellbinders Blog
Debbie Olson
Kimberly Crawford
Sharon Harnist
Beth Pingry
Amy Crockett
Kellie Fortin
Latisha Yoast
Becca Feeken
Lucy Abrams
Sankari Wegman
AJ Otto
Beate Johns
Heidi Van Laar
Kazan Clark
Julie Overby
Peet Roeven
Michele Kovack
Judy Hayes
Kathy Racoosin
Stephanie Kraft
Terre Fry
Angela Barkhouse
Holly Simoni
Heidi Blankenship

Thanks so much for coming by! Have a fun time blog hopping.
Have a wonderful day! Hugs and smiles

Welcome to JustRite Stampers’ newest Wednesday feature, 12 Weeks of Christmas Blog Hops #4!   Every Wednesday up until Thanksgiving some of your favorite designers will be joining some of the JustRite design team for a series of Christmas blog hops, showcasing JustRite’s entire Christmas Collection of stamps!  This week, it’s the Spellbinders design team!  So mark your calendars for Wednesdays at 9am Central for great Christmas gift, card & project ideas, starting at the JustRite Inspiration blog!

Today’s tutorial on SCS was created by Leigh O’Brien. Four or five years ago, when Leigh was on the Dirty Dozen team on SCS, she created a pattern for a darling tote bag she called Totally Totebag. We had a lot of requests for this tutorial and after such a long time being exclusive to only fan club members, today it is posted as a new tutorial in the resource section.

The base of the tote bag was created with Early Espresso cardstock, the patterned paper is Cosmo Crickets Mitten Weather paper. It was sponged with Vintage Photo Distress ink and stitched to the sides. I cut and embossed Cream Neenah cardstock with long scallop rectangle Nestabilities, cut the long edges off and down to 1/2″ and stitched them under the totebag flaps.

The handles were attached with Vintage Brads (Stampin’ Up!), the side straps with antique golden brads.  The sentiment and image are from JustRite Stampers A Merry Little Christmas . They were stamped with Rich Cooca Memento Inkon Neenah Natural White cardstock and colored with Copic Markers (bow and berries: R27, R29, R39, R89, Leaves: G21, G24, G28 Bells: Y21, Y26,Y29). The image was cut and embossed with Eyelet Circle Nestabilities and sponged with Vintage Photo Distress Ink.  

Here is a video for the visual learner:
[youtube]https://www.youtube.com/watch?v=XyAH4cOG-pc[/youtube]

Please visit these designers’ blogs to see what fabulous Christmas projects they have for you on the hop today!

JustRite Inspiration Blog
Spellbinders Paper Arts
Becca Feeken
Mona Pendleton
Debbie Olson
Ashley Cannon Newell
Sharon Harnist
Eva Dobilas
Kazan Clark
Beate Johns
Kellie Fortin
Margie Higuchi
Kathy Jones
Regina Hanson
Sankari Wegman
Deborah Young
Angela Barkhouse
Michele Kovack
Terre Fry
Barb Schram

Thanks so much for stopping by! Have a wonderful day! Hugs and smiles

justritenaturessentimentpur.jpg

Welcome to JustRite Stampers’ newest Wednesday feature, 12 Weeks of Christmas Blog Hops #3!  Every Wednesday up until Thanksgiving some of your favorite designers will be joining some of the JustRite design team for a series of Christmas blog hops, showcasing JustRite’s entire Christmas Collection of stamps!  So mark your calendars for Wednesdays at 9am Central for great Christmas gift, card & project ideas, starting at the JustRite Inspiration blog

For my card I picked a set that is not in the Christmas collection, but has a beautiful Christmas Sentiment: Nature’s Nested Sentiments. The sentiment I picked has a big beautiful font and was perfect to place into a beaded oval. I started by cutting and embossing an oval out of Cream Neenah Cardstock with Classic Oval Nestabilities. The oval was sponged first with Antique Linen, then the edges with Vintage Photo Distress ink. The sentiment was stamped in the center with Walnut Stain Distress Ink and a border was paper pierced.

 A beaded oval was cut and embossed from Cream cardstock and sponged with Vintage Photo ink. The oval with the sentiment was adhered with dimensionals to the beaded oval.

justritenaturessentimentpurplechristmas.jpg

The card base is a 5 1/2″ x 8 1/2″ piece of Neenah Cream cardstock folded in half. The edges were sponged with Antique Linen.

A 4″ x 5 1/4″ piece of Kraft cardstock was sponged with Vintage photo. A 3 3/4″ x 5″ piece of Cosmo Cricket Jack Frost paper was sanded, sponged with Antique  Linen ink and then stitched to the sponged Kraft cardstock piece. Then the layers were adhered to the card base.

A Cream strip of cardstock was cut and embossed with Eyelet Borderabilities. It was cut in half length wise and adhered to the top and bottom of a  2″ x 5″ strip of Cosmo Cricket Flurry paper. The edges of the strip was sanded then sponged with Antique Linen. May Arts Crochet Lace was added to the lower half of the strip. The strip was adhered to card base. The oval layers were attached to the card base with dimensionals.

I cut tissue paper with the two smallest Eyelet Circle Nestabilities and held them together with one of Stampin’ Up!’s Vintage brads. The tissue paper layers were sponged with Dusty Concord Distress ink. Then I created a colored pearlized spray by mixing water, Pearl Perfect Pearls and a drop of Vintage Photo Distress Re-inker in a Mini Mister. I then sprayed the flower and dried it with a heat tool to add shimmer and a darken the rest of the white tissue showing.  Champagne Kaisercraft pearls finish off the card front.

justritenaturessentimentpurplechristmasinside.jpg

For the inside of the card, I sponged another 4″ x 5 1/4″ piece of Kraft cardstock with Vintage Photo. A 1″ strip of Jack frost and a 3/8″ strip of Flurry paper were stitched to a 3 3/4″ x 5″ piece of Cream cardstock.

I stamped the pine cone from Holiday Cheer Borders & Centers in Rich Cocoa Memento Ink on Cream cardstock. It cut and embossed it with Classic Circle Nestabilities. The image was colored with Copic Markers (E31, E33, E35, E37, V12, V15, BG11, G21, G24) and sponged with Antique Linen and Vintage Photo Distress ink. It was then layered on a Kraft cardstock piece with cut and embossed with Eyelet Circle Nestabilities and sponged with Vintage photo.

You can find a video for the tissue flower here:
[youtube]https://www.youtube.com/watch?v=LKRosUoQ2ww[/youtube]

Please visit these designers’ blogs to see what fabulous Christmas projects they have for you on the hop today!

JustRite Inspiration Blog
Debbie Olson
Becca Feeken
Sharon Harnist
Jeanne Streiff  <=may have some downtime 1-4pm Central
Michele Kovack
Mona Pendleton
Heidi Blankenship
Beate Johns  <=may have some downtime 1-4pm Central
Sankari Wegman
Selma Stevenson
Kellie Fortin
Angela Barkhouse
Pam Imholz
Kazan Clark
Liz Weber
Stephanie Kraft

Personal Note:
I am excited to tell you that I will be teaching my first class at a scrapbook store. You can find out the date, the cards and all the other details here! All three cards are Christmas cards created with Spellbinder dies. This card is one of them (minus the stitching, spraying the flower and the inside of the card).

Have a wonderful day! Hugs and smiles

© 2012 fresh & fun Suffusion theme by Sayontan Sinha