inkadinkadotreewatercolorwi.jpg

Splitcoast is featuring a new Product review today. We had the opportunity to play with Inkadinkado’s new ink pads and watercolor markers. My favorite thing were the Watercolor Marker. They are soooo cool! They have a dabber point on one side, and a fine point on the other. The dabber is specifically made for us stamper in mind. Just add it directly to your stamp by painting or dabbing it on, mist and stamp!

The cool thing is if you brush the ink on first, then go over and dab on several places, it will give you different shades of the same color.

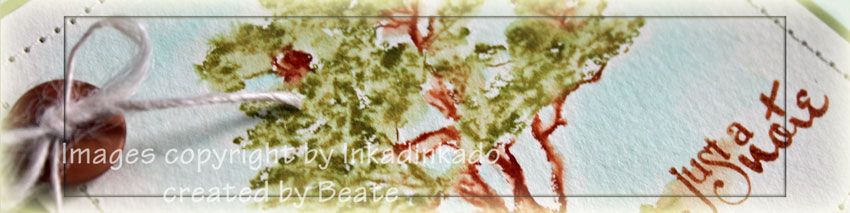
For my card the Dogwood stamp from Inkadinkado was inked up with Terra Cotta and Olive Green Marker and stamped on Watercolor paper. I added sky with the sky blue marker and my aqua painter. I just scribbled marker on an acrylic block and picked the ink up from there with my aqua painter. The same was done with the ground with Terra Cotta Marker.

inkadinkadotreewatercolorbe.jpg

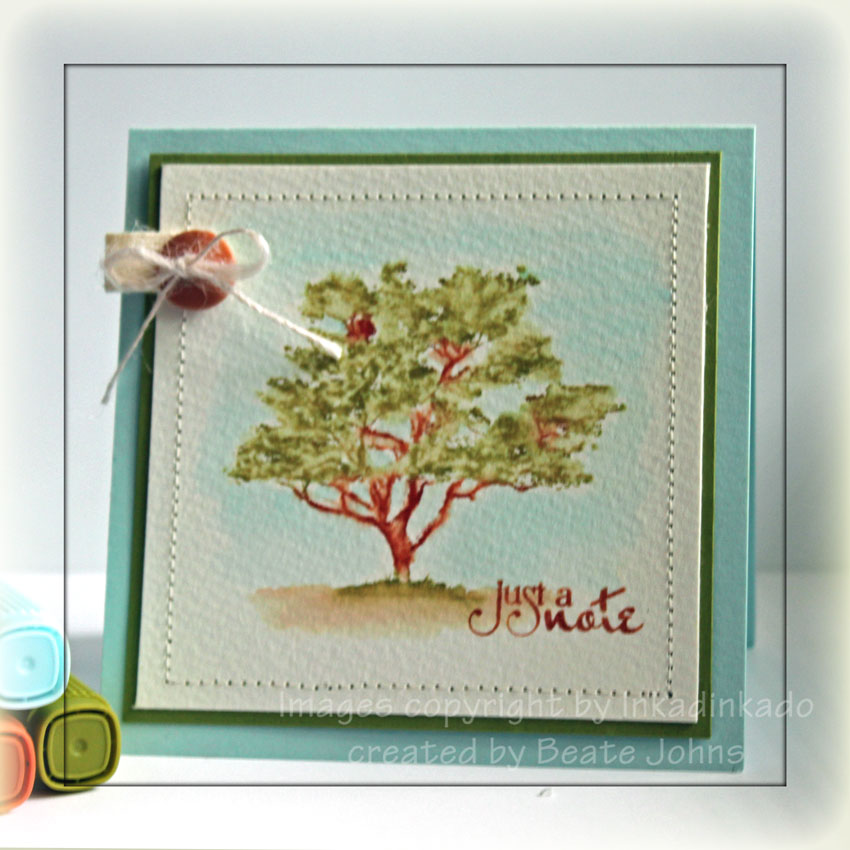
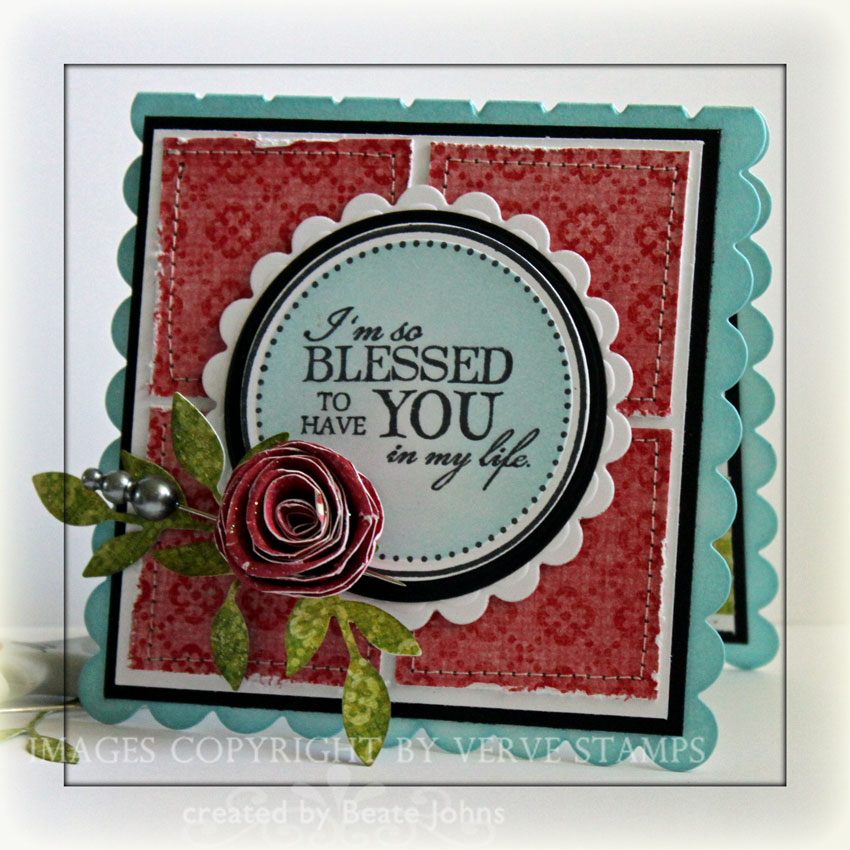
The sentiment is from Verve’s Accent Notes was inked with the Terra Cotta marker and stamped on the lower right hand corner.

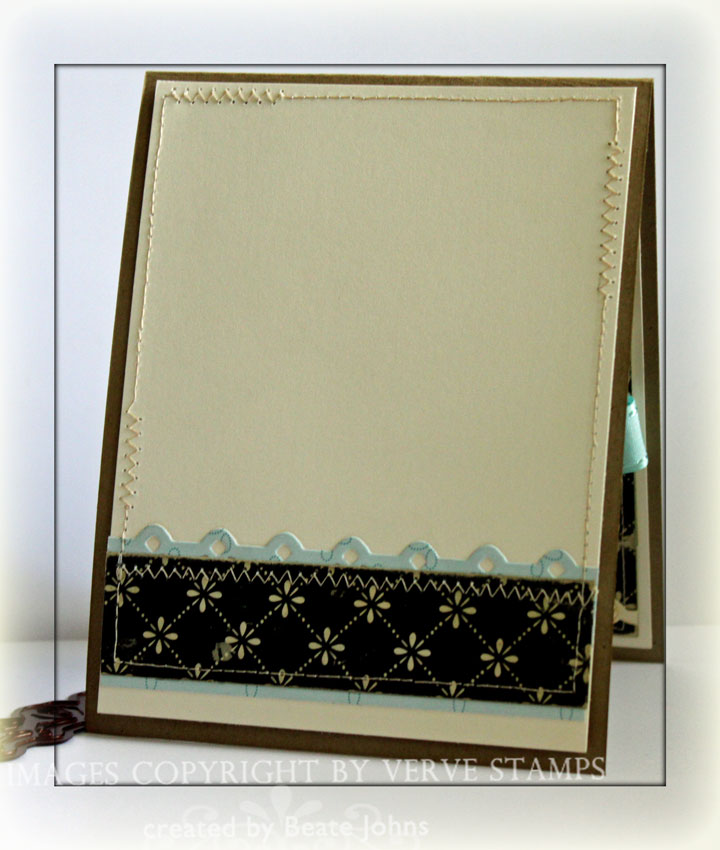
The card base is a 4 1/4″ x 8 1/2″ piece of Sno Cone cardstock folded in half. The 3 5/8″ square of watercolor paper was stitched to a 3 7/8″ square of Old Olive cardstock. To add a little something something….I stitched a tiny bit of twill to a button and adhered that to the top left of the card.

Here is a video about the new Markers:

[youtube]https://www.youtube.com/watch?v=L5GVsJnzg0Q[/youtube]

Make sure to also check out today’s tutorial by Sharon Tidwell. She shows you how to use Watercolor Crayons on Canvas. Have a wonderful day! Hugs and smiles

verveaccentnotesfs174wide.jpg

Last Sunday the Featured Stamper on SCS was Nikki Schmaltz. I was excited to be able to case Nikki. She creates such gorgeous cards. There were quite a few in her gallery I would like to case, but for that challenge I decided on this beauty. Since I liked it so much, I didn’t change much for my case.

The main image and sentiment are from Verve’s Accent Notes. The frame was stamped in Jet Black Archival Ink on Very Vanilla cardstock. It was cut with Blossom Nestabilities and sponged with Tumbled Glass Distress Ink. The image was highlighted with the Inkessential white pen. The sentiment was also stamped on Vanilla cardstock with Jet black Archival Ink. It was cut out with Circle Nestabilities and sponged with Antique Linen Distress ink.

verveaccentnotesfs174kaleid.jpg

The card base is a 4 1/4″ x 11″ piece of Kraft cardstock. The edges of the card front were sponged with Antique Linen Distress Ink.  A 3″ x 3 3/4″ piece of Hometown October Afternoon Patterned paper was adhered to a 2 1/2″ x 3 3/4″ piece of Ducks in a Row Patterned Paper to create a 3 3/4″ x 5″ layer. The edges were sanded and sponged with Antique Linen, then it was stitched to a 3 15/16″ x 5 3/16″ piece of Very Vanilla cardstock.

The corner pieces, middle strip and the bottom strip were cut with Kaleidoscope Borderabilities and the corner pieces from the Pendant pack out of Very Vanilla cardstock. The dies were left on and the embossed pieces were sponged with Antique Linen. Latte Kaisercraft Pearls were added to the die cut pieces.

The ribbon flower was created out of Champagne Satin Ribbon from May Arts. The ribbon used for the leaves I bought at JoAnn’s. A Teal Kaisercraft Pearl was added in the flower center.

verveaccentnotesfs174inside.jpg

As always, my inside is decorated to match the outside, but is kept very simple.

Thanks so much for stopping by. We are on our way to Destin today. It’s a 12 hour drive plus stops. But it’s worth it. I get to go to the beach! Have a great day! Hugs and smiles

 vervestarstruckencausticwid.jpg

When I played with my Encaustic Wax I made quite a few backgrounds. It is such a great technique! Here is another card I made with one of the backgrounds.

For this background I think I used yellow, red, black and white wax. I cut the background with Circle Nestabilities. It was layered first on a black, then on a white cardstock circle. I stamped the sentiment and star from Verve’s Starstruck in Jet Black Archival Ink.

vervestarstruckencausticbj.jpg

The card base is a 4 3/4″ x 9 1/2″ piece of Dusty Durango cardstock folded in half. The edges of a  3 15/16″ square of textured Basic Gray cardstock were punched with the Ticket Corner punch. It was stitched on a 4 1/8″ square of Basic Black cardstock and then adhered to a white cardstock square measuring 4 5/16″. The corner of both bigger squares were also punched with the ticket corner punch.

The image layers were adhered to the center of the squares and Silver Kaisercraft Rhinestones were placed around the circles.

vervestarstruckencausticins.jpg

For the inside of the card I stamped a 1 3/8″ x 3 3/8″ strip of Dusty Durango with Rusty Hinge Distress ink and the big star image from the set. It was layered on a small black scallop strip and stitched to a 3 3/8″ square of Whisper White. That was then layered first on a basic black then a basic gray cardstock square.

I cut a small circle out of the same background with Circle Nestabilities, layered it on a slightly bigger black circle and stamped the You’re a Star from the Starstruck set in it’s center with Jet Black Archival Ink.

Thanks for stopping by! Have a great day! Hugs and smiles

inkadinkadoencausbutterflwi.jpg

I have another Encaustic card to share with you. This one I created for the sketch challenge on SCS. The background was created with yellow, red and orange wax on top and green and a bit of brown wax on the bottom.

The background was layered first on Basic Black Cardstock, then on a scalloped textured white rectangle cut with Long Rectangle Nestabilities.The Butterfly image is from Inkadinkado and was stamped on the background with Jet Black Archival Ink.

inkadinkadooencausticbutter.jpg

The card base is a 4 1/4″ x 10 1/4″ piece of Old Olive cardstock folded in half.  A 3 1/2″ x 4 1/2″ piece of The Thrift Store October Afternoon paper was sanded and stitched on a  3 7/8″ x 4 3/4″ pieces of Basic Black cardstock. The top right corner was stamped with a stamp from Verve’s Accent Notes in Jet Black Archival ink. The horizontal piece is a 2″ square of Thrift Store paper. It was also sanded and stitched to a 3/16″ bigger piece of Basic Black cardstock.

The sentiment is also from Accent Notes. it was stamped on Textured White cardstock and cut out with Petite Oval Nestabilities. It was layered on black scallop oval. A bow out of double sided May Arts ribbon finishes off the card front.

inkadinkadooencbutterfinsid.jpg

The layer sizes on the inside of the card are the same as on the card front. The horizontal layer is 1 1/4″ wide was sanded and then stitched on the inside layers. The Verve Accent stamp was stamped on the top right and the Inkadinkado butterfly on the bottom left.

Thanks so much for looking! Have a great day! Hugs and smiles

saframedtreetlc273wide.jpg

Monday’s Technique Lover Challenge was to create a frame and use it on your project. It was a great challenge to use one more of my Encaustic Backgrounds. Did I mention that I had fun playing with that technique?

For this background I used light blue, darker blue and white wax for the sky and two greens and a yellow for the green hills. I stamped the tree from Mini Ornates in Jet Black Archival ink over the background. The frame was cut with Rectangle Nestabilities out of Whisper White Textured cardstock.

saframedtreetlc273.jpg

My card base is a 4 1/4″ x 10 1/2″ piece of Kraft cardstock folded in half. A 3 3/4″ x 4 3/4″ piece of My Mind’s Eye Just Dreamy 2 Paper was sanded and stitched to a 3 7/8″ x 4 7/8″ piece of black cardstock. Both layers were adhered to the card base.

The sentiment is a a little Verve stamp I received as a thank you for my order. Yep, Julee is great like that. It was stamped with Jet Black Archival ink on Whisper White cardstock, cut with Petite Oval Nestabilities, sponged with Shabby Shutter Distress ink and layered on a scallop Kraft oval.

I thought it needed a splash of blue so I added a bow created with the Bow-Easy out of 1/2″ wide blue satin ribbon on the left next to the sentiment. Three black Kaisercraft Rhinestones finish off the card front.

saframedtreetlc273inside.jpg

The inside of the card is very simple. I just added a 1 3/8″ wide strip of Just Dreamy 2 Paper to a white cardstock layer that was then stitched to a black layer.

Thanks for stopping by! Have a wonderful day. Hugs and smiles

jffencausticwide.jpg

Birgit Edblom wrote another fantastic tutorial for SCS today. This time for Encaustic Painting on cards. I ordered  some Encaustic wax (check this site, they have great videos too) because I LOVE the way her samples looked. Sunday I had time to play. It is so much fun! I have a lot of finished backgrounds sitting here waiting to be turned into cards. Rebecca had fun too. I even got my oldest son to try the technique. Hey…it’s melting wax and then putting it on glossy cardstock with an iron. It’s pretty darn cool!

jffencausticfrontbj.jpg

I created my background with a mix of blue and white wax on top and brown and black on the bottom of the glossy cardstock. The tree stamp is from Just For Fun and was stamped with Jet Black Archival ink on top of the background. It was then cut with Label 1 Nestabilities. My Nestabilities die got a bit messy from that. I think next time I will cut the glossy cardstock first, then try the technique.

The card base is a 4 1/4″ x 9″ piece of Kraft cardstock folded in half. A 3 15/16″ square of Vanilla cardstock was embossed with Cuttlebug’s Script Texture Embossing Folder, the edges were distressed and it was stitched to a 4 3/16″ square of Basic Black cardstock.

For the sentiment I cut two ovals with the smallest Petite Oval Nestabilities die. One was cut out of Vanilla cardstock, the other was cut out of Kraft cardstock. The Vanilla Oval was cut down right next to the embossed edge and stamped with a partial quote from Verve’s Beautiful You stamp set. It was first adhered to the Kraft oval, then to the main image. A double bow was tied out fo twine and adhered to the sentiment layer with a small spot of Glossy Accents.

jffencausticinside.jpg

As always I used the same size layers for the inside as for the card front. On the vanilla layer I stamped the Tree in Frayed Burlap Distress Ink on the lower right hand side. If I would do it again, I think I would use a blue ink to tie the blue of the front in some more. Over the tree image I stamped the entire sentiment in Jet Black Archival ink. I partially stitched that layer to the black layer underneath.

You can try this technique with Crayola Crayons. The wax won’t be as thick, but it works. I hope you try this out. It is very FUN, but BEWARE! It is addicting!

Have a wonderful day! Hugs and smiles

savervefernwisheswide.jpg

Jenn was supposed to come over this weekend. We had planned on attending Wendy Vecchi classes in Indianapolis. But Texas is having bad weather and her flight was cancelled. I didn’t feel like driving to Indi without Jenn, so I stayed home and stamped. I made this card for yesterday’s Inspiration Challenge at SCS

ic232fernbamboolaminedishes.jpg

I picked these dishes as my inspiration pieces. I really liked the neutral color combo of the dishes and thought that it would translate into a great card.

savervefernwishesic232front.jpg

I stamped the weed image from Nature’s Moments first in Snow Cap Adirondack ink, then in Sepia Archival ink on the right side of a 3 1/2″ square of Kraft cardstock. The edges of the square distressed, then the square was stitched to a distressed 3 11/16″ square of White cardstock.

An oval was cut out of Kraft cardstock with Petite Oval Nestabilities. On the right hand side I stamped the weed image in Snow Cap Adirondack ink. The sentiment is from Verve’s Wishing you stamp set. It was stamped on Sepia Archival ink. The oval was layered on a slightly large scallop oval. It was cut out of Chocolate chip cardstock. The edges of that layer were sponged with Walnut stain distress ink. I punched a small circle on the left hand side of the oval layer with the Crop-a-Dile. Organdy Ribbon was tied through the hole around the layers.

The card base was cut out of Core’dinations Chocolate Box cardstock with the Scalloped Square Big Shot Die. The next layer was a 3 15/16″ square of Chocolate Chip cardstock that had been sponged with Walnut Stain Distress ink.

savervefernwishesic232insid.jpg

For the inside of the card I used the same cardstock squares as on the front. I stamped the image again on the Kraft layer with Sepia ink on the right hand side. I stamped the second part of the sentiment on a white scallop oval that had been cut with Nestabilities.

Thanks for stopping by! Have a wonderful day! Hugs and smiles

bellakindnesswide.jpg

All my playing with MFT stamps got me hooked on cute images. I usually don’t think I am any good at cute cards, but they are so much fun! So I stamped Maisy Ketto with Tuxedo Black Memento Ink on Solar White Neenah Cardstock and colored her with Copic Markers ( C1, YR000, YR00, Y35, Y38, R27, R29, BG000, E19, E25, YG17, YG25). Originally I had tried to turn this into a magic card, but I didn’t like the way it looked, so I finished the card for Thursday’s Way to Use it Challenge.

bellakindnessflywt270.jpg

The card base was cut out of Old Olive Textured Cardstock with Stampin’ Up!’s Big Shot Scalloped Square die. The edges of a 3 7/8″ square of October Afternoon Fly A Kite Paper were distressed. A 1 3/4″ wide strip of textured Real Red cardstock was adhered to square before it was stitched to a 4 1/8″ square of Basic Black cardstock.

A Scallop Square Frame was cut with Square Nestabilities. The edges of the image layer were sponged with Tumbled Glass Distress Ink and paper pierced before the frame was adhered. Stardust and Orange Stickles were added to the image and Tiny Twinkles adhered to ther crown. A bow made out of 1/2″ wide olive Silk Ribbon was adhered to the top left of the frame with a red button on top.

I don’t have any Bella sentiments yet, so I used one from Verve’s Beautiful Kindness. It was stamped on a 1/2″ wide strip of Solar White cardstock with Tuxedo Black Memento Ink. the edges were sponged with Tumbled Glass and the left edge was punched with my Photo Corner Punch (SU). It was attached to the lower right side of the frame. The flower was cut out of a Grunge Paper, that was covered with dictionary pages. The flower was colored with the yellow Copics I had used on the image. A red button was attached to the flower center with black waxed Linen thread.

bellakindnessinside.jpg

The inside was decorated pretty simple. I just can’t leave card insides completely blank anymore. It seems unfinished.

I created this as a sample for the Gable Box video tutorial.

vervegableboxbestdaybj.jpg

The box base is a piece of Kraft cardstock. For the decoration I pieced two 2 1/2″ x 8″ strips of October Afternoon Fly a Kite together, then cut them down to 12″. I cut a 12″ strip of Vanilla cardstock with the Scalloped Scallop Die-namics die and stitched the patterned paper strip over it. I ran the double strip over my table edge a few times to break down the fibers just a bit. Then I taped the strips around the box with Scor-Tape.

The circle from Just For You was stamped in Walnut Stain Distress ink on Pure Luxury Ivory Cardstock. The sentiment is from Wishing You. The circle was cut with Circle Nestabilities and sponged with Tumble Glass Distress ink. The circle was layered first on a Chocolate Chip circle that had been sponged with Walnut Stain ink, then on a scalloped Kiwi Kiss cardstock sponged with Peeled Paint Distress Ink.  A Prima Daisy with a Recollection Brad (Michaels) center was added to the bottom left and Stardust stickles was placed over the dots of the circle.

The box was tied shut with Olive Silk Ribbon.  A Tres Jolie Button was tied around the ribbon with waxed Linen.

Here is a video for the visual learner:

[youtube]https://www.youtube.com/watch?v=Oc0TEGDTiwQ[/youtube]

ververolledflowerwide.jpg

We are running another flower tutorial on Splitcoast today. This time it is for Rolled Paper Flowers and it is written by the wonderful Joanne Basile. Wait until you see her samples. Your jaw will drop to the floor.

For my sample I used a 3 1/4″ square of My Mind’s Eye Just Dreamy 2 paper to create the rolled flower. Once it was done I added Rock Candy Stickles with a paint brush. The leaves were cut also out of Just Dreamy 2 paper with Sizzix Little Leaves die, sponged with Peeled Paint Distress ink and covered with Shabby Shutter Distress Stickles ( I really need to get the Peeled Paint Stickles).

vervejustforyourolledwt269.jpg

My card base was cut with Stampin’ Up!’s Scallop Square Big Shot die out of Neenah Solar White cardstock. The edges were sponged with Tumbled Glass Distress ink. I am kind of stuck on that color right now. It’s such a soft blue.

The edges of four 1 3/4″ squares of My Mind’s Eye Just Dreamy 2 paper were distressed and the square were sewn to a 3 3/4″ piece of white cardstock. That was layered to a 3 15/16″ square of Basic Black cardstock and taped to the card base.

The sentiment is from Verve’s Just For You stamp set. It was stamped in Tuxedo Black Memento Ink on Neenah Solar White cardstock. It was cut out with Circle Nestabilities and sponged with the die still on the cardstock with Tumbled Glass Distress ink. It was layered first on a slightly bigger black cardstock circle, then on a scalloped white circle.

ververolledflowerinside.jpg

I kept the inside very simple and just added a dash of green with a 1 1/8″ x 3 3/4″ strip of Just Dreamy 2 paper. All layers were the same size as on the card front and were sewn together before adhered to the card base.

I hope you have fun with these cute flowers. Thanks for stopping by. Hugs and smiles

© 2012 fresh & fun Suffusion theme by Sayontan Sinha