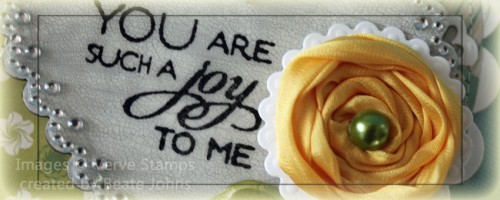
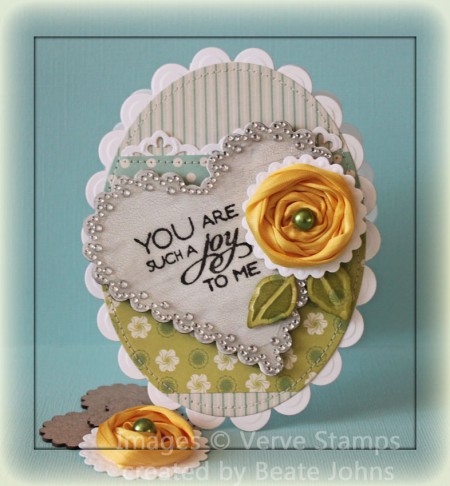
Today’s tutorial on Splitcoaststampers is on how to create rolled ribbon flowers. They are fun and easy! For my sample I rolled a flower out of May Arts Yellow Silk ribbon. It was adhered to a piece of Neenah Solar White cardstock that had been cut and embossed with a Beaded Oval Nestabilities die and topped with a Sage Green Pearl from Want2Scrap.

Two leaves were cut and embossed out of Cosmo Cricket Odds & Ends paper with one of the Foilage dies. The leaves were sponged with Peeled Paint Distress Ink and adhered under the ribbon flower.

The card base was cut with the second smallest Scallop Oval Grand Nestabilities die out of Neenah Solar White cardstock. Another single piece of white cardstock was cut with the same die.

A small strip of white cardstock was cut and embossed with a Parisian Accent die. It was adhered under a strip of Cosmo Cricket Odds & Ends paper. The strip was adhere two other pieces of the same paper pack. The layers were cut and embossed with the second smallest Oval Grand Nestabilities die. The layers were stitched to the single scallop oval layer before that was adhered to the card base.

The second largest Scallop Heart Nestaboard piece was painted with White Crackle Paint. After it dried a sentiment from Verve’s Kind Words was stamped over the cracked area with Black Acrylic paint. It was then embossed with UTEE. I saw this cool technique over at Shelley Hickox blog. She is an amazing artist. Once it cooled down, I added a Rhinestone Heart Nestabling to it’s edge. The heart was adhered to the card base and topped with the ribbon flower.

Here is a video for the visual learner:

[youtube]https://www.youtube.com/watch?v=e3NHFX9yd5U[/youtube]

Thanks so much for stopping by! Have a great day.
Hugs and smiles

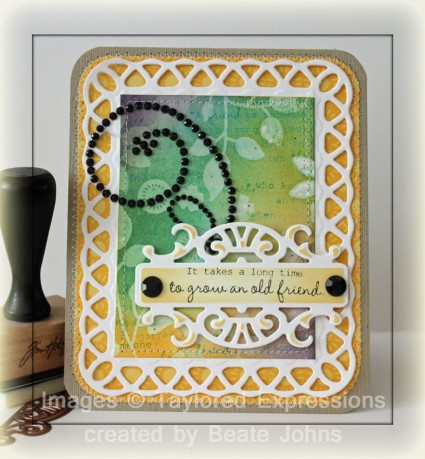
I should just call the remake of those super old tutorials blast from the past. I wrote the original tutorial back in 2004. It definitely needed a make over! For my Burned Batik sample I chose Taylored Expressions Friendship Blooms stamp set. With it’s big branch and flowers it was just perfect for it.

Images from that set were stamped in Embossing ink on a 2 7/8″ x 3 7/8″ piece of Neenah Solar White cardstock. They were embossed and heated until most of the embossing powder melted away. Then the layer was sponged with Wild Honey, Broken China and Peeled Paint. A bigger sentiment from the set was stamped all over the panel before it was buffed with a piece of cloth. The layer was stitched to a piece of white cardstock that had been cut and embossed with the largest of the Lattice Rectangle Nestabilities dies (sorry, I can’t help myself! I LOVE that die!).

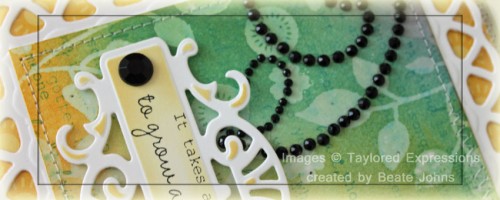
A sentiment panel was cut and embossed out of white cardstock with one of Spellbinders Fancy Tag Three dies. It was sponged with Wild Honey ink and a sentiment from the Friendship Blooms set was stamped in the center with Jet Black Archival ink.

Part of a black Rhinestone swirl was adhered to the upper right hand side before the sentiment panel was adhered with dimensionals. A big black rhinestones were attached on each side of the sentiment panel.

The corners of a 4 1/4″ x 5 1/4″ piece of Home Town Pink Paislee paper were rounded before the layer was stitched to the card base, a 4 1/2″ x 11″ piece of Textured Kraft cardstock folded in half. Each corner of the card base was rounded as well.

Here is a video for the visual learner:

[youtube]https://www.youtube.com/watch?v=3vGAxtRq6yM[/youtube]


Make sure to check out the new tutorial on Splitcoast today. Starla Nelson is showing us how to stamp on Metal.


Thanks so much for stopping by! Have a wonderful day!
Hugs and smiles

Today’s new tutorial on Splitcoast is written by Christine Okken. She shows us how to create a gorgeous box with Grand Label 4 Nestabilities dies.

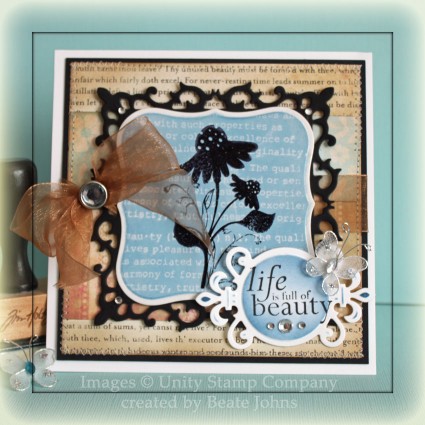
For the “From the Archives” tutorial of the newsletter I picked the Ghosting technique. I created the original tutorial back in 2006. It needed a makeover bad! I started out by cutting a piece of Glossy Cardstock with the second largest of the Label 1 Nestabilities dies. Putting the die back over the cardstock, I stamped the script background panel from Unity’s Store Kit Naturally You in Versamark all over my label. After the ink dried (hit it with a heat gun), I sponged Faded Jeans Distress ink over the panel.

A flower from Moments in Bloom was stamped in the center of the label with Jet Black Archival Ink.

A piece of black cardstock was cut and embossed with the largest of the https://shrsl.com/?~18ub and the image label was adhered to that. A piece of Solar White Neenah cardstock was cut and embossed with one of the Fleur De Lis Accent dies and sponged with Faded Jeans Distress ink. A sentiment from Moments in Bloom was stamped in it’s center with Jet Black Archival ink.

A strip of 1 1/4″ x 5″ piece of The Girls Paperie Kitch Paper was adhered to a 2 1/4″ x 5″ strip from the same paper line. Both were adhered to a 5″ square of the same paper line and stitched to a 1/4″ bigger piece of black cardstock. Gold Organdy Ribbon was tied around the layers. The bow was topped with a Recollection rhinestone brad. The layers were adhered to a 5 1/2″ x 11″ piece of of Neenah Solar White cardstock, that had been folded in half.

Silver Rhinestones and a darling little butterfly from Want2Scrap finish off the card.

Here is a video for the visual learner:
[youtube]https://www.youtube.com/watch?v=D9pQ3UCedc0[/youtube]

Thanks so much for stopping by! Have a wonderful day!
Hugs and smiles

P.S.: I got my sewing machine back. It was so worth to get it serviced. It purrs like a kitten again and sews like a new machine! My stamp room is now complete!


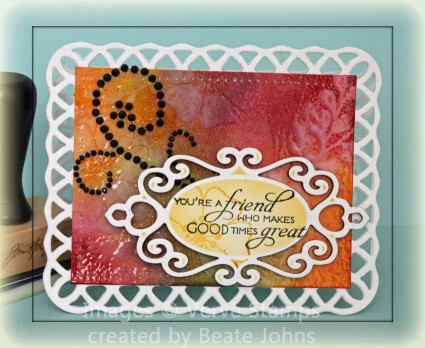
For the last weekly Inkling I reshot the Tapestry Tutorial and posted it as the “From the Archive” tutorial. For my new sample I used Verve Stamps Great Friend stamp set. Instead of pigment inks I used Distress ink to sponge the background with. I love that they stay wet long enough not only to create a beautiful blended background, but also to emboss the entire background.

The colors I picked for sponging my background were Wild Honey, Fired Brick and Peeled Paint. The flowers from Great friend were stamped in Snowcap Adirondack Pigment ink.

The background was adhered to a card base cut and embossed out of Neenah Solar White cardstock with the largest of the Lattice Rectangle dies.  My sentiment panel was cut and embossed with one of the Fancy Tag Two dies and sponged with Wild Honey Distress ink. The sentiment was stamped in Tuxedo Black Memento ink. The layer was  adhered to the matching Nestaboard.

A black Rhinestone swirl was adhered to the upper left hand corner before my layered sentiment panel was adhered to the card base.

Here is a video for the visual learner:

[youtube]https://www.youtube.com/watch?v=4aUbj4v0DRY[/youtube]


Thanks so much for stopping by! Have a wonderful day!
Hugs and smiles

Today’s tutorial on Splitcoast is for the Embedded Image technique and written by Holly McMillen. Holly doesn’t have the equipment to shoot video tutorials, so I did that for her.

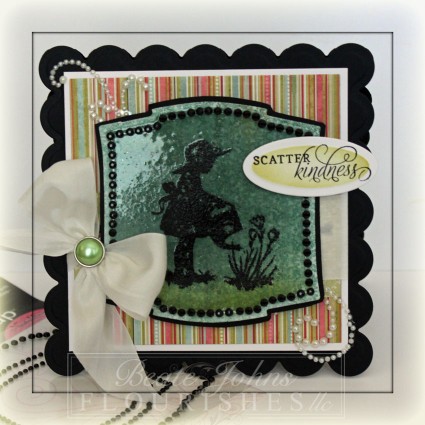
For my focal point I cut a piece of the new My Mind’s Eye 6×6 Vanity Fair Patterned paper (sneak peek….brought it home with me from CHA) with the second largest of the Label 2 Nestabilities die. The bottom was sponged with Peeled Paint, the top with Stormy Sky Distress inks before the paper was embossed several times with clear embossing powder.

The image is another sneek peak. It’s an image from Flourishes Sweet Days of Summer set, which will be released on August 12th. Wait until you see all the images. It’s gorgeous…and yes, I am a lucky duck to already own that set and the paper! After the clear embossing powder cooled on the label, I stamped the image in Embossing ink on the label and embossed it with Black Soot Distress Embossing powder.

The layer was adhered to a piece of black cardstock, which was cut with scissors into a slightly bigger layer. Black Nestabling for Label 2 were adhered around the image.

The card base was cut out of black cardstock with the second smallest of the Grand Scallop Square Nestabilities. A 1 3/4″ x 4″ strip of MME Vanity Fair paper was adhered to a 4″ square of the same paper pack. The layers were adhered to a 1/4″ bigger piece of Neenah Solar white cardstock and White May Arts Silk Ribbon was tied around it. The bow was topped with a Recollection brad and the layers were adhered to the card base.

A white pearl swirl from Want2Scrap was cut apart and parts were adhered to the top left and bottom right of the card base before the main image was adhered in the center with dimensionals.  A sentiment from the new set was stamped with Jet Black Archival ink on a piece of Neenah white cardstock that had been cut and embossed with the smallest of the small Petite Oval Nestabilities dies. Before the panel was adhered, it was sponged lightly with Peeled Paint Distress ink.

Here is a video for the visual learner:

[youtube]https://www.youtube.com/watch?v=5lgov28AKIQ[/youtube]

Thanks so much for stopping by! Have a wonderful day!
Hugs and smiles

New tutorial author Patty Bombyk created a Paper Bead tutorial and is sharing it on Splitcoast today. I shot a quick video to accompany her photo tutorial.

[youtube]https://www.youtube.com/watch?v=r6Z_KHQApa8[/youtube]

My goal for today is getting back into stamping and making at least one card.

Have a wonderful day! Hugs and smiles

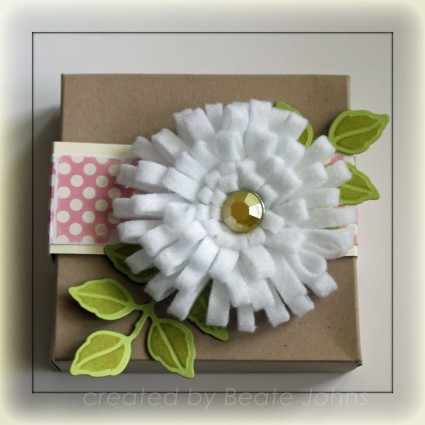
Today’s tutorial on Splitcoaststampers is written by the sweet and talented Tosh Leyendekker. She shows us how to create loopy flowers out of felt strips.

The finished flower is around 3″ big. I cut and embossed leaves out of MFT’s Sour Apple Cardstock with on of Spellbinders new Foliage dies.  The leaves were sponged with Shabby Shutter Distress ink before I adhered them under my Loopy Flower. I placed a retired Pink Paislee brad in the center of the flower.

The flower was placed on a pizza box I had sitting on my shelf unfinished. Not sure why I never finished it. The pizza box base is was created out of Kraft cardstock, the patterned paper used is from October Afternoon’s Ducks in a Row line.

Here is a video for the visual learner:

[youtube]https://www.youtube.com/watch?v=EKdtXNYeKOA[/youtube]

Thanks so much for stopping by! I hope you have a wonderful week!
Hugs and smiles

Today is my last Sunday as Limelight Designer for Flourishes. I had fun creating projects that would be featured on the Flourishes blog. What an honor!

You know it won’t be the last time you see me using Flourishes stamps though. I LOVE Flourishes images. They are so much fun to create with!

For my last post, I thought I would make a Magic Card and use that sample to create a video tutorial for this interactive card. We had several requests for a video tutorial for that card. For the video, I created the card slightly different then the photo tutorial. Just because I wanted to use Nestabilities and my Wizard to cut the window instead of using the Coluzzle.

For my sample I used the stamp set A Guiding Light. To see the entire card check the Flourishes blog.

Here is a video for the Visual Learner:

[youtube]https://www.youtube.com/watch?v=0CjD1s0Rxy0[/youtube]

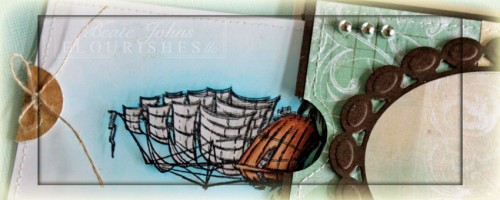
I created this card as a challenge entry for the Come Find the Treasure! VSN challenge. We were to create a card and hide something in the card.

I hadn’t created a Big Buckle Card in a very long time and thought it would be the perfect time to create one for the challenge and then use it as a sample for the video tutorial for that technique.

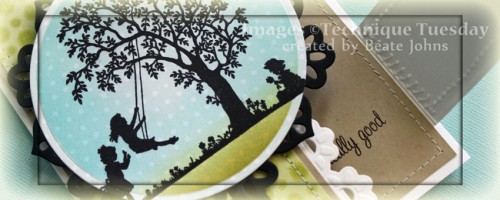
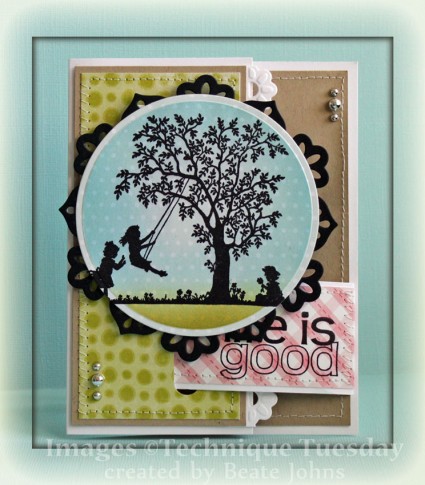
I recently had purchased the Life is Good Technique Tuesday stamp set at my LSS and thought it would be perfect for a Buckle card. I stamped the image in Jet Black Archival ink on Echo Park Playground paper. The image was cut and embossed with a Classic Circle Nestabilities die. The sky was sponged with Tumbled Glass Distress ink, the ground with Shabby Shutter Distress ink before the image was adhered to a piece of black cardstock, cut and embossed with a Floral Doily Motif die.

The card base was created out of the Neenah Solar White cardstock. The left hand side of the card front was lined with a 2 1/4″ x 5″ piece of Echo Park Playground paper that had been stitched to a  1/4″ bigger piece of Kraft cardstock. Before the stitched panel was adhered to the left hand side of the card front, a white cardstock strip was cut and embossed with the Floral Doily Accent border die and adhered under the panel.

A 1 7/8″ wide strip of Echo Park Little Girl paper was adhered to a 2″ wide White cardstock strip. The corners of the right end were rounded, the left end was adhered under the 4″ x 5 1/4″ piece of Kraft cardstock that was adhered to the inside panel of the card.

The sentiment is also from Life is Good. It was stamped in Jet Black Archival Ink directly on the buckle. Part of the sentiment is hidden to comply with the challenge. The smaller sentiment (really good) that comes with the set, was stamped on the inside of the card underneath the panel. Silver Recollection pearls finish off the card.

Here is a video for the visual learner:

[youtube]https://www.youtube.com/watch?v=ybhwiREtzgw[/youtube]

Thanks so much for stopping by! Have a wonderful day!
Hugs and smiles


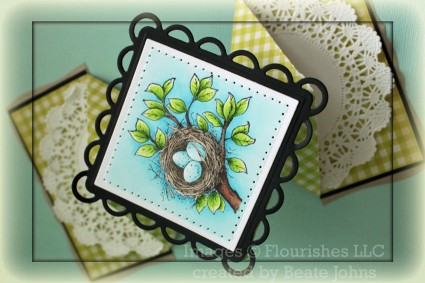
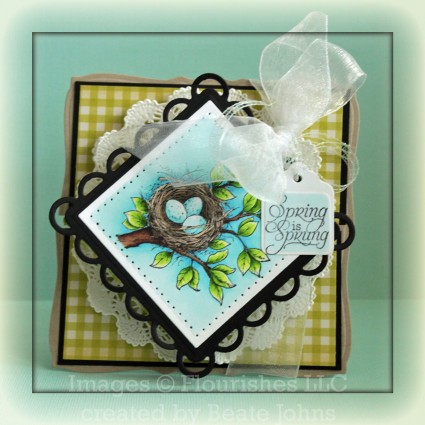
Remember the card I made for the Inspiration Emporium challenge last month? I created a tutorial for the Diamond fold card for Splitcoast and it’s being published today. My sample is the same as the Fragment card, except for without the fragments. Instead of  those, I paper pierced the edges of the square.

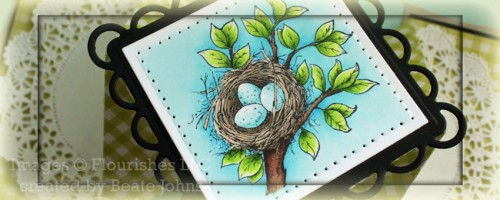
I chose another image from Flourishes Spring is Sprung set. I just LOVE that set. I stamped the bird nest in Tuxedo Black Memento Ink on Neenah Solar White cardstock and colored it with Copic Markers (Nest: E41, E42, E43, E44   Eggs: BG000, BG01, BG02   Leaves: YG01, YG03, YG17   Branch: E23, E25, E27, E29   Sky: B12, B000, B0000).

he image layers were adhered to a Diamond Fold card base created out of a 4″ x 12″ piece of October Afternoon Weathervane paper. I created a tutorial for it, but that won’t be published until the end of May. It’s pretty easy though. Score your strip at 2″ and 10″. Mark the center of the strip on each side and fold the paper down and back up.

The 2″ x 4″ panels were stitched to a 2 1/8″ x 4 1/4″ piece of black cardstock, then adhered to a piece of Kraft cardstock, cut and embossed with a Curved Rectangle Nestabilities dies. A doily was cut and half and a half was adhered on each panel.

A sentiment from the Spring is Sprung was stamped in Tuxedo Black Memento Ink on Solar White cardstock that had been cut and embossed with the retired Five in one Tag die from Spellbinders. The center of the tag was colored with Copic Marker BG000. The tag attached to the card with the White May Arts Organdy Ribbon that was used to tie the card shut.

Here is a video for the visual learner:

[youtube]https://www.youtube.com/watch?v=QzPyoUja4DI[/youtube]

Thanks so much for stopping by! Have a wonderful day.
Hugs and smiles

© 2012 fresh & fun Suffusion theme by Sayontan Sinha