Sorry I am so late picking a winner for my latest blog candy. Random.org picked #45, that is Gloria Westerman. Gloria, email me with your mailing address and I will get those dies out to you right away.
Have a wonderful evening! Hugs and smiles

Welcome to the Whimsy Stamps December 2012 rubber stamp and die release!
Today, Whimsy Stamps is releasing 20 fantastic new Rubber Stamps & Stamp Sets, 5 wonderful new Whimsy Shapeology Dies, a fabulous new Shape EZ by TLC template and 2 beautiful Whimsy Designer Paper 6×6 packs. These new goodies are available to buy right now from the Whimsy Stamps store along with all your Whimsy favourites.
We are also welcoming two new DT members to the Whimsy family today! We hope you will join us in giving a warm Whimsy welcome to Melissa Andrew and Janette Garcia. We are very excited that these extremely talented gals have joined us here at Whimsy as members of our magazine staff! Welcome Melissa and Janette!
From today until 23 December, the Whimsy DT and Special Guests will be showcasing these new products with a daily mini blog hop. Each mini blog hop has a new release prize hidden somewhere along the way and you have 24hrs to enter each prize draw by leaving a comment on every blog listed for that day.
At the end of release week (Monday 24 December) a ‘Release Round-Up’ will be posted on the Whimsy blog with a complete list of winners from the daily mini blog hops.

For my card today I used an image from the darling new Playful Kittens stamp set. Again this card works wonderful for the current Simon Says Stamp challenge. Some of my favorites on this card include Washi Tape, Patterned paper, Wee images, Rhinestones and Copic Markers.
The image was stamped with Tuxedo Black Memento Ink on a 3 1/4″ x 5″ piece of Neenah Solar White cardstock. The bottom corner were rounded and the image was colored with Copic Markers (Kitten: C00, N0, N1, N2, R000, R20 Scarf: Y11, Y13, Y15, Y17, YR09, R24, R29, R39 Ground: YG01, YG03, YG17 Butterfly: YG01, BG10, BG11, BG13).
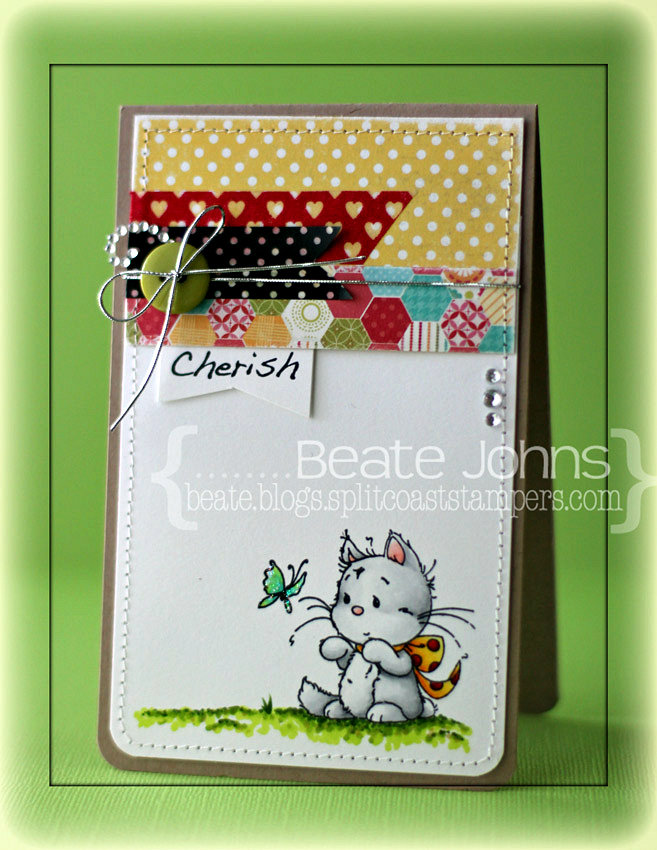
Two 3 1/4″ wide strips of Echo Park So Happy Together paper were sanded and adhered to the top of the image layer. The edges were stitched and two pieces of Washi Tape were adhered to the left hand side of the patterned paper strips. A green button was tied on with silver cord.
A sentiment from the Playful Kittens set was stamped on a scrap piece of paper. It was cut into banner shape and adhered under the paper strips. Stardust Glitter was added over the butterfly wings and rhinestones above the button and to the right hand side of the card.
To be entered into today’s mini blog hop prize draw, be sure to leave a comment on ALL of the DT posts listed below by 12.00pm EST tomorrow:
For a full reveal of this month’s fabulous release, please visit the Whimsy blog. Thanks so much for stopping by. Have a wonderful day!
Hugs and smiles
|
|

It’s time for a new Crafty Friends Challenge. Charmaine is the hostess and her challenge to us is to create a mostly white card, with just a splash of color. I will also enter the card into the current Simon Says Stamp Challenge, which is to use your favorites. Here I used paper piercing, rhinestones, dies, patterned paper and paper piercing. The layout of the card is from the current CASE Study card by Windy Robinson.
I started by cutting snowflakes out of silver glimmer paper with one of the Snowflake Borderabilities dies. A 1 3/4″ x 3″ strip of Carta Bella’s Winter Fun patterned paper was adhered to the bottom of a 3″ x 5″ piece of Neenah Solar White cardstock after the edges of the paper were sanded. The bottom edges were rounded and the edges of the layers were paper pierced. Seam Binding was tied around the top of the patterned paper and three bells were tied on with silver cord.
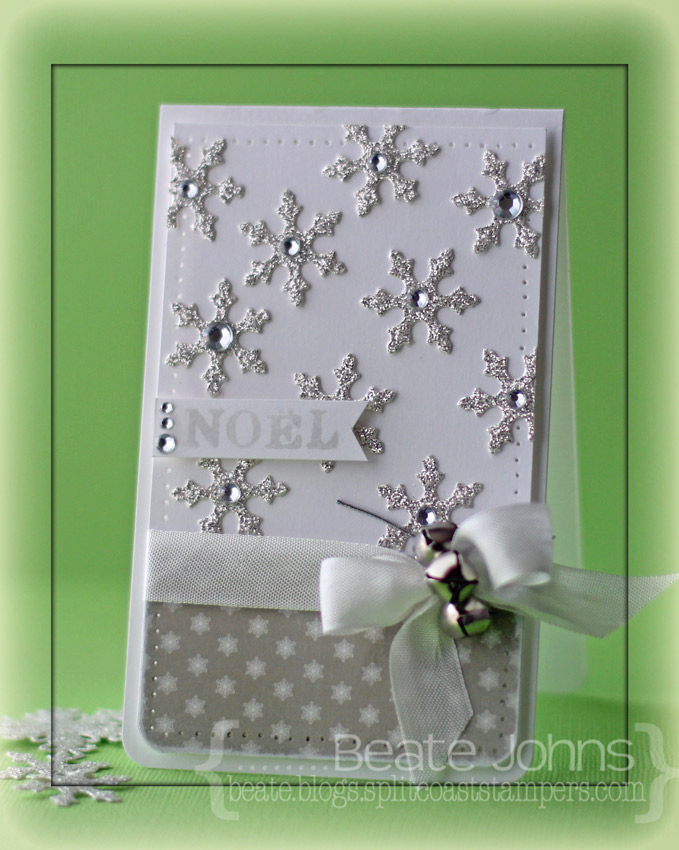
The layers were adhered to the card base, a 3 1/4″ x 10 1/2″ piece of Solar White cardstock folded in half with the bottom corners rounded. A sentiment from Simon Says Stamps Small Folded Banners Holiday was stamped in Platinum Stazon on white cardstock. It was cut into banner form. Want2Scrap Rhinestones finish off the card.
Check out my fellow Crafty Friends for more inspiration:
Thanks so much for looking! I hope you have time to join us in the challenge. It’s easy and fun! Have a wonderful week!
Hugs and smiles
|
|
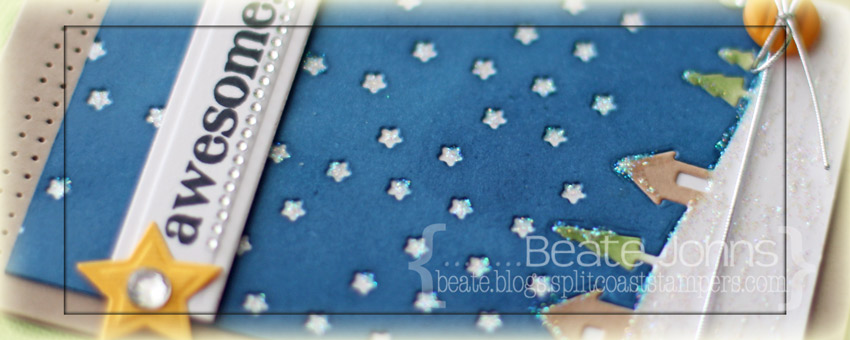
Usually on the 15th we have a NinaB. Designs blog hop. Because everyone is so busy this month we decided to skip it. I thought it would be fun to post card showcasing Nina’s stamps anyway. The card also works great for the current Simon Says Stamp challenge, which is to showcase your favorites. Some of my favorites are using dies, rhinestones, Memento Inks and my trusted corner chomper.
I started my card with a 3″ x 4 1/4″ piece of Neenah Solar White cardstock. The lower part was cut with the Country Landscape Memory Box die. The upper part was cut with the Simon Says Stamp exclusive Falling Stars die. The houses were sponged with Toffee Crunch, the trees with Bamboo Leaves Memento Ink. The sky was sponged with Nautical Blue Memento ink. The bottom corners were rounded before the layers were adhered to another piece of white cardstock exactly the same size.

Stardust Stickles was added on the bottom, on top of the trees and houses as well as in the star holes. Silver cord was wrapped around the lower edge and topped with a yellow button. A sentiment from Just Sayin’ was stamped in Tuxedo Black Memento Ink on white cardstock that had been cut and embossed with one of the Nested Lacey Pennant Nestabilities® dies.
Yellow Bazzill cardstock was cut and embossed with the smallest Star Nestabilities® die. The star was adhered to the right hand side of the sentiment and topped with a rhinestone. The sentiment strip was adhered to the image layer with foam adhesive squares. the layer was adhered to the card base, a 3 1/2″ x 10″ piece of Kraft cardstock, folded in half with more foam adhesive squares. More rhinestones (under the sentiment and above the button) and a double row of paper piercing above the layer finish off the card.
Thanks so much for looking! Have a wonderful weekend!
Hugs and smiles
|
|
I have another little something something for my regular readers as a thank you. If you have commented on at least 2 posts the last two weeks, comment underneath for a chance to win the retired Fanciful Holiday die set from Spellbinders.
 If you haven’t commented two times yet, just check out my older posts and leave a couple of comments. Thanks so much for always visiting my blog and commenting. I really appreciate it.
I will pick a winner next week Tuesday with the help of random.org. Have a wonderful weekend!
Hugs and smiles
Spellbinders is currently running the BIGGEST contest they’ve ever hosted to date! Spellbinders Explore Beyond Challenge: Craft to Win gives you a chance at a $5,000 Grand Prize Package from Spellbinders and their cross promotional partners! They’ll also be choosing a 2nd place winner to receive a $1,000 prize package and a $500 3rd place prize package!
Prizes will include products from WorldWin Papers, Want2Scrap, Xyron, KaiserCraft, Scrapbook Adhesives by 3L,Basic Grey, Scrapbook & Cards Today Magazine, BoBunny, Fancy Pants Designs, Canadian Scrapbooker, Nikki Sivils, Elmer’s, Bazzill Basics, Graphic 45, IMAGINE Crafts/Tsukineko and more!
How do you participate? It’s easy!
Simply create an original project using at least two (2) Spellbinders dies. And get creative with it! Push your own creative boundaries…do something different. We’ll be looking for those crafters and artists who have really taken on the challenge to truly “Explore Beyond”.
Take photos of each step of your project. If chosen as a finalist… You’ll be asked to submit these photos.
Submit a photo (of your finished project only!) to the appropriate Spellbinders Flickr Group.
Contest runs from November 26th, 2012 through December 26th, 2012 Midnight EST.
Categories:
Official Rules:
You may enter more than once in multiple categories. Projects entered must be original. A total of twelve (12) finalists will be chosen. There will be two (2) finalists from each category. Finalists will be announced on December 27, 2012. Finalists will be asked to submit photos of the steps of their projects to validate their originality. Finalists will be asked to mail in their final original project to the Spellbinders office. Original projects must be received by end of day, Friday, January 4, 2013.
A celebrity panel of judges will review the twelve (12) final submissions and narrow it down to three (3) winners. Winners will be announced on Friday, January 11, 2013. There will be one (1) Grand Prize winner of a $5,000 prize package and the project will be featured at the Spellbinders booth at the Craft and Hobby Association show on January 12, 2013. There will be one (1) 2nd prize winner of a $1,000 prize package and featured on the Spellbinders blog. There will be one (1) 3rd prize winner of a $500 prize package and featured on the Spellbinders blog.
Legal:
All federal, state and local taxes are the sole responsibility of the winners. By acceptance of the prize, winners agree without limitation to the use of his/her name, photograph and/or likeness for publicity purposes without any additional compensation. Winners agree to be bound by these rules and the decisions of the Spellbinders panel, which are final and binding in all matters regarding this event. Winners agree that the event and its representatives affiliates, agents, directors, officers and employees have no liability whatsoever for any injuries, losses or damages of any kind relating to or arising from this event or resulting from participation in this contest.Contest is not open to Spellbinders Employees, Various Team Members, or their immediate family members (Grandparents, Parents, Siblings, Spouses, Children).
Do you have an Advent tradition? When the kids were little, I had an advent calendar that I filled with small treats every day. As they grew older we started filling the advent calendar with a little hint where the treat is hidden. My kids still love this little scavenger hunt, even though my hints are too easy for them to find (I am not good at this…but it’s the tradition that counts, right?). Well…over the moves the first advent calendar got lost and the one I made for a Splitcoast tutorial years ago, lost a few tins. It was time for a new one.
I really wanted the KaiserCraft Advent calendar to alter, but I couldn’t find it online (last minute as I am), so I ordered this Karen Foster Countdown Calendar. It comes with rubon numbers, but I didn’t use those.
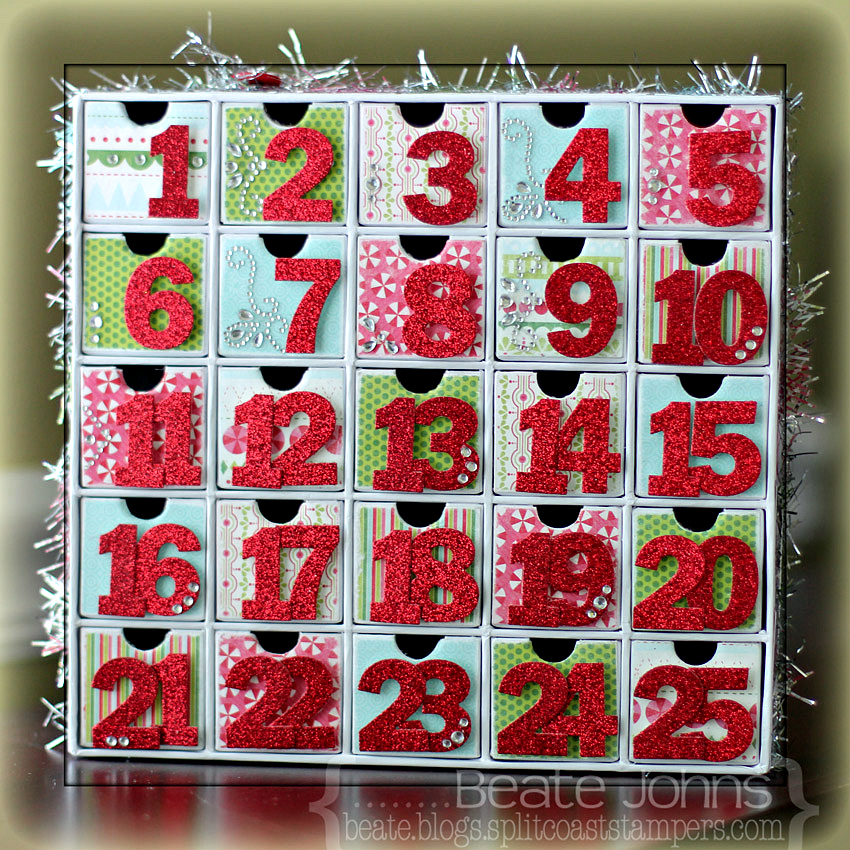
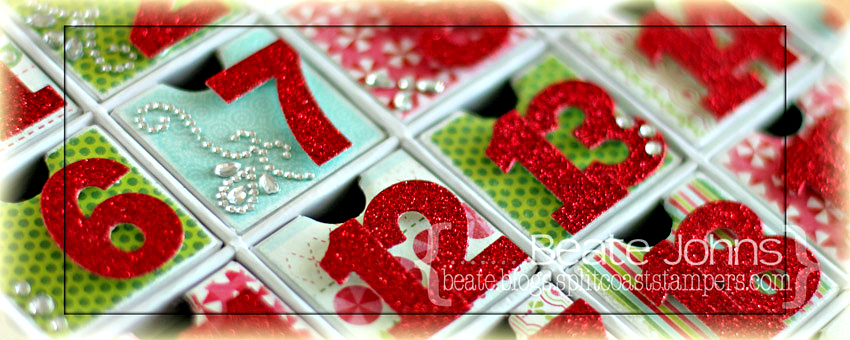
I started by covering each drawer front with Carta Bella Merry & Bright paper. The drawers are tiny.I cut the papers into 1 7/16″ squares, sanded the edges and used a 1/2″ circle punch for the finger holes. I adhered the paper with Scor-Tape. I mention it because I first adhered it with Glue & Seal, thinking liquid adhesive would work better, only to have the paper just come off again.
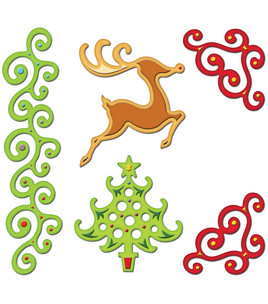
The numbers were cut out of Red Glimmer Paper (Stampin’ Up!) with By the Numbers Die-namics dies. Those were popped up with adhesive foam squares on each drawer. Rhinestones were added to add just a bit more sparkle. I bought the tinsel 2 years ago in my LSS in Ohio. It comes on a pretty wooden spool. Unfortunately I don’t know the maker of it. The sticker came off.
Thanks so much for stopping by! Have a wonderful day!
Hugs and smiles
|
|
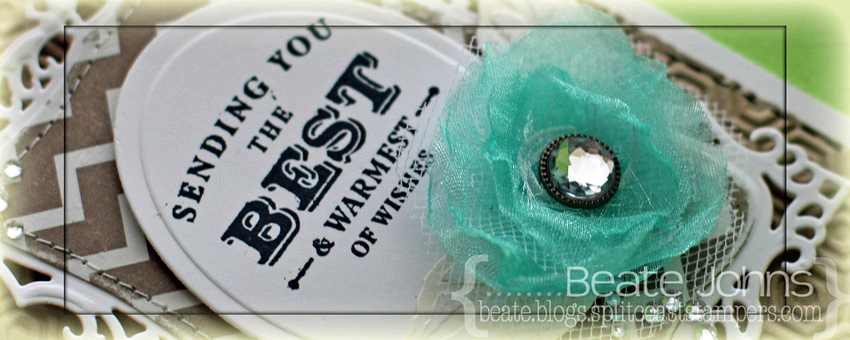
Today’s tutorial on Splitcoaststampers is written by the wonderful Susan Roberts. She shows us how to create a flower by cutting and melting ribbon pieces. It’s perfect for winter, when my hands seem to be cold all the time. 🙂
For my sample I used ribbon and tulle bought at Hobby Lobby. Both were cut with the two smallest Blossom Nestabilities® dies, heated and stuck together with a decorative brad.
A sentiment from Simon Says Stamp Apothecary Labels was stamped in Tuxedo Black Memento Ink on Neenah Solar White cardstock that had been cut and embossed with the second largest of the Classic Oval SM Nestabilities® dies.
Two pieces of Fancy Pants Country Boutique Paper were cut and embossed with the single leaf dies from the Bitty Blossoms Shapeabilities® die set. The leaves were sanded before they were adhered under the ribbon flower, who was in turn adhered to the lower half of the sentiment oval.
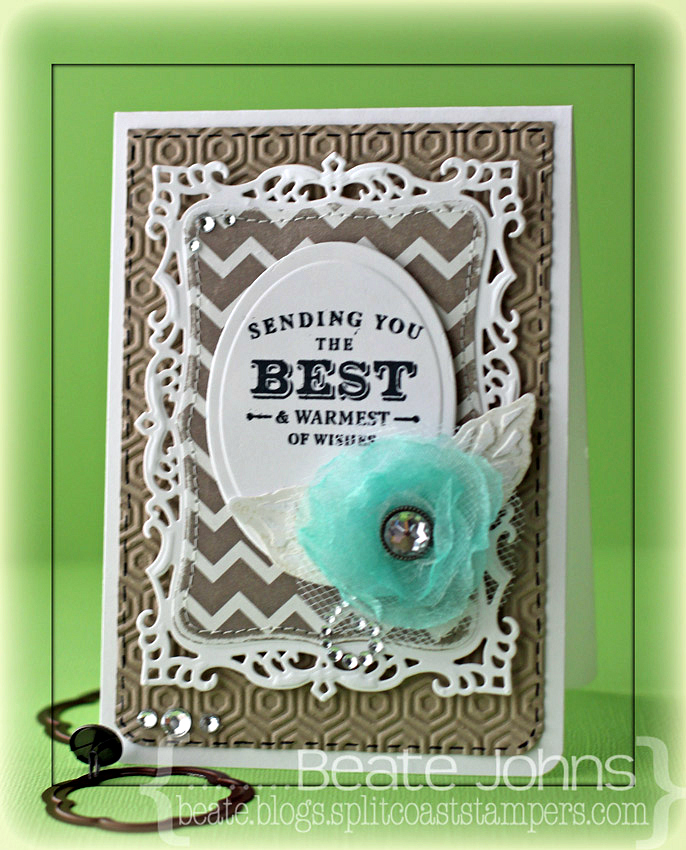
Another piece as well as more Neenah Solar White cardstock was cut and embossed with the second largest Decorative Label Eight Nestabilities® die. The patterned paper was sanded and cut on the embossed edge before it was stitched to the white die cut. The sentiment panel was adhered to the center of the fancy panel with foam adhesive squares.
The bottom corners of a 3 1/2″ x 5 1/4″ piece of Kraft cardstock were rounded and a faux stitched border was added with a black gel pen. The layer was then embossed with the So Trendy M-Bossabilities ® folder. It was adhered to the card base, a 3 3/4″ x 11″ piece of Solar White cardstock, folded in half with the bottom corners rounded. Rhinestones finish off the card.
Here is a video for the visual learner:
[youtube]https://www.youtube.com/watch?v=ajo7y88Rf3Q[/youtube]
Thanks so much for stopping by! Have a wonderful day!
Hugs and smiles
|
|

Becky and Melanie thought it would be great fun to team up for a little Holiday Hop today. We are showcasing Becky’s new set, “Warm Woolen Mittens” along with Becky’s new cut file “Grand Banners” and “Grand Banners – Winter Sentiments” and Melanie’s newest set, “Lots of Letters” as well as some of her other recent favorites.
For my card I stamped one of the patterns from Pretty Patterns in VersaMark ink on a 3″ x 5″ piece of Neenah Solar cardstock. It was embossed with clear embossing powder and stars were cut and embossed out of the lower half with the two smallest dies from the Star Nestabilities set. I had seen Jennifer McGuire create a card with this technique and had wanted to try that out ever since.
The bottom left corner was rounded before the background was sponged first with Teal Zeal, then with Nautical Blue Memento Ink. The stars were sponged with London Fog Memento Ink while the dies were still on the cardstock.
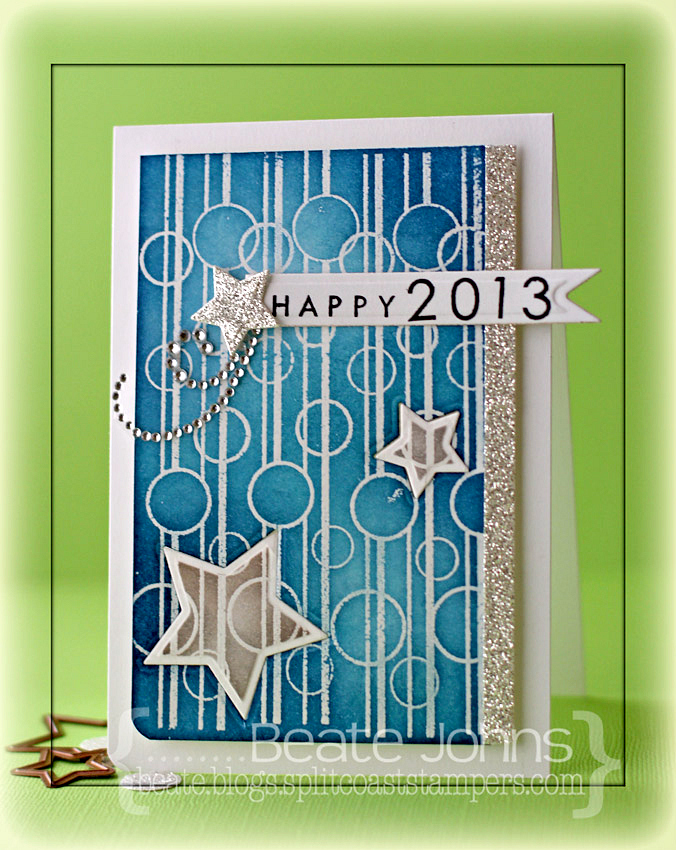
The card base is a piece of 3 3/4″ x 11″ piece of Neenah Solar White cardstock folded in half. Again the bottom left corner was rounded. The background and the stars were adhered to the card base with adhesive foam squares. A 1/4″ x 5″ silver glimmer paper (Stampin’ Up!) strip was adhered to the right hand side of the background. A small star was cut out the same paper.
The word happy is from the stamp set Inspiration Mosaic. It was stamped in Tuxedo Black Memento Ink on a strip of white cardstock. 2013 was stamped behind it with numbers from the new Lots of Letters set. The sentiment was cut out with a Pennant die. The glitter star was adhered to the left of the sentiment and both were adhered to the upper half of the card. Part of a Finesse Rhinestone swirl finish off the card.
Make sure you visit everyone’s blog to leave a comment and be entered to win a clear “I do!” and “Beyond Baskets” stamp set! A winner will be announced Thursday.
Becky Oehlers (Illustrator of Warm Woolen Mittens)
Thanks so much for looking! Have a wonderful day!
Hugs and smiles

I am exciting to be guest designing for Tiddly Ink this month. For my first card I decided to use the darling Winter Wryn image. I printed her out on Neenah Solar White cardstock and colored her with Copic Markers (Coat/Hat: YR09, R24, R29, R39 Hat/coat trim: W00, W1, W2 Skin: E50, E21, E34 Hair: Y21, Y23, E31, E33 Boots: C1, C3, C5, C7, C9). The cardstock was cut down to 5 1/4″ length and the left hand side was cut with the Notebook Die-namics die. The right hand corner was rounded.
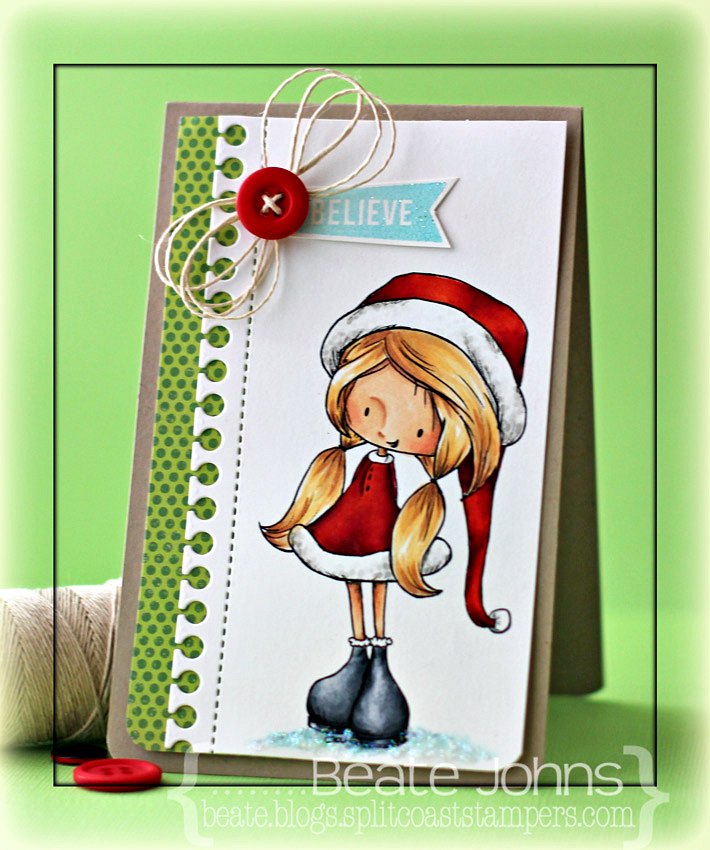
A piece of Carta Bella Merry & Bright paper was adhered on the left to form a 3 1/4″ x 5 1/4″ layer. It was adhered to the card base, a 3 1/2″ x 11″ piece of Kraft cardstock, folded in half. Both bottom corners were rounded.
A sentiment from Kelli Purkey’s Joy stamp set was stamped in Sea Breeze VersaMagic ink on white cardstock. It was embossed with iridescent ice embossing powder and cut out. Hemp cord was wrapped into a bow and tied together with a bow. The sentiment was taped under it and it was adhered to the upper right hand side.
Do you have any Tiddly Ink images? They are so cute and so much to color.
Hugs and smiles
|
|


