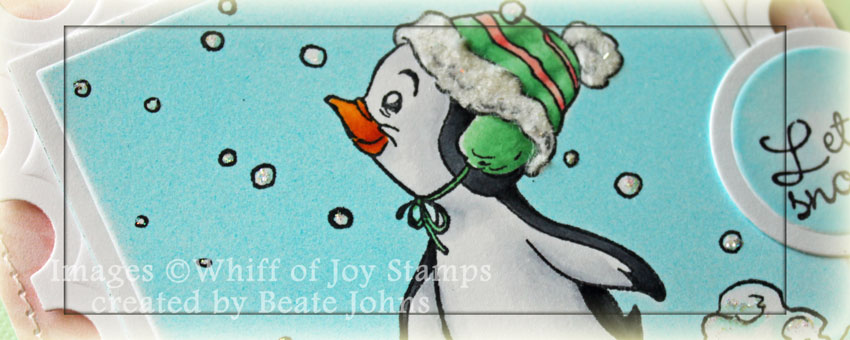
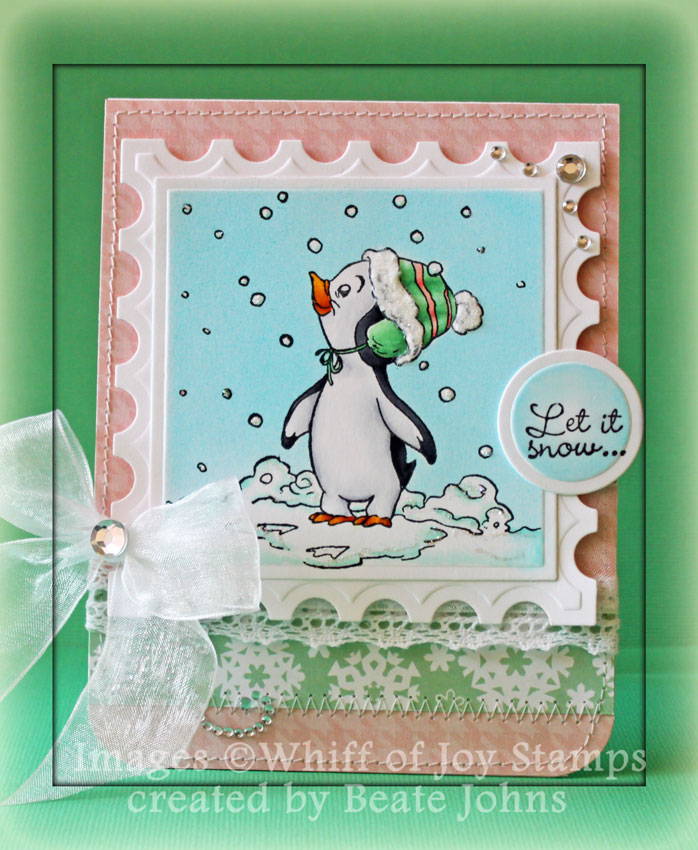
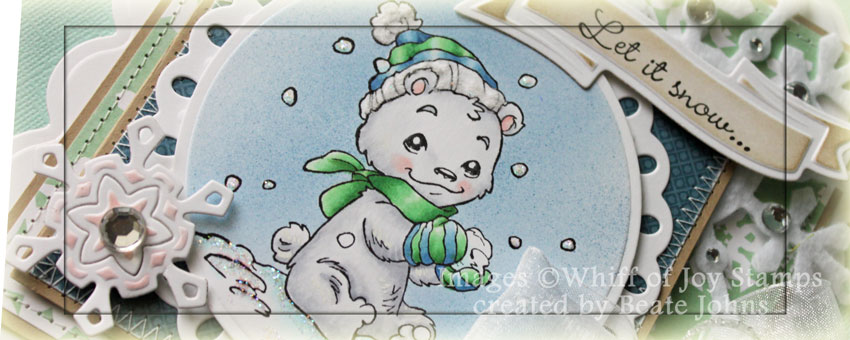
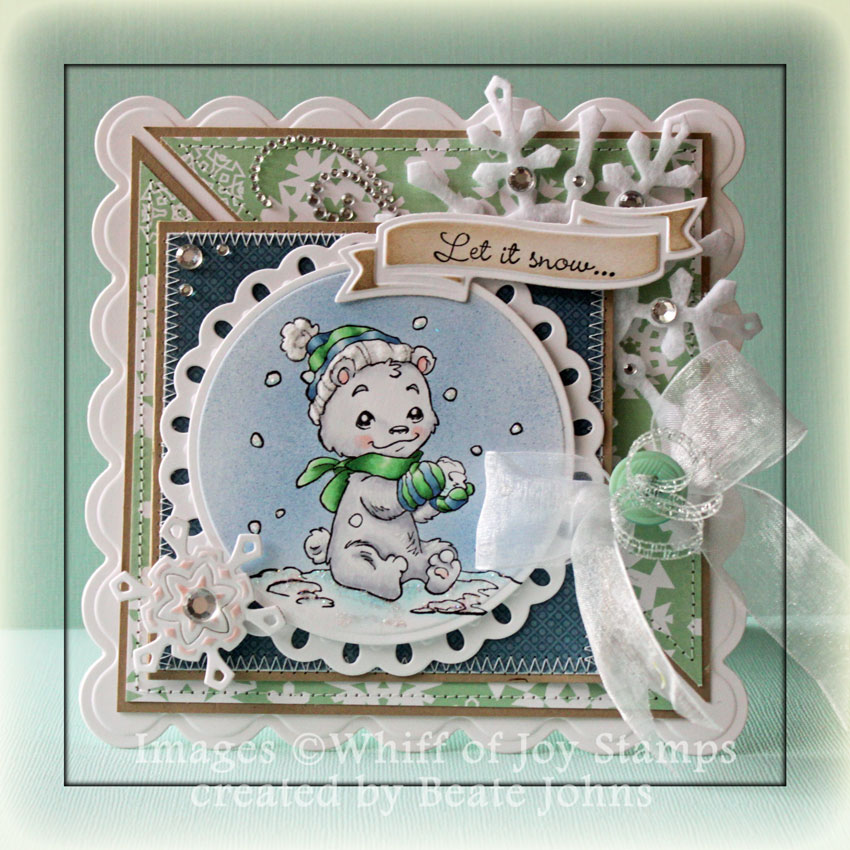
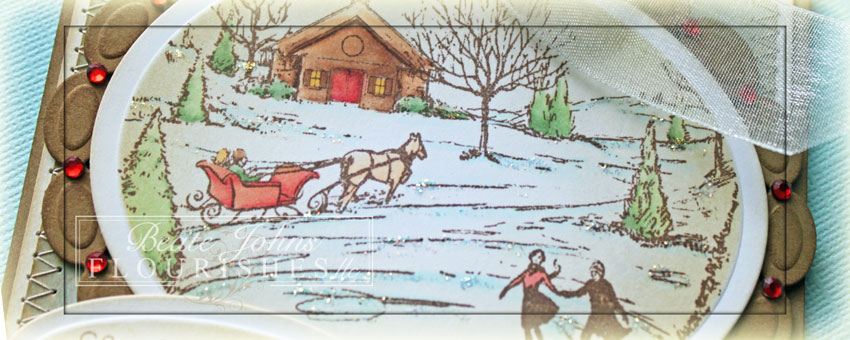
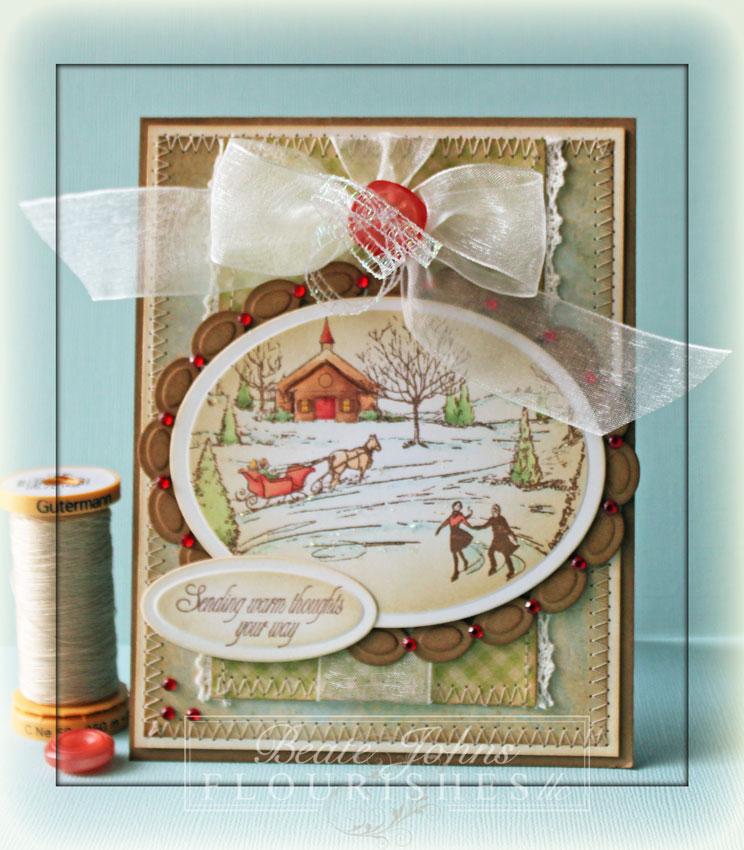
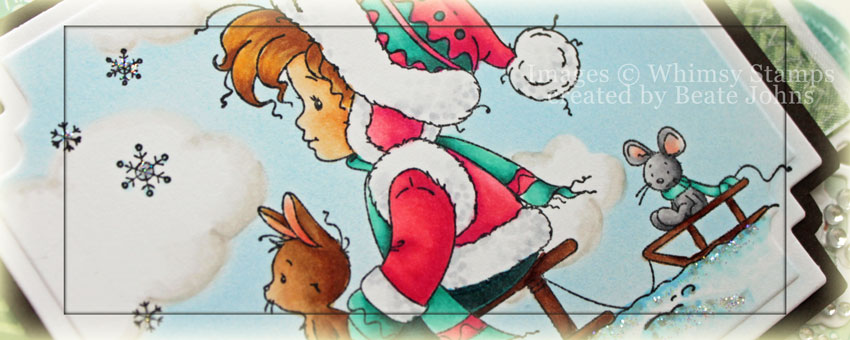
I created this card for the latest Whimsy Magazine edition. It is out today and you can download it for free. The image I used is from the latest Whimsy Stamps release. It is a Wee stamp called Let it Snow. The image was stamped in Tuxedo Black Memento Ink on Neenah Solar White cardstock.

The image was cut and embossed with a Label 22 Nestabilities die and colored with Copic Markers (Bunny: E30, E31, E33, E 34, R30, R20, R22     Mouse: N0, N1, N3, N4   Clothes: RV21, RV23, RV25    BG11, BG13, BG15     C00, C1, C2   Pants: BG75, BG78   Sled: E23, E25, E27   Skin: E50, E51, E53    Hair: Y23, E31, E33).  The image was masked , cloud masks were added and the image was airbrushed with Copic Marker B12. The Clouds were colored with Copic Markers W00, W0 and W1. The layers were adhered to a piece of Canyon Brown cardstock and hand cut into a slightly bigger layer.

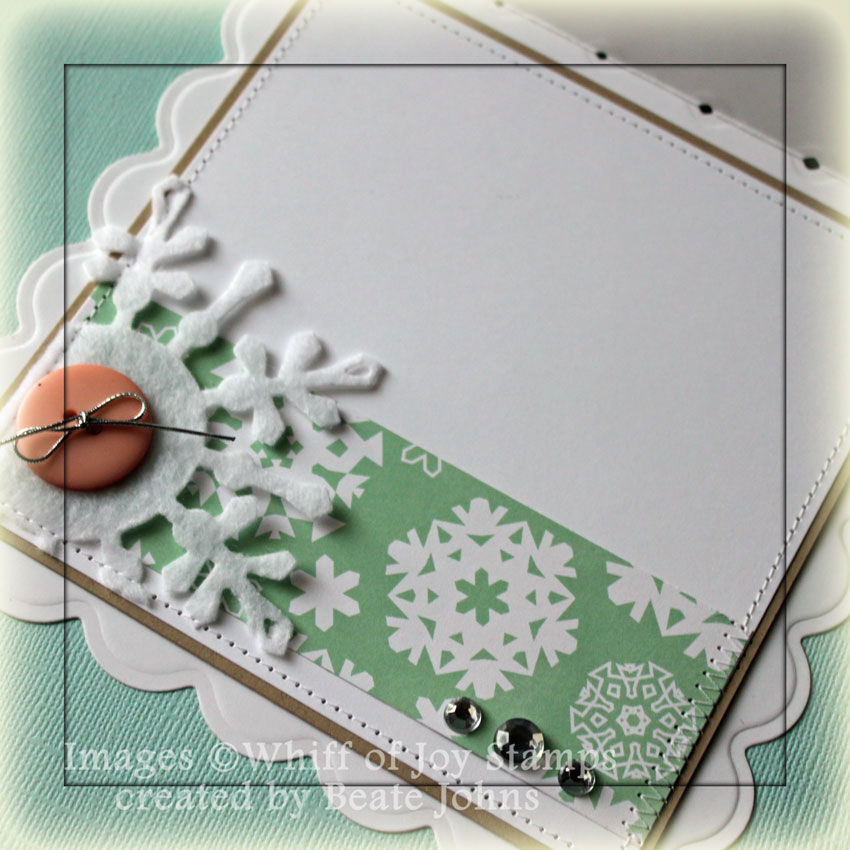
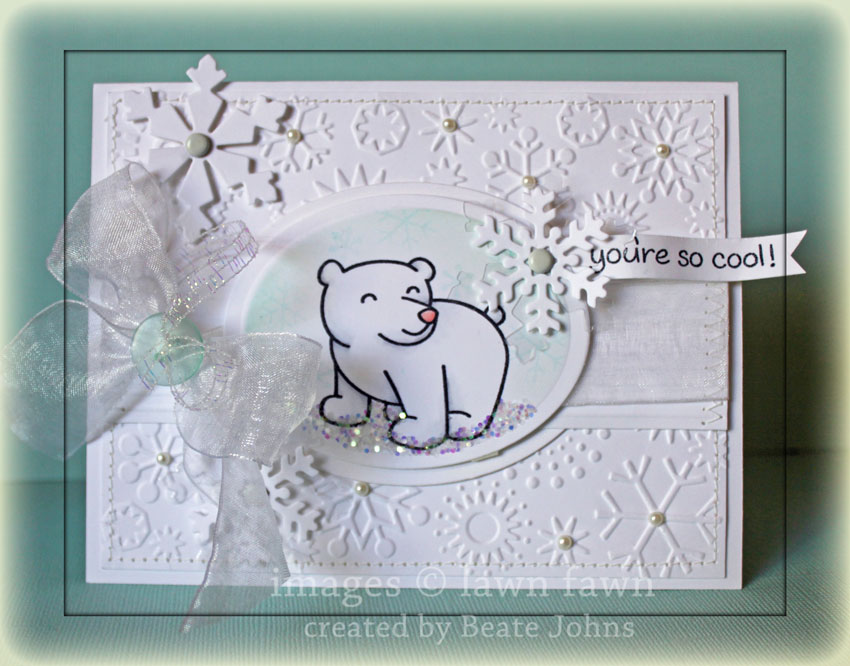
A 4 3/4″ long strip of white cardstock was cut and embossed with a Lace Doily Accent die. It was adhered under a 2″ x 4 3/4″ piece of Echo Parks Holly Jolly Christmas patterned paper. The strips were adhered to a 4 3/4″  square of the same paper pack. The layers were stitched toa a 1/4″ bigger piece of white cardstock. White Organdy Ribbon was tied around the horizontal strip and topped with a Recollection Glitter Brad.

The card base was cut out of Core’dination cardstock with a Grand Label 23 Nestabilities die. The edges of the cardstock were sanded before the the layers were adhered. A sentiment from the new Winter Notables was stamped in Tuxedo Black Memento Ink and colored with Copic Markers used on the main image. It was adhered on the top right of the image. Parts of a Finesse Rhinestone Swirl were added to the card front.

Thanks so much for stopping by! Have a wonderful day!
Hugs and smiles


Today I am sharing another card I created for a VSN challenge in the beginning of the month. This challenge was to add a snowflake into your design.

For my sample I cut and embossed a piece of Cryogen White cardstock with a Classic Square Nestabilities die, stamped it with a Snowflake from Sweet ‘n Sassy Stamps Snowflake Silhouette in Spun Sugar Distress ink and stitched it to a piece of Pink Pirouette cardstock, cut and embossed with the largest Postage Stamp Nestabilities die.

I cut and embossed more shimmery cardstock with dies from the retired Create a Flake one  Spellbinders die pack (you can still find Create a Flake 2 and the new Create a Flake 3 packs in stores), sponged the centers with New Sprout Memento ink,  and topped with Vintage Glass Glitter Shards. The layers were topped with a tiny button and tied together with wire before the snowflake was adhered to the pink snowflake layers.

The card base is a 4 1/4″ x 11″ piece of Cryogen White cardstock, folded in half with the bottom corners rounded. A 1 3/4″ wide strip of My Mind’s Eye Lost & Found 2 Rosy paper was adhered to the lower half and May Arts Organdy Ribbon was tied over it. The snowflake layers were adhered to the card base with dimensionals. Part of a Finesse Rhinestone swirl and additional Rhinestones finish off the card.

Thanks so much for stopping by! Have a wonderful day!
Hugs and smiles

It’s sneak peek week at Flourishes! Today, the Flourishes Design Team is showing off a brand new set called Snow Wonderful.


It has two gorgeous new images and several great sentiments. Use these images with Flourishes’ Tailor-made Classic Keyhole Template Die for a perfectly cut and embossed image every time! This set’s sentiments even fit perfectly in the die set’s word window!

I used the gorgeous bird image for my sample. The image was stamped in Tuxedo Black Memento Ink on white cardstock and cut and embossed with the Classic Keyhole Template Die. The image was colored with Copic Markers (Birds: B21, B23, W0, W1, Y17, YR18   Branch: E23, E25, E27, E29   Needles: YG61, YG67   Background: BG0000, BG000, BG01). The image layer was adhered to a paper doily.

Three pieces of My Mind’s Eye Lost & Found 2 Rosy Patterned Paper were stitched to a 4 1/4″ x 5 1/2″ piece of white cardstock. Seam Binding was tied around the layers vertically before the layers were adhered to the card base, a 4 1/2″ x 11 1/2″ piece of Kraft cardstock, folded in half. The Seam binding bow was topped with a button, tied on with Linen thread.

A sentiment from Snow Wonderful was stamped in the lower right corner of the card front. Parts of a Finesse Pearl Swirl as well as single adhesive Pearls were used to finish decorating the card.

Want to win this set? All you need to do is leave some love in the form of a comment on the blogs below! Why? You need to try to figure out…..

One of the ladies on our link list below will be picking a name from the comments on her blog post today. We don’t know which one it is… so the more blogs you leave comments on, the more chances you have to win! So, head on over and see how our fabulously talented DT used this beautiful new set. The winner will be announced on Saturday, December 17th at noon CST. Want another chance to win? Go to the Flourishes Blog at noon CST to check out the challenges that could you walking away with the entire December release.

Thanks so much for stopping by! Have a wonderful day and good luck on winning the set. It’s beautiful!!!
Hugs and smiles

It’s Virtual Stamp night over on Splitcoaststampers. The first challenge is hosted by Lydia. She is asking us to create a card with something that gives us the “Warm Fuzzies”. Who wouldn’t get the warm fuzzies looking at this darling image. Plus the sweet penguin has a warm looking hat on.

To start out I stamped the Penguin’s first Snow image in Tuxedo Black Memento Ink on Neenah Solar White cardstock. The image was cut out with a Classic Square Nestabilities die and colored with Copic Markers ( Penguin: C00, C1, C3, C5, C7, C9, Y17, YR15, YR18   Hat: YG41, YG45, R30, R32   Snow: BG10, BG11). I covered the main image with a mask cut with Eclipse tape. But the snow flakes were too small for that, so I used Liquid Masking Fluid. The image was airbrushed with Copic Marker B04.

Stardust Stickles was added to the snow and snow flakes. Sugar Sparkly Fluff was added to the hat rim and pom-pom. The image was adhered to a piece of Solar White cardstock, cut and embossed with the largest Postage Stamp Nestabilities die.

A 1 1/4″ x 4 1/4″ strip of Echo Park Holly Jolly patterned paper was adhered to the lower part of a 4 1/4″ x 5 1/2″ piece of the same paper pack. The lower corners were rounded. White Crochet Lace was adhered above the paper strip before White Organdy Ribbon was tied above teh paper strip. The image was adhered over the ribbon with dimensionals.

The sentiment is from Whiff of Joy’s Seasonal Greetings. It was stamped in Tuxedo Black Ink on Neenah Solar White cardstock, cut and embossed with Standard Circle Nestabilities die. The center of the circle was colored with Copic Markers B0000 and B000. The layers were adhered to a card base a 4 1/4″ x 11″ piece of Solar White cardstock, folded in half.  Part of a Finesse Rhinestone Swirl and additional Rhinestones finish off the card.

Thanks so much for stopping by! I hope you have time to play with us tonight.
Have a great evening.
Hugs and smiles

CardMaker Magazine is launching a new blog and is featuring Little Darling Stamps today. Little Darling stamps will be included in CardMaker Magazine’s “Our Favorite Products” in the January issue that is on sale in stores now. To celebrate this occasion, Angie Hunt is giving away five Little Darling Stamps, one from each of the five releases so far, to a random commenter on her blog.

For my card I did something for the first time. I merged digital images. When I agreed to help out for this event, I got to pick a Little Darlings image, but as digital image. I picked the darling Ice Dancer. To give her an area to skate on, I purchased this Ice Skating Lake digi image from Make it Crafty. I followed the excellent tutorial on merging images from Crafty Cardmakers, which made it very easy to merge my images.

I printed them out on Neenah Solar White cardstock and cut the image with the largest of the Standard Circle Nestabilities dies. The image was colored with Copic Markers (Coat and socks: R24, R29, R39   Coat Trim: C00, C1, C3   Skirt and shoes: E42, E43, E44, E47   Shirt: E40, E42   Skin: E50 E51, E53, BV00   Hair: Y21, Y23, E33   Trees: G21, G24, G28   Sky: B0000, B000, B00, B91) before it was layered on to a piece of Solar White cardstock, cut and embossed with the largest scallop circle from the standard circle collection. Stardust Stickles was used to add sparkle to the snow and Glossy Accents on part of the lake.

For my card layout I used the current Sketch Saturday Sketch. Little Darlings is sponsoring it this week. The winner will be receiving a $15 merchant gift voucher from LovetoStamp.

I cut a circle with a Grand Circle Nestabilities die out of  Echo Park’s Times & Seasons paper and sanded the edges. One 2 1/8″ and a 2 3/8″ wide strip from the same paper pack were also cut and embossed with the same die and had their edges sanded.

A white cardstock strip was cut and embossed with one of the Jumbo Scalloped Borderabilities dies and adhered under the blue layer. A piece of White Crochet Lace was adhered to one side of the red layers. Both of the strips were adhered to the circle layer and the edges were stitched.

White Organdy ribbon was tied around the horizontal strip, topped with a button tied on with Silver Curling ribbon. The layers were then adhered to a card front, cut and embossed with a Grand Scalloped Circle die out of Solar White cardstock.  A sentiment from Whimsy’s Treasured Moments Tickets was stamped in Tuxedo Black Memento ink on a piece of Solar White cardstock, cut and embossed with a Standard Nestabilities circle die. The sentiment center was colored with Copic Markers B000, B00. Part of a Finesse Rhinestone swirl and more silver Rhinestones finish off the card front.

Thank you so much for stopping by! Good luck winning those stamps.
Have a wonderful day!
Hugs and smiles

Wohoo! Today is the first day of me being officially on the Whiff of Joy Challenge team. This week’s challenge is easy. It’s a beautiful sketch from Katharina.

I had just received my latest order and new right away I wanted to ink up the darling Ice-Beary Greetings stamp right away. The image was stamped in Tuxedo Black Memento Ink on Neenah Solar White Cardstock, colored with Copic Markers (Bear: C00, C1, C3   Scarf: YG41, YG45   Hat/Mittens: B41, B52, B45) and cut and embossed with a Standard Circle Nestabilities die. The image was then masked and airbrushed first with the medium nib of Copic Marker B93, then with the Brush tip of Marker B95 (brush tip gives a more speckled look).

Sugar Sparkly Fluff was added the hat trim and pom pom, Stardust Stickles over the snow. Subtle highlights were added with Copic Opaque White. The circle was then adhered to a piece of Solar White cardstock, cut and embossed with the largest Tear Drop Circle Die.The image layers were adhered to a 4″ square of Winter Park Paper after that was stitched to a 1/4″ bigger piece of Kraft cardstock.

A 5″ square of Echo Parks Holly Jolly Christmas Paper was cut in half diagonally. The triangles were stitched to triangles cut out of a 5 3/8″ square of Kraft cardstock.  On the triangle going on the right side of the card front I punched a hole on the lower left side and tied White organdy ribbon through it. The bow was topped with a button, tied on with Silver Curling Ribbon.

Next I cut a piece of felt with Spellbinders 2010 Snowflake Pendant. I put a piece of scrap paper underneath the felt. I help cut the felt right through. The snowflake was adhered to the upper right corner of the image layers. A piece of white cardstock was cut and embossed with the smaller dies of that pendant pack, airbrushed with Copic Marker R00 (I used that for the little bears cheeks). That snowflake was adhered to the lower left corner of the image layers.

The card base was cut and embossed with a Grand Square Nestabilities die out of Solar white cardstock. The layers were adhered to that and dressed up with part of a Finesse swirl and Silver Rhinestones.

A sentiment from Whiff of Joy’s Seasons Greetings was stamped in Tuxedo Black on a piece of Solar White cardstock, cut and embossed with a die from Spellbinders Ribbon Banners. The inside of the banner was sponged with Pumice Stone Distress ink. The sentiment was adhered with dimensionals over the felt snowflake and part of the image.

The inside was dressed up to match the outside of the card The white square measures 5″. It was topped with a 1 5/8″ wide strip of Holly Jolly paper and stitched to a 3/16″ bigger piece of Kraft cardstock. A partial snowflake was added to the lower left corner, topped with a Basic Grey button that was tied on with silver string. Three Silver Rhinestones finish off the card.

Thanks so much for stopping by. Please check out my fellow team members listed on my right side bar. I hope you have time to participate in the challenge. It’s a fun sketch and you could win prizes, if you use a Whiff of Joy stamp on your card.

Have a wonderful day! Hugs and smiles


Today challenge is easy and fun. Silke gave us a beautiful sketch to work with. For my sample I stamped the Cardinal from Flourishes Christmas Classics in Tuxedo Black Memento Ink on Neenah Classic White cardstock. The image was colored with Copic Markers (Cardinal and berries: R08, R27, R29, R59  Beak and feet: YR15, YR18, R08   Branches: E55, E57, E57   Background: B0000) and cut and embossed with a Classic Circle Nestabilities dies along with the Out of the Box Technique.

The edges of the image layer were sponged with Vintage Photo Distress ink before the image was layered on a piece of Classic White cardstock, cut and embossed with the second largest Tear Drop Circle Nestabilities dies. The edges of that circle were slightly sponged with Antique Linen Distress Ink.

The edges of a 2 1/4″ x 4 3/4″ piece of 25 Days of Christmas Simply Stories Patterned Paper were sanded and sponged with Vintage Photo Distress ink before they were stitched and adhered to a 4″ x 5 1/4″ piece from the same paper pack. The bigger piece had been sanded and sponged as well.

Two 1 1/4″ x 4″ different patterned 25 Days of Christmas paper strips were also sanded and sponged before they were stitched as horizontal layers over the other papers. One of the strips  had a piece of Ivory Crochet Lace stitched underneath.  May Arts Ivory Organdy Ribbon was tied around that layer, tied into a bow and topped with a Basic Grey button, tied on ivory embossing thread.

The layers were adhered to the card base, a 4 1/4″ x 11″ piece of Classic White cardstock folded in half. The bottom corners were rounded. A Finesse Pearl Swirl ,cut apart and adhered partly to the lower left, partly to the upper right hand corner,  finishes off the card.

Please check out my fellow Timeless Tuesday Challenge members for more samples and inspiration:

Cindy Haffner
Heather Jensen
Maki Jones
Mona Pendleton
Silke Ledlow
Tammy Hershberger
and
December Guest Designer Theresa Pollack

Thanks so much for stopping by! Have a wonderful day!
Hugs and smiles


This month the challenge is to create a winter/holiday creation. Link up your Bringing Back Beautiful Challenge creations at the Flourishes Blog. If you upload to SCS, please use the keyword BBB17. You have until December 31th to enter! As we unveil our challenge for next month, we’ll share our True Beauties – those card makers who wowed us with this challenge! Winners will be featured on the Flourishes Blog and will receive a True Beauty blog button to display proudly on their blog!


For my card I pulled out the Christmas Post card stamp set. I stamped it in Rich Cocoa Memento Ink on a piece of Neenah Solar White cardstock, cut and embossed with the largest Classic Oval Nestabilities die. The image was colored with Copic Markers ( Horse E50, E51   House: E21, E23   Trees: G20, G21   Bushes: YG61, YG63   Reds: R20, R21, R22) and the edges were sponged first with Antique Linen, then with Vintage Photo Distress ink.

The image was layered on a piece of Kraft cardstock that had been cut and embossed with a Beaded Oval Nestabilities die  that had been sponged with Vintage Photo Distress ink. The snow in the image was highlighted with Diamond Stickles and Red Baby Bling was added in between each beaded oval piece.

Two pieces of May Arts Crochet Lace were stitched to a 2 3/4″ x 4 3/4″ piece of Baby Steps Simple Stories Patterned Paper after the edges of the paper were sponged with Vintage Photo Ink. The edges of a 3 3/4″ x 5″ piece of the same paper pack were sponged with Vintage Photo ink before they were stitched to a 1/4″ bigger piece of Neenah Solar White cardstock that had been sponged with Antique Linen ink.

Ivory Organdy Ribbon was tied around the smaller layers before they were adhered to the bigger layers. The ribbon bow was topped with a button, tied on with iridescent curling Ribbon.  The main image was adhered over the layers with dimensionals and everything was adhered to the card base, a 4 1/4″ x 11″ piece of Kraft cardstock, folded in half and sponged with Vintage Photo.

A sentiment from the Vintage Postcard stamp set was stamped in Rich Cocoa Ink on a piece of Neenah Solar White cardstock, cut and embossed with the smallest Petite Oval Nestabilities die. The layer was sponged with Antique Linen Distress ink. It was adhered to the lower left of the image. Three small red bling Rhinestones on the bottom left corner finish off the card.

Check out what the rest of the design team has created!

Thanks so much for stopping by! I hope you have time to participate in the challenge. Have a wonderful day!
Hugs and smiles

During the Mini VSN a few of weeks ago, the first challenge was to create a card with an image of a warm clothing along with some felt on your card. I had just shot the video tutorial for the Pocket Card ,and had a finished pocket, that just needed an image to be finished off.

I stamped an image from the super cute There She Goes Clear Stamps Wonderful Winter Wishes set in Tuxedo Black on Neenah Solar White cardstock as well as a  patterned piece from Echo Parks Holly Jolly paper pack. The jacket was cut out of the patterned paper and shaded with Copic Markers ( R35, R37, R39). The image on the cardstock was cut and embossed with a Classic Circle Nestabilities die and also colored with Copic Markers (mitten and boots: G000, G00, G02 Skin: E0000, E00, E01, R20 Pants: E40, E41, E42 Snow: BG0000, BG000, B01 Hair: E97, E25 carrot: YR15, YR18). The jacket was adhered to the main image and the background was airbrushed with Copic Marker B02. The cloud that had been masked, was shaded with Copic Markers (W00, W0, W1).


The card base was created out of a 4 1/4″ x 11″ piece of cardstock, scored at 1 1/4″ and 5 1/2″. The four corners were rounded. A 3 3/4″ square of Holly Jolly paper was stitched to a 1/4″ bigger piece of whtie cardstock. A quarter of a paper doily was adhered to the lower left of the the stitched layers and three buttons were tied to it with Linen Thread.

Part of a Finesse Swirl was adhered over the buttons and more Rhinestones were adhered to the lower right corner. The layers were adhered to the card base. Before the flap was taped down, May Arts Organdy Ribbon was tied around it. Pink felt was cut with a small Heart Nestabilities die and stitched to the top of the bow.

The image circle was adhered to a piece of Solar White cardstock, cut and embossed with a Tear Drop Circle Nestabilities die. The layers were adhered to the card base with dimensionals.

The inside tag is a 3 1/2″ x 5″ piece of Solar White cardstock. The top corners were rounded and a 1 1/8″ wide strip of Holly Jolly paper was adhered to the lower half. A sentiment from the Wonderful Winter Wishes set was stamped above the strip with Tuxedo Black ink. Another pink felt heart was topped with a clear button and stitched to the tag with embroidery thread.

The card works great for this weeks DYSU Challenge, so I will be entering it there. It’s an easy challenge that I could enter all my cards into. Use ribbon. It would be harder for me if the challenge was NOT to use ribbon. LOL

Here is a video for the visual learner:

[youtube]https://www.youtube.com/watch?v=PrH-I8Op-O0[/youtube]

Thanks so much for stopping by! Have a wonderful day!
Hugs and smiles


Here is a card I made for one of last weeks VSN challenges. This challenge was to create a white card. We were allowed to add some color to the main image.

I chose the cute ice bear from Lawn Fawn’s Critters in the Snow. It was stamped in Tuxedo Black Memento Ink on a piece of Neenah Solar White cardstock cut and embossed with a Classic Oval Nestabilities die. The bear was shaded with Copic Markers (R00, R20, C00, No, N1) and the background was sponged lightly with Tumbled Glass Distress Ink. Smaller snowflakes from the Critter set was stamped in second generation on the background and the bottom was covered in Chunky Crystal Crafty Sparkles.

Another piece of white cardstock was cut and embossed with the next size up Classic Oval Nestabilities die. A 4″ x 5 1/4″ piece of Solar White cardstock was embossed with the Snowflake Embossing Folder. The edges of the embossed layer were stitched before the oval was adhered in the center. A 2″ x 5 1/4″ strip of white cardstock was scored with in 1/8″ increments with my Scor-Pal and adhered over the oval.

White organdy ribbon was tied around the horizontal layer and topped with a button that was tied on with iridescent curling ribbon. Snowflakes were cut out of Acetate and white cardstock with the Whimsy Snowflake die . Some snowflakes were added to the layers with white brads.

A sentiment from the Critters in the snow was stamped on a thin strip of white cardstock, formed in a banner and attached to the oval with a layered snowflake. Small pearls were added to centers of some of the snowflakes. The layers were adhered to the card base, a 5 1/2″ x 8 1/2″ piece of white cardstock, folded in half.

Thanks so much for stopping by! Have a wonderful day.
Hugs and smiles

© 2012 fresh & fun Suffusion theme by Sayontan Sinha