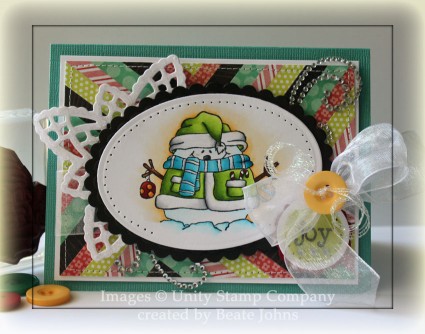
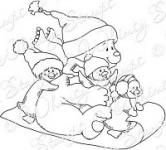
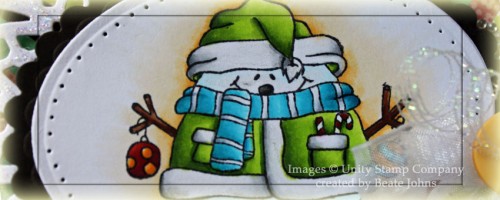
Today’s tutorial on Splitcoast is for the Herringbone technique. It’s a  great way to get rid of your small patterned paper strips. For my sample I used an the Itty Bitty Unity image called Roly Poly Winter Joy. I had it colored since the CHA Supershow. It had been stamped with Tuxedo Black Memento Ink on Neenah Solar White cardstock and colored with Copic Markers (not sure about the colors, sorry). The image was cut and embossed with a Petite Oval Nestabilities die. It was adhered to a piece of Canyon Brown cardstock, cut and embossed with a Scalloped Petite Oval Nestabilities die. The edges of the image oval were paper pierced.

The Herringbone background was created with MME Lime & Twist Life of the Party patterned paper. It measured 3 1/2″ x 4 3/4″. It was stitched to a 3/16″ bigger piece of Neenah Solar White cardstock. White Organdy Ribbon was tied around the layers. A Basic Grey button was tied over the bow with Iridescent Curling Ribbon.

A piece of white cardstock was cut and embossed with a Lace Doily Accent die. It was adhered behind the image layers were before those were adhered to the Herringbone layers with dimensionals. The Lace Doily die cut was covered with Stardust Stickles. A sentiment from the Roly Holy set was stamped in Tuxedo Black on a piece of white cardstock cut and embossed with a Classic Circle Nestabilities die. The inner part was airbrushed before the circle was adhered to a piece of Cherry Cobbler Cardstock cut and embossed with a Scallop Circle die. The edges of the sentiment circle were paper pierced before it was adhered under the bow.

The card base is a 5 1/2″ x 8 1/2″ piece of Core’dinations cardstock folded in half. The layers were adhered to the card base and parts of a Finesse Rhinestone swirl finish off the card front.

Here is a video for the visual learner:

[youtube]https://www.youtube.com/watch?v=AMbHmMdUTC8[/youtube]

Thanks so much for stopping by! Have a wonderful weekend!
Hugs and smiles

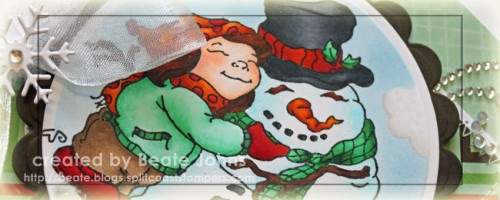
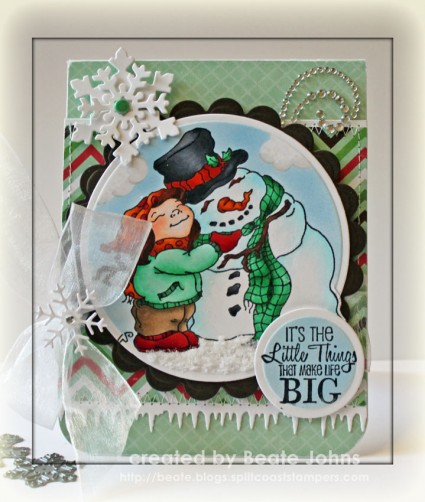
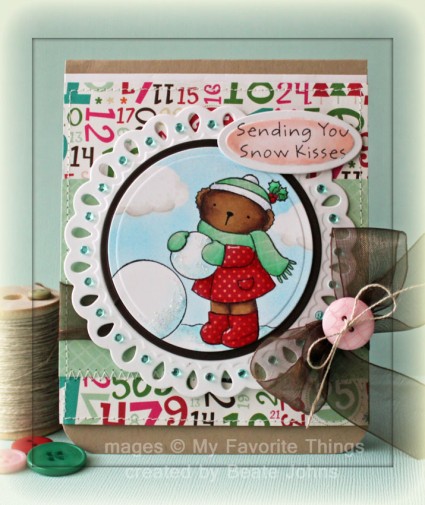
I am excited to be a Guest Designer for Little Darlings new rubber stamp release. I stamped the image called Snowy Friends in Tuxedo Black Memento Ink on Neenah Solar White cardstock. It was cut and embossed with a Classic Circle Nestabilities die and colored with Copic Markers (Skin: E0000, E00, R20 Hair: E99, E37, E29 Pants: E42, E43, E44 Jacket: G0000, G00, G00 Shoes: R24, R27, R39 Hat: YR15, Y18, R24, R28 Snowman Scarf: G03, G05, G07 Snowman hat: C3, C5, C7, C9 Branch: E25, E29 Eyes: E99, E39, E27).

The image was masked and two cloud masks were added before the circle was airbrushed with Copic Marker B41. The bottom was covered with Polar White Flower Soft.   The bottom of the clouds were colored with Copic Markers (W00, W0, W1). The layer was adhered to a piece of Canyon Brown Cardstock, cut and embossed with a Big Scalloped Circle Nestabilities die.

A white paper strip was cut with MFT’s  new Icicle Border die. It was adhered under a 4″ square of Echo Park Holly Jolly Paper and a slim strip of white cardstock was adhered on top. The layers were stitched to a 4″ x 5 1/4″ piece of Holly Jolly paper. The bottom two corners were rounded and white organdy ribbon was tied around the horizontal layers before the image was adhered with dimensionals.

Two snowflakes were cut out of white cardstock with Whimsy Layered Snowflake die, stacked and topped with a brad, that had been colored with Copic Marker G02. The snowflake was adhered to the upper right edge of the layers, part of a Finesse Rhinestone Swirl to the top right.

Another snowflake was cut with the smallest of the MFT Snowflakes die-namic dies. It was adhered to the top of the bow with Glossy Accents. A Baby Bling Rhinestone was adhered in the center of the snowflake.

A sentiment from The Cats Pajama’s Bearing Flowers was stamped in Tuxedo Black ink on a piece of Neenah Solar White cardstock, cut and embossed with a Classic Circle Nestabilities die. It was airbrushed with Copic Marker B41 and adhered to the lower right  of the image.

If you like this image and the others from this release, check out the Little Darlings Challenge Blog. Participate in the challenge and you could win a $10 Gift certificate if you win and made a project without their stamps, or a $20 Gift certificate if you made a project with Little Darling stamps.

Thanks so much for stopping by! Have a wonderful day.
Hugs and smiles

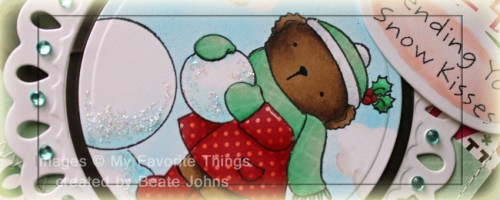
I hadn’t played with MFT stamps for a while. So when I saw this VSN Mini challenge, I  got out Pure Innocence Snow Angel, stamped it in Tuxedo Black Memento Ink, once on Neenah Solar White cardstock and twice on small patterned Holly Jolly Echo Park Patterned Paper.

The image was colored with Copic Markers (bear: E55, E57, E59   Holly & Berries: R08, R17, R29, G02, G05  Hat rim: C2, C0, C00   Snow: B0000, B000). The scarf hat and mitten patterned paper pieces were shaded with G0000, G000, G00, the boots and coat with R02, R05, R08). Before the paper pieces were added to the main image, The image was cut and embossed with a Classic Circle Nestabilities die. Two cloud masks were added, the image was masked and the background was airbrushed with Copic Marker B02. The Clouds were shaded with Copic Markers W00, W0, W1.

The image layer was adhered to a slightly bigger Canyon Brown cardstock circle and then to a piece of Neenah Solar White cardstock, cut and embossed with the largest Tear Drop Circle Nestabilities die. Turquoise Baby Bling was added to the Tear drop circle.

A 2 3/4″ x 4 1/4″ piece of Holly Jolly paper was adhered stitched to a 4 3/4″ x 4 1/4″ Holly Jolly paper piece. A small strip of white cardstock was adhered to the top of the paper layers and brown May Arts Organdy Ribbon was tied around the horizontal layer. The bow was topped with a button, tied on with Linen Thread. The layers were adhered to the card base, a 4 1/4″ x 11″ piece of Kraft cardstock, folded in half. The bottom two corners were rounded.

A sentiment from Snow Angel was stamped on a piece of Solar White cardstock that had been cut and embossed with the smallest Petite Oval Nestabilities die. The center of the oval was colored with Copic Markers R000 and R00.

Thanks so much for stopping by! Have a wonderful day!
Hugs and smiles

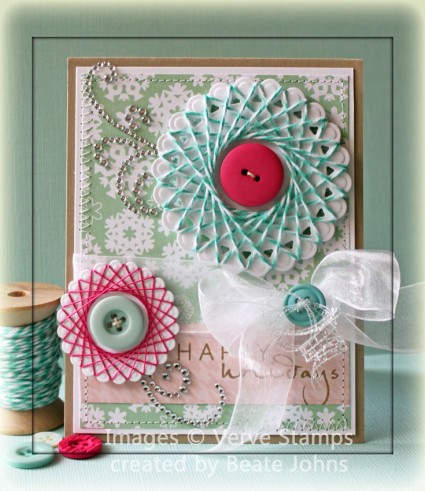
Today’s tutorial on Splitcoaststampers is written by Susie Nelson. She shows us how to create Spirelli – String Art. For my sample I used two different strings: Caribbean Twine from the Twinery and 20 count pink thread from Lizbeth (Hobby Lobby). I cut and embossed Neenah Solar White cardstock with the second and third smallest die from the Beaded Circle Nestabilities dies and wrapped my string around the scallops.

I first thought to use the Spirelli circles as flowers, but I can’t help myself. I am in LOVE with Echo Parks Holly Jolly Christmas paper and thought I could use them as funky snowflakes. I added a button in each snowflake center with Linen Thread.

A sentiment from Verve’s Frosty Flakes was stamped in Frayed Burlap Distress ink on a 1 1/4″ x 3 3/4″ strip of Holly Jolly Paper. It was adhered to a 3 3/4″ x 5″ paper from the same paper pack. Both pieces were stitched to a 4″ x 5 1/4″ piece of Solar White cardstock. White Organdy Ribbon was tied above the horizontal strip. A button was tied over the bow with Silver Iridescent Ribbon and the layers were adhered to the card base, a 4 1/4″ x 11″ piece of Kraft cardstock, folded in half. Parts of a Rhinestone Finesse Swirl next to the Spirelli circle finish off the card front.

Here is a video for the visual learner:

[youtube]https://www.youtube.com/watch?v=r2ZJUBdCfHg[/youtube]

Thank you so much for stopping by! Have a wonderful day!
Hugs and smiles


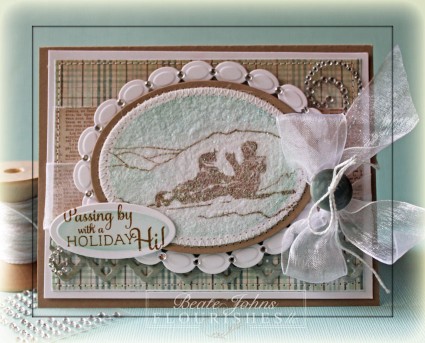
Today’s challenge hostess is Heather Jensen. She is asking us to use the Dryer Sheet Technique on your project. I love the soft look it gives to the image.

I started by stamping  an image from A Season of Celebration in Vintage Photo Distress Ink on Neenah Solar White cardstock. It was cut with Classic Oval Nestabilities dies and sponged with Tumbled Glass distress ink. A used Dryer Sheet was adhered over the image, cut to size and Glitter was added over it. The oval was stitched to a piece of Kraft cardstock that had been cut and embossed with the next size oval Nestabilities die and then adhered to white cardstock, cut and embossed with the largest Beaded Oval Nestabilities die.  A small Baby Bling Rhinestone was adhered between each of the beads.

A 2 1/3″ x 5″ piece of MME Lost & Found Portobello Road Paper was adhered 3 3/4″ x 5″ piece of the same paper pack. The layers were stitched to a 1/4″ bigger piece of cardstock.  A 5″ wide strip of  was cut and embossed with a Lace Doily Accent die and it was adhered under the horizontal strip. White May Arts Ribbon was tied around the horizontal strips. The bow was topped with a button that was tied on with embroidery floss. The layers were adhered to the card base, a 5 1/2″ x 8 1/2″ piece of Kraft cardstock, folded in half.

A piece of white cardstock was cut and embossed with the smallest Petite Oval Nestabilities dies. A sentiment from the same set was stamped on the oval and the inner part was sponged with Tumbled Glass. Part of a Finesse Rhinestone swirl was adhered over the bow and small part on the lower right, right under the sentiment panel.

Please check out my fellow Timeless Tuesday Challenge members:

Cindy Haffner
Heather Jensen
Maki Jones
Mona Pendleton
Silke Ledlow
Tammy Hershberger
and
November Guest Designer Miriam Napier

This card also works great for last weeks Do you Stack up challenge, which was to add A Splash of Blue. Thanks so much for stopping by! I hope you have time to participate in the challenge. Have a wonderful day!
Hugs and smiles

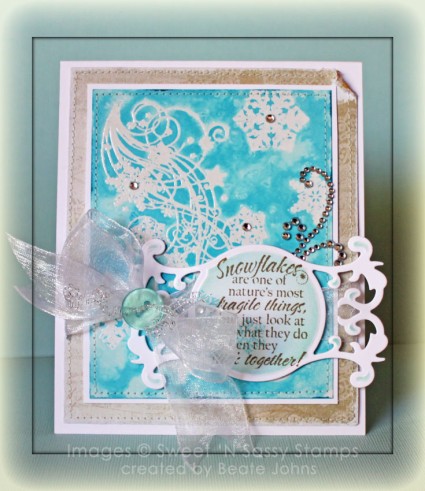
One of last weekend’s VSN challenges was to create a card with the Salted Background Technique. That was the perfect time for me to create a a video for that technique.

I had received the newest order from Sweet ‘n Sassy Stamps latest release. I knew I wanted to use the gorgeous Snowflake Swirl image for that technique. I embossed the Swirl and a few snowflakes on a 3 1/2″ x 4 1/2″ piece of Glossy Cardstock Tumbled Glass Distress Re-inker was brushed over the cardstock, rock salt was sprinkled over it and the cardstock was misted with water. After the background dried, it was adhered to a 1/4″ bigger piece of Neenah Solar White cardstock.

A 4 1/4″ x 5 1/4″ piece of MME Lost & Found 2 Sunshine paper was sanded and the edges were stitched. The salted background layers were adhered to the paper.

A sentiment from the Snowflake swirl was stamped in Frayed Burlap on a piece of Neenah Solar White cardstock that had been cut and embossed with a Fancy Tags 3 die. The embossed parts were sponged with Tumbled Glass ink.

White Organdy Ribbon was threaded through the tag and tied around the layers. The bow was topped with a button that was tied on with silver curling ribbon.  The layers were adhered to the card base, a 4 1/2″ x 11″ piece of white cardstock folded in half. Baby Bling and parts of a Finesse Rhinestone swirl finish off the card.


Here is a video for the visual learner:

[youtube]https://www.youtube.com/watch?v=ULQ1XTRI304[/youtube]

Thanks so much for stopping by! Have a wonderful day!

Hugs and smiles


Welcome to Whimsy Stamps November rubber stamp and die RELEASE DAY!

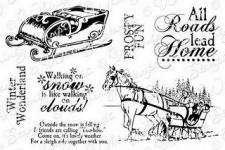
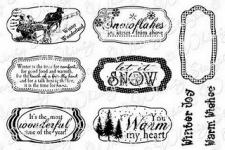
Whimsy Stamps has released 20 fabulous new rubber stamps and 4 wonderful new Shapeology die sets today. These new goodies are available to buy right now from the Whimsy Stamps store along with all your Whimsy favourites.

From today until 23 November the Whimsy DT and Special Guests will be showcasing these fabulous new stamps and dies with a daily mini blog hop. Each mini blog hop has a new release prize hidden somewhere along the way and you will have 24hrs to enter each prize draw by leaving a comment on every blog listed for that day.

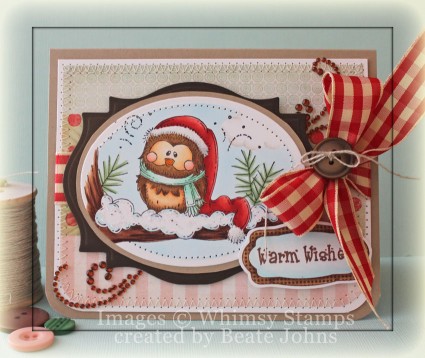
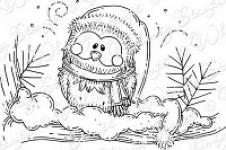
I created this card with the newly released Cozy Winter Owl stamp from Whimsy Stamps. It was stamped in Tuxedo Black Memento Ink on Neenah Solar White cardstock, cut and embossed with a Classic Oval Nestabilities die and colored with Copic Markers (Owl: E50, E51, E53, E55, E57   Hat:: R21, R22, R24, R27   Branch: E23, E25, E27, E26, YG61, YG63   Scarf: G0000, G000, G00).

The image was masked, a cloud mask was added and the oval was airbrushed with Copic Marker B02. The cloud bottom was colored with Copic Markers W00, W0 and W1 and Stardust Stickles was added to the snow on the branch and Sugar Sparkly Fluff to the hat trim. The image was adhered to a piece of Kraft cardstock that was hand cut into a slightly bigger oval. The pieces where adhered to a piece of Canyon Brown cardstock, cut and embossed with a Nestabilities Label 18 die.

Three 5″ long strips of MME Lost & Found Market Street paper were adhered to create a 3 3/4″ x 5″ piece of paper. The bottom two corners were rounded before the layers were stitched to a 1/4″ bigger piece of Neenah Solar White cardstock.  May Arts Gingham Ribbon was tied around the middle strip. It was topped with a button tied on with Linen Thread.

The layers were adhered to the card base, a 5 1/2″ x 8 1/2″ piece of Kraft cardstock folded in half. The image layers were adhered to the card with dimensionals. Parts of a brown Finesse swirl were adhered to the upper right and lower left of the card.

A sentiment from the new Winter Notables stamp set was stamped in Tuxedo Ink on Solar White cardstock. It was colored with Copic Markers used on the main image. It was adhered to the lower right of the image with dimensionals to finish off the card.

To be entered into today’s mini blog hop prize draw, be sure to leave a comment on ALL of the DT’s posts listed below by 12.00PM EST tomorrow. All winners will be announced on the Whimsy Inspirations blog after 12.00PM on 23 November.

To take a peek at today’s fabulous new release creations by the Design Team, please click on the links below…

Here is a full list of the wonderful new rubber stamps and dies released today:

5 Crissy Armstrong rubber stamps
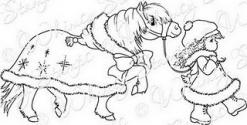
Cool Pony ~ Penguin Skier ~ Sealed With A Kiss ~ Served With Love ~ Snow Fun 

4 Kenny K rubber stamps
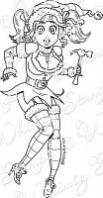
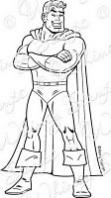
Brianna Blaster ~ Sexy Elf ~ Superhero ~ Toy Soldier

3 Meljen’s Designs rubber stamps
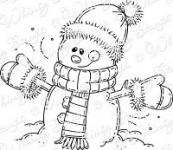
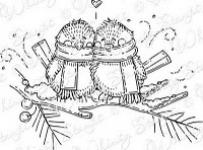
Bundled Little Snowboy ~ Cozy Little Chickadees ~ Cozy Winter Owl

5 Wee Stamps rubber stamps
A Letter For Me ~ Christmas Bunny ~ Let It Snow ~ Suzi With Bunny ~ Wee Florist

3 Raindrop Echo Designs rubber stamp sets
Cozy Hands sentiments (co-ordinating die set available) ~ Sleigh Ride ~ Winter Notables (co-ordinating dies available)

4 Raindrop Echo Designs Shapeology dies
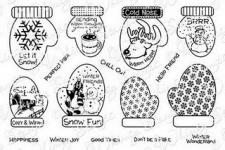
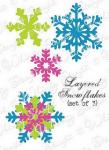
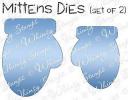
Layered Snowflakes ~ Mittens (co-ordinating stamp set available) ~ Notables 1 (co-ordinating stamp set available) ~ Elegant Notables 1 (co-ordinating stamp set available)

Don’t forget to visit today’s DT and leave a comment on their blog posts to be entered into the draw to win a new release stamp, then pop by the Whimsy Inspirations blog tomorrow for the next list of showcase posts!

Thanks for stopping by and I hope you enjoy our new release!

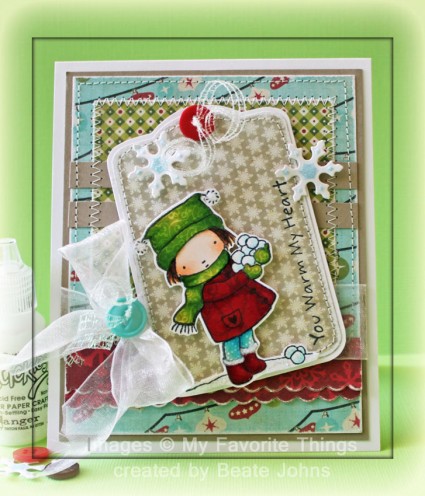
Here is another card I made for one of the VSN challenge. I combined it with last weeks MFT sketch. For my card I picked the Pure Innocence set called Snow Day. I stamped the image in Tuxedo Black Memento Ink on Neenah Solar White cardstock as well as different patterned paper from Echo Parks Season’s Greetings. The image and clothes pieces were colored with Copic Markers (jacket/boots: R17, R29, R39   Hat: YG21, YG25, YG17   Pants: B000, B12, B14    Hair: Y23, E25, E29    Skin: E0000, E00, E01) cut out and assembled.

A piece of Season’s Greetings paper was cut with MFT’s Tag die-namic die. The edges were sanded before the paper was stitched to a piece of Solar White cardstock. A sentiment from Snow Day was stamped on the right edge in Tuxedo Black Ink. The paper pieced image was adhered to the tag with dimensionals. Sugar Sparkly Fluff was added to the pom poms of the hat and the rims of the boot. Stardust Stickles was added to the snowballs.

Two 4″ long strips of Season’s Greetings were cut with the Small Scalloped Border Die-namics die, sanded and adhered to a 4″ x 5″ piece of the same paper pack.  a 3 1/4″ wide patterend paper was adhered on top of the blue paper and two 3/8″ wide Kraft strips were adhered to the papers before they were stitched to a 1/4″ bigger piece of Kraft cardstock.

White Organdy Ribbon was tied above the red strips and topped with a blue button, which was tied on with iridescent curling ribbon. Before the tag was adhered to the layers with dimensionals, a button was tied to the top with more curling ribbon.

Solar White cardstock was cut and embossed with a Snowflake Borderabilities die. The snowflakes were airbrushed with Copic Marker B02. The snowflakes were adhered to the layers with dimensionals. The airbrushed parts of the snowflake were covered with Stardust Stickles. Everything was adhered to the card base a 4 1/2″ x 11″ piece of white cardstock, folded in half.

Thanks so much for stopping by! Have a wonderful day.
Hugs and smiles

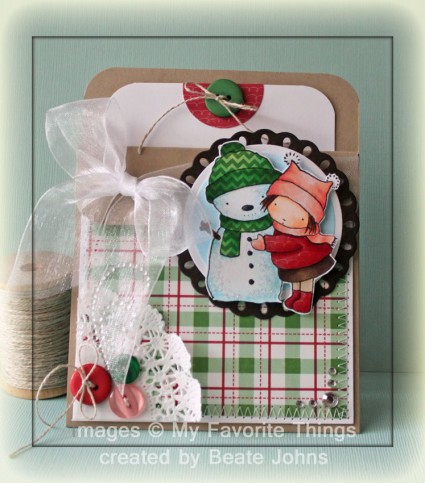
Every  week I try to shoot a video for one of the older tutorials. This week I picked the Pocket Card Tutorial. I am loving Echo Parks Holly Jolly Christmas patterned paper so much right now, I had to use it again (and should probably order more).

For my main image of the card I picked the image from MFT’s Merry KISSmas stamp set. It was was stamped in Tuxedo Black Memento Ink on Neenah Solar White cardstock. It was stamped again on pieces of Holly Jolly Christmas paper. Parts were cut out and adhered to the main image. The paper pieces as well as the main image were colored with Copic Markers ( hat/scarf: R00, R30, R32     Shirt/boots: R32, R35, R37     Stockings: E40, E42   Skirt: E43, E44, E47     Skin: E0000, E00, E01    Hair/branch: E23, E25, E29    Snowman: B0000, B000    Hat: G00, G02, G05, G07    Buttons: C5, C7, C9) and cut out.

The image was adhered with dimensionals on a piece of Solar White cardstock, cut and embossed with a Classic Circle Nestabilities die and airbrushed with Copic Marker B02. That circle was adhered to a piece of Canyon Brown cardstock, cut and embossed with a Tear Drop Nestabilities die.

The card base was created out of a 4 1/4″ x 11″ piece of cardstock, scored at 1 1/4″ and 5 1/2″. The four corners were rounded. A 3 3/4″ square of Holly Jolly paper was stitched to a 1/4″ bigger piece of whtie cardstock. A quarter of a paper doily was adhered to the lower left of the the stitched layers and three buttons were tied to it with Linen Thread.

Part of a Finesse Swirl was adhered over the buttons and more Rhinestones were adhered to the lower right corner. The layers were adhered to the card base. Before the flap was taped down, May Arts Organdy Ribbon was tied around it. The image were adhered over the flap with dimensionals.

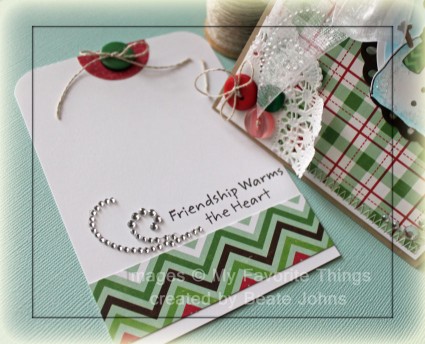
The inside tag is a 3 1/2″ x 5″ piece of Solar White cardstock. The top corners were rounded and a 1 1/8″ wide strip of Holly Jolly paper was adhered to the lower half. A sentiment from the Merry KISSmas set was stamped above the strip with Tuxedo Black ink and part of Finesse swirl was adhered next to it.

I punched a half circle out of Holly Jolly paper with a 1 1/4″ circle punch, adhered it to center of the top of the tag and tied another button on with Linen thread.

Here is a video for the visual learner:

[youtube]https://www.youtube.com/watch?v=PrH-I8Op-O0[/youtube]

Thanks so much for stopping by! Have a great day.
Hugs and smiles

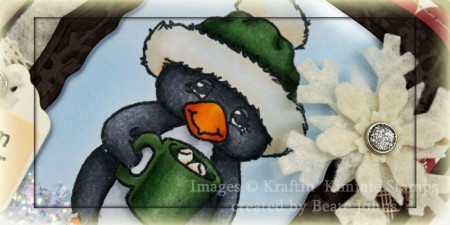
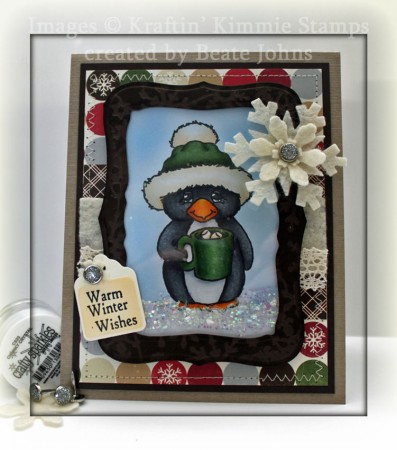
Today’s Kraftin’ Kimmie Challenge is called “Let It Snow”. It sure is perfect for where I live. We had our first snow “sprinkles” a few days ago. Today we are supposed to get some more later in the day. For my card I picked Oliver. I really like this little guy. I stamped the image in Tuxedo Black Memento Ink on X-Press It! Blending card and colored it with Copic Markers (Penguin: C0, C1, C2, C3, C5, C7, C8, YR23, YR24, E97, Hat: YG63, YG67, G28, Marshmellows: E50, E53). The background was airbrushed with Copic Marker B21. Faux Snow and a bit of  Chunky Crystals Crafty Sparkles were added to the bottom of the image.

A frame was cut with Label 8 and curved Rectangle Nestabilities out of and embossed with both dies as well as Canyon Brown Neenah Solar Card Snowflake Impressabilities. With the dies and the Impressabilities template over the frame (that wasn’t easy to hold all three) the frame was sponged with Walnut Stain Distress Ink.

A piece of Acetate was taped behind the frame and a mounting tape was added. More Chunky Crystals Crafty Sparkles were added inside the frame an the image was taped behind it to create a shaker.

Beige felt was cut with Create-a-Flake Shapeabilities dies, held together with a Recollection brads and adhered to the frame. The sentiment is from Kraftin’ Kimmie’s Holiday Sentiments. It was stamped on Natural White Neenah cardstock with Tuxedo Black Memento ink, cut and embossed with the Five Tag Spellbinders die and airbrushed with Copic Marker E51. It was topped with a small felt snowflake cut with Create-a-Flake Shapeabilities die and topped with another Recollection brad.

The card base is a 4 5/8″ x 11 3/4″ piece of textured Kraft cardstock folded in half. A 2 1/2″ x 4″ piece of Merry Christmas Echo Park paper was stitched to a 5 1/4″ piece of the same paper series. The long side of a 4″ long beige felt strip was cut with the Label 8 Nestabilities and adhered to the horizontal paper strip. May Arts Crochet Lace was adhered over the lower straight edge of the felt.

The shaker piece was adhered to the center of the card base with dimensionals and the sentiment was adhered to the left hand side of that.

Thanks so much for stopping by. Have a wonderful weekend! Hugs and smiles
© 2012 fresh & fun Suffusion theme by Sayontan Sinha