oclartofnaturedt26wide.jpg

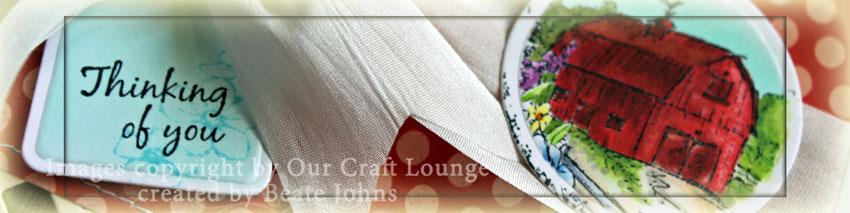
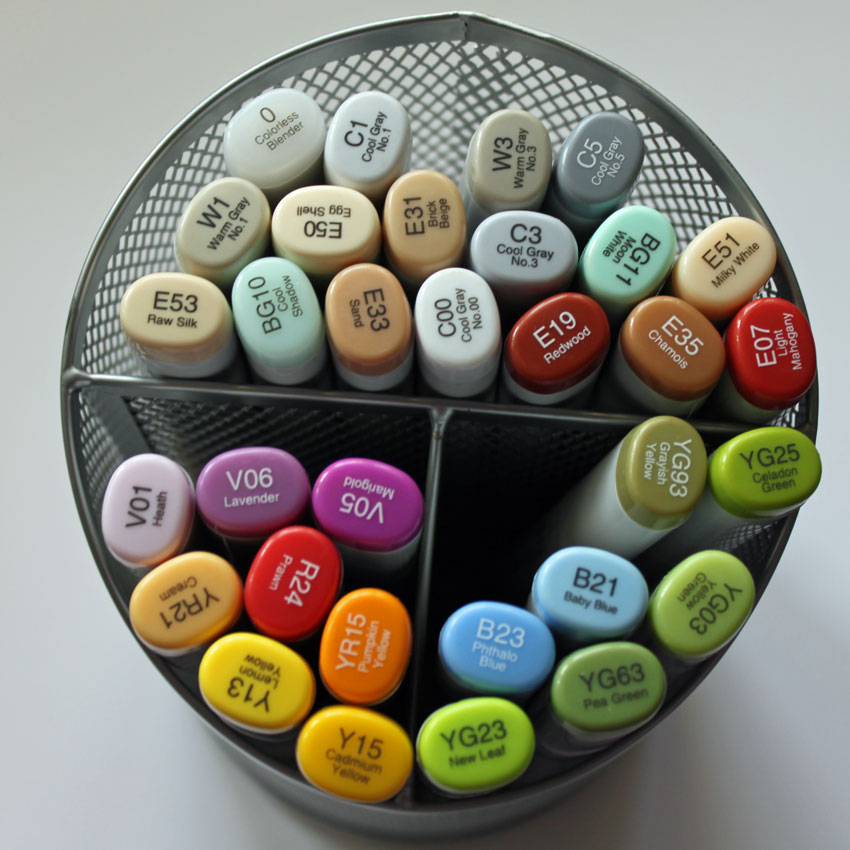
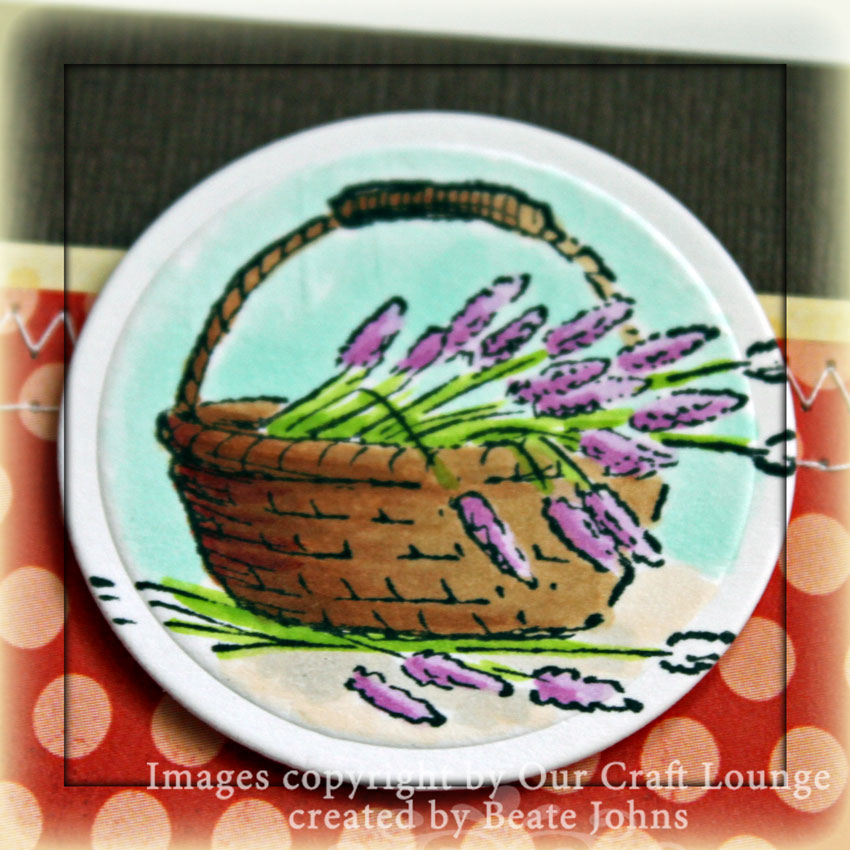
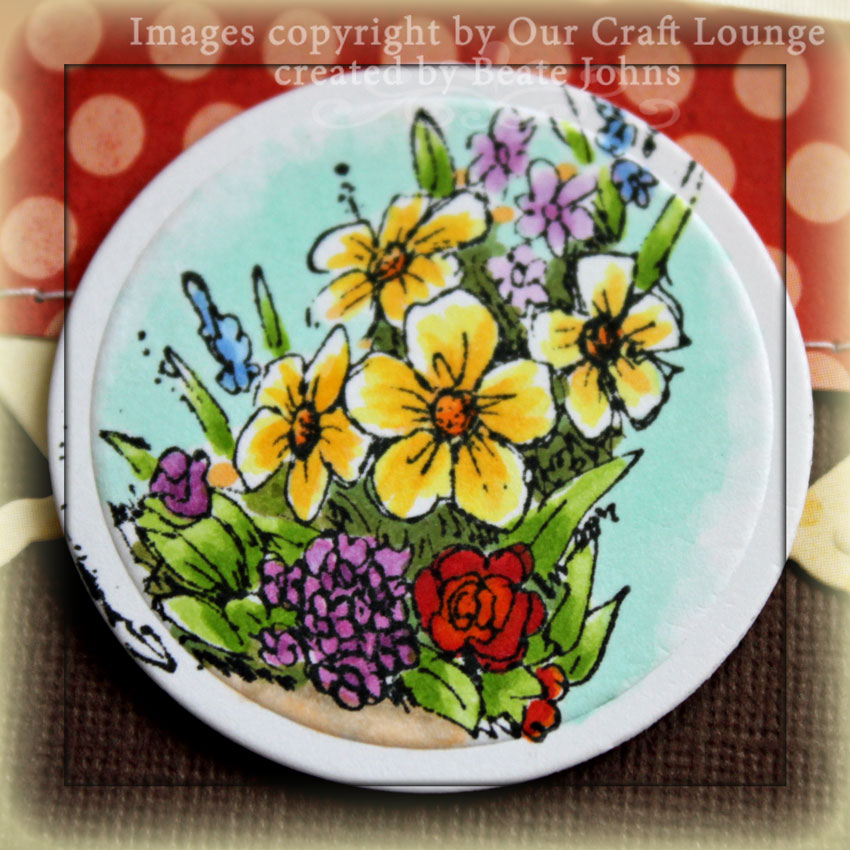
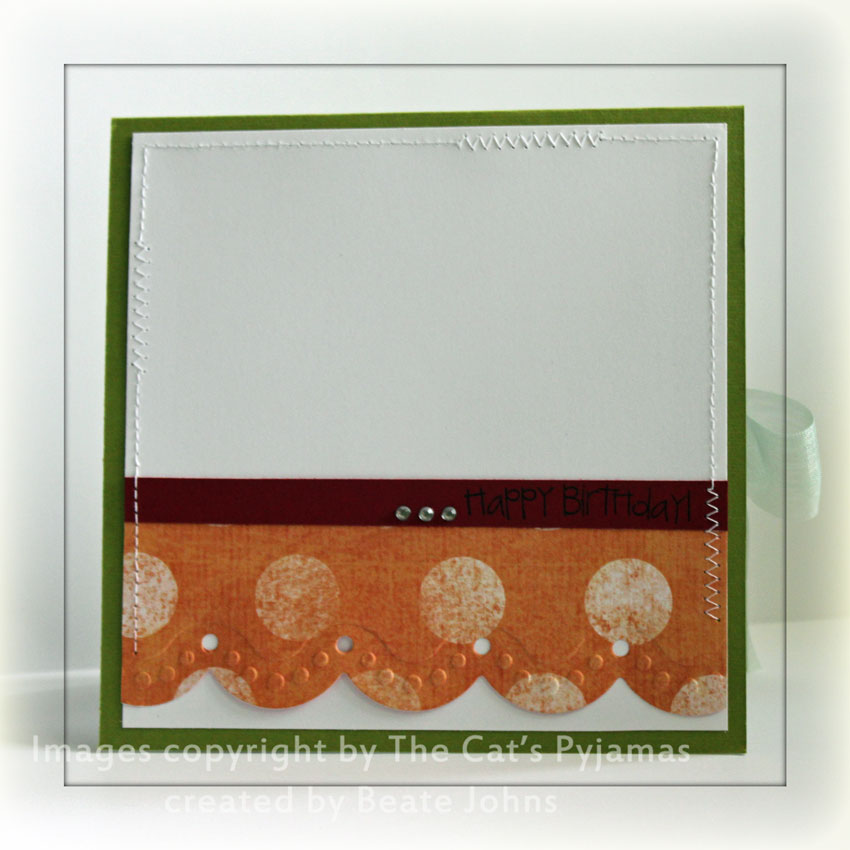
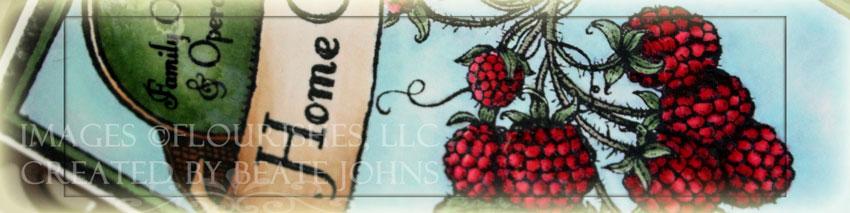
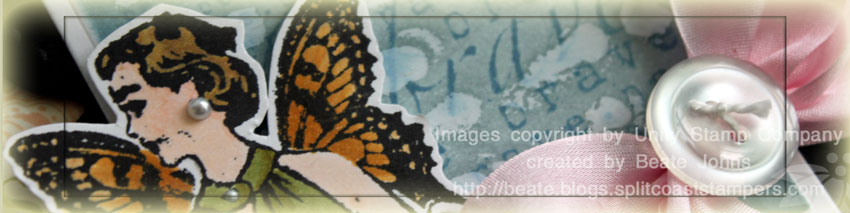
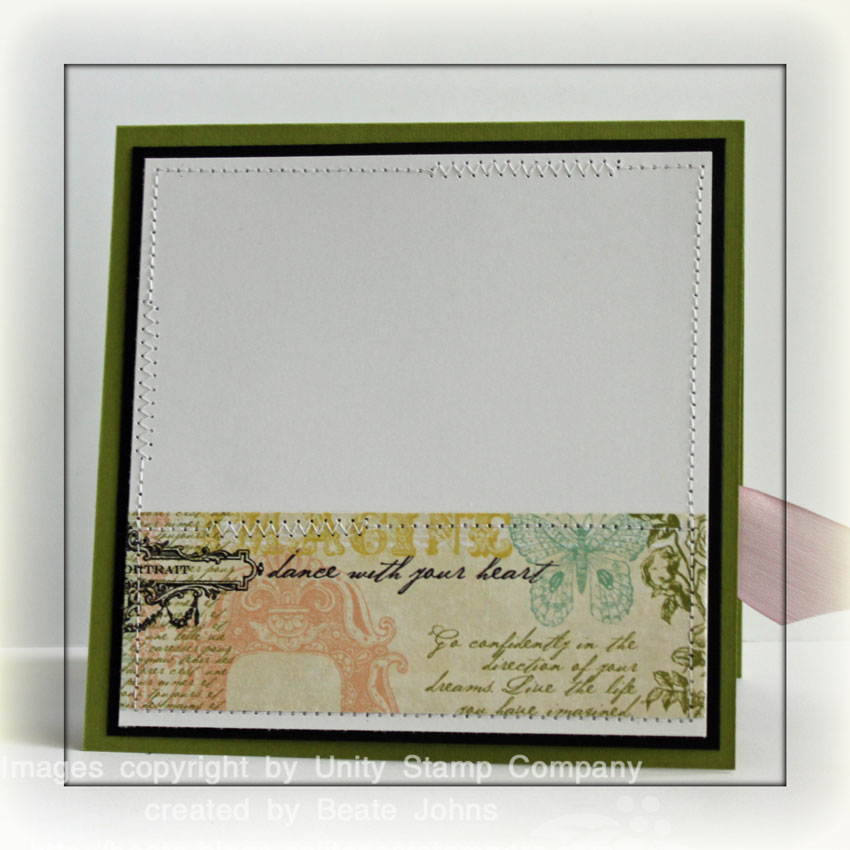
I made this card forOur Craft Lounge’s Sketch challenge and the Free For All Challenge on Splitcoast.  I cut and embossed three 1 5/8″ circles with Classic Circle Nestabilities out of Neenah Solar White cardstock and stamped an image from the new OCL set The Art of Nature  on each circle with Tuxedo Black Memento Ink . The images were colored with Copic Markers. I went a little crazy and used quite a lot of different colors.  You can see all the markers I used in the thumbnail as well as closeup shots of each image.

oclartofnaturecopics.jpg   oclartofnaturedt26basket.jpg  oclartofnaturedt26barn.jpg  oclartofnaturedt26flowers.jpg

The card base is a 4 1/2″ x 12″ piece of textured Chocolate Chip cardstock folded in half. A 4 1/2″ x 5″ piece of Be Loved Paper from My Mind’s Eye was cut and embossed on the lower edge with Lattice Borderabilities. Another piece of Be Loved  Paper was cut down to 4″ x 4 1/2″ and stitched to the 4″ x 5″ layer.

oclartofnaturedt26beate.jpg

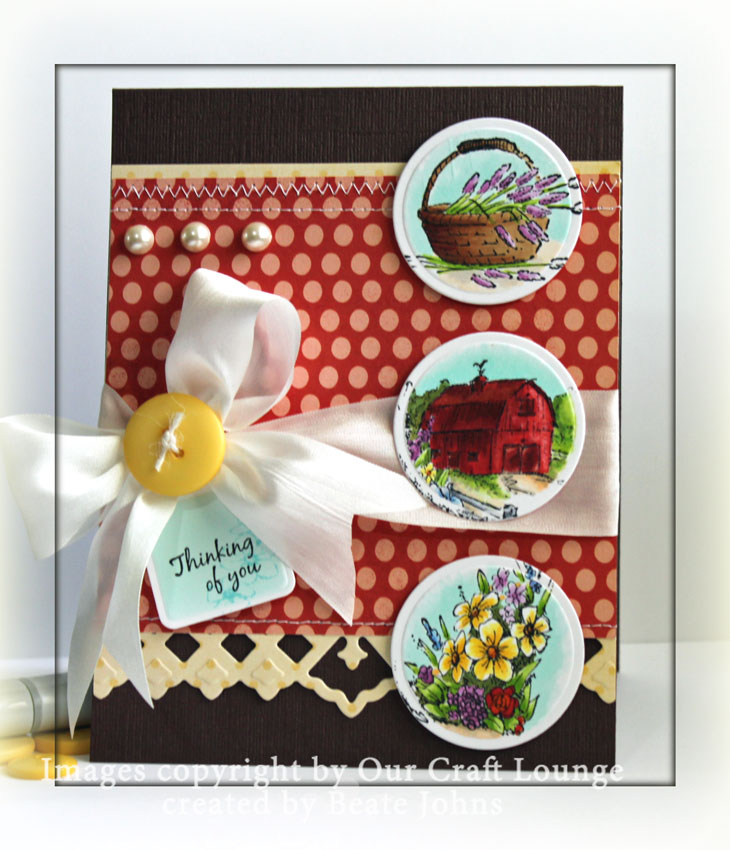
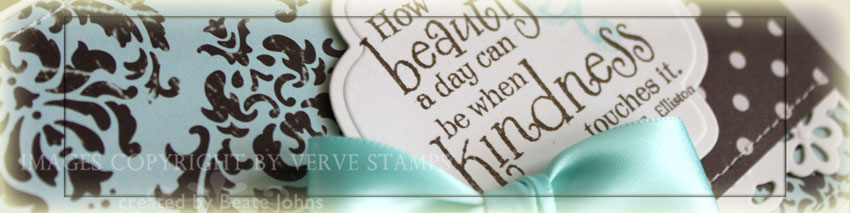
White Silk Ribbon from May Arts was tied around the layers. A tag was cut out of Neenah White cardsdtock with a Spellbinder Die. The sentiment was stamped on it with Tuxedo Black Memento Ink and the inner part of the tag was colored with Copic Marker BG10. It was tied around the ribbon with a  Basic Grey Button and string.

The images were adhered to the card front with dimensionals. Three Kaisercraft Pearl Pearls finish off the card base.

oclartofnaturedt26inside.jpg

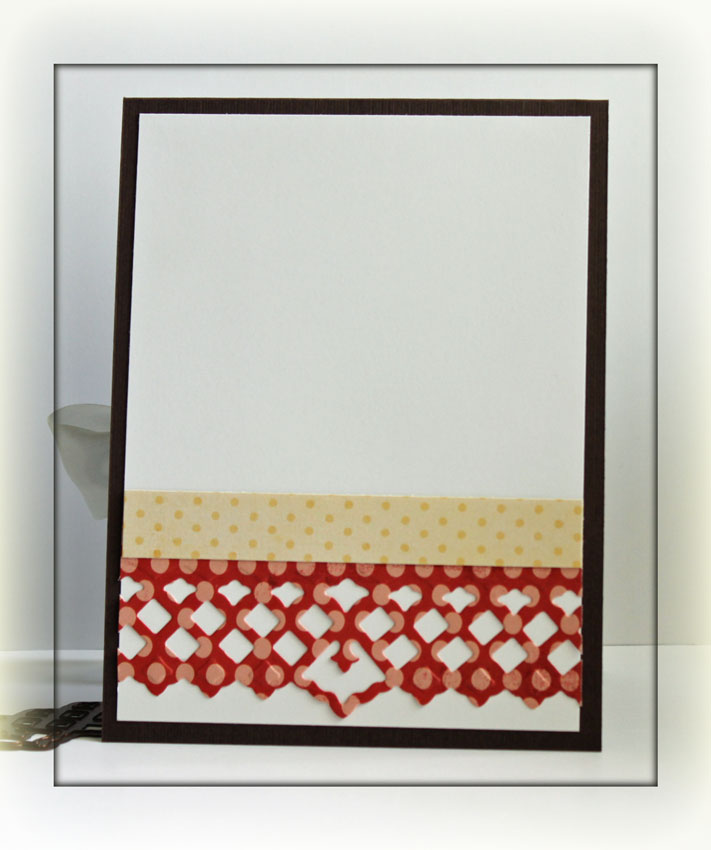
For the inside of the card I cut a 4 3/16″ x 5 11/16″ piece of Whisper White cardstock and layered it with more Be Loved paper.

Thanks so much for stopping by. Have a wonderful day! Hugs and smiles

tgflaundrythinkingwide.jpg

Check out this cute stamp! I had a blast coloring her the other night. I thought it would make a great “Thinking of you” card. The image is from The Greeting Farm. It was stamped with Black Soot Distress Ink on Neenah Solar White cardstock and colored with Copic Markers ( E00, E03 skin, R43, R35, R46 hairband, slippers, blanket, E99, E37, E18 hair, B0000, B32, B34, blanket, YR31, Y35, W3 laundry, YG01, YG03, YG25, C3 shirt and laundry, N1, N3, N5 ground, B0000 background) and cut out with Petite Oval Nestabilities.

tgflaundrythinkingofyoubeat.jpg

The card base is a 4 1/4″ x 11″ piece of Early Espresso Cardstock (Stampin’ Up!) folded in half. A 2″ x 3 3/4″ x 5″ strip of Seaside October Afternoon paper was adhered to a 3 3/4″ x 5″ piece of the same collection . A 3 3/4″ long strip of Espresso cardstock had been cut and embossed with Eyelet Borderabilities and layered underneath the horizontal strip. The layers were stitched to a 3 15/16″ x 5 3/16″ layer of white cardstock.

I didn’t have the right color ribbon for my card, so I colored light blue ribbon with B34 Copic Marker. After it dried, it was tied around the horizontal layers and topped with a white Basic Grey Button.  The sentiment is from the Ippity set Just Wanted to Say. It was stamped on Neenah Solar White cardstock with Black Soot Distress ink and then cut and embossed with Petite Oval Nestabilities. The inner part of the oval was colored with B0000 Copic Marker. To finish off the card I added three red buttons on the lower right.

The inside of the card is decorated really simple. Another 3 Espresso strip was cut and embossed with Eyelet Borderabilities and adhered under a 1 3/8″ x 3 15/16″ strip of Seaside October Afternoon paper. Both were adhered stitched to a 3 15/16″ x 5 3/16″ White cardstock piece that was then taped to the inside of the card.

Thanks so much for stopping by! Remember, if you are in or close to Columbus, come and see me tomorrow at DickBlick. I am a bit nervous about demoing Copic markers there for the first time EVER! I would love to see some friendly faces.

Hugs and smiles

tcpgrownupcupcakewide.jpg

I am so excited that The Cat’s Pajama’s is now a member company on Splitcoast! I love the darling images and the hilarious sentiments. I saw that you were supposed to make a cupcake card for the Crazy4Challenges and thought of this darling stamp right away.

The image was stamped with Black Soot Distress Ink on Neenah Solar White Cardstock and colored  with Copic Markers (R22, R24, R29, E02, E04, YR12, YR15, YR16, YR21, YR31, Y32, Y35, W00, W01, W3, B0000, YG03, YG05) and cut it out with Classic Circle Nestabilities. The image was then layered on a slightly bigger black circle and a Scalloped Octangle cut out of Stampin’ Up!’s Cherry Cobbler Cardstock. Stardust Stickles was added to the frosting of the cupcake on my (dirty) snow.

tcpgrownupcupcakebeate.jpg

The card base is a 5 1/4″ x 10 1/2″ piece of Textured Old Olive cardstock folded in half. A  4 3/4″ X 2 1/4″ Strip of Pretty Please paper (My Mind’s Eye) was cut with Jumbo Scallop Borderabilities and adhered to a 4 3/4″ square of the same paper pack. the layers were then stitched to a 4 15/16″ square of Whisper White cardstock. Thin white zic zac ribbon was adhered where the horizontal strip ended before Seafoam Organdy ribbon was tied around the layers.

The sentiment was stamped with Black Soot ink on Neenah Solar White cardstock and cut with Classic Oval Nestabilities. Kaisercraft Clear Rhinestones on the border stamp from the set finish off the card front.

tcpgrownupcupcakeinside.jpg

The inside of the card is very simple. A 2″ x 4 15/16″ strip of Pretty Please My Minds Eye paper was cut and embossed with the Jumbo Scallop Borderabilities. A 3/8″ Cherry Cobbler strip was adhered to the the top of the layer and then stitched to a 4 15/16″ square of Whisper White cardstock. Happy Birthday was stamped on the Cherry strip with Black Distress ink and three small clear Rhinestones were added to the left.

Thanks so much for stopping by! Have a wonderful day!
Hugs and smiles

fllcraspberryhandpickedwide.jpg

I created this card for Flourishes Timeless Tuesday Challenge. It was a tough one last week. We were to use NO embellishments. No ribbon, no brads, no rhinestones, no pearls….say WHAT? Definitely a challenge. For that I just picked a big image to cover most of my card. I also used the sketch from Midnight’s Madness Sketch challenge from last week.

First I stamped the Seed package from Flourishes Seeds of Kindness on one of Tim Holtz Mask Sheet. I cut out the mask and set it aside. Next I stamped the image on Natural White Neenah cardstock with Black Soot Distress ink. The image was covered up and the raspberries from Berry Sweet, also from Flourishes. The image was colored with Copic Markers (RV21, R24, RV29 (Berries), G21, G24, G85 (Leaves), E30, E31, E33, E34, E37 (Sign))

fllcraspberrieshandpickedft.jpg

The image was layered on a Scalloped Frame cut and embossed on Chocolate Chip Cardstock. The card base is  a 4 1/4″ x 11″ piece of Kraft cardstock, folded in half. A 3 1/2″ x 4 1/4″ piece of Natural White Neenah was embossed with Tim Holtz Checkerboard Embossing folder, layered with a Cherry Cobbler cardstock strip that was cut with Jumbo Scallop Borderabilities.

To add just a little something something, I covered the round sign completely with Glossy Accents. I also added Glossy Accent to the Raspberries, but for those I dabbed it on to create a more bumpy texture.

Thanks so much for stopping by! Have a wonderful day!
Hugs and smiles

edulembabookfairywide.jpg

Check out this cute image. I found it when I checked the Copic Challenge Blog . The challenge is all about Reading. Copic Challenge blog teamed up with Elizabeth Dulemba, an award winning Children’s book author/illustrator. She offers some of her images for free to print out. I picked out the Reading Fairy for my card and printed her out on Neenah Solar White cardstock. It was cut out with Petite Oval Nestabilities and colored it with Copic Markers (YG21, YG23, YG25, YG17 (Clothes) E51, E53 (skin), R12 (lips), Y23, Y26, Y28 (hair), E41, E43, E44 (book), B91, B000 (wings), Y00 (outline). The image was layered on a scalloped oval cut out of Chocolate Chip cardstock.

edulembabookfairysc292beate.jpg

The edges of a 3 3/4″ x 5″ piece of October Afternoon Fly A Kite Store Paper were sanded, then the layer was stitched to a 4 15/16″ x 5 3/16″ piece of Basic Black cardstock. The combined layers were adhered to a Baja Breeze card base (4 1/4″ x 11″, folded in half).

A 1 1/2″ x 4 1/4″ strip of Neenah Solar White cardstock was cut with Lattice Borderabilities, a 1 1/4″ x 4 1/4″ piece of Baja Breeze with Eyelet Borderabilities. Along with a 1 1/4″ x 4 1/4″ strip of Fly A Kite October afternoon paper strip, the strips were fanned out and adhered to the lower part of the card. The sketch for this card was this week’s Sketch Challenge on Splitcoast. I covered the ends of the strips on the right hand side with a white Prima Flower that was topped with a brown button. Three brown dew drops finish off the card.

Thanks so much for stopping by! Have a wonderful day!

Hugs and smiles

unitybravegirlgluewide.jpg

Today’s tutorial on Splitcoast is written by Roni Johnson. It’s for the Distress Glue technique. For my sample I cut a square with Classic Square Nestabilities, added Tacky Glue, let it dry and then sponged it with Weathered Wood and Stormy Sky Distress ink. The square was layered on a black Fair Isle Pendant.

unitybravegirldistressedglu.jpg

A 4 1/2″ square of Webster’s Pages paper was stiched to a 4 11/16″ square of black cardstock. A 4 1/2″ strip of Neenah Solar White cardstock was cut with the Lattice Borderabilities and adhered to the lower half of the square. A hole was punched in the lower right hand side of my main image before it was adhered to the card front with dimensionals. Pink Satin Ribbon was tied through that hole and around the layers and topped with a button. My card base is a 5″ x 10″ piece of Textured Old Olive cardstock folded in half. The layers were attached to the card base with dimensionals.

The butterfly lady (or as Jenn and I call her “Frida”) is from the Unity set Brave Girl. It was stamped in Black Soot Distress Ink on Neenah Solar White cardstock and colored with Copic Markers (c9.jpge0000.jpge01.jpgyg93.jpgyg95.jpgy28.jpge35-copy.jpgyr21-copy.jpgyr23.jpg). White Opal Liquid Pearls were added to her dress and a Kaisercraft Pearls Pearl as her earring. The butterfly wings were colored with the clear Spica Pen for a subtle shimmer. She was cut out and adhered to the square with dimensionals.

unitybravegirlglueinside.jpg

The inside of the card is pretty simple. I used the left over strip (1 1/2″ wide) from the Webster’s Pages paper from the front, cut it down to 4 1/2″ and adhered it to a 4 1/2″ Solar White square. The square was stitched to a 4 11/16″ basic black cardstock piece before it was adhered to the inside of the card.

Here is a video for the visual learner:
[youtube]https://www.youtube.com/watch?v=yK_SHszRwo4[/youtube]

Thanks so much for stopping by! Have a wonderful day! Hugs and smiles

bellagertiesurprisepopupwid.jpg

I recently shot a video for the Surprise Pop-Up Card tutorial and created this card as a sample. I used the darling Gertie from Stamping Bella’s Lulu Collection.

bellagertiesurprisepopupclo.jpg

The card base is a 4 1/4″ x 11″ piece of Real Red Cardstock folded in half. Two 3 3/4″ wide pieces of October Afternoon Paper (The Thrift Store and Report Card) were stitched to a 3 15/16″ x 5 3/16″ piece of Basic Black cardstock. After cutting the slider part, a strip of basic black cardstock was cut and embossed with Eyelet Borderabilities. The strip was cut into pieces that fit just over the slider parts and adhered. The strip that was adhered to the middle part only had adhesive on the part under the score line.

Gertie was stamped in Tuxedo Black Memento ink on Neenah Solar White cardstock and colored with Copic Markers(R27, R20, BG72, BG75, BG78, E50, E51). It was cut out with Petite Oval Nestabilities. With the die  still on the cardstock, the oval was airbrushed with Copic Marker BG10.

Strawberry Hydrangea Prima Flowers were topped with a White Recollections Brad and adhered to the lower right corner of the slider with dimensionals.

bellagertiesurprisepopupope.jpg

When you pull up the slider, you find the sentiment of the card. It’s from the Flourishes set Humming Along. It was stamped in Tuxedo Black Memento Ink.

bellagertiesurprisepopupins.jpg

The inside of the card is decorated with The Thrift Store paper and another Hydrangea flower.

Here is a video for the visual learner:

[youtube]https://www.youtube.com/watch?v=8vjtaZoAqPw[/youtube]

Thanks so much for stopping by! Have a wonderful day! Hugs and smiles

tgffirstizzysc286wide.jpg

I love this little girl stamp. I told Rebecca moves out and starts college, she might become my favorite daughter. LOL It is my only Greeting Farm stamp so far, but I will get some more with my next order from Inspiration Emporium. I was excited they added the TGF stamps to their inventory. I had this stamp since January, but just recently used her for the first title (hence the time).

I stamped Izzy in Tuxedo Black Memento Ink on Neenah Solar White cardstock and colored it with Copic Markers (it’s been so long, I forgot the colors…sorry!). It was cut out with Petite Oval Nestabilities and airbrushed with a light colored Copic Marker.

tgffirstizzysc286beate.jpg

The card base is a 4 1/4″ x 11″ piece of Chocolate Chip cardstock folded in half. A 3 3/4″ long strip of Neenah Solar White cardstock was cut with the Eyelet Borderabilities and adhered underneath a 1 3/4″ piece of Thrift Store paper. May Arts White Crochet Trim was adhered above the green strips before the layers were stitched to a 3 15/16″ x 5 3/16″ piece of White cardstock.

A 1 5/8″ x 4 1/2″ piece of textured Real Red Cardstock was stitched on three sides and layered over the card front. Over that is a scalloped rectangle cut out of Chocolate Chip cardstock with Long Rectangle Nestabilities. The image was adhered over that.

White Crochet Trim (JoAnn’s) was stitched together and one side was pulled together and turned into a flower. I topped with a red Basic Grey button. Three Champagne Kaisercraft Pearls were adhered to the top right to finish off the card front.

tgffirstizzysc286inside.jpg

For the inside of the card I layered a 1 3/4″ x 3 15/16″ piece of Thrift Store paper over an Old Olive strip cut with Eyelet Borderabilities and then on a 3 15/16″ x 5 3/16″ piece of Whisper White cardstock. The layers were stitched together before they were adhered to the inside of the card.

Thanks for stopping by. Have a great day! Hugs and smiles

fllcbeautywithincc276wide.jpg

This card was created for a not so easy color challenge on Splitcoast a few weeks back. Soft Suede, Apricot Appeal and Almost Amethyst….I didn’t think I could do it, but I think it worked in this card.

I used Flourishes Beauty Within Stamp set. The image was stamped in Tuxedo Black Memento Ink on Solar White cardstock and colored with Copic Markers (G03, G07, BV20, BV23, Y21, Y23, E43, E44). The image was cut with Label 13 Nestabilities, layered on Soft Suede cardstock and cut around it to create the small layer underneath.

fllcbeautywithincc276amethy.jpg

The card base is a 4 1/4″ x 11″ piece of Soft Suede Cardstock folded in half. A 3 3/4″ x 5″ piece of Apricot Appeal Cardstock was embossed with Tim Holtz Damask Texture Plate and the edges were sponged with Wild Honey Distress Ink. The edges of a 1 3/4″ x 5″ strip of Whisper White cardstock were distressed and adhered to the upper part of the Apricot cardstock. The layers were stitched to a 3 15/16″ x 5 3/16″ piece of Whisper White cardstock.

A piece of Almost Amethyst Patterned paper (retired from Stampin’ Up!) was cut and embossed with Lattice Borderabilities and adhered over the the white paper strip and three Pearl Kaisercraft pearlswere adhered to the left side. A 3 3/4″ strip of White cardstock was cut with the other of the Lattice Borderabilities and stitched to a 1 3/4″ x 3 3/4″ piece of Amethyst patterned paper strip. May Arts Crochet trim as adhered over that strip.

The sentiment is from Beauty Within. It was stamped with Tuxedo Black Memento Ink on Neenah Solar White cardstock and cut with Petite Oval Nestabilities and adhered to the card front with dimensionals. White Taffeta Ribbon was tied into a bow and topped with a Recollections (Michaels) brad.

Thanks so much for stopping by! Have a wonderful day! Hugs and smiles

vervebeautifulkindnessdrawi.jpg

Today’s tutorial on SCS is created by Holly McMillen and is for a darling Drawer Box. It holds regular size cards as well as other treats. Holly says if you use thicker cardstock or thin chipboard, you can use them to store Nestabilities or clear stamp sets. How cool is that.

Mary Brown came over a couple of weeks ago and we stamped together. She brought over a few sheets of the new Early Espresso cardstock from Stampin’ Up! Boy…that is gorgeous. I know I will order lots and lots of it. We used it to make the sample box for my sample for the video tutorial. In the video…I am using Chocolate Chip (she left me enough for the Video piece, I just cut it wrong. DUH).

vervebeautifulkindnessdrawe.jpg

A 4″ x 5 1/2″ piece of Daydream October Afternoon paper was stitched to an 1/8″ bigger piece of Very Vanilla cardstock. A 1 1/4″ x 5 1/2″ piece of Weathervane October Afternoon Paper was stitched to a slightly bigger piece of Very Vanilla that had been cut with Eyelet Borderabilities.

The sentiment is from Verve’s Beautiful Kindness. It was stamped in Walnut Stain Distress Ink and cut out with Label 9 Nestabilities. The swirl is also from that set and was stamped in Aqua Adirondack ink.  The sentiment was adhered to the box top with dimensionals. The Aqua ribbon used here I bought at JoAnn’s.

Here is a video for the visual learner:

[youtube]https://www.youtube.com/watch?v=A6RAUQO7-h4[/youtube]

 Personal Note:
I am sorry I haven’t been visiting blogs and leaving comments and missing on some days of posting cards lately. We had friends visiting over the weekend and since Tuesday morning I only have internet early in the morning. Weird! Time Warner isn’t coming until Friday to check it out. My personal guess is that something is wrong with our cable. When we had really cold weather the cable would be out until noon, then work again until it got cold in the evening. Now it seems my cable doesn’t like hot either and is out from about 9:30 a.m. until 11 p.m. Arrrgh!

Thanks so much for stopping by! Have a wonderful day! Hugs and smiles

© 2012 fresh & fun Suffusion theme by Sayontan Sinha