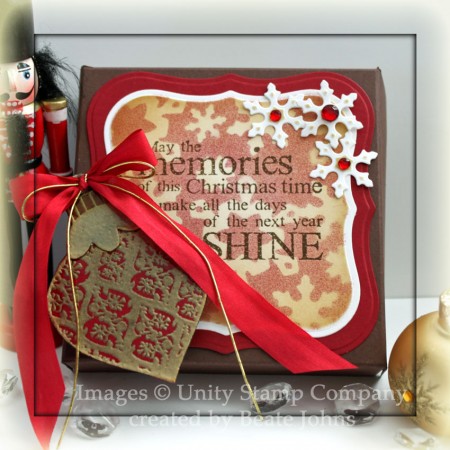
Today’s Tutorial was created by Jenny Gropp. She shows us how to create sturdy magnets as a gift idea. I placed my sample on a pizza box created to match.

The pizza box was created out of Chocolate chip card stock and layered with a piece of Cherry Cobbler card stock, cut and embossed with the largest Label 1 Nestabilities die. A piece of Neenah Solar White card stock was cut with a size smaller die, layered with snowflake die cuts from Create-a-Flake 2 and the Snowflake Borderabilities Petite and airbrushed with Copic Marker R89. With the die still over the card stock, I sponged it with first with Antique Linen all over, then on the edges with Vintage Photo Distress ink.  The sentiment is from Unity’s Embellished Season and was stamped in the center with Walnut Stain Distress Ink.

I airbrushed Copic Marker R89 over a  piece of Neenah Solar White card stock, stamped the ornament (also from Embellished Season) over it with Embossing inkand embossed it with Gold embossing powder. The card stock was adhered to a piece of cardboard that had been backed with Black card stock and cut out. The edges were colored with my black Copic Marker and a strong magnet was adhered to the back. Glossy Accents was added over the entire ornament.

Once the ornament was completely dry, a double bow out of red silk and gold cord was adhered to the top of the ornament. It was secured to the box with a magnet strip. Three small snowflakes were cut and embossed with the Snowflake Borderabilities Petite die out of Neenah Solar White card stock. They were topped with Red Kaisercraft Rhinestones.

Here is a video for the visual learner:

[youtube]https://www.youtube.com/watch?v=6BHSZ52UsbU[/youtube]

Thanks so much for stopping by! Have a wonderful day! Hugs and smiles

I needed a sample for the Faux Silk technique to shoot the video tutorial. I thought Unity’s Harmonious Sprig would be perfect for this.

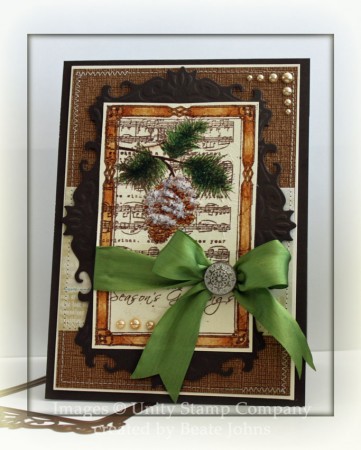
I stamped the image in Rich Cocoa Memento Ink on cream Tissue paper and adhered it to a Neenah Natural White cardstock. I used Xyron to add adhesive to the entire piece of cardstock. After the tissue was adhered, it was colored with Copic Markers (Pine Cone: E31, E33, E35 Pine Needles: G24, G28). Tissue paper is very soft, so the color does run a bit. But it helps to have the cardstock underneath. Because of the complete adhesive cover, the ink couldn’t sink in to the cardstock underneath. It was almost like coloring on glossy cardstock.

Canyon Brown Neenah cardstock was cut with the Classic Frame Nestabilities die. I cut it twice, then cut the tops off and adhered them around my image.  Polar White Flower Soft as well as fine glitter was added over the pine cone and olive Silk Ribbon was tied around the center of the image.

A 3″ x 4 1/2″ piece of Webster’s Pages Holiday Paper was adhered to a 4 3/4″ x 6 3/4″ piece of Core’dination cardstock. That was stitched to a 1/8″ bigger piece of Natural White Neenah cardstock. The card base measures 5 1/2″ x 7 1/4″ and was pieced together out of Canyon Brown Neenah cardstock. Latte Kaisercraft Pearls on the bottom left of the image panel and top right corner of the Core’dination cardstock.

Again my inside of the card is super simple. It doesn’t take long, but I like it better then keeping it plain.

Here is a video for the visual learner:

[youtube]https://www.youtube.com/watch?v=KmOBaWi_y-U[/youtube]

Thanks so much for stopping by! Have a wonderful day! I know mine will be. I am in Chicago hanging out with Lori, Jenn and Sharon today. Lori is teaching a Copic Certification. Sharon and Jenn are helping.  Tomorrow is the Intermediate Copic Certification. Marianne is teaching and we are all taking the class. I can’t wait!

Hugs and smiles

tgflaundrythinkingwide.jpg

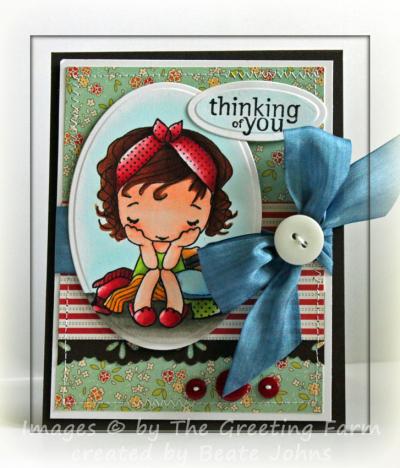
Check out this cute stamp! I had a blast coloring her the other night. I thought it would make a great “Thinking of you” card. The image is from The Greeting Farm. It was stamped with Black Soot Distress Ink on Neenah Solar White cardstock and colored with Copic Markers ( E00, E03 skin, R43, R35, R46 hairband, slippers, blanket, E99, E37, E18 hair, B0000, B32, B34, blanket, YR31, Y35, W3 laundry, YG01, YG03, YG25, C3 shirt and laundry, N1, N3, N5 ground, B0000 background) and cut out with Petite Oval Nestabilities.

tgflaundrythinkingofyoubeat.jpg

The card base is a 4 1/4″ x 11″ piece of Early Espresso Cardstock (Stampin’ Up!) folded in half. A 2″ x 3 3/4″ x 5″ strip of Seaside October Afternoon paper was adhered to a 3 3/4″ x 5″ piece of the same collection . A 3 3/4″ long strip of Espresso cardstock had been cut and embossed with Eyelet Borderabilities and layered underneath the horizontal strip. The layers were stitched to a 3 15/16″ x 5 3/16″ layer of white cardstock.

I didn’t have the right color ribbon for my card, so I colored light blue ribbon with B34 Copic Marker. After it dried, it was tied around the horizontal layers and topped with a white Basic Grey Button.  The sentiment is from the Ippity set Just Wanted to Say. It was stamped on Neenah Solar White cardstock with Black Soot Distress ink and then cut and embossed with Petite Oval Nestabilities. The inner part of the oval was colored with B0000 Copic Marker. To finish off the card I added three red buttons on the lower right.

The inside of the card is decorated really simple. Another 3 Espresso strip was cut and embossed with Eyelet Borderabilities and adhered under a 1 3/8″ x 3 15/16″ strip of Seaside October Afternoon paper. Both were adhered stitched to a 3 15/16″ x 5 3/16″ White cardstock piece that was then taped to the inside of the card.

Thanks so much for stopping by! Remember, if you are in or close to Columbus, come and see me tomorrow at DickBlick. I am a bit nervous about demoing Copic markers there for the first time EVER! I would love to see some friendly faces.

Hugs and smiles

unitymomentsinbloomalcoholw.jpg

Today’s tutorial on Splitcoast  was written by Sherry Cheever, aka. Bad Sherry! She shows us how to create the Faux Bleach look with Alcohol inks. I created my card the same way, just substituted the Alcohol inks for Copic Refills. It works just as well.

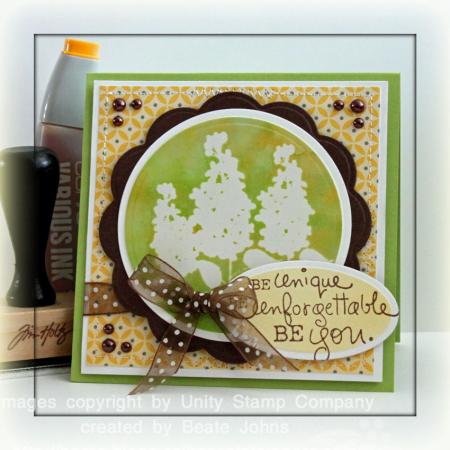
The image is from Unity’s Moments in Bloom/Naturally you store kit. It was stamped in Embossing ink on glossy cardstock and embossed with clear embossing powder. Next Y35, YG25 and B21 Copic Refills were added to a Felt Applicator and dabbed over the glossy cardstock. The image was then cut with Classic Circle Nestabilities, covered with a piece of scrap paper and ironed over until the embossed layer was gone. The image was then layered on a slightly bigger white circle, then on a scalloped chocolate chip circle cut with Big Scalloped Circle Nestabilities.

unitymomentsinbloomalcoholf.jpg

The card base is a 4 1/4″ x 8 1/2″ piece of Sour Apple cardstock  folded in half. I spend about 30 minutes in the October Afternoon booth at CHA talking with their staff there and they gave me a Seaside paper pad. How sweet was that? I did my own sharing with the amazing Debbie Olson and split the pack with her. For this card I used a 3 3/4″ square of the new paper and sewed it to a 3 15/16″ square of white cardstock.

The sentiment is from the same Unity Kit. It was stamped in Rich Cocoa Memento Ink on Neenah Solar White cardstock and cut with Petite Oval Nestabilities. I left the die on and airbrushed the oval with YR35.

A hole was punched in the lower left hand side of the main panel. Through that May Arts ribbon was threaded and tied in a bow. The sentiment was adhered next to it with dimensionals. To finish off the card I added Chocolate Kaisercraft Pearls in the three open corners.

Thanks so much for stopping by! Have a wonderful day!
Hugs and smiles
unitybravegirlgluewide.jpg

Today’s tutorial on Splitcoast is written by Roni Johnson. It’s for the Distress Glue technique. For my sample I cut a square with Classic Square Nestabilities, added Tacky Glue, let it dry and then sponged it with Weathered Wood and Stormy Sky Distress ink. The square was layered on a black Fair Isle Pendant.

unitybravegirldistressedglu.jpg

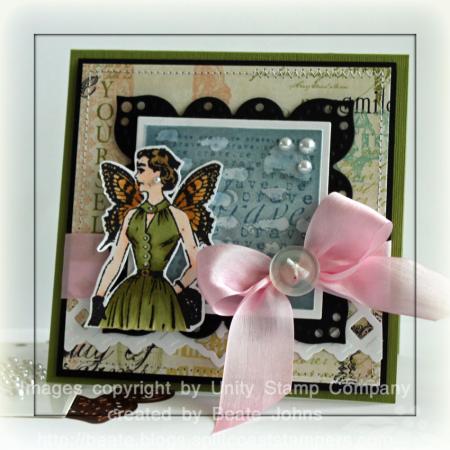
A 4 1/2″ square of Webster’s Pages paper was stiched to a 4 11/16″ square of black cardstock. A 4 1/2″ strip of Neenah Solar White cardstock was cut with the Lattice Borderabilities and adhered to the lower half of the square. A hole was punched in the lower right hand side of my main image before it was adhered to the card front with dimensionals. Pink Satin Ribbon was tied through that hole and around the layers and topped with a button. My card base is a 5″ x 10″ piece of Textured Old Olive cardstock folded in half. The layers were attached to the card base with dimensionals.

The butterfly lady (or as Jenn and I call her “Frida”) is from the Unity set Brave Girl. It was stamped in Black Soot Distress Ink on Neenah Solar White cardstock and colored with Copic Markers (c9.jpge0000.jpge01.jpgyg93.jpgyg95.jpgy28.jpge35-copy.jpgyr21-copy.jpgyr23.jpg). White Opal Liquid Pearls were added to her dress and a Kaisercraft Pearls Pearl as her earring. The butterfly wings were colored with the clear Spica Pen for a subtle shimmer. She was cut out and adhered to the square with dimensionals.

unitybravegirlglueinside.jpg

The inside of the card is pretty simple. I used the left over strip (1 1/2″ wide) from the Webster’s Pages paper from the front, cut it down to 4 1/2″ and adhered it to a 4 1/2″ Solar White square. The square was stitched to a 4 11/16″ basic black cardstock piece before it was adhered to the inside of the card.

Here is a video for the visual learner:
[youtube]https://www.youtube.com/watch?v=yK_SHszRwo4[/youtube]

Thanks so much for stopping by! Have a wonderful day! Hugs and smiles
unitymuslinflowerswide.jpg

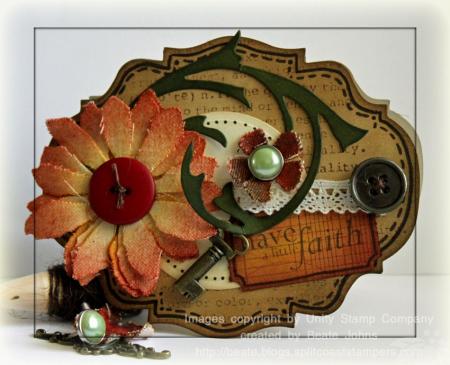
One of the VSN challenges asked us to use flowers on a card. After seeing the Moxie Fab challenge of using fabric on cards, I thought I cut some flowers with the Tattered Floral Alteration die out of Muslin. The flowers were sponged with Wild Honey Distress ink, then with Fired Brick Distress ink.

unitymuslinflowersvsntim.jpg

The card base was cut with Tim’s Baroque Alteration dieout of Natural Ivory cardstock. A border was doodled with a black marker. Then the edges were sponged first with Antique Linen, then with Vintage Photo Distress ink. The card base was stamped with the definition stamp from Unity’s Naturally You in Vintage Photo ink.

A swirl was cut with Elegant Flourishes Die out of Always Artichoke and sponged with Crushed Olive Distress ink.A ticket was cut out of Natural Ivory cardstock with the Ticket Strip Die. It was stamped with the background from Moments In Bloom in Vintage Photo ink. It was sponged with Wild Honey Distress ink. The sentiment from Moments in Bloom was stamped on the ticket in Walnut Stain Distress ink.

The card still needed an anchor of some kind to pull it all together. So I cut a circle out of Vanilla cardstock, sponged the edges with Antique Linen Distress ink and added a dotted border. It was adhered to the middle of the card and then everything was adhered along with  a few more embellishments.

Make sure you visit the Unity Blog to find out all the participants of today’s Friends with Flair Blog hop.

The small flower was also cut with Tim’s Tattered Floral die out of Muslin. It was sprayed with Red Pepper and Butterscotch Adirondack Colorwash (Note to self: Always wear gloves while spraying Colorwash! My fingers were stained for a week).

unitywhitelilacbracketwide.jpg

It’s another Friday. Time for Friends with Flair! I LOVE this new store kit from Unity! It’s absolutely gorgeous! I used it for a VSN challenge on SCS. In this challenge we were asked to used Watermark Ink.

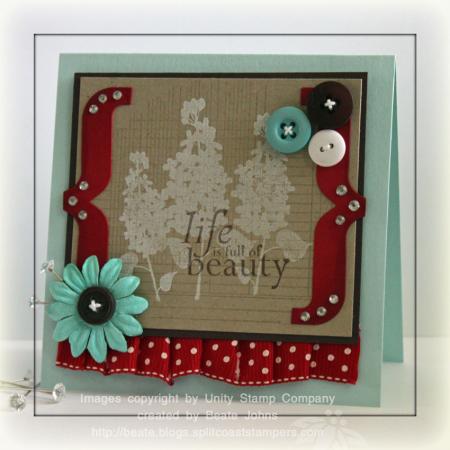
I started with a 3 1/4″ x 3 3/4″ piece of Kraft cardstock. The background stamp from Moments in Bloom was stamped in Watermark Ink. Next the Lilacs were stamped over it in Adirondack Snow Cap ink.  On top of that I stamped the sentiment in Walnut Stain Distress ink.

Brackets were cut with Stampin’ Up!’s Bracket die out of Wild Cherry cardstock. The outer edges were darkened with a Versamarker. Those were decorated with buttons, Tiny Twinkles and a Prima flowers with Maja Roads Trinket Pins.

unitywhitelilacbracketsbeat.jpg

Red polka dotted ribbon was ruffled and sewn to the bottom of a 3 3/8″ x 3 15/16″ piece of Chocolate Chip cardstock. The Kraft layer was adhered on top of that.  The card base is a 4 1/2″ x 9″ piece of Sno Cone cardstock was folded in half and used as a card base.

Make sure you check the Unity blog to find a link to all Friends for Flair Participants or hop on over to Lisa’s blog. She is next. Thanks for stopping by! Have a great day! Hugs and smiles
unitymistedflowerwide.jpg

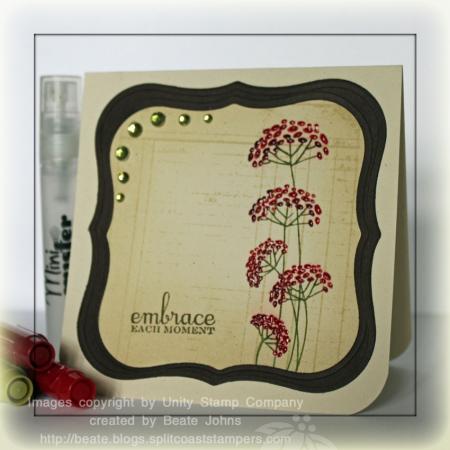
Another Friday, another Friends with Flair Blog hop! For this sample I colored the Feel the Joy image with Stampin’ Up! Markers (Real Red, Bravo Burgundy and Old Olive), misted it and then stamped it on a 4 1/4″ square Natural Ivory card. I masked the outer edge of the card and sponged the inside with Antique Linen. I stamped the Vintage Ledger background (LOOOOVE it!) in the same color and then added the sentiment in Walnut Stain Distress ink.

unitymistedflowercasbeate.jpg

The bottom corners of the card were rounded with a retired Stampin’ Up! corner rounder. A frame was cut with Label 1 Nestabilities out of Chocolate Chip cardstock, sponged with Walnut Stain Distress ink and adhered around the image. Split Pea Kaisercraft Rhinestones finish off the card front.

The inside of the card is so simple, I didn’t take a picture. I just stamped the flower image in Antique Linen on the left hand side of the inside.

Here is a video for the visual learner:

[youtube]https://www.youtube.com/watch?v=EEug80-dgxI[/youtube]

Thank you so much for stopping by. Make sure you check the Unity blog to find a link to all the participants of today’s Friends with Flair Blog hop. Or hop on over to Sydney’s blog. She is the next blog up. Have a great day! Hugs and smiles
sastamphodgepodgewide.jpg

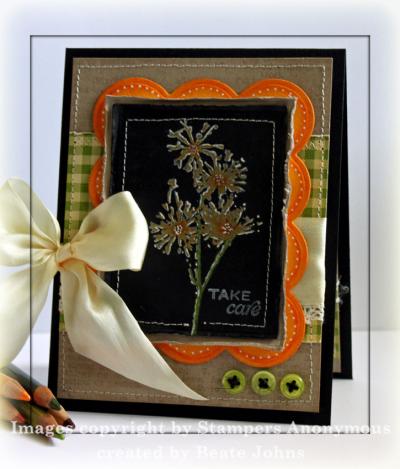
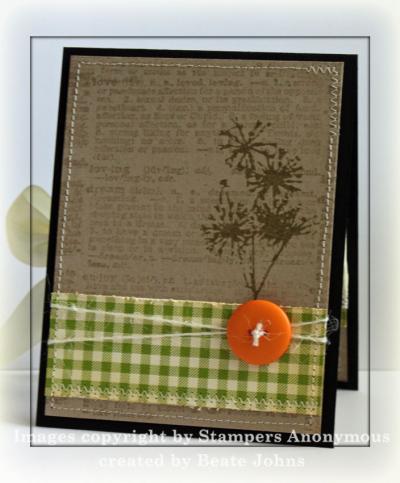
I usually try to use only stamps from one company on a card, but this one has three! The main image is from Tim Holtz Nature’s Discovery, then I needed a background stamp for the Kraft cardstock and used Unity’s Giving it All meaning. I only had a small spot for the sentiment and this one from Flourishes Taglines fit perfectly. The card was created for a Technique Challenge over on SCS. The challenge was to create a card with the Black Magic technique. I usually don’t like the look of this technique…but after playing with it for a bit, really liked how this card turned out. It looks better IRL.
sastamphodgepodgetlc274beat.jpg

I stamped the image from Nature’s Moments  in Snow cap pigment ink on black cardstock and colored it with Prismacolor Pencils (Dark Brown, Marine Green, Limepeel,  Yellow and Pumpkin Orange). It was cut out with Classic Rectangle Nestabilities. It was layered on the next size rectangle in Kraft cardstock. The layers were stitched together to give it an extra border and the edges of the cardstock was distressed.

I cut a a large scallop rectangle out of Apricot Appeal cardstock with Nestabilities, sponged it with Wild Honey Distress ink and added a dotted border with the Inkessential white pen. The image layer was attached to the scallop layer with dimensionals.

The card base is a 4 1/4″ x 11″ piece of Basic Black cardstock folded in half. Next is a 3 15/16″ x 5 3/16″ piece of Kraft cardstock. The layer was stamped with Unity’s Giving it all Meaning background in Watermark Resist Ink. A 3″ x 3 15/16″ piece of Fly A Kite October Afternoon Paper was distressed and stitched to the Kraft layer. May Arts Ribbon was tied around the layer and three green buttons ($1 bin at Michaels) were attached with black Burlap String. The layer was attached to the card front with dimensionals.

sastamphodgepodgeinside.jpg

The card inside is pretty simple, but I really like how it looks. A 3 15/16″ x 5 3/16″ piece of Kraft cardstock. It was stamped with Giving it All Meaning in Watermark Resist ink. The image from Nature’s Moment was stamped on the right hand side with Frayed Burlap Distress Ink. A 1 3/8″ x 3 15/16″ strip of Flying a Kite Paper was distressed and stitched to the Kraft layer. I tied a Basic Grey Button to the layer with tiny twine from MFT’s Bakery Blend Ribbon.

Thanks so much for looking! Hugs and smiles
unityearthfairysc282wide.jpg

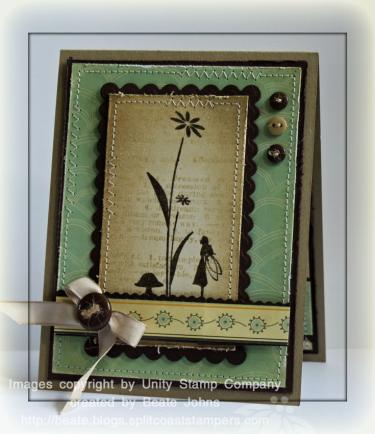
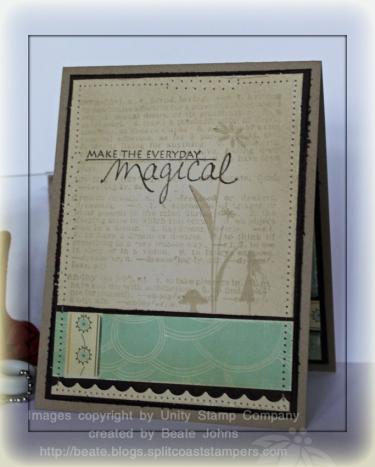
I am so excited that I can participate in Unity’s Friends with Flair again. It’s been too long! I made this card for the Sketch Challenge on SCS two days ago. As soon as I saw the sketch, I thought of this fairy. I think she is my favorite Unity stamp ever. I don’t know why, she just really speaks to me.

I started by stamping the background Giving it All Meaning in Antique Linen on a 2 1/4″ x 3 15/16″ piece of Natural Ivory cardstock. Next I stamped the fairy from the KOM Simply Magical in Walnut Stain Distress ink and embossed it with clear embossing powder. The edges of the layer were sponged and distressed. The layer was stitched to a slightly bigger scalloped Chocolate Chip layer, cut with the Long Rectangle Nestabilities. I can’t help myself. I LOVE stitching on cards. I love the way it looks.

unityearthfairy2scs282beate.jpg

The card base is a 4 1/4″ x 11″ piece of Kraft cardstock folded in half. The edges were sponged with Antique Linen. A 3 3/4″ x 5″ piece of Cosmo Cricket Earth Love Paper was distressed, sanded and then stitched to a 3 15/16″ x 5 3/16″ piece of Chocolate Chip cardstock. The edges of that layer had been distressed and sponged with Walnut Stain Distress Ink. Three little Basic Grey button were stitched to the upper right hand side with natural Burlap string.

The horizontal strip is also from the Earth Love paper pack. It was cut 1/2″ wide and layered with some long rectangle cutout I still had in my scrap paper. Kraft Taffeta ribbon was tied into a bow and topped with another Basic Grey Button to finish off the card.

unityearthfairysc282inside.jpg

For the inside of the card I sponged a 3 3/4″ x 5″ piece of Natural Ivory cardstock with Antique Linen, stamped it in the same color with Giving it All Meaning and the fairy and stitched it to a 3 15/16″ x 5 3/16″ piece of sponged and distressed Chocolate Chip cardstock. The patterned paper strip measures 1″ x 3 3/4″ and was sanded, sponged and then layered on a chocolate chip cardstock strip. One side of the chocolate chip strip had been cut with long rectangle Nestabilities.

Thank you so much for stopping by. Check the Unity blog to see who else is participating in today’s Friends with Flair blog hop. Have a great weekend! Hugs and smiles

© 2012 fresh & fun Suffusion theme by Sayontan Sinha