wvlistenheartgrungeflowerwi.jpg

I am having so much fun with the new things I learned at Ranger. While creating a card for the Just For Fun Stamps Color Challenge, I thought I take pictures on how to create a Grunge Rose, the way Tim taught them to us at Ranger U. I hope to be able to publish the tutorial soon. I want to shoot the video first to be able to post both together.

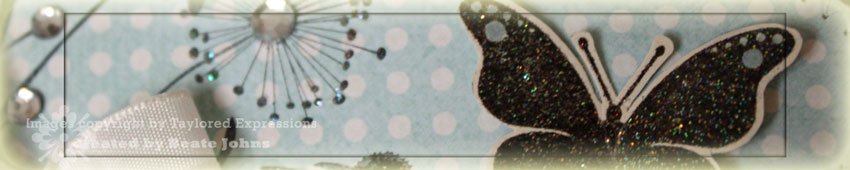
My card base is a 5 1/2″ x 8 1/2″ piece of Kraft cardstock folded in half. A 3 3/4″ x 5″ piece of My Mind’s Eye Just Dreamy 2 paper was stamped in Jet Black Archival black with a background from Urban Tapestry. The corners were punched with the ticket corner punched and the edges were distressed. It was stitched a 3 15/16″ x 5 3/16″ piece of black cardstock. (After taking the photographs…I saw that I didn’t sponge the edges! What’s wrong with me…so I took everything apart and sponged the edges with Broken China…I just don’t have an updated photo yet. The light isn’t right for taking pictures anymore).

wvlistenheartgrungeflowerbj.jpg

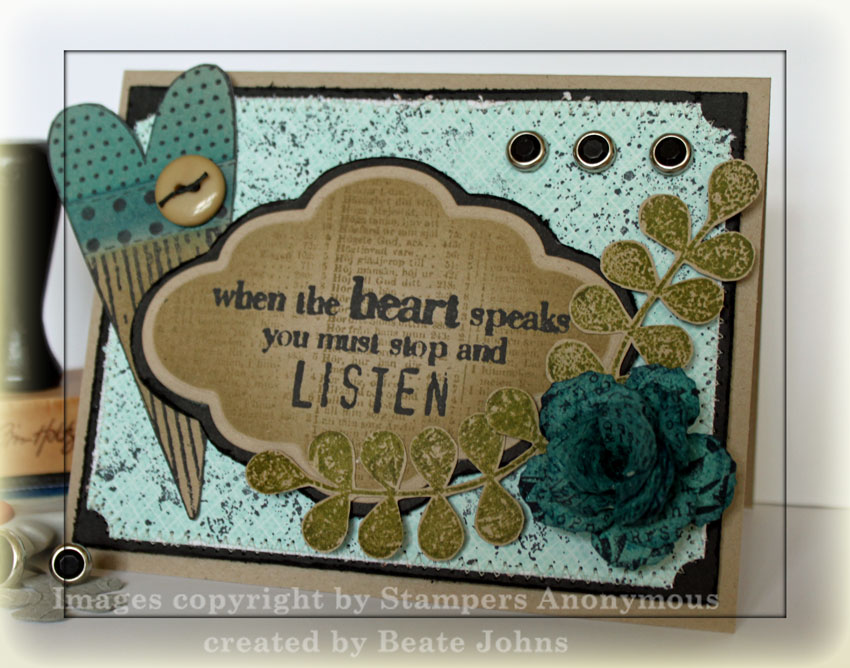
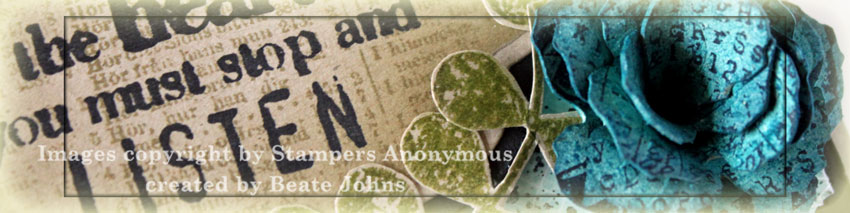
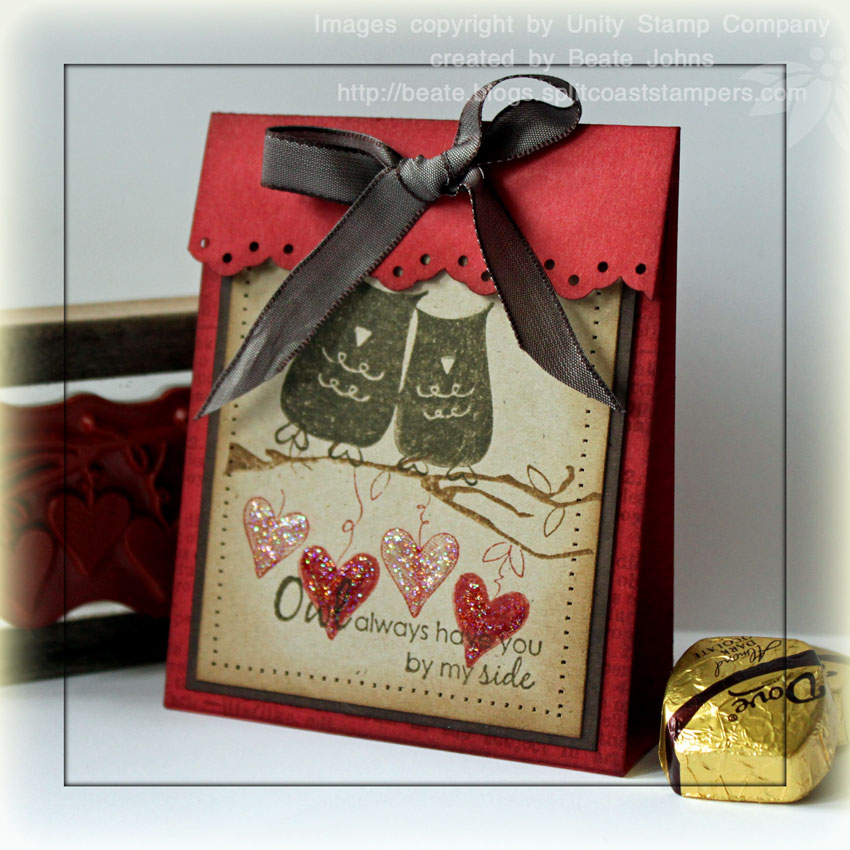
A piece of Kraft cardstock was cut and embossed with Label 6 Nestabilities. With the die still in place, The edges were sponged with Frayed Burlap and the entire piece was stamped with the background from Love to Make Art. The sentiment is from the same set and was stamped in Jet Black Archival ink. Using the same die as a template, I traced around it with a pencil on black cardstock, cut out the layer, distressed it and adhered my sentiment on top of that.

The heart is also from Love To Make Art. It was stamped in Jet Black Archival ink on Kraft cardstock, cut out and sponged with Broken China, Stream Adirondack ink and Frayed Burlap. The button is a Basic Grey button and the string is black waxed Linen.

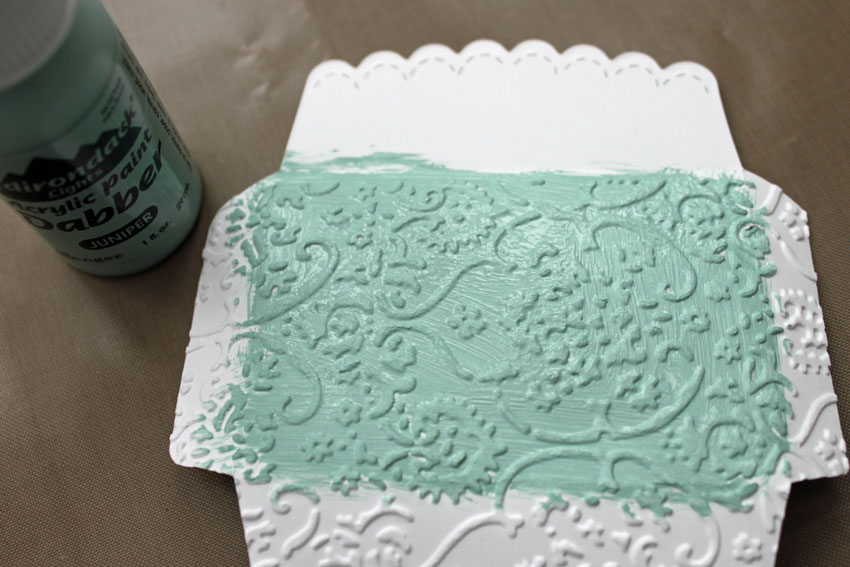
The leaves from the same Wendy Vecchi set were stamped in Peeled Paint with a bit of Forest Moss at the edges. They were cut out and adhered to the lower right of the sentiment panel. For the flower I embossed three 5″ x 6″ pieces of Grunge paper with the Divine Swirl Embossing Folder and then cut out flowers with Tim’s Tattered Floral Alteration Die. I picked only the medium flower cut outs and sponged the flowers first entirely with Stream Adirondack ink, then the edges with Chipped Sapphire Distress ink. Next I stamped each flower with a different background stamp. Two of those stamps were from the set Going Somewhere, one from the set Mini Muse.

Talking about Wendy Vecchi. She will be at a scrapbook store in Indianapolis in May! I already signed up for two of her classes. I hope there lives a SCS member in Indianapolis or close by, who wouldn’t mind organizing a SCS dinner. How much fun would that be after class? So how about it? Who is coming to class and dinner later on? I know Sherry Cheever is coming. She told me about the class. I can’t wait to hang out with her all day!

Thanks for stopping by! Have a wonderful weekend! Hugs and smiles

juniperscallopboxwide.jpg

Today’s tutorial on SCS is written by Jane Matsumoto. It’s how to create a box with four scallop edge envelopes. It’s very cute, but after Ranger U, I am so not in the cute mood. So I decorated it a bit different. I embossed a grungeboard swirl with Vintage Photo Distress Embossing powder and added a flower from Foilage and a Philosopy Tag.

juniperscallopboxbeate.jpg

My box is made out of Neenah Solar White cardstock. I embossed all four sides with Cuttlebug’s Textile. Next I treated the cardstock with a technique Tim showed us on Grungeboard. He called it Grunge Distress. Since I was not using Grungeboard, I call it Acrylic Distress. I shot some step by step pictures to show you. Just click on more if you want to see it. 

P.S.: I will have to take out the candy and tissue and add some brown speckles on it. It’s just too darn white.

Continue reading »

Today’s tutorial on Splitcoaststampers is on how to make a paper cone. They are fun and versatile. You can use them as a treat bag or you can turn them around and use them as a party hat or base for a doll. What’s not to like, right?

justritepaperconeromantic.jpg

For my sample I used the new Jumbo Scallop Petite Borderabilities. Splitcoaststampers is posting a review on the new wide scallop dies Spellbinders came out with. I received these dies to play with. I LOVE Spellbinder dies, this one was no exception!

The paper used for this cone is from the Laundry Line from My Mind’s Eye. I cut and embossed two 11″ strips of Chocolate Chip cardstock with the Spellbinders Borderabilities. I used the double scallop one for the cone handle, the single one as a trim for the cone.

The sentiment is from JustRite’s Romantic Sentiments . It was stamped in Fired Brick Distress ink and sponged with Tattered Rose ink. The border was stamped in Walnut Stain Distress ink and is from as the Decorative Round Borders. The sentiment and border as well as the scalloped circle behind it were cut and embossed with the Circle Nestabilities.

The flower is a little sneak peek of Tim Holtz’s Flower Tattered Floral Die. Daisy from Eclectic Paperie gave my a few cut outs when I met her at the CHA. I can’t wait to own that die!!! The flower cut-outs were sponged with Fired Brick Distress ink, layered and topped with a Making Memories Brad. Silk May Arts ribbon finishes off my cone.

Here is a video for the visual learner:

[youtube]https://www.youtube.com/watch?v=wF4dhfcsiQA[/youtube]

Have a wonderful day! Hugs and smiles

tefishysmoocheswide.jpg

Wednesday’s tutorial on Splitcoast was for a Folded Paper Frame. It’s easy, fun and fast and adds a different look to your card.

tefishysmoochesfoldedwindow.jpg

My card base is a 4 1/4″ x 8 1/2″ piece of Real Red cardstock folded in half.  A 3 3/4″ square of My Mind’s Eye Pretty Please  Paper was stitched to a 3/16″ bigger piece of basic black cardstock and adhered to the card front with dimensionals.

The paper frame was created out of a 4 1/4″ square of Pretty Please patterned paper. It was adhered to a slightly bigger black scallop cardstock square that had been cut with Square Nestabilities.

The darling image is from Taylored Expression’s new release. It’s called Fish in Love. It was stamped in Tuxedo Black Memento ink on Neenah White cardstock and colored with Copic Markers (green fish: YG00, YG01, YG03 Orange Fish Y32, Y35, Y38, R35 Hearts: R32, R35  Water: BG0000, BG000, BG01  outside fish bowl: YG00, YG000). Squiggly lines were added with a Quicky Glue Pen and Glitter was added over that (Thanks to Taylor’s Mom for that cool idea!)

The sentiment is from Taylored Expression’s Animal Love Sentiment. It was  stamped with Tuxedo Black ink on Neenah cardstock. Then it was punched out with Stampin’ Up!’s large oval punch, colored with Copic Markers (R32, R35, YG00, YG000), adhered to a black scallop oval punch-out and covered with Stardust Stickles.

The flamingos stamp  used in the video is also from Taylored Expression. The image was stamped in Tuxedo black on Neenah cardstock with Copic Markers (Flamingos: R32, R35  Beak: BG72, W2  Sun: Y21, Y23, Y26). Here is a video for the visual learner:

[youtube]https://www.youtube.com/watch?v=xOJNouEvCSs[/youtube]

Happy Valentine’s Day! Hugs and smiles

flowersoftufproudofyouwide.jpg

Flower Soft has a great new product out…well actually two. But the latest product review on SCS was all about the new Flower Soft Ultra Fine. I really like the much finer new product. It makes it easier to use on more detailed stamps. The other new product is their beautiful new line of stamps called Moments in Time

flowersoftufproudofyou.jpg

My image is from the Moments in Time stamp set called Man of the Hour. This image reminds me so much of my two boys when they were little. Kids grow up way to fast, don’t they? The image was stamped in Tuxedo Black Memento ink on Neenah White cardstock and colored with Copic Markers (Shirt and socks: R24, R27, R29, BG93, BG96  Ball E33, E34, E35  Shorts: E70, E71, C00 Grass: YG01, YG03, YG05  Skin: E50, E51, E53  Shoes: E44, E47  Hair: Y18, Y26, YR28, E15, E8). The image was cut out and embossed with Curved Rectangle Nestabilities. While leaving the die on, I airbrushed the sky with Copic Marker B24.

On the ground I added Flower Soft Ultra Fine Sand, for the grass I used the Flower Soft Ultra Fine Sage. The sand color was to light, so after the glue dried, I airbrushed that area with E47. The top right of the image was paper pierced.

The card base is a 4 1/4″ x 11″ piece of Always Artichoke cardstock folded in half. A 3 1/2″ x 4 7/8″ piece of Kraft cardstock was stamped with the ball from the same set in Frayed Burlap Distress ink. The edges were sponged with the same ink. That layer was stitched to a 1/4″ bigger piece of Chocolate chip cardstock. The stitched layers were attached to the card front with dimensionals.

The sentiment is from Verve’s Dare To Be You stamp set. It was stamped in Tuxedo Black ink on Neenah White cardstock, punched with SU’s large oval punch and sponged with Frayed Burlap ink before it was adhered to the image.

The rubber stamps from Flower Soft come as unmounted rubber sheets along with Kling-on cushion. I created a quick tutorial on how to mounting unmounted rubber stamps. I used my Flower Soft image for the photo tutorial and a Stamp’n Whiskers image for the video tutorial that you can see here:

[youtube]https://www.youtube.com/watch?v=WW6U-vPnqpU[/youtube]

tediscoverwingseaselwide.jpg

I created this card for the Easel card tutorial , which ran two weeks ago on SCS. I apologize again for being horrible at keeping up with my blog right now. I don’t know why I can’t get my act together.

tediscoveryourwingseaselbea.jpg

 The image is from Taylored Expressions Discover Your Wings. It’s such a beautiful set. It was stamped in Black Soot Distress Ink on a 3 1/2″ square of Bo Bunny Kitchen Spice paper. It was stitched to a 3 11/16″ square of Black cardstock. A small hole was punched on the lower left hand corner and Kraft Taffeta Ribbon was tied through both layers. Then those layers were adhered to a  3 15/16″ square of Natural Ivory Cardstock before attaching it to the Chocolate Chip card base.

To spruce up the image Black Diamond Stickles was added to the top of the cone flowers, Kaiser Clear Rhinestones to the Dandilion tops. The butterfly is from the same stamp set. It was stamped in Black Soot Distress ink and embossed with Iridescent Ice Embossing Powder.

For the inside layer a black strip was punched with Martha Stewarts Deco Shell Border punch. A 7/8″ x 3 13/16″ strip of designer paper was stitched to the layer and stamped with images from Discover your wings.

Here is a video for the visual learner:

[youtube]https://www.youtube.com/watch?v=7QPHOkRukeQ[/youtube]

We have a winter storm warning for today and part of tomorrow and expecting snow! If you are in my area, stay save and warm! Have a wonderful day! Hugs and smiles
 

 unityowltreatbagcoverwide.jpg

I am sorry I have been so quiet. First winter hit us hard, then my oldest had exam and last week I was at the CHA. I hope to post again regular starting today! CHA was so much fun! It was great to meet up with so many fellow stampers. I had a wonderful time!

Yesterday’s tutorial on SCS was for a Treat Bag Cover.

unityowltreatbagcoverbeate.jpg

I started with a 3 3/8″ x 10 1/2″ piece of Riding Hood Red cardstock. It was stamped with Unity’s Giving it all Meaning background in Fired Brick Distress ink. The edge of the flap was punched with SU’s Eyelet Border Punch and the edges were sponged with Fired Brick.

I inked up the branch from the Believe in Fairytales Store kit with Vintage Photo Distress ink, the hearts with Fired brick and stamped the image on a 2 7/8″ x 3 1/2″ piece of Kraft cardstock. The owls are from the same stamp set and were stamped in Walnut Stain distress ink. The edges were spongedwith Vintage photo ink. The Kraft cardstock was adhered to a 1/4″ bigger piece of Chocolate Chip cardstock. The edges of that had been sponged with Walnut Stain.

To finish the image off I sewed around the edges with a sewing machine (without thread) and added Stardust Stickles over the hearts.

Here is a video for the visual learner:

[youtube]https://www.youtube.com/watch?v=a9DFs8svcGo[/youtube]

fllcdoveandhollystainedwide.jpg

A few month ago I thought it would be cool to make a mosaic stamp with left over rubber from Stampin’ Up! sets. I showed it to Lydia Fiedler, she helped me name the technique Stained Mosaic. It is today’s tutorial on SCS.

For my sample I chose the Holly and Dove set from Flourishes. As soon as it came out I knew I wanted to use it for this technique. The card base is a 4 1/4″ x 8 1/2″ piece of Ridinghood Red Cardstock folded in half and sponged with Aged Mahogany Distress ink. The bottom of the card was punched with the Deco Shell Border Punch from Martha Stewart.

fllcdoveandhollystainedmosa.jpg

A 3 5/8″ square was embossed with the Victoria Cuttlebug embossing folder and sponged the raised part with Antique Linen, then the edges with Vintage Photo Distress ink. A small strip of Fruitcake Basic Grey paper was taped to the lower part and it was stitched to a 3 7/8″ square.  Burgundy Silk May Arts ribbon was tied around the layers before they were taped to the card base with dimensionals.

The image was stamped with Tuxedo Black Memento Ink and colored with Copic Markers. I cut it out with Label 3 Nestabilities, stamped my Mosaic stamp over it with Versamark and embossed it with clear embossing powder.  After the embossing powder cooled, I rubbed my black ink pad over the image, then buffed it with a paper towel, leaving the ink only in the cracks that were left by the stamp.

The sentiment is from the same stamp set. It was stamped on Vanilla cardstock, cut with Petite Oval Nestabilities, sponged first with Antique Linen, then a bit with Vintage Photo distress inks. Tiny white pearls were added under the the sentiment and the oval was adhered to a black scallop oval.

Here is a video for the visual learner:

[youtube]https://www.youtube.com/watch?v=vwXR7q9CyHU[/youtube]

On a personal note, sorry I haven’t been posting. I had another cold and then got stuck on a new book series. Have a wonderful day! Hugs and smiles

Valerie Stangle wrote today’s tutorial on Splitcoast. She is showing us how to make this tag box. Make sure to check it out and leave her a comment on her video. It’s her first one ever.

tagboxnewsletter.jpg

Have a wonderful day! Hugs and smiles

vervechristmasinairdryedgew.jpg

Last Wednesday a Product Review about The Ultimate Crafter’s Companion  was posted on Splitcoaststampers. Whenever there is a Product Review we try to include tutorials for the product that is reviewed.

For the Crafter’s companion I wrote tutorials for Dry Embossed edges , Creating Bows and Creating Envelopes with The Ultimate Crafter’s Companion.

My card base is a 4 1/4″ x 8 1/2″ piece of textured Real Red cardstock folded in half. After double embossing a decorative border on the bottom of the card front, I cut around the edge of that border with my scissors. Snowflakes from the Verve set Frosty Flakes were stamped in Fired Brick distress ink over the front of the card front. The edges of the card front were sponged with the same ink.

vervechristmasinairdryeedge.jpg

A 1 3/4″ x 4 1/4″ piece of Bo Bunny Paper was taped on a 1/8″ bigger piece of White cardstock and taped on the lower half of the front.  Tiny Twinkles were glued between the the two dry embossed edges. Another strip of different Bo Bunny paper was taped behind the dry embossed edge to add a bit more color.

The sentiment is from Verve’s Christmas is in the Air. It was stamped in Adirondack Espresso Ink, cut with Label 8 Nestabilities and sponged with Adirondack Willow ink. A Chocolate Grosgrain ribbon bow was added to the bottom left of the sentiment layer and a snowflake to the top right. The snowflake outline is from Christmas is in the Air, the inside is from Frosty Flakes and was stamped in Adirondack Aqua Ink. The snowflake was covered with Crystal Effects and then sprinkled with Dazzling Diamond Glitter. A Bo Bunny i candy jewel finishes off the flake.

Here is a video for the visual learner:

[youtube]https://www.youtube.com/watch?v=IMDUq3GgzQE[/youtube]

© 2012 fresh & fun Suffusion theme by Sayontan Sinha