Today’s tutorial is for a simple Luminaria. They can be created lots of different ways, but I thought I start showing an easy one, all out of one piece of cardstock. The images and the background were printed out with the new Flower Soft CD-Rom. It contains some super cute images and helps to make some quick cards and projects.

flowersoftluminary.jpg

The ovals were cut with Oval Nestabilities (of course….I seem to not be able to create one project without Spellbinders products. I am truly hooked on those!). Vellum Paper was taped behind the window.

The images were cut out and taped to my box with Scor-Tape and dimensionals. Polar White Flower Soft was added to the trees and ground.

Here is a video for the visual learner:

[youtube]https://www.youtube.com/watch?v=8_r7wc47ivI[/youtube]

gratitudewsc101wide.jpg 

I wrote the first SCS tutorials back in 2003, can you believe it? Well…they look like it. So I am trying to slowly but surely to redo them.

Here is my new take on the Crayon Resist technique. For this sample I stamped the image in Tuxedo Black Ink, then colored it with Copic Markers (YG23, YG25, YR65, YR68). Then white Crayon was added over the colored image and a bit to the side of it.

gratitudewsc101crayonr.jpg

The card base is a 4 1/4″ x 11″ piece of Aruba Core’dinations Cardstock folded in half. Next a 3 1/2″ x 4 5/8″ piece of 7Gypsies Capri Patterned Paper was taped on a 3 3/4″ x 4 7/8″ piece of Chocolate Chip cardstock. Both layers were stitched together (yes, I love that I have my sewing machine out of the basement, in my stamp area now).

The  1 5/8″ x 3 1/2″ piece of Kiwi Kiss cardstock was stamped with Floral Edge in Shabby Shutter Distress ink. The edges were distressed and sponged. A 1″ x  3 1/2″ strip of Chocolate Chip cardstock was cut and embossed with  Eyelet Borderabilities, taped underneath the Kiwi Layer and stitched to it. White Organdy Ribbon from SU was tied to the right edge. A Prima Flower was taped over the ribbon with dimensionals. It has a Recollection brad in it’s center.

The main image is from Unity’s Gratitude = Joy stamp set. It was stamped and colored, then cut out with Label Four Nestabilities. It was layered on a size bigger label cut out of Chocolate Chip. That layer had been embossed with a Cuttlebug Embossing Folder and sponged with Vintage Photo Distress ink. The sentiment is also from Gratitude = Joy. It was stamped in Tuxedo Black Ink, punched out with the 1″ circle punch, sponged with Shabby Shutter Distress ink, layered on a 1 1/4″ Chocolate Chip circle and the edges were paper pierced.

Here is a video for the visual learner:

[youtube]https://www.youtube.com/watch?v=LkP-_z48jMI[/youtube]

Have a wonderful weekend! We are having friends visiting from Illinois. It will be great!

Hugs and smiles

abundantblessingssmile.jpg

My Bermuda Bay card base measures 4 1/4″ x 8 1/2″ . It was dry embossed and cut with the Xyron Creatopia.  A piece of Thoroughly Modern designer paper was taped to the top and sanded. White May Arts Satin Ribbon was tied around it.

The image is from Verve’s stamp set Abundant Blessings. It was stamped with Melon Mambo ink, cut out with Circle Nestabilities and first layered on a slightly bigger Chocolate chip circle, then on a Whisper White Scallop Circle. Another piece of Thoroughly Modern Designer Paper was taped to the inside of the card front.

To see the Creatopia cutting and dry embossing, check this video:

[youtube]https://www.youtube.com/watch?v=wwfMTNNaKOY[/youtube]
I shot this video before receiving a second wheel guide from Xyron. The second wheel guide  helps cutting paper straighter.

Here is another tutorial published this Wednesday. This one is about altering spiral notepads. I wrote it to show off Creatopia‘s permanent adhesive and laminating cartridge, but you can alter bought spiral notepads without the machine as well.

unitykom020309notes.jpg

It’s pretty self explanatory, so I will just add the supply list:

Stamps: Unity February 09 Kit of the Month stamp set

Ink: Tuxedo Black Memento Ink

Paper: Paper Salon Patterned Paper, Black cardstock

Acc.: Button Late, retired SU’s Sage ribbon

unitykom020309inside.jpg

On the inside I stamped each notepad page in second generation Soft Suede ink with another stamp from Unity’s February KOM set.

Here is a video for the visual learner:

[youtube]https://www.youtube.com/watch?v=n4NcCg9iCY0[/youtube]

 kindredspiritacrylicheader.jpg

Tomorrow is the 4th annual World Card Making Day. It is a holiday especially for us paper crafters to get together and create and start your holiday card making season. Card makers from all over the world will be celebrating the joy of creating and giving handmade cards.

Head on over to the WCMD site and check out event ideas and the WCMD gallery. Upload a card to the gallery there to share it with other cardmakers worldwide and be eligible to win a great prize on both the PaperCraft Connection and the Moxie Fab World. Enter the WCMD contest  and you have a chance to get published in the March/April 2010 Papercrafts magazine. Categories for this contest include: Birthday, Christmas/Season’s Greetings, Hello/Thinking of you, love and Thank you.

Check out the WCMD Blog tour to see 25 more cards made especially for today and receive a 25% off coupon for the online store

If you are planning on posting a blog entry specifically for the WCMD, you can add a link your post on the WCMD website with Mr. Linky here.

Make sure you comment on this post and go to the Moxie Fab World blog and leave a comment there as well. It will increase your chance to win a great prize. Comments will close at midnight October 4th and prize winner will be announced on Tuesday, October 6th.

__________________________________________________________________________________________

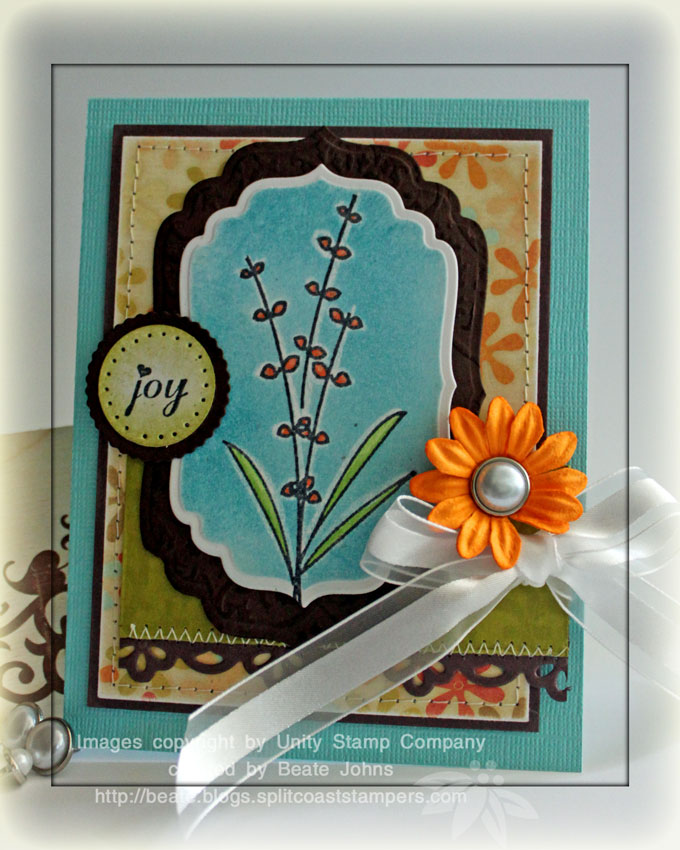
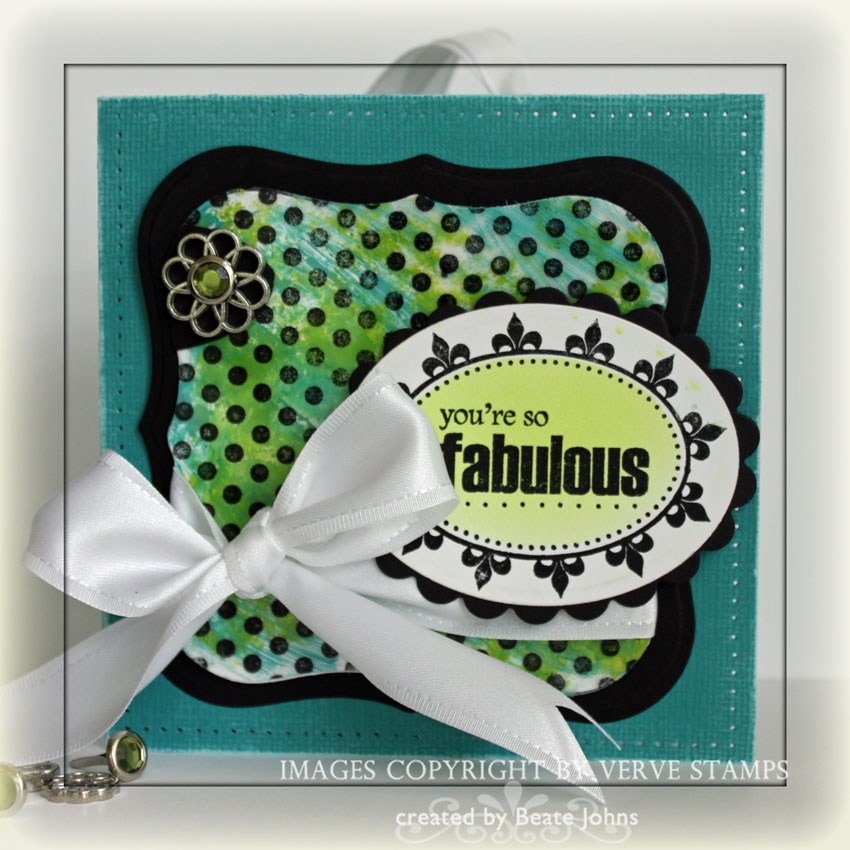
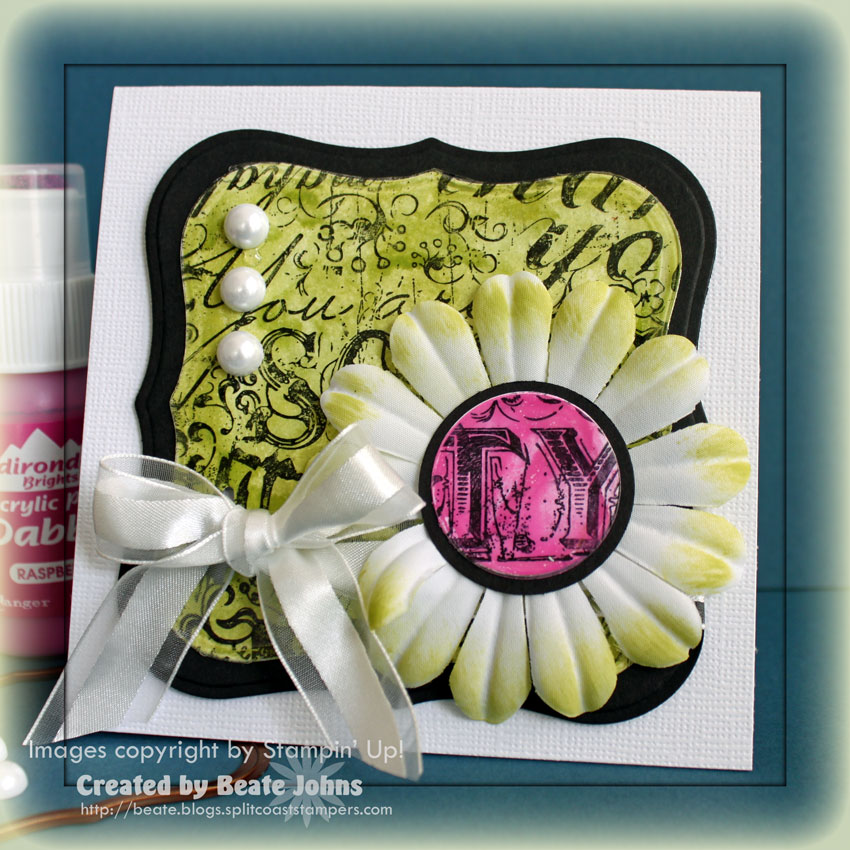
For my card today I used this week’s tutorial on SCS called Acetate smash.

kindredspiritsbookmarkcard1.jpg

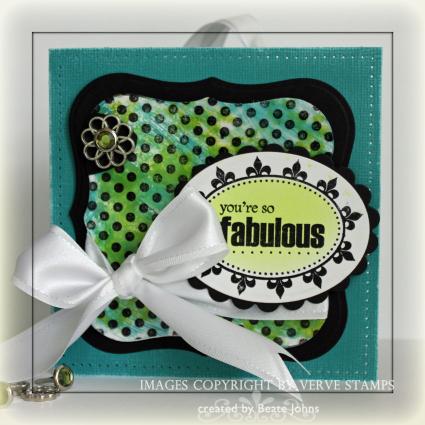
My card  base is created out of Core’dinations cardstock from the Roy G. Biv Super Assortment. It uses a 4 1/2″ x 9″ piece of cardstock folded in half. I paper pierced and sanded the edges.The main panel was cut with Label One Nestabilities. The large layer was cut out of Basic Black cardstock, the smaller one out of Acetate and once out of Whisper White cardstock.

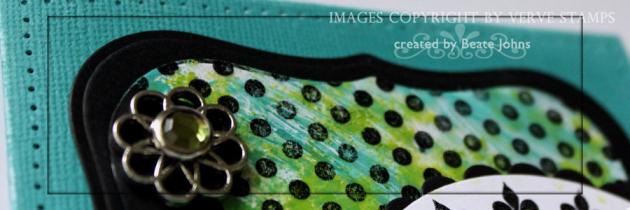
I stamped the Acetate with the dotted background from Bountiful Backgrounds in Black Stazon, turned the Acetate around and added Citrus and Pool Acrylic Paint with Dabbers from Adirondack. The White cut out was pressed against the Acetate. The cool thing is, once the Acrylic Paint dries, the layers stick together! The layers were adhered to the black die cut.  I punched out an oval with the large oval punch, trimmed it to match the Label cut and adhered it to the top left. A Filigree brad topped with an Ice Rhinestone brad were centered over that. On the lower half I tied White Satin Ribbon from May Arts.

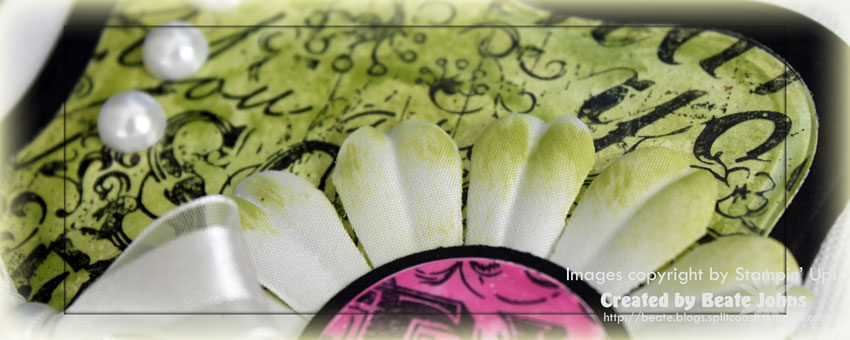
The frame image is from the stamp set Kindred Spirits, the sentiment from Bountiful Backgrounds. It was stamped in Black Stazon on Whisper White cardstock and cut with Oval Nestabilities. The created a reverse mask, leaving only the center of the image exposed and airbrushed it with Copic Marker YG23. It was layered on a slightly bigger black scallop oval.

Here is a video for the visual learner:

[youtube]https://www.youtube.com/watch?v=RxoWL5IC7s0[/youtube]

Make sure to stop by Splitcoast tomorrow to check out the hourly challenge that will be posted there in honor of WCMD! Just click on the blinkie on the site bar to get you there.

Have a great weekend! Hugs and smiles

gratuitousgraffitiwcmdlong.jpg

Sorry I have been so quiet. I have been working like crazy on a big project that is now not going to be shown until next week. Bummer for now, but I can promise lots of posts at the end of next week!

Today’s tutorial on SCS is on how to create a background with your Acrylic Paints and a piece of Acetate. It’s really fun,  fast and easy.

gratuitousgraffitiwcmd09bj.jpg

The card base for today’s card is a 4 1/2″ x 9″ piece of Core’dinations Paper from the Roy G. Biv Super Assortment.

The centerpiece was created with today’s tutorial technique. It is super easy. Cut a piece of Acetate to the shape you need. Cut neutral cardstock the same shape. I used Label One Nestabilities. Next I stamped Gratuitous Graffiti with Black Stazon over my Acetate. Turn Acetate over and add Acrylic Paint. I used the Lettuce Adirondack Acrylic Paint Dabber. Place your neutral cardstock over the ink and let dry.

For the flower center I cut a 1 1/4″ Acetate and White Circle with Circle Nestabilities, stamped the TY from Gratutitous Graffiti over it with Black Stazon and added Rasberry Adirondack Acrylic Paint over it. The flower itself is  like the half pearls on the top left from Stampin’ Up!’s Pretties Kit. I sponged the edges with Lettuce paint. I attached the center to the flower with dimensionals, tied white Organza ribbon around the layers and adhered the flower over it.

Here is a video for the visual learner:

[youtube]https://www.youtube.com/watch?v=RxoWL5IC7s0[/youtube]

I created a tutorial for another way of playing with Shimmery Paint: Shimmery Resist. I uploaded it today on Splitcoast.

dashershimmer1.jpg

My card base is a 4 1/4″ x 8 1/2″ piece of Chocolate chip cardstock folded in half. Next is a 3 15/16″ square of Whisper White followed by a 3 3/4″ square of Christmas Cocoa Specialty Paper. The edges of the paper were paper pierced.

For the main image I stamped Dasher in Chocolate Chip Craft ink on a 2 1/2″ square of Real Red cardstock and embossed it with clear embossing powder. Next I brushed Shimmery Paint all over with a the cardstock and stamped Snowflakes from the Serene Snowflake set over it with Shimmery Paint.

 dashershimmer3.jpg

I buffed the image with a paper towel. It was layered on a 1/4″ bigger piece of Whisper White cardstock. The top right corner was paper pierced and a ribbon slot was added on the lower right. I threaded Organza ribbon through the slot, adhered the image with dimensionals to a 3 1/4″ Chocolate Chip square and tied my ribbon into a bow. The bottom edge had been punched with the Eyelet Border punch.

dashershimmer2.jpg

The sentiment is from Teeny Tiny Wishesand is stamped in Chocolate chip craft ink on Real Red cardstock. It was embossed with clear embossing powder and punched out with the large oval punch. I stamped a snowflake from Serene Snowflakes over it with Shimmery Paint and layered it on a Whisper White Scallop Oval Punch-out. The sentiment was adhered to the card with dimensionals.

Here is a video for the visual learner:

[youtube]https://www.youtube.com/watch?v=jEQZeNElqMg[/youtube]

I will post the other card shown in the video tomorrow.

Have a wonderful day! Hugs and smiles

I created a quick tutorial on how to create a personalized stamp with JustRite products for this weeks Product Review on SCS. As a sample, I created a tag for my Christmas cookies.

justritechristmascookies.jpg 

And of course, I did have to bake those cookies. I usually NEVER bake those cookies before the beginning of December. They are crack cookies. I have no control over myself whatsoever. The kids were happy, my scale wasn’t so much! LOL

justritechristmascookiesclo.jpg

The assembled stamp was stamped in Chocolate Chip craft ink on Shimmery Cream cardstock as well as Ruby Red cardstock and embossed with clear embossing powder. I cut it with Circle Nestabilities, sponged the edges and layered them on top of each other. I added Stardust Stickles to the snowflake and topped it of with Kaiser Rhinestones. The ribbon is May Arts Silk Ribbon.

Here is a video for the visual learner:

[youtube]https://www.youtube.com/watch?v=Pfd7CLRMyDk[/youtube]

Today’s tutorial is for a Tent Topper Card. Michelle Wooderson came up with it a few years ago. These cards are so adorable. The main image is taped so it stands over the top edge of the card.

We are also posting a new Product Review on SCS today. This time we checked out JustRite Stampers new Christmas stamps. Go on over and check it out. I have to tell you that I LOVE the new JustRite products. No more conditioning!!! How sweet is that. AND….the new 2″ wood stamp has room for a double border.

For this sample though I used one of their new bigger sets called Old Fashioned Christmas.

justritesnowmantopper.jpg

I stamped the image in Memento Black ink on Shimmery White cardstock and cut and embossed it with two circle Nestabilities. I left the circle Nestabilities over the cardstock and used my Air Brush and Copic Marker EE00 to add the shading. Then I colored the rest of the image with these Copic Markers: E25, E97, YYR07, R21, YR 24, B21, B23, BG96, G85, W1, R22, R27, R29. The outer rim was taped to a slightly larger Chocolate Chip scallop circle with adhesive, the image with dimensionals. I added a bit of Stardust stickles to my snowman to finish them off.

The card base is a 4 1/4″ x 8 1/2″ piece of Chocolate chip cardstock folded in half, followed by a 3 15/16″ square of Whisper White. Both patterned paper strips are from BasicGrey’s Periphery Collection.

The ribbon, oh the ribbon….it’s gorgeous, beautiful silk ribbon from MayArts. You can email Starlitstudio to order it by the roll, or you can order it from Sharon Johnson. I am hooked….wait until you feel it.

justritesnowmancloseup.jpg

One good thing about living up North where it’s cold…..I can use snowman images without feeling silly about it. And yes, the I went outside the lines a bit on the sleeve of one snowman. I still like them anyway…

Have a wonderful day! Hugs and smiles

Here is a video for the visual learner.

[youtube]https://www.youtube.com/watch?v=_Iod59knIbM[/youtube]

Today’s tutorial on SCS is for a Double Pocket Card.

ovalalldoublepocketcardeyel.jpg

My card base is a a 4 1/4″ x 11″ piece of Sahara Sand cardstock folded in half. It is layered with a 3 15/16″ x 5 3/16″ piece of Chocolate Chip. The Double Pocket card piece is created out of Whisper White cardstock. All designer paper is from Thoroughly Modern Designer Paper Pack.

The Ruffled backing of my circle layers is created with the Eyelet Shapeabilities Pendant. The circle layers were cut with Nestabilities. Both butterflies were cut with Big Diez Beautiful Butterflies Die. The bigger butterfly was first pained with Shimmery Paint and sponge dauber, then the edges were sponged with Chocolate Chip. The pearls are from the Pretties Kit.

The sentiment is stamped twice, once in Basic Brown and once in Bermuda Bay. The You from the Basic Brown layer was colored with Rose Red ink. I cut slightly inside the oval lines and taped this piece on my Bermuda Bay oval, that had been cut out with the large oval punch. That was layered on a scallop oval that had been punched out of Chocolate Chip Cardstock. The gorgeous ribbon is from May Arts.

ovalalleyeletinside.jpg

The inside of the card is pretty simple and mirrors the layers on the card front.

Here is a video for the visual learner:

[youtube]https://www.youtube.com/watch?v=CPgv4Ofb_g0[/youtube]

Here are two Double Pocket cards I made a while ago:

Christmas Card

Baby Card

I am sure most of you have heard about the new demonstrator agreement form we Stampin’ Up! demonstrator will have to sign at the end of this month. I am afraid I might not be able to stay a demonstrator with the new agreement. I sent an email to Stampin’ Up!’s compliance office, but haven’t heard back yet. I feel bad, since I love Stampin’ Up! products, but I won’t give up my work at Splitcoaststampers so I can stay a demonstrator. I will let you know what happens. My blog might be changing to a more Non-Stampin’ Up! blog soon.

Hugs and sad smile 🙁

© 2012 fresh & fun Suffusion theme by Sayontan Sinha